Getting Started with TJBot
 SFUptownMaker, jweisz, maryam
Voice Control an LED
Our first project is to set up TJBot to voice control an addressable LED. To begin, we need to hook up the LED to TJBot.
LED Hookup
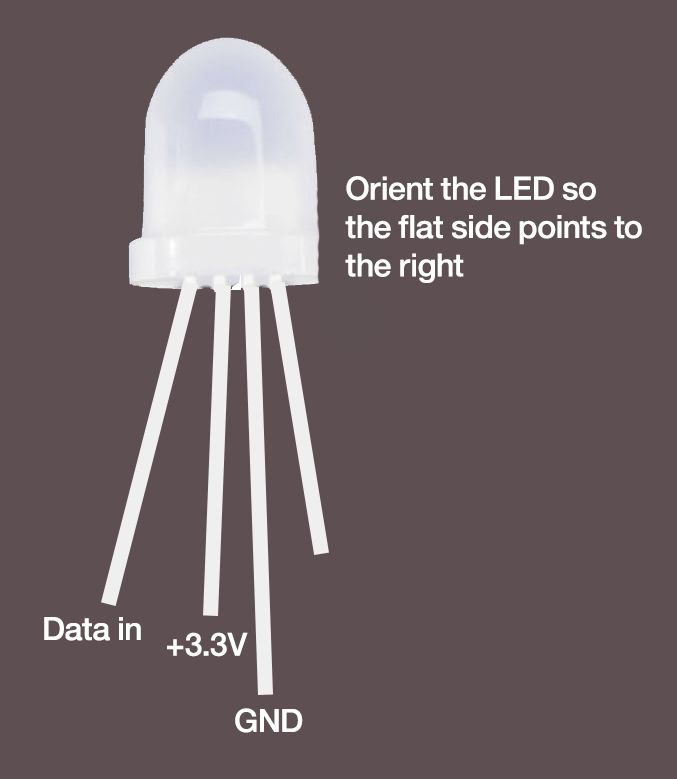
Start by finding one of the LEDs included in the TJBot kit. It should look like the picture below and be about the size of a pencil eraser.
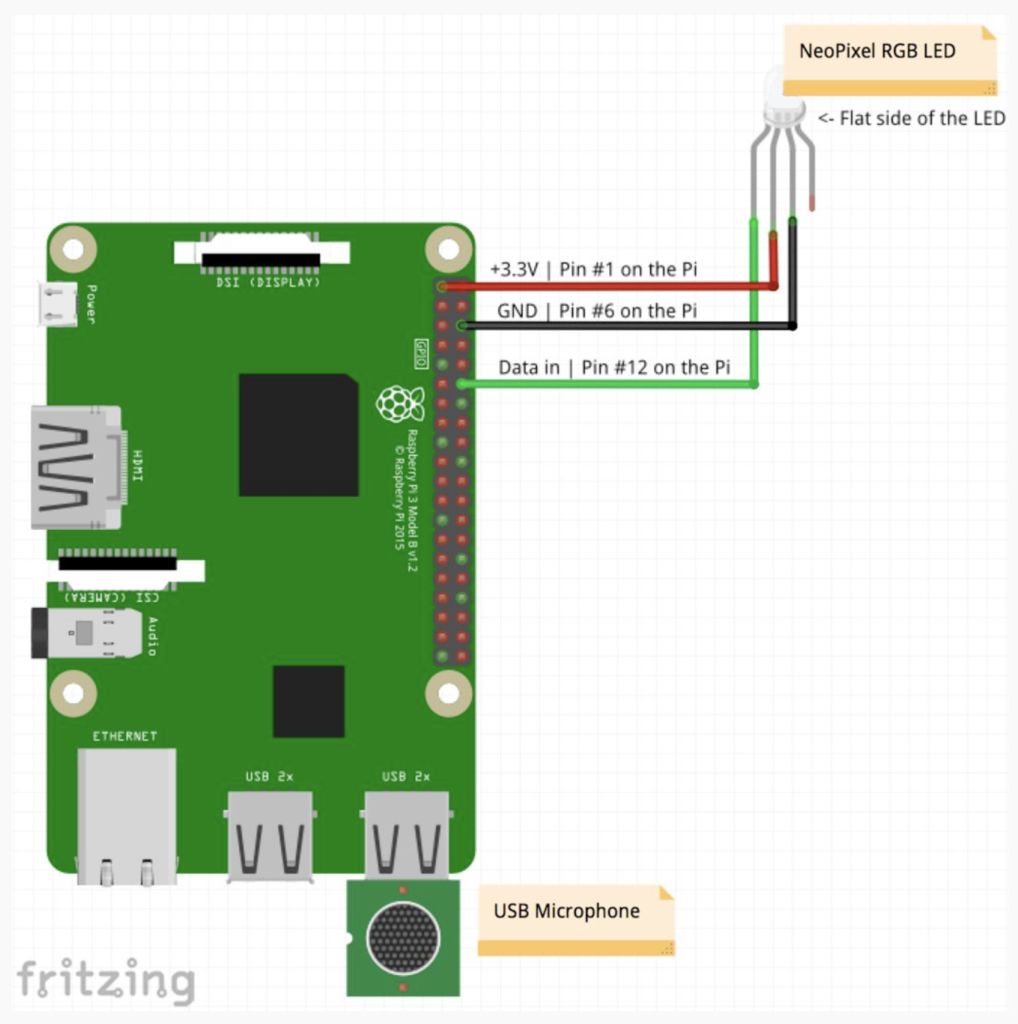
You now need to connect this LED to the Raspberry Pi. Find the F/F jumper wires that were included in your kit, and follow the diagram below to hook up the LED.
USB Microphone Hookup
Now is the time to plug the USB microphone into one of the USB ports on the Raspberry Pi. It doesn't matter which port you plug it into, just plug it in.
Set up a Speech-to-Text Instance on IBM Cloud
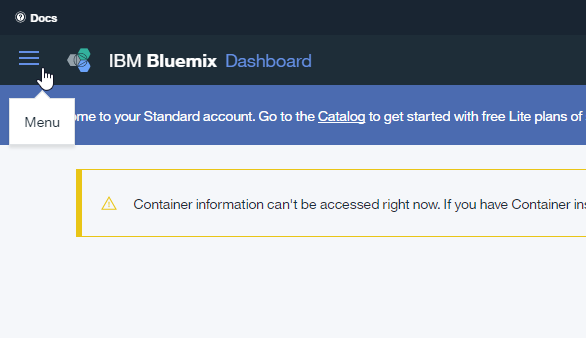
Go back to the IBM Cloud dashboard and click on the hamburger menu (Did you know this is called a hamburger menu? You learn something new every day!) in the upper left corner.
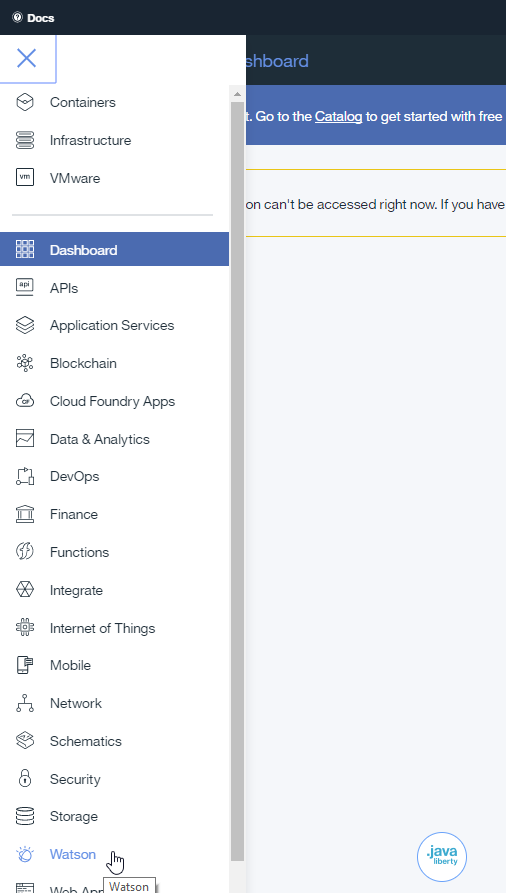
A menu will pop out of the left edge of the page. Find the entry for "Watson" in this menu (it's down near the bottom, and you may need to scroll to find it) and click on it.
You'll be told that you don't have any Watson service instances yet, and be invited to create one. Click on the "Create Watson service" button.

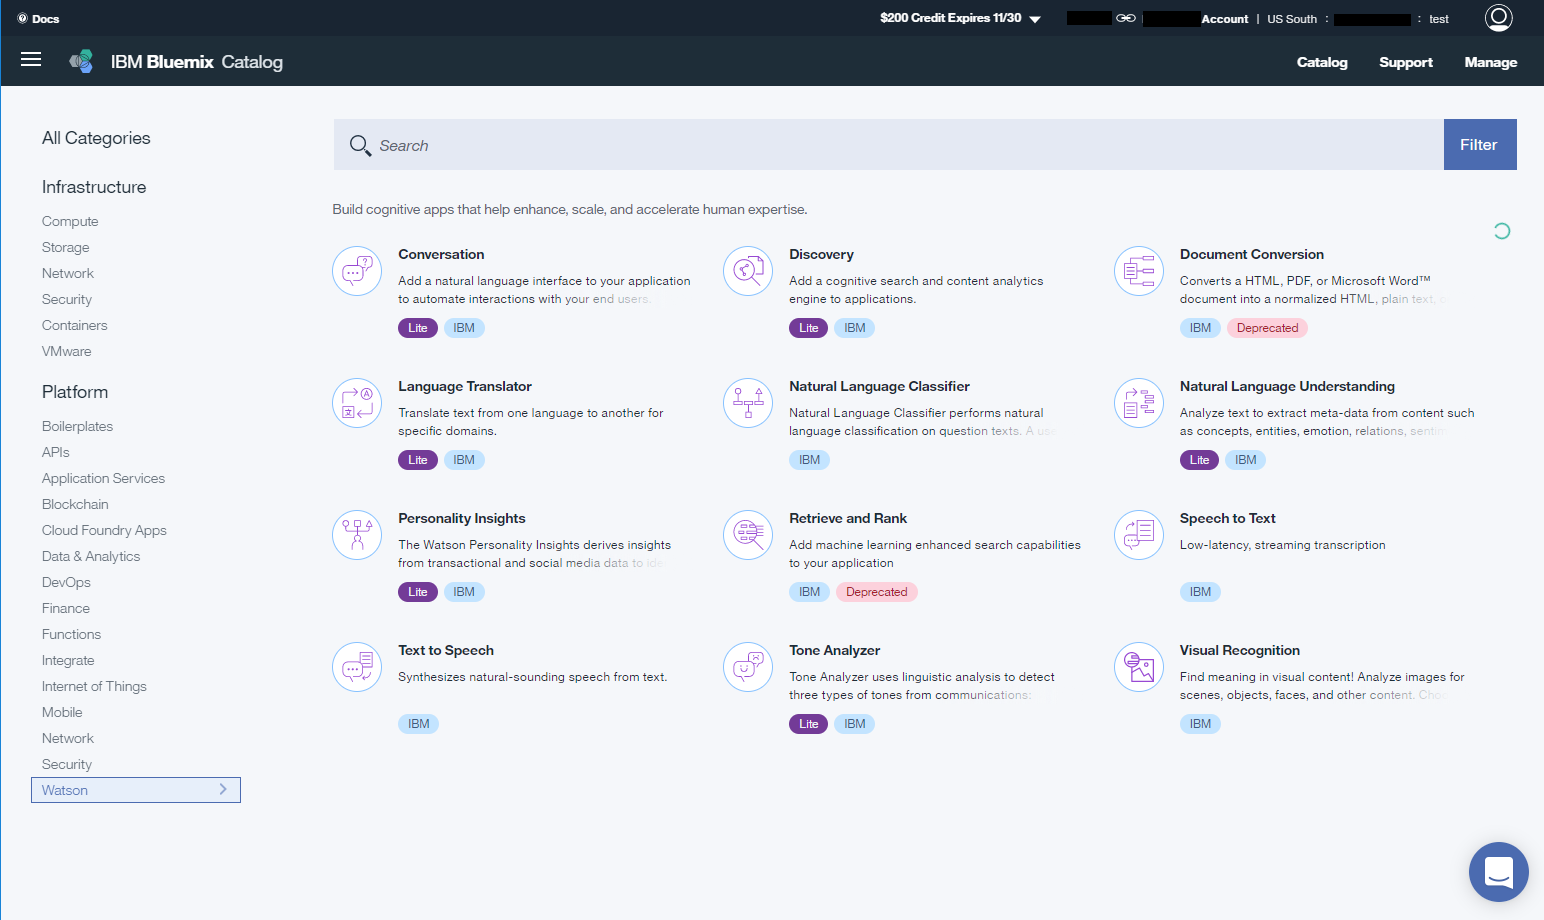
That will bring up this page, with a list of all available Watson services.
Click on the "Speech to Text" section to bring up this page of setup options.

All you need to do here is click the "Create" button and you're in business. The default values can be left in place.
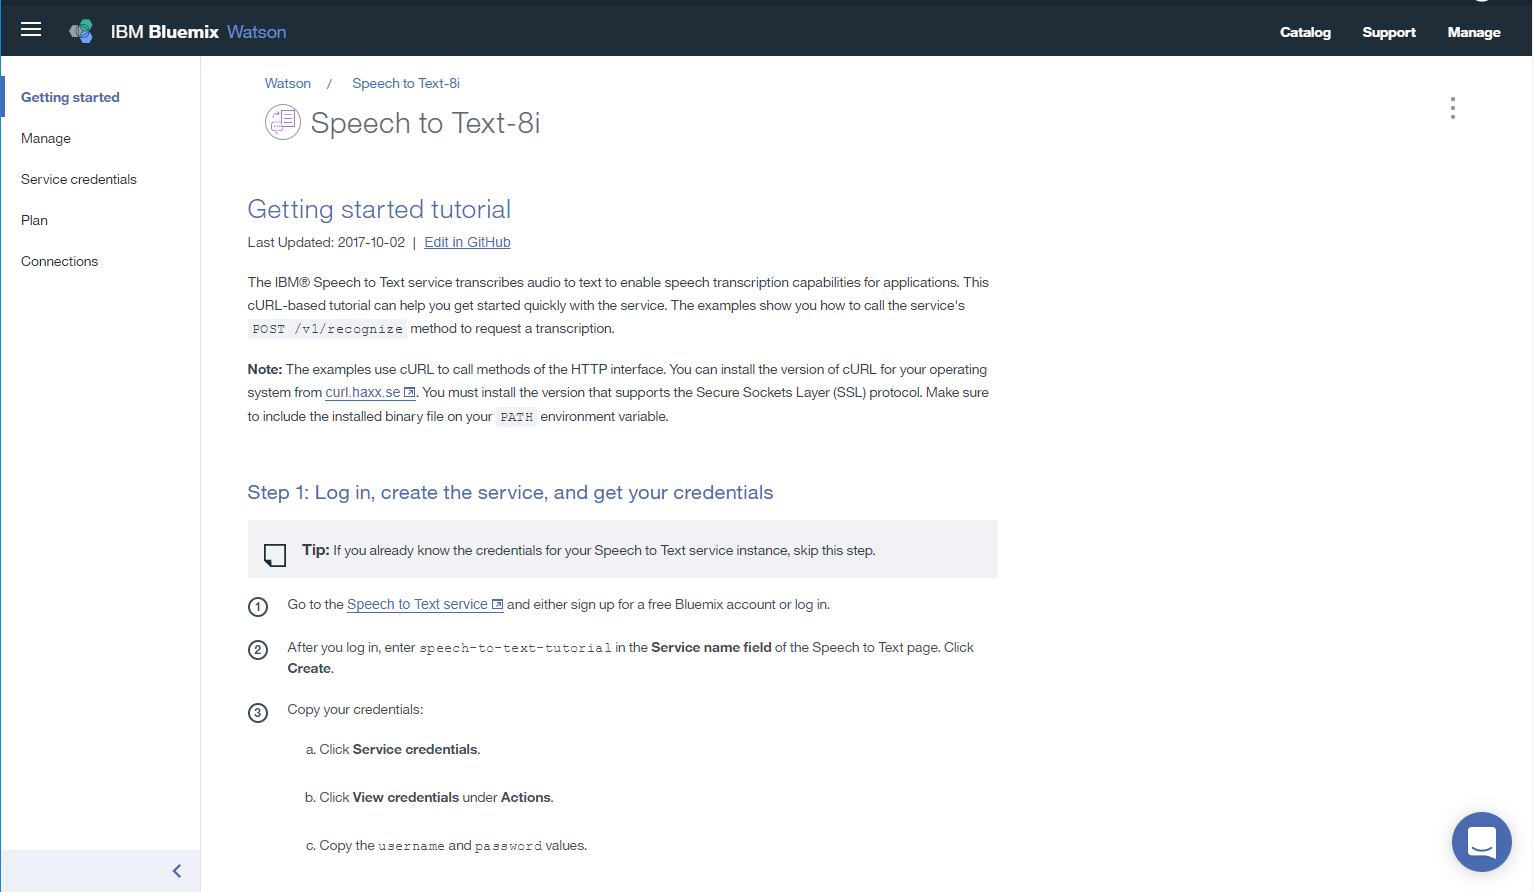
You'll be brought to this page. We're going to need to fetch the credentials for our "Speech to Text" instance, so click "Service credentials" along the left edge of the page.
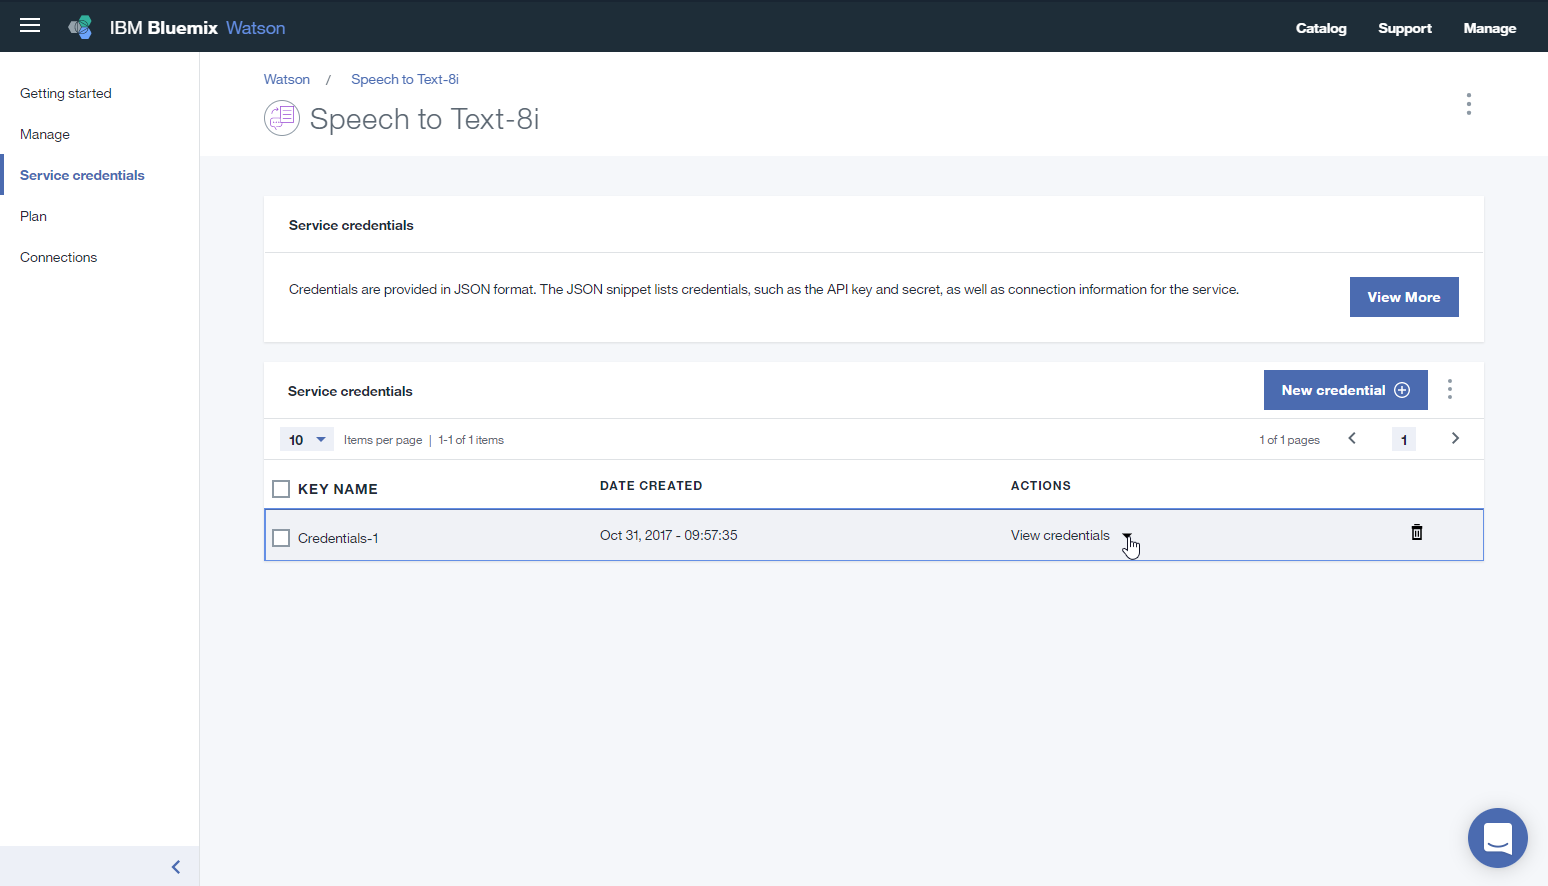
That will bring up this page. To see your credentials, click on the "View credentials" drop down in the middle of the page under the ACTIONS.
Copy the Credentials into the Raspberry Pi Config File
Now we need to copy those credentials into a file on the Raspberry Pi. If you haven't been working on the Raspberry Pi up to this point, it's probably easiest just to be logged in on the Pi and open the IBM Cloud website on the Pi's web browser.
The file you need to modify is located in "Desktop/tjbot/recipes/speech_to_text" and it's called "config.default.js". Double clicking the file will open it in the text editor. You can then copy and paste in the new information.
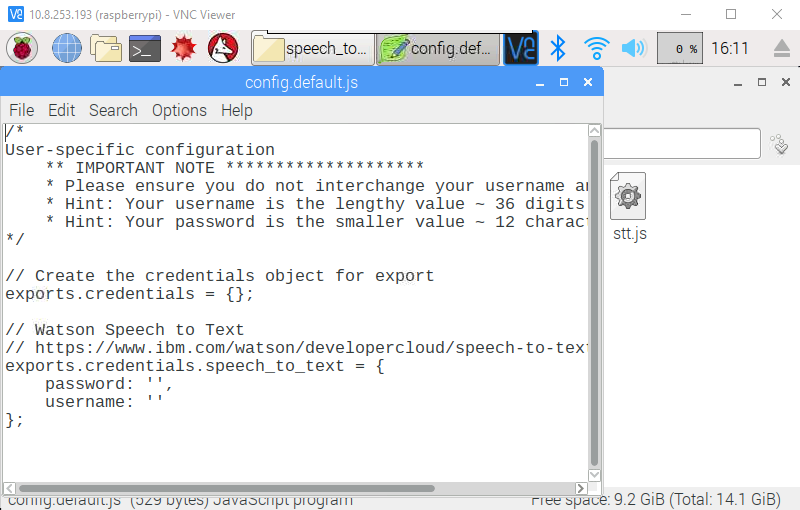
Copy and paste the "username" and "password" from the webpage into the text document. Note that the order of the two is swapped! On the webpage, username is above password, but in the text doc, it's password above username. Once you've entered the information, you need to "Save as..." the document to change its name. The new name is "config.js". You must do this or the recipe will fail.
The credentials on the IBM AI/Watson Speech-to-Text Services page have been changed to an API format:
{
  "apikey": "**XXXXXXXXXXXXXXXXXXXXXXXXXXXXXXXXXXXXXXXXXXXX**",
  "iam_apikey_description": "Auto generated apikey during resource-key operation for Instance - crn:v1:bluemix:public:speech-to-text:XXXXXXX:XXXXXXXXXXXXblah-blah-blahXXXXXXXXXXXXXXXX",
  "iam_apikey_name": "auto-generated-apikey-**XXXXXXXX-XXXX-XXXX-XXXX-XXXXXXXXXXXX**",
  "iam_role_crn": "XXXXXXXXXXblah-blah-blahXXXXXXXXXXX",
  "iam_serviceid_crn": "XXXXXXXXXblah-blah-blahXXXXXXXXXXX",
  "url": "https://stream.watsonplatform.net/speech-to-text/api"
}
Your username is contained in the iam_apikey_name entry, but only the XXXXXXXX-XXXX-XXXX-XXXX-XXXXXXXXXXXX section. Exclude the auto-generated-apikey- part of that entry.
"iam_apikey_name": "auto-generated-apikey-XXXXXXXX-XXXX-XXXX-XXXX-XXXXXXXXXXXX",
PASSWORD:
Your password/API key is contained in the apikey entry; it should be in this structure, XXXXXXXXXXXXXXXXXXXXXXXXXXXXXXXXXXXXXXXXXXXX. You will need to modify the input of the config.js file from password to apikey.
"apikey": "XXXXXXXXXXXXXXXXXXXXXXXXXXXXXXXXXXXXXXXXXXXX",Your config.js file should have the following format:
/*
 * User-specific configuration
 * IMPORTANT NOTES:
 *  Please ensure you do not interchange your username and password.
 *  Your username is the longer value: 36 digits, including hyphens
 *  Your password is the smaller value: 12 characters
*/

// Create the credentials object for export

exports.credentials = {};

// Watson Speech to Text
// https://www.ibm.com/watson/services/speech-to-text/
exports.credentials.speech_to_text = {
    apikey: 'XXXXXXXXXXXXXXXXXXXXXXXXXXXXXXXXXXXXXXXXXXXX',
    username: 'XXXXXXXX-XXXX-XXXX-XXXX-XXXXXXXXXXXX'
};
Install and Run the Speech to Text Example
Now, open a command line on the Pi and run the following commands:
cd Desktop/tjbot/recipes/speech_to_text
npm install
sudo node stt.js
The npm install step will take some time to complete. Once you issue the node stt.js command, you'll see this:

You can now issue commands to TJBot to change the color of the LED, such as "Turn the light red", "Turn the light blue", or "Turn the light off". Pretty nifty, huh? Try out the voice commands to change the color of the LED.
When you're done, just hit ctrl+C to quit the script.