Getting Started with the Tessel 2
 D___Run___,
  rwaldron,
  lyzadanger,
  reconbot
Blinking an LED with Johnny-Five and JavaScript
Making an LED (Light-Emitting Diode) blink is the most basic "Hello, World!" exercise for hardware, and is a great way to familiarize yourself with a new platform. In this experiment, you'll learn how to build a basic LED circuit and use Johnny-Five with your Tessel 2 to make the LED blink and pulse. In doing so, you'll learn about digital output and Pulse Width Modulation (PWM).
Perhaps you've controlled LEDs before by writing Arduino sketches (programs). Using Johnny-Five + Node.js to control hardware is a little different, and this article will illustrate some of those differences. If you're totally new to all of this — not to worry! You don't need any prior experience.
If you have had experience with the Tessel 2 then you know that it is programmed with JavaScript and the Johnny-Five framework to be able to control the I/O on the board. If you have never programmed with JavaScript before or the Tessel 2, we highly recommend that you check out the Johnny-Five Inventor's Kit Experiment Guide for a more in-depth explanation and exploration.
To get you started, here is an example of a blink script using Node.js and Johnny-Five.
language:javascript
var Tessel = require("tessel-io");
var five = require("johnny-five");

var board = new five.Board({
  io: new Tessel()
});

board.on("ready", () => {
  var led = new five.Led("L2");
  led.blink(500);
});
To make sure that everything is up and running on your Tessel 2, let's create a project directory as we did in the software setup portion, install the required Node.js modules and add this file to our directory. We can do this through our console by using these commands:
mkdir myProject;
cd myProject;
npm init -y;
npm install johnny-five tessel-io;
touch blink.js;
These commands do the following in order:
- Create a directory (folder) called
myProject - Change directory, or move into
myProject - Initiate an npm project within
myProject, which creates a package.json - Install the needed libraries, which in this case are
johnny-fiveandtessel-io, usingnpmto install them for us; these will be placed in a directory callednode_modules - Create a blank file called
blink.jsin themyProjectdirectory using thetouchcommand
With that complete, open your favorite text editor (one choice is atom) and navigate to your blink.js file. Copy and paste the blink code above into your file and save it.
From here you can run blink.js by navigating to your myProject directory and typing the following command in your terminal prompt:
t2 run test.js
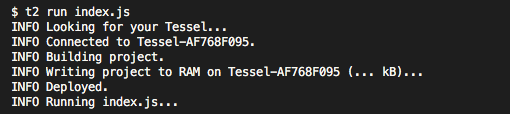
Your terminal should output some information that will look similar to this...
Then the REPL prompt should appear...

... and one of your onboard LEDs should be blinking...
Success! Your Tessel 2 is up and running, and you have taken your first step into JavaScript-based robotics and IoT applications. Go forth and hack away with your newfound superpower.