E-Textile Mask
This Tutorial is Retired!
For an updated E-Textile Mask tutorial, try checking out the "Illuminated Mask" tutorial.
View the updated tutorial: Illuminated Mask
 Gella
Gella 
Step 1: Cut Out Template
Download and print the provided template. Hold the template up to your face to make any adjustments to the eye or nose shapes so that it fits the way you like. Then trace the template pieces onto felt.
Right-click the image below and choose “Save Link As” to download the template to your computer.
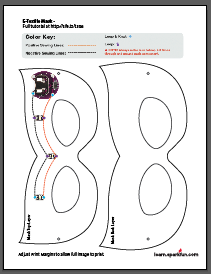
There are two layers - one for sewing on the electronics and a larger mask shape that will be glued on at the end to give it some extra support. Set aside the bigger mask shape for now. We'll be sewing all of the electronics onto the top (smaller) mask shape.

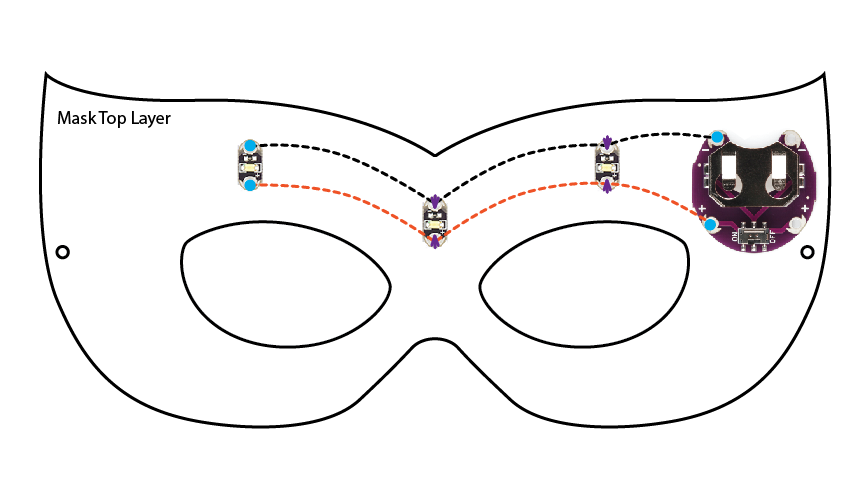
To light up the mask we will be connecting the LEDs to the battery holder with conductive thread using a parallel circuit layout. This isn't just a choice based on the look of the boards, it is actually an electrical plan as well! In a parallel circuit all of the components are aligned so that they get the same amount of voltage running through them. Each LED gets the same amount of power and shines just as brightly as the others. Use your printed template as a guideline for placement of the components.
Learn more about parallel circuits here: LDK Experiment 2: Multiple LED Circuits