Displaying Sensor Data with Bluetooth
Option 3: Displaying Data With a Phone
Utilizing your phone as a dashboard is a convenient way to display data. There’s no sense in carting around a laptop when a smartphone can easily fit in the palm of your hand.
Option 3: Hardware
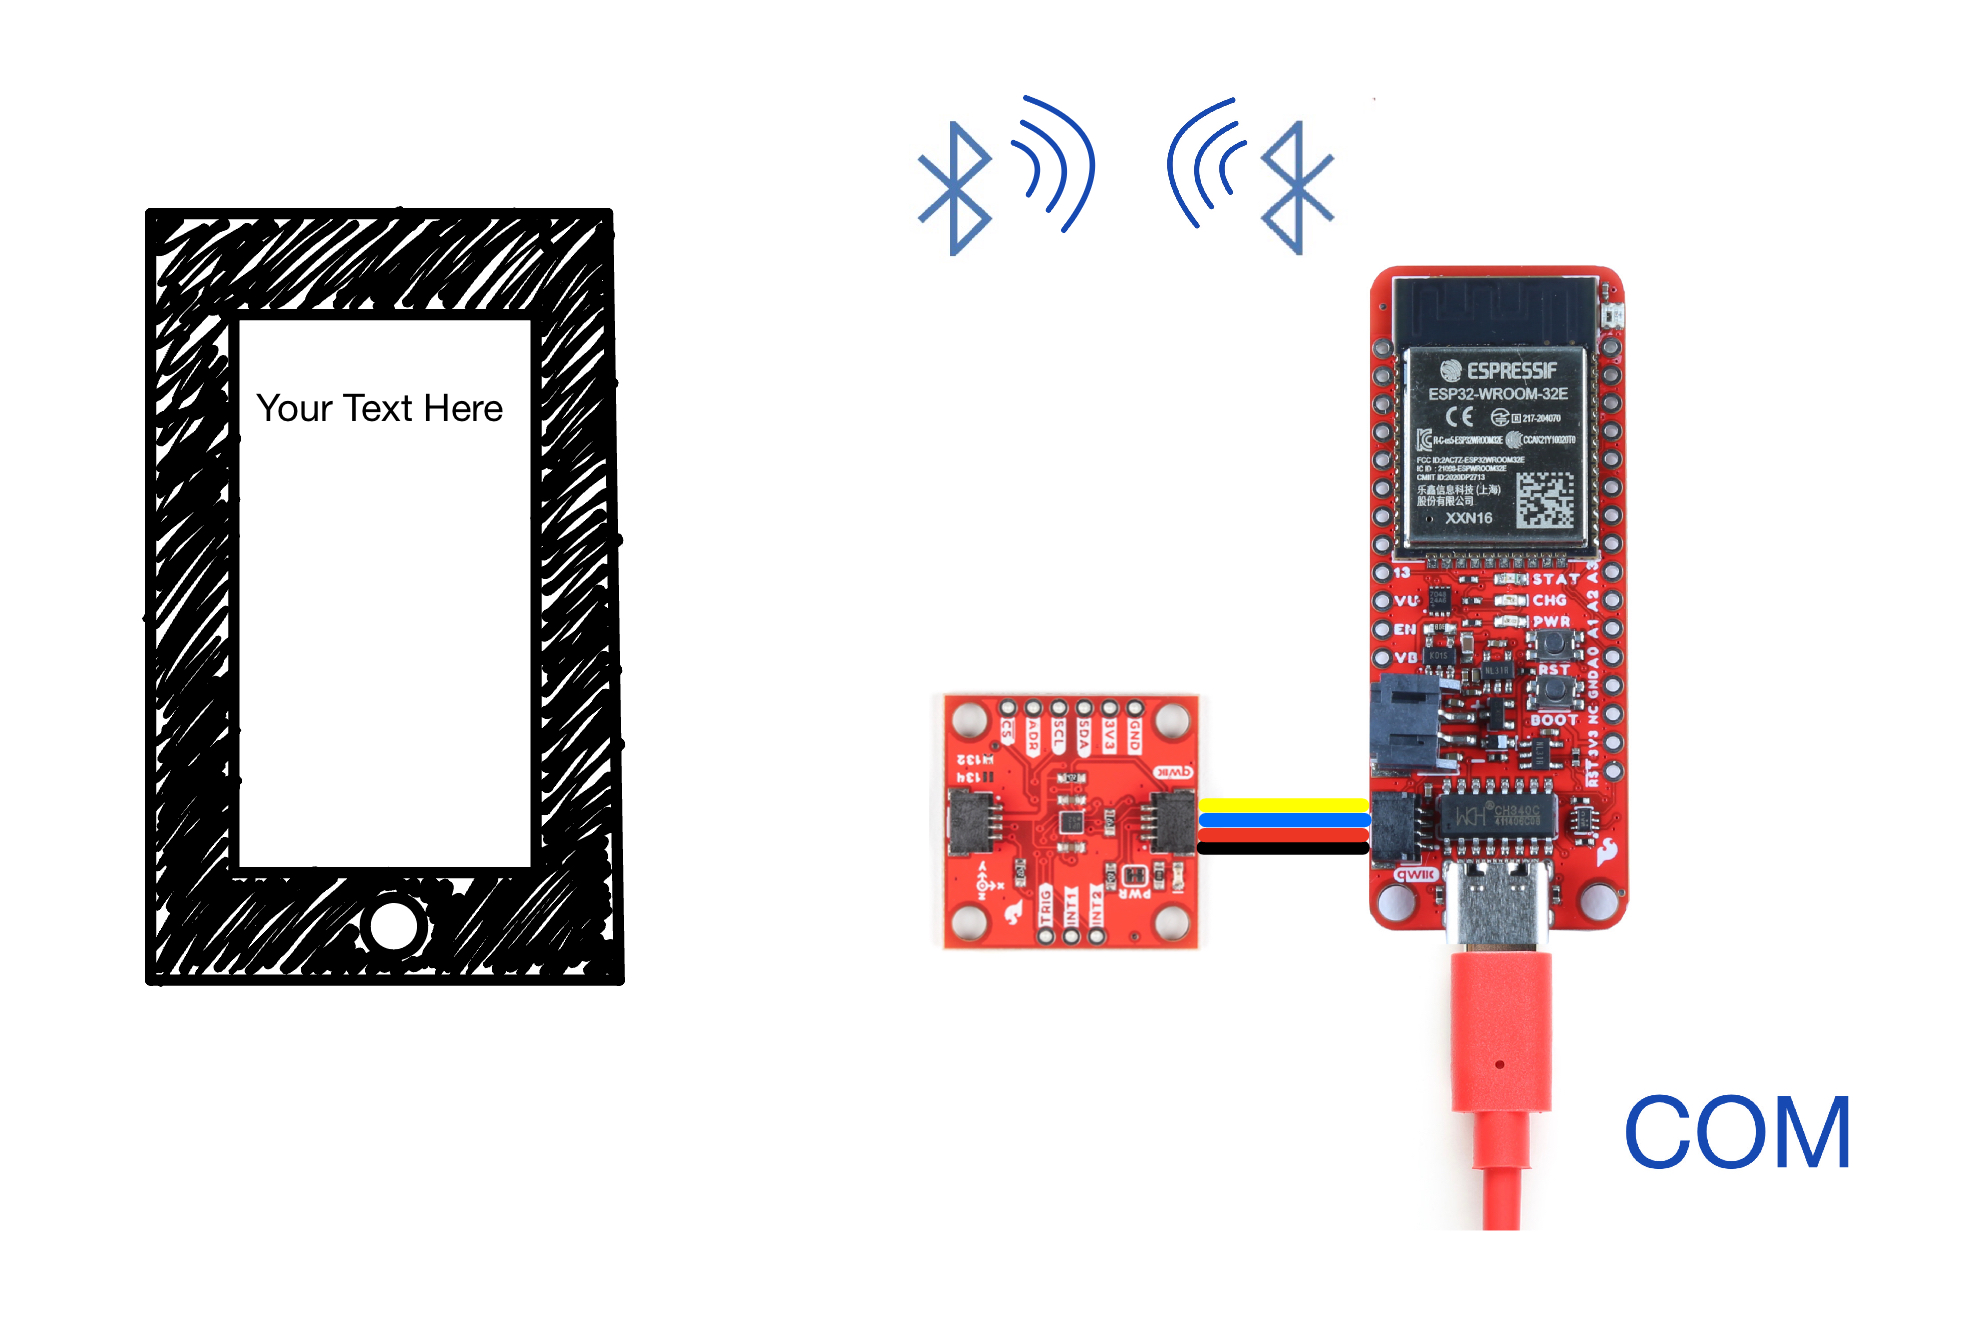
Option 2 of this tutorial attaches an accelerometer to an ESP32 board that is connected to your computer. Following the instructions for this option also requires that you have a mobile device with a BLE app installed.
Option 3: Uploading The Code
Upload the following code to your ESP32 Thing Plus C:
#include "BluetoothSerial.h"
#include <Wire.h>
#include <SparkFun_KX13X.h> // Click here to get the library: http://librarymanager/All#SparkFun_KX13X

SparkFun_KX132 kxAccel;
outputData myData; // Struct for the accelerometer's data

/* Check if Bluetooth configurations are enabled in the SDK */
/* If not, then you have to recompile the SDK */
#if !defined(CONFIG_BT_ENABLED) || !defined(CONFIG_BLUEDROID_ENABLED)
#error Bluetooth is not enabled! Please run `make menuconfig` to and enable it
#endif
BluetoothSerial SerialBT;

float tempX = 0.0; //gives the characteristic the pointer instead of the value
float tempY = 0.0;
float tempZ = 0.0;
String FullString = "";

void setup() {
  Serial.begin(115200);
  Wire.begin();

  SerialBT.begin(" SparkFun Server");
  Serial.println("Bluetooth Started! Ready to pair...");

  //connect the accelerometer to the board using qwiic cables
  if (!kxAccel.begin())
  {
    Serial.println("Could not communicate with the the KX13X.");
    while (1)
      ;
  }
   if (kxAccel.softwareReset())
    Serial.println("Reset.");

  // Give some time for the accelerometer to reset.
  // It needs two, but give it five for good measure.
  delay(5);

  // Many settings for KX13X can only be
  // applied when the accelerometer is powered down.
  // However there are many that can be changed "on-the-fly"
  // check datasheet for more info, or the comments in the
  // "...regs.h" file which specify which can be changed when.
  kxAccel.enableAccel(false);

  kxAccel.setRange(SFE_KX132_RANGE16G); // 16g Range
  // kxAccel.setRange(SFE_KX134_RANGE16G);         // 16g for the KX134

  kxAccel.enableDataEngine(); // Enables the bit that indicates data is ready.
  // kxAccel.setOutputDataRate(); // Default is 50Hz
  kxAccel.enableAccel();
}

void loop() {
  if (kxAccel.dataReady())
  {
    tempX = myData.xData;//gives the pCharacteristic the pointer insted of the value
    tempY =myData.yData;
    tempZ = myData.zData;
    kxAccel.getAccelData(&myData);
  }
  FullString = "X = " + String(tempX,3) + " Y = " + String(tempY,3) + " Z = "+ String(tempZ,3) + "\r\n";
  for(int i = 0; i < FullString.length(); i++)
  {
    SerialBT.write(FullString.c_str()[i]);
    Serial.write(FullString.c_str()[i]);
  }
  delay(20);
}
Next, download a BLE app. We used "Serial Bluetooth Terminal", which can be found here on the Google Play Store. If you have a different phone OS, there are many apps like it available for different phones. Connect to your ESP32 over Bluetooth through your BLE app.
Option 3: Results
Our accelerometer gave a live datafeed to the cell phone through the app. Establishing a connection to a phone using Bluetooth is a great jumping off point for countless applications.