Binary Blaster Assembly Guide
 QCPete
Quickstart - Your First Component
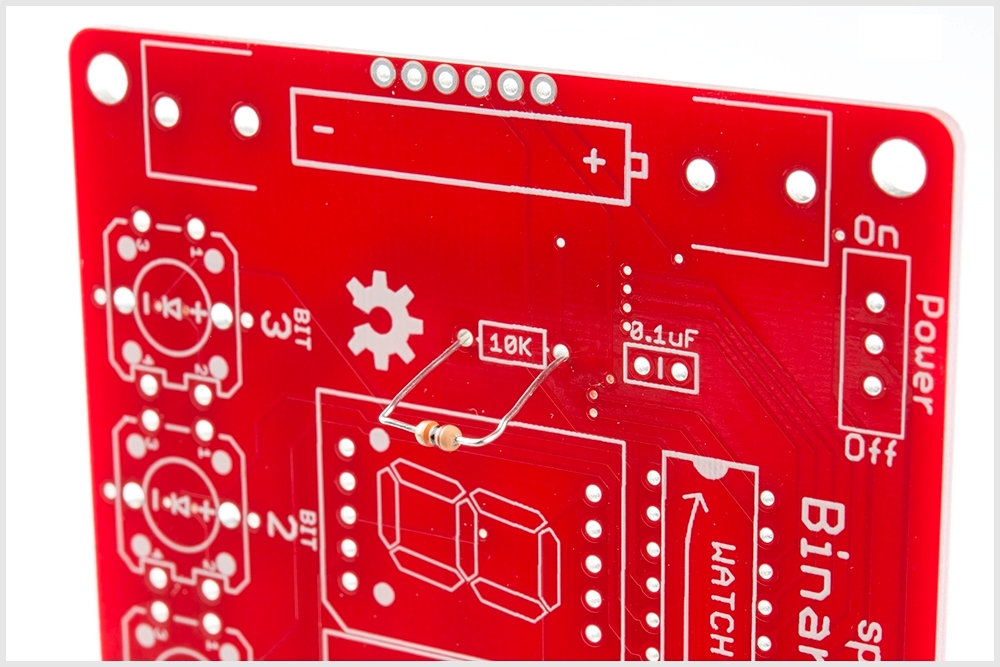
Locate the 10KΩ Resistor. It has a specific pattern of stripes on it: BROWN, BLACK, ORANGE, GOLD.
It looks like this:
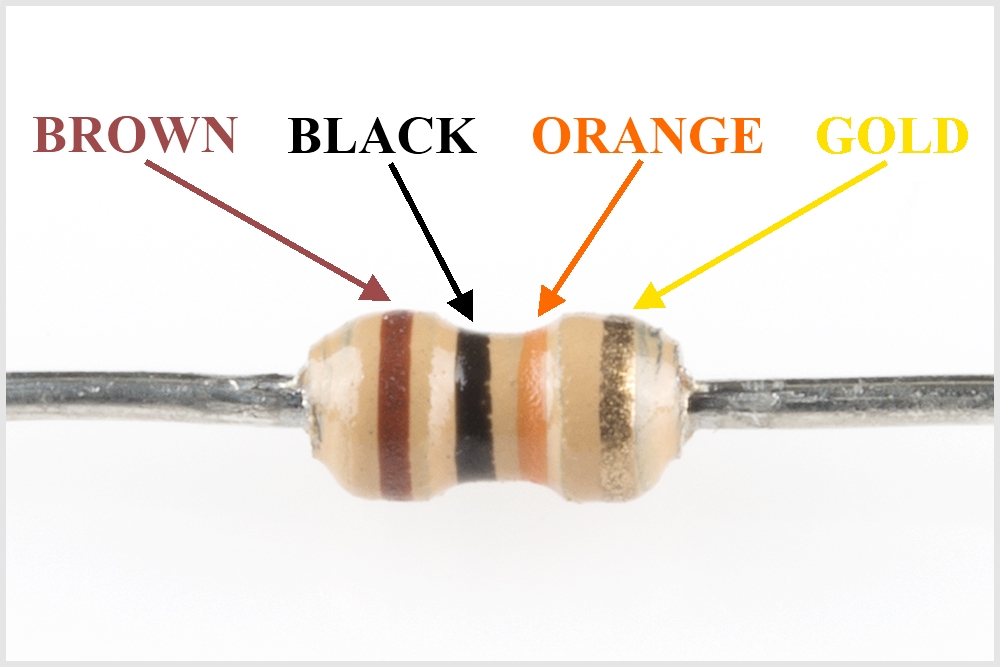
Note, the patten can be in the opposite order; this is still the correct resistor.
To further understand resistor markings, please check out the following tutorial: Decoding Resistor Markings
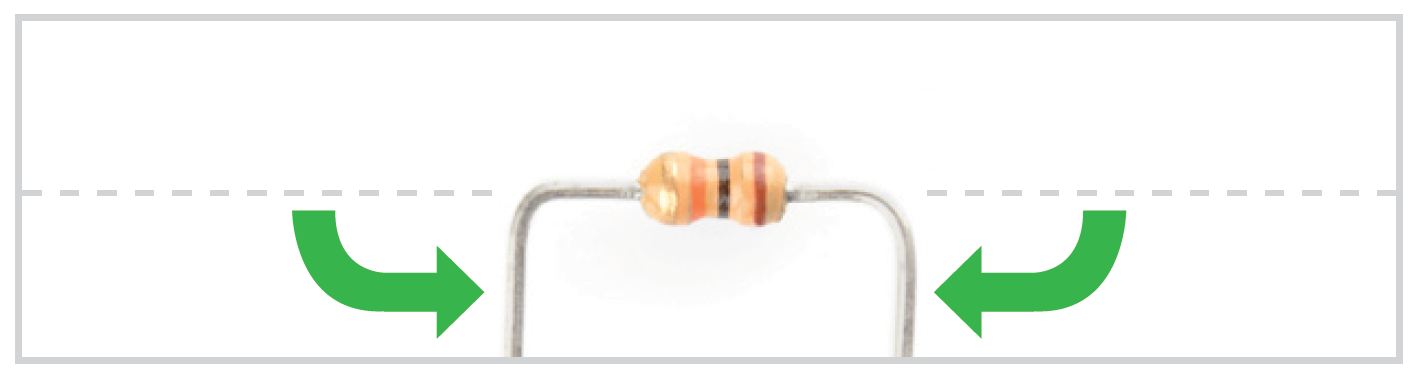
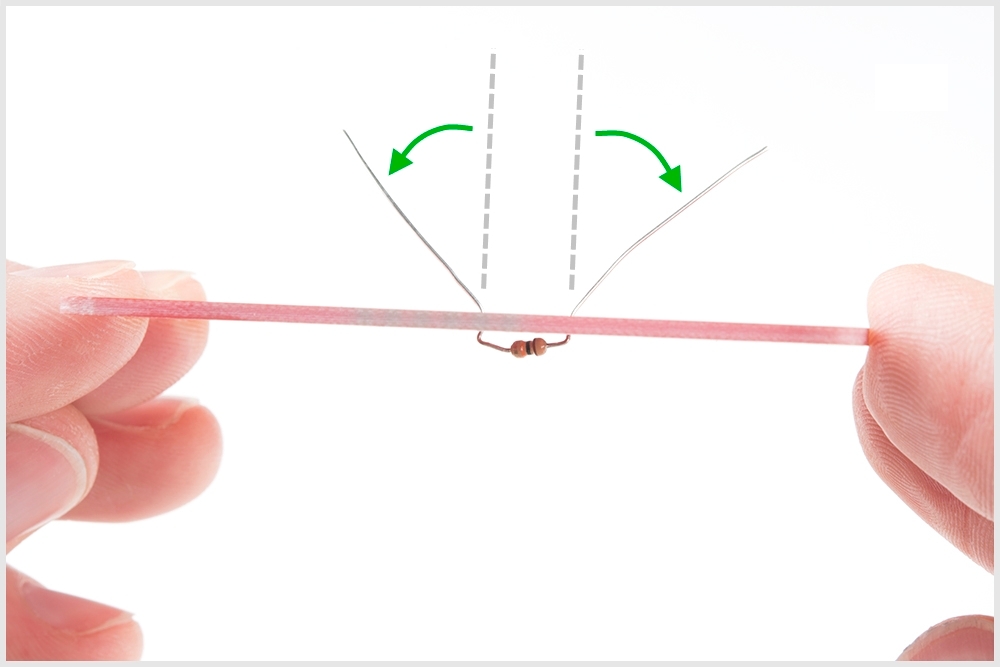
Bend the legs downward.
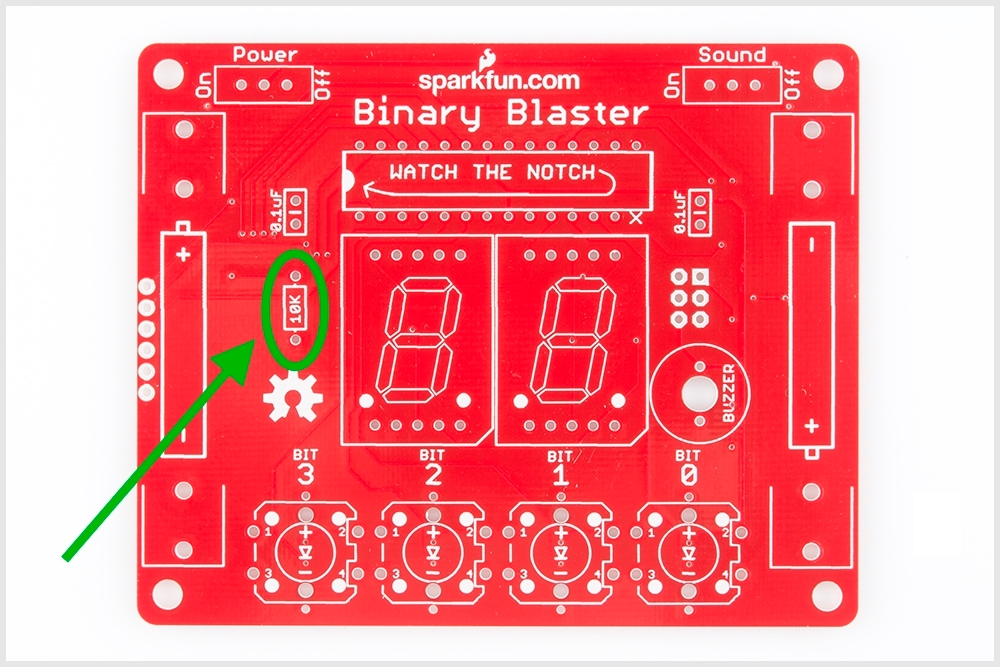
Locate the 10KΩ Resistor position on the board.
Insert the resistor into the PCB. Note, this component is not polarized, so it does not matter which leg goes into each hole. Some components on this kit are polarized, and we will take extra care when we get to them to ensure they are plugged in properly.
Push the resistor in so it is nearly flush with the board.

Slightly bend the legs outward to hold it in place.
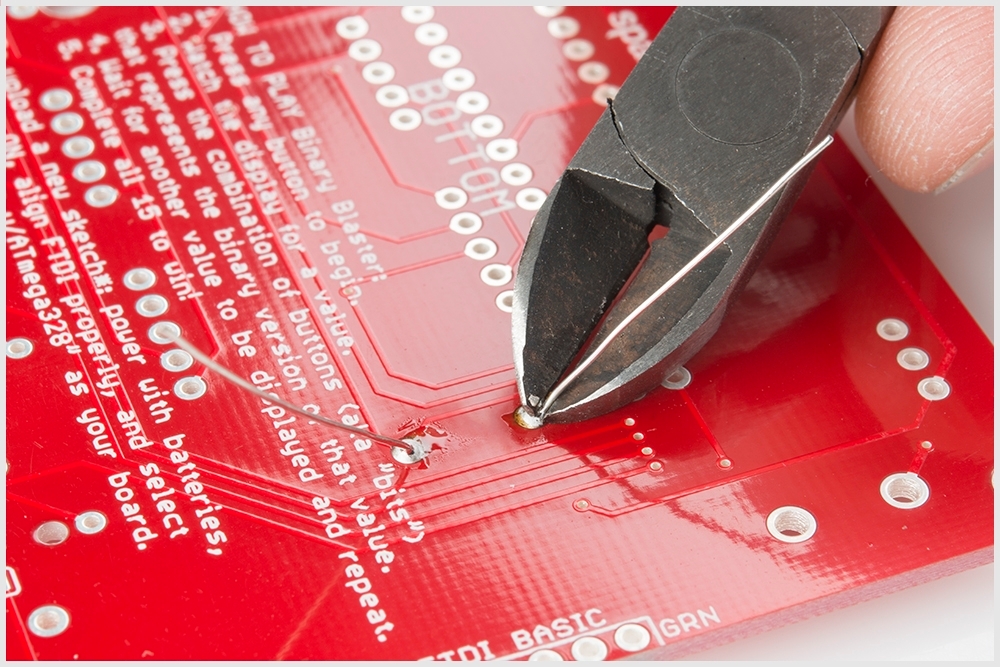
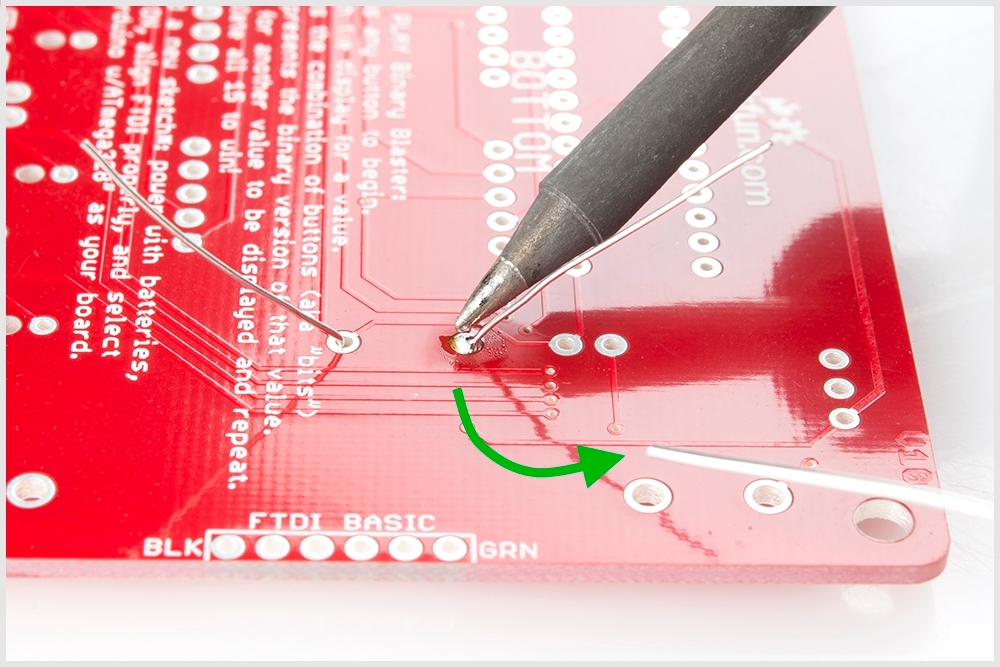
Flip the board over. Hold the soldering iron's "Sweet Spot" so it touches both the leg and the metal ring. Hold for 2 seconds.
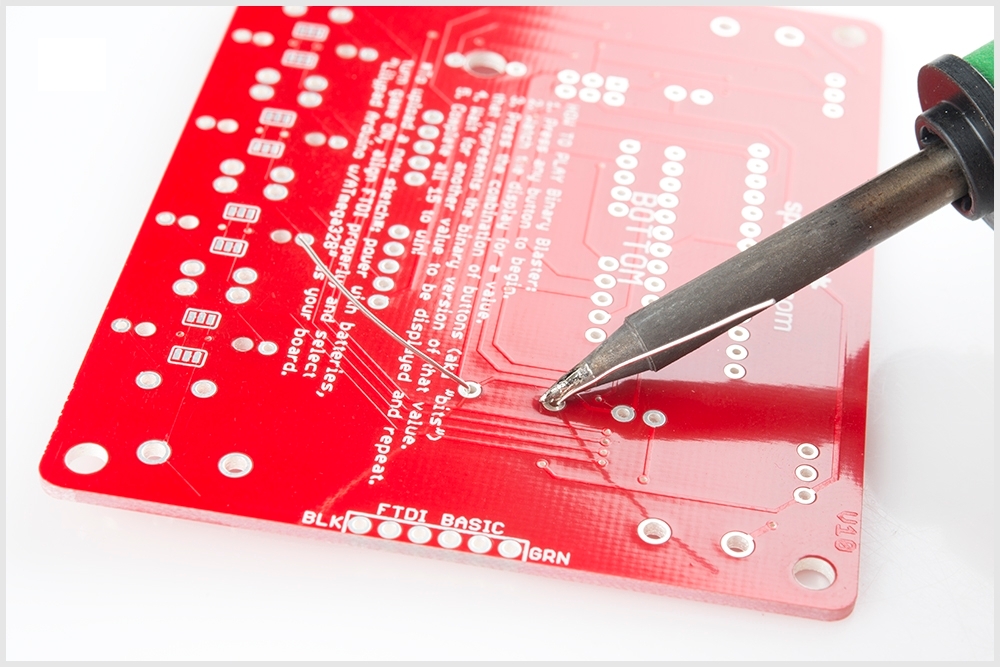
Feed solder into the joint.
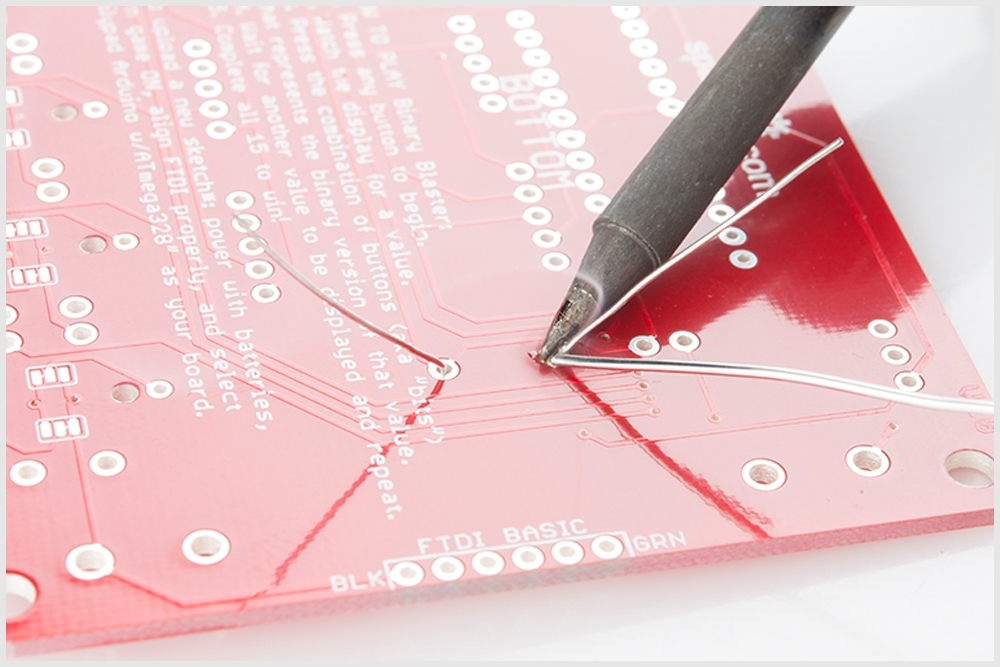
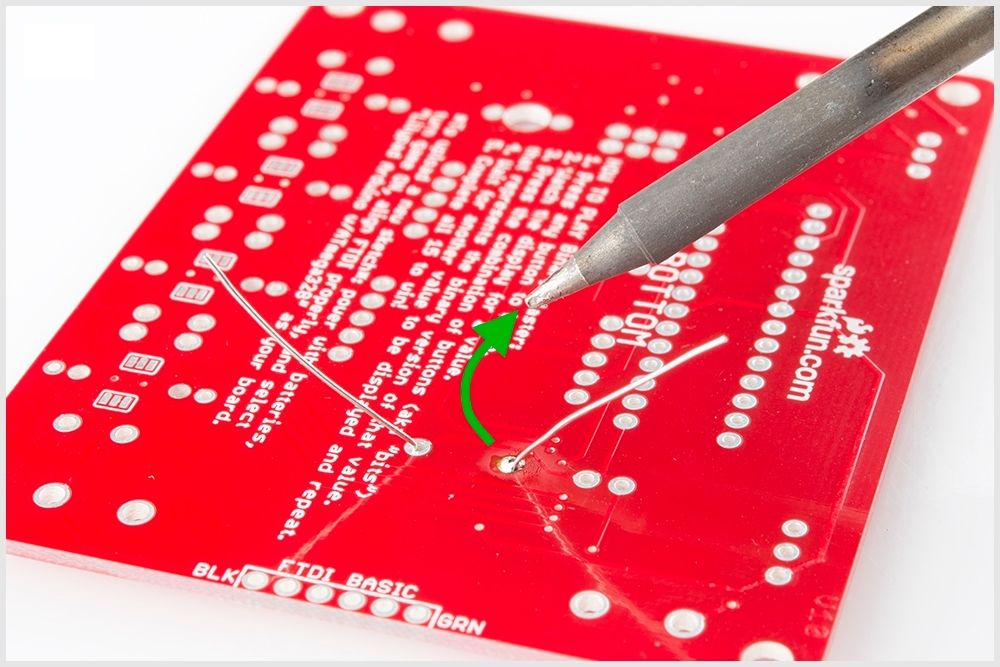
First, pull away the solder.
Second, pull away the iron.
Your solder joints should look like this:

Clip off any excess legs.