XBee WiFi Hookup Guide
 jimblom
Using XCTU
XCTU is Digi's XBee configuration software. It makes communicating with XBees very easy, and provides a nice interface to modify all of the module's settings. When using it with the XBee WiFi's, it even provides a WiFi network scanning and connection interface to make connecting to networks a breeze.
The current release of XCTU is available on Digi's website, unfortunately it's only available for Windows. For Mac OS X users, there is a beta version of XCTU 6.0.0 available, which we've tested and found to work flawlessly with the XBee WiFi's. (Windows users can check it out too, it's pretty slick.) Go ahead and download XCTU to follow along.
For this section we'll also assume you have an XBee connected to your computer via a USB Explorer or something similar. The Explorer should have enumerated as a COM port on your computer. This is the port we'll use to communicate with the XBee.
Connecting to a WiFi Network With XCTU
Before we can begin using the XBee WiFi, we need to set it up to connect to our WiFi network. This is a process made simple with XCTU. Follow the steps below:
- Plug your XBee into your XBee Explorer, and plug the Explorer into your computer.
- If you haven't already installed drivers for your Explorer, you may need to do so. Check out our How to Install FTDI Drivers tutorial for help there.
Open XCTU. It should open up on the "PC Settings" tab. On there, select your XBee Explorer's COM port and make sure the port settings are as below (9600 8-N-1).
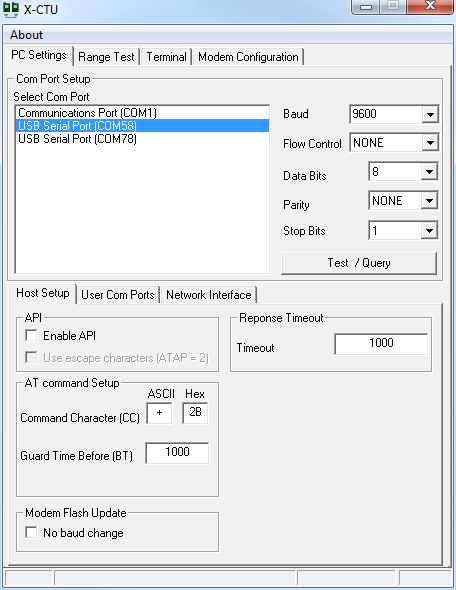 First, setup your COM port and make sure the settings are correct.
Hit Test/Query to make sure you can communicate with your XBee WiFi. You should get a response like:
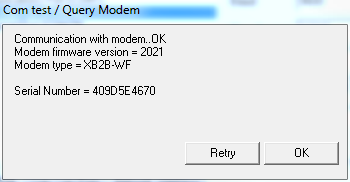 This is a good sign! Means we're communicating with the XBee.
Click over to the "Modem Configuration" tab. And click "Read" to display your XBee WiFi's stored settings.
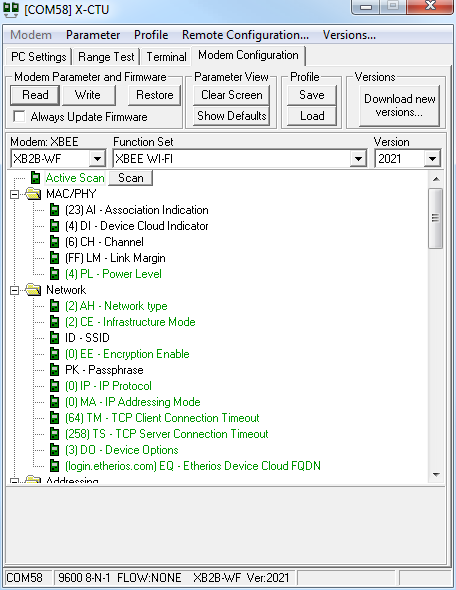 A view of the XBee WiFi's default parameters.
Select "Active Scan" near the top of the scrolling window. Then click the "Scan" button** that appears. This will open the network scan utility.
Click the "Scan" button at the bottom of the scan window. If all goes well, your network should appear above. The "Link Margin" value represents the strength of the signal (bigger is better). And the "Security" value indicates the encryption mode of the network.
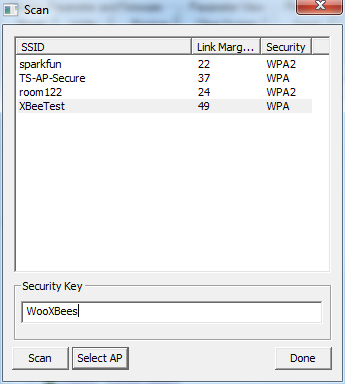 Select your network's SSID, enter a passkey if necessary, and click "Select AP".
Select your network. If it is encrypted, enter your Security Key. Then click "Select AP" (not "Done"!). XCTU will configure your XBee, and it'll try lease a DHCP address if your network is set up for it.
- This step can take a while. Be patient. Hopefully, once connected, you'll see a window telling you the XBee connected to your network in "x milliseconds".
After successfully connecting, click "Read" at the top of the window again. This will update all of the XBee's settings, including GW (the gateway IP), MK (the subnet mask), and MY (the module's assigned IP). If these values all make sense, then congratulations, your XBee is connected to your WiFi network!
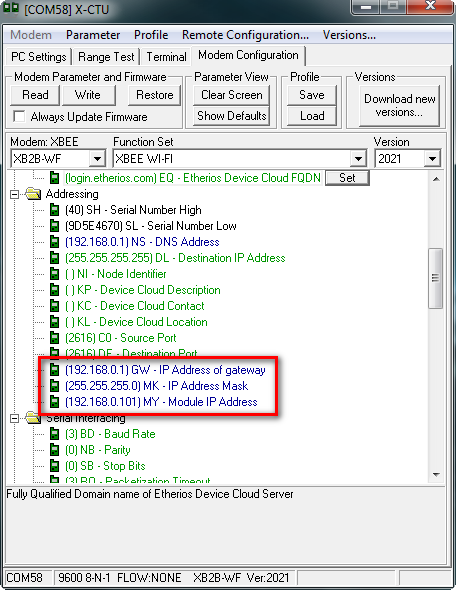 Our XBee WiFi module's IP address is 192.168.0.101.
Yay! What now? There are a few directions you can go:
Communicating with Other XBees
If you've ever used XBees before, you probably think of them as easy-to-setup wireless transceivers. Two XBees, configured correctly, can seamlessly pass data to each other from one serial port to another. XBee WiFi's are no different!
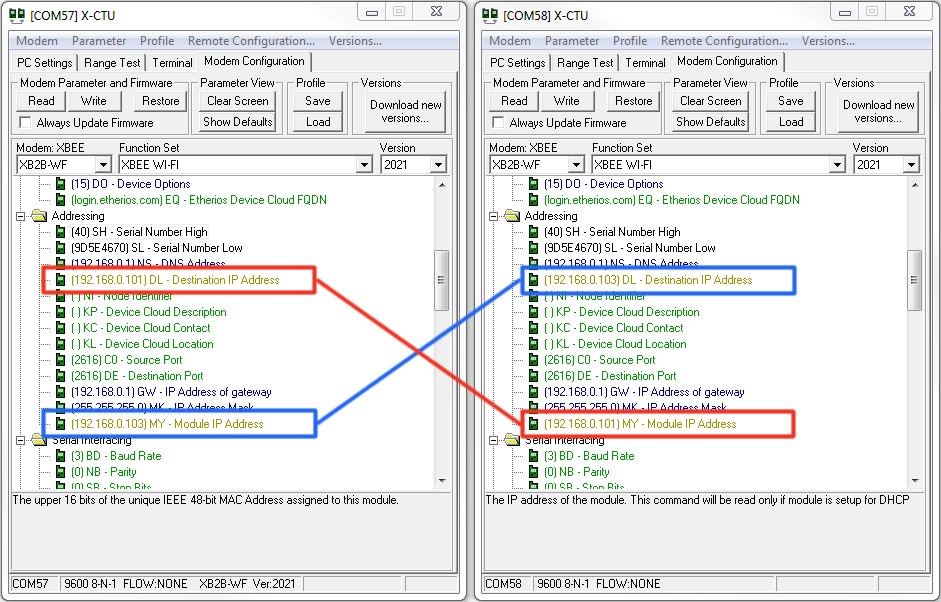
Following that same set of steps, you can set up a second XBee WiFi module to also connect to your wireless network. It'll get a unique IP address (usually assigned via DHCP). Take note of that.
To setup two XBees to communicate to each other, you'll need to modify the DL -- Destination IP Address -- of each to the other XBee. You can open a second XCTU window, or configure each one at a time.
Then you can click over to the Terminal tab to type characters and have them sent from your computer, through one XBee, into the other XBee and out to a second terminal.
Another optional application for these modules is to use them on the cloud. Digi's Device Cloud service makes this very easy. Click over to the next page to see an example setup.