WiFi IR Blaster Hookup Guide
This Tutorial is Retired!
This tutorial covers concepts or technologies that are no longer current. It's still here for you to read and enjoy, but may not be as useful as our newest tutorials.
View the updated tutorial: SparkFun WiFi IR Blaster Hookup Guide
Sending IR Codes
Armed with the timing data for your desired IR command, load up the IRsendDemo example. Around line 42, replace the rawData array with the one you copied from the previous example. You shouldn't have to modify the pin definition for the IR emitter -- just double-check to make sure IR_LED is set to 4, which is the ESP8266 pin connected to the IR emitter.
With that change made, upload the code. Then point the IR emitter at your device. The emitter has a range of about 10 feet, so you may need to get a little close. It should receive a command every 6 seconds.
If your code is Sony- or NEC-encoded, you can also plug the value from data in the previous example to send an NEC or Sony command. This is quite a bit more efficient than sending the raw timing data.
Sending NEC Codes via Web Server
One last example which really begins to show the power of this module is the IRServer example. This sketch will connect your ESP8266 to WiFi and set it up as a web server. When the right HTTP endpoint is hit, it will send a desired command. So you can trigger your device from a web browser!
This example requires that you have an NEC-encoded signal to send.
Before uploading this example, plug your WiFi network's SSID and password into the ssid and password variables.
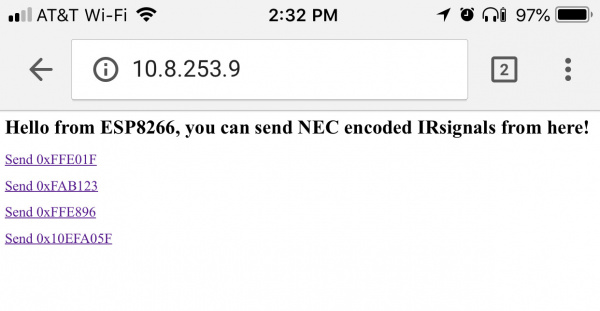
Then adjust some of the static HTML in the handleRoot() function to send your desired code. This is a little tricky. You need to find your NEC code from the receive example -- in my case it was 0x10EFA05F. You'll also need to convert this value to decimal (here's a calculator for that). In my case it was 284139615. Plug those two values into a new line of C-string'ed HTML. I added this line on line 59, for example:
language:c
              "<p><a href=\"ir?code=284139615\">Send 0x10EFA05F</a></p>" \
Then upload the code! Open the serial monitor to check on your ESP8266's connection status. Once connected it should provide you an IP address.
On a device connected to the same WiFi network, plug that IP address into the address bar. You should be greeted with a page like this:
Then aim your IR Blaster at a device, and click your newly added link. Your signal should be routed from your phone or computer, over the WiFi airwaves, to the device you want to control.
