Using Home Assistant to Expand Your Home Automations
 Alex the Giant
Example 3: Automations
If you're familiar with If This Then That (IFTTT) automations, they work very similarly. Automations consist of three parts: The trigger which starts the processing of an automation rule, the optional conditions which can be used to prevent an action from happening when triggered (e.g. only during a certain time, or only if a switch is currently on or off), and actions which Home Assistant will do when the automation is triggered.
In this example we'll create an automation to be triggered from the first MQTT example to toggle the Wifi Plug of the second example to show how to use Home Assistant to take a device that you made and programmed to control a commercially available device, or in our case a WiFi plug switch.
Creating an Automation
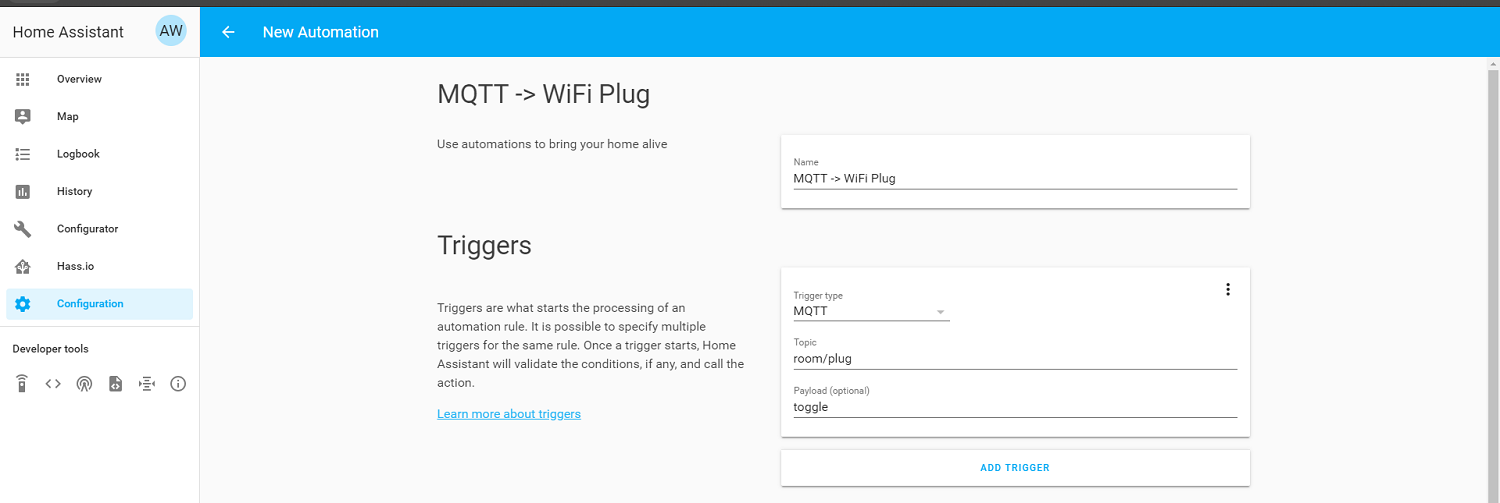
To create an automation, you can either use the configurator tool to edit the automations.yaml file, or in this case, use the automations tool to generate the code. To create an automation, select configuration from the left menu bar, and click automation (or go to http://hassio.local:8123/config/automation) and click the "Add Automation" button from the bottom right.

The first thing we need to do is to give the automation a name. The name is only used to remember what the automation does, so we can simply put "MQTT -> WiFi Plug". For the trigger, we'll select MQTT as the trigger type, with the topic set to "room/plug", and for the payload enter "toggle".
We won't need to add any conditions to the automation, so for the actions we'll set the action type to "Call service". For the service we'll select "switch.toggle", and for our service data we'll enter "{ "entity_id": "switch.xxxxxxxxxxxxx" }" where the x's represent your plug's serial number. When done press the save button in the lower right, and go back to configuration -> general and check the config and restart the server.

Finding the Entity ID
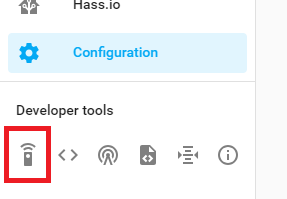
If you're having a hard time finding the entity ID for a device, you can look it up under the developer tools section of the left menu bar under services.
From the Services page, you can select the service "switch.toggle", and from the entity select the plug. From there you can copy all of the service data and paste that into the service data entry for your automation.

ESP32 Code
As we wait for the server to restart, we need to modify the switch sketch from the first example. In the first example we sent messages over MQTT of "on" and "off" over the "room/light" topic. To get our automation to trigger correctly, we'll want to change our topic to "room/plug" and change the message we're sending to only be "toggle", to match the trigger event of our automation. Copy and paste the following code into your Arduino IDE and upload to your ESP32.
language:c
/******************************************************************************
MQTT_Switch_Example.ino
Example for controlling a light using an MQTT switch
by: Alex Wende, SparkFun Electronics

This sketch connects the ESP32 to a MQTT broker and publishes the message
"toggle" to the topic "room/plug".
******************************************************************************/

#include <WiFi.h>
#include <PubSubClient.h>

// WiFi Network Credentials
const char *ssid =  "-----";   // name of your WiFi network
const char *password =  "-----"; // password of the WiFi network

// Home Assistant Credentials
const char *HA_USER = "-----";
const char *HA_PASS = "-----";

// MQTT Network
IPAddress broker(192,168,1,-); // IP address of your MQTT broker eg. 192.168.1.50
const byte SWITCH_PIN = 0;           // Pin to control the light with
const char *ID = "Example_Switch";  // Name of our device, must be unique
const char *TOPIC = "room/plug";  // Topic to subcribe to
const char *MESSAGE = "toggle";   // Message to publish to our topic
WiFiClient wclient;

PubSubClient client(wclient); // Setup MQTT client

// Connect to WiFi network
void setup_wifi() {
  Serial.print("\nConnecting to ");
  Serial.println(ssid);

  WiFi.begin(ssid, password); // Connect to network

  while (WiFi.status() != WL_CONNECTED) { // Wait for connection
    delay(500);
    Serial.print(".");
  }

  Serial.println();
  Serial.println("WiFi connected");
  Serial.print("IP address: ");
  Serial.println(WiFi.localIP());
}

// Reconnect to client
void reconnect() {
  // Loop until we're reconnected
  while (!client.connected()) {
    Serial.print("Attempting MQTT connection...");
    // Attempt to connect
    if (client.connect(ID,HA_USER,HA_PASS)) {
      Serial.println("connected");
      Serial.print("Publishing to: ");
      Serial.println(TOPIC);
      Serial.println('\n');

    } else {
      Serial.println(" try again in 5 seconds");
      // Wait 5 seconds before retrying
      delay(5000);
    }
  }
}

void setup() {
  Serial.begin(115200); // Start serial communication at 115200 baud
  pinMode(SWITCH_PIN,INPUT);  // Configure SWITCH_Pin as an input
  digitalWrite(SWITCH_PIN,HIGH);  // enable pull-up resistor (active low)
  delay(100);
  setup_wifi(); // Connect to network
  client.setServer(broker, 1883);
}

void loop() {
  if (!client.connected())  // Reconnect if connection is lost
  {
    reconnect();
  }
  client.loop();

  // if the switch is being pressed
  if(digitalRead(SWITCH_PIN) == 0)
  {
    client.publish(TOPIC, MESSAGE);
    Serial.println((String)TOPIC + " => toggle");

    while(digitalRead(SWITCH_PIN) == 0) // Wait for switch to be released
    {
      delay(20);
    }
  }
}
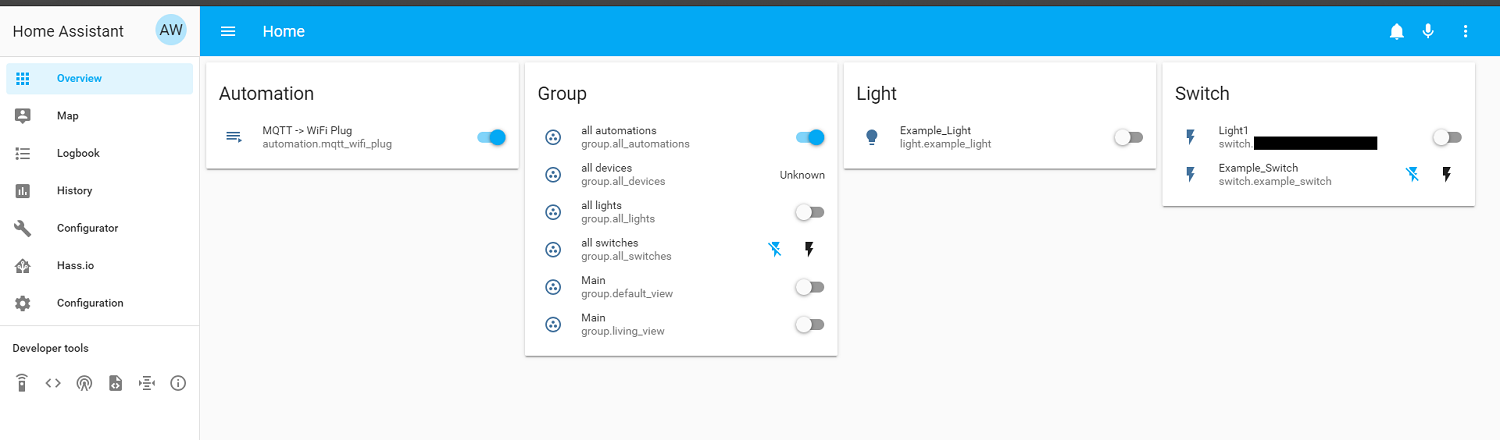
Once the code has uploaded, and the server has restarted, go to your overview or unused entities, and make sure your automation is enabled. Once it is, when you push the button connected to IO pin 0 on the ESP32, the plug should toggle states.
Going Further with Low Power
With a constant power source, the amount of current the ESP32 draws isn't much of a concern. But with having a WiFi remote for your switches, it's likely that battery power would be preferable to allow moving the switch anywhere you'd like. To get the most out of a battery, you'll want to draw as little current as you can, so to do this, we'll put the ESP32 in low power mode, and when the button is pressed we want to wake up the ESP32, connect to WiFi and the MQTT server, send our message and go back to sleep. With the sketch below, the ESP32 Thing Plus will draw around 5mA while in sleep mode, and draw up to 160mA when the MQTT packet is sent.
language:c
/******************************************************************************
Low_Power_MQTT_Switch_Example.ino
Example for controlling a light using an MQTT switch
by: Alex Wende, SparkFun Electronics

This sketch enters low power mode and waits for IO pin 0 to be pressed. Once
pressed, the ESP32 wakes up, connects to WiFi and the MQTT broker, and
publishes "toggle" to the topic "room/plug" and goes back to low power mode.
******************************************************************************/

#include <WiFi.h>
#include <PubSubClient.h>

// WiFi Network Credentials
const char *ssid =  "-----";   // name of your WiFi network
const char *password =  "-----"; // password of the WiFi network

// Home Assistant Credentials
const char *HA_USER = "-----";
const char *HA_PASS = "-----";

// MQTT Network
IPAddress broker(192,168,1,-); // IP address of your MQTT broker eg. 192.168.1.50
const byte SWITCH_PIN = 0;           // Pin to control the light with
const char *ID = "Example_Switch";  // Name of our device, must be unique
const char *TOPIC = "room/plug";  // Topic to subcribe to
const char *MESSAGE = "toggle";   // Message to publish to our topic
WiFiClient wclient;

PubSubClient client(wclient); // Setup MQTT client

// Connect to WiFi network
void setup_wifi() {
  Serial.print("\nConnecting to ");
  Serial.println(ssid);

  WiFi.begin(ssid, password); // Connect to network

  while (WiFi.status() != WL_CONNECTED) { // Wait for connection
    delay(10);
    Serial.print(".");
  }

  Serial.println();
  Serial.println("WiFi connected");
  Serial.print("IP address: ");
  Serial.println(WiFi.localIP());
}

// Reconnect to client
void reconnect() {
  // Loop until we're reconnected
  while (!client.connected()) {
    Serial.print("Attempting MQTT connection...");
    // Attempt to connect
    if (client.connect(ID,HA_USER,HA_PASS)) {
      Serial.println("connected");
      Serial.print("Publishing to: ");
      Serial.println(TOPIC);
      Serial.println('\n');

    } else {
      Serial.println(" try again in 5 seconds");
      // Wait 5 seconds before retrying
      delay(5000);
    }
  }
}

#define BUTTON_PIN_BITMASK 0x200000000 // 2^33 in hex

/*
Method to print the reason by which ESP32
has been awaken from sleep
*/
void wakeup_reason(){
  esp_sleep_wakeup_cause_t wakeup_reason;

  wakeup_reason = esp_sleep_get_wakeup_cause();

  if(wakeup_reason == ESP_SLEEP_WAKEUP_EXT0)
  {
    setup_wifi(); // Connect to network
    client.setServer(broker, 1883);

    if (!client.connected())  // Reconnect if connection is lost
    {
      reconnect();
    }
    client.loop();

    client.publish(TOPIC, MESSAGE);
    Serial.println((String)TOPIC + " => toggle");

    while(digitalRead(SWITCH_PIN) == 0) // Wait for switch to be released
    {
      delay(20);
    }
  }
}

void setup(){
  Serial.begin(115200);
  wakeup_reason();

  /*
  First we configure the wake up source
  We set our ESP32 to wake up for an external trigger.
  There are two types for ESP32, ext0 and ext1 .
  ext0 uses RTC_IO to wakeup thus requires RTC peripherals
  to be on while ext1 uses RTC Controller so doesnt need
  peripherals to be powered on.
  Note that using internal pullups/pulldowns also requires
  RTC peripherals to be turned on.
  */
  esp_sleep_enable_ext0_wakeup(GPIO_NUM_0,0); //1 = High, 0 = Low

  //Go to sleep now
  Serial.println("Going to sleep now");
  esp_deep_sleep_start();
}

void loop(){
  //This is not going to be called
}
When you push the button this time, you should notice a delay before the plug turns on or off. The main reason is the time it takes to connect to the WiFi network and then to the MQTT server. How else could we take this further? These examples were to demonstrate easy proof-of-concept demonstrations. By soldering a few more buttons and adding a case, you could create a remote that can turn on and off a bunch of lights, either one at a time, or by groups just by adding more automations and setting each button on the remote to send a different MQTT command.