Using EAGLE: Schematic
 jimblom
Tips and Tricks
Names and Values
Every component on your schematic should have two editable text fields: a name and a value. The name is an identifier like R1, R2, LED3, etc. Every component on the schematic should have a unique name. You can use the NAME tool --  on any component to change the name.
A part's value allows you to define unique characteristics of that part. For example, you can set a resistor's resistance, or a capacitor's capacitance. The importance of a part's value depends on what type of component it is. For parts like resistors, capacitors, inductors, etc. the value is a critical piece of information when you're generating a bill of materials or assembly sheet. To adjust a part's value parameter, use the VALUE tool --  .
.
Verifying Connections
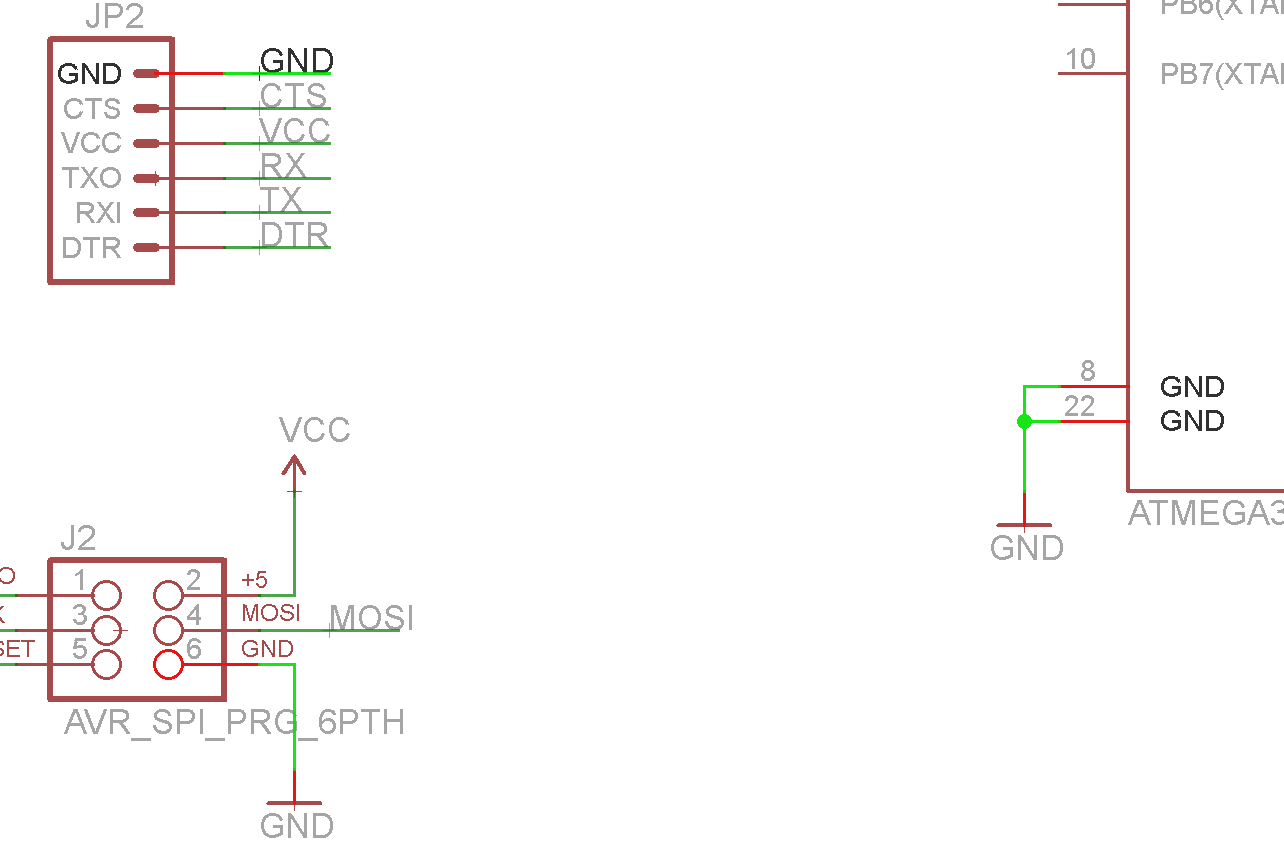
The SHOW tool --  -- is very useful for verifying that pins across your schematic are connected correctly. If you use SHOW on a net, every pin it's connected to should light up. If you're dubious of the fact that two like-named nets are connected, give the SHOW tool a try. SHOW-ing a net connected to GND, for example, should result in a lot of GND nets lighting up.
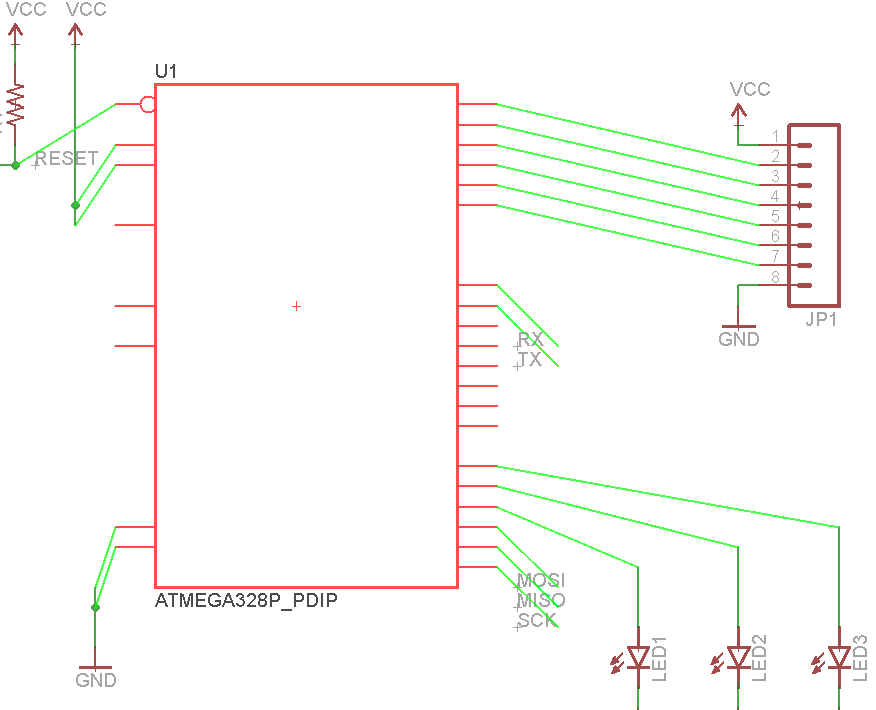
As an alternative to show, you can temporarily MOVE a part a part to make sure nets are connected to it. Use MOVE to pick a part up, and the nets connected to it should bend and adjust to remain so. Just make sure you hit ESC to not move the part (or UNDO if you accidentally move it).
If a net isn't moving along with the part, it's not connected to the pin correctly. Double check to make sure you routed to the very end of the pin, and not a bit further:
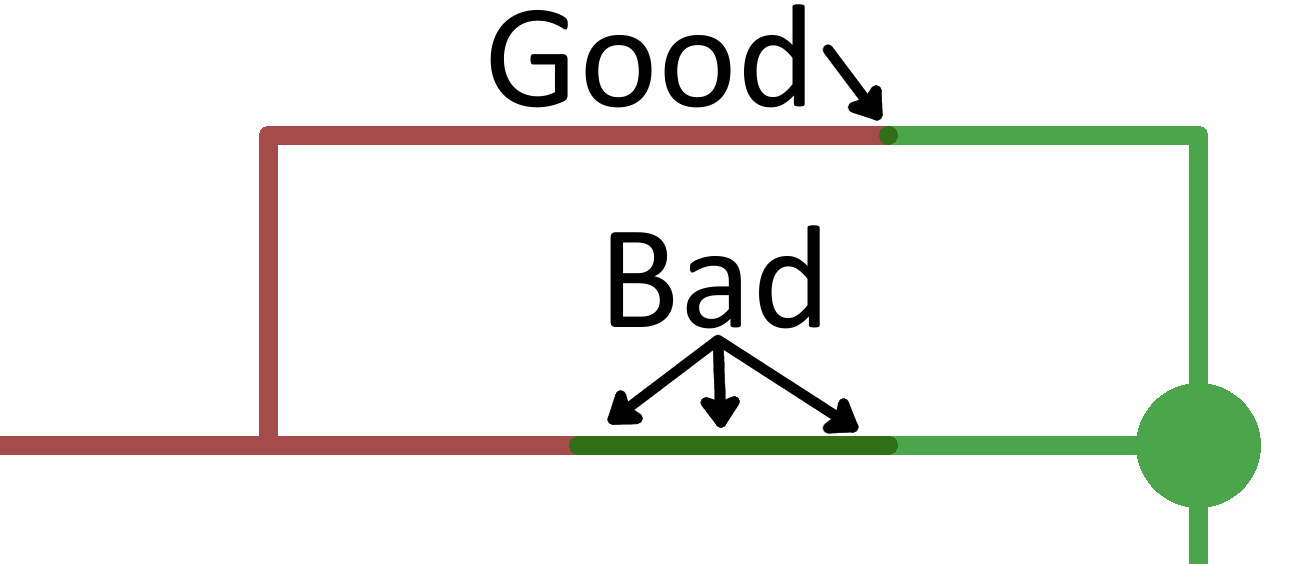
If you have any nets incorrectly connected like above, DELETE --  -- it, and try re-netting.
Group Moving/Deleting/Etc.
Any tool that you use on a single component, can also be used on a group of them. Grouping and performing an action on that group is a two-step process. First, use the group tool --  -- to select the parts you want to modify. You can either hold down the left-mouse button and drag a box around them, or click multiple times to draw a polygon around a group. Once the group is made, every object in that group should glow.
After grouping, select the tool you want to use. The status box in the far bottom-left will have some helpful information pertaining to using the tool on a group:

In order to perform any action on a group, you have to select the tool, then hold down CTRL and right-click the group. After you CTRL+right-click, the tool will operate on the group just as it does a single component.
Copy/Paste
EAGLE's Copy --  -- and Paste --
  -- tools don't work exactly like other copy/paste tools you may have encountered before. Copy actually performs both a copy and paste when it's used. As soon as you copy a part (or any object on the schematic -- name, text, net, etc.) an exact copy will instantly spawn and follow your mouse awaiting placement. This is useful if you need to add multiples of the same part (like GND nodes or resistors).
Paste can only be used to paste a group that has previously been copied to your clipboard. To use paste you first have to create a group, then (with the copy tool selected) CTRL+right-click to copy it, but hit ESC instead of gluing it down. This'll store the copied group into your operating system's clipboard, and you can use paste to place it somewhere. This tool is especially useful if you need to copy parts of one schematic file into another.