Using EAGLE: Board Layout
 jimblom
Routing the Board
Routing is the most fun part of this entire process. It's like solving a puzzle! Our job will be turning each of those gold airwires into top or bottom copper traces. At the same time, you also have to make sure not to overlap two different signals.
Using the Route Tool
To draw all of our copper traces, we'll use the ROUTE tool--  -- (not the WIRE tool!). After selecting the tool, there are a few options to consider on the toolbar above:

- Layer: On a 2-layer board like this, you'll have to choose whether you want to start routing on the top (1) or bottom (16) layer.
- Bend Style: Usually you'll want to use 45° angles for your routes (wire bend styles 1 and 3), but it can be fun to make loopy traces too.
- Width: This defines how wide your copper will be. Usually 0.01" is a good default size. You shouldn't go any smaller than 0.007" (or you'll probably end up paying extra). Wider traces can allow for more current to safely pass through. If you need to supply 1A through a trace, it'd need to be much wider (to find out how much, exactly, use a trace width calculator).
- Via Options: You can also set a few via characteristics here. The shape, diameter, and drill can be set, but usually the defaults (round, auto, and 0.02" respectively) are perfect.
With those all set, you start a route by left-clicking on a pin where a airwire terminates. The airwire, and connected pins will "glow", and a red or blue line will start on the pin. You finish the trace by left-clicking again on top of the other pin the airwire connects to. Between the pins, you can left-click as much as you need to "glue" a trace down.
While routing it's important to avoid two cases of overlap: copper over vias, and copper over copper. Remember that all of these copper traces are basically bare wire. If two signals overlap, they'll short out, and neither will do what it's supposed to.
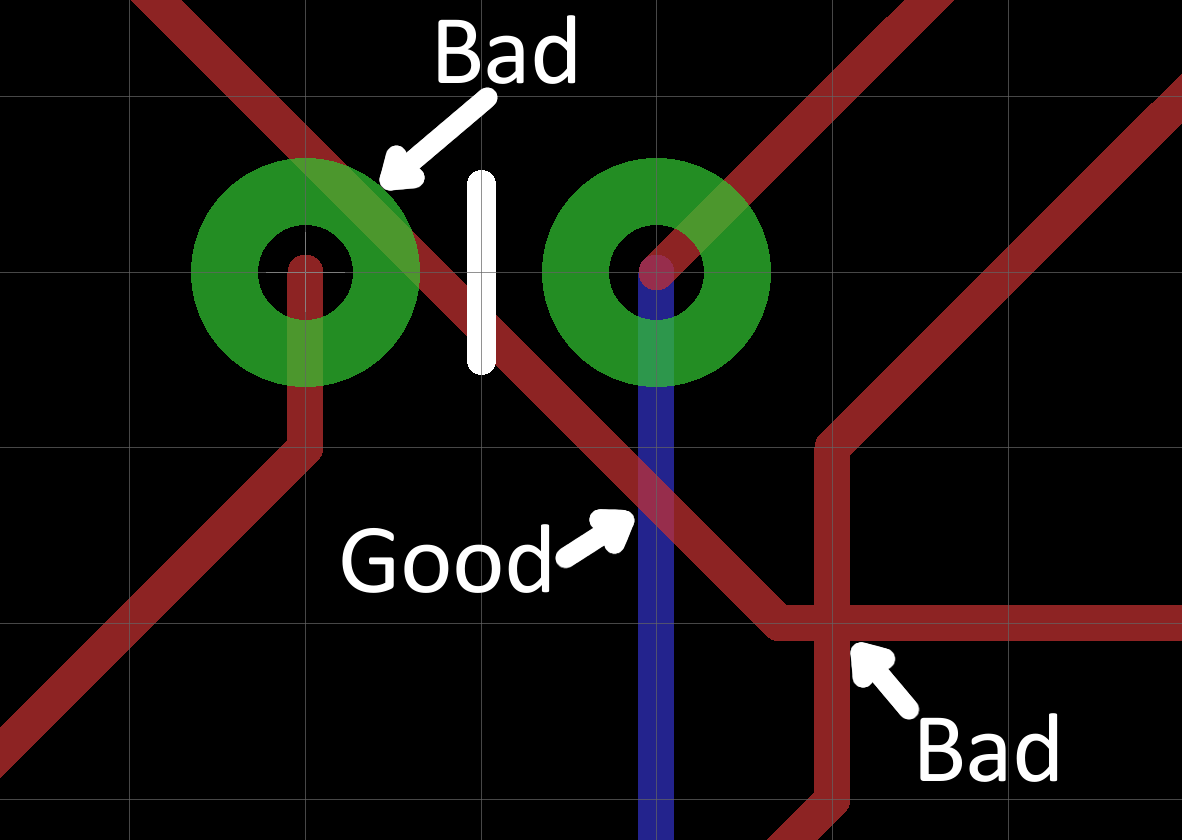
If traces do cross each other, make sure they do so on opposite sides of the board. It's perfectly acceptable for a trace on the top side to intersect with one on the bottom. That's why there are two layers!
If you need more precise control over your routes, you can hold down the ALT key on your keyboard to access the alternate grid. By default, this is set to be a much more fine 0.005".
Placing Vias
Vias are really tiny drill holes that are filled with copper. We use them mid-route to move a trace from one side of the board to the other.
To place a via mid-route, first left-click in the black ether between pins to "glue" your trace down. Then you can either change the layer manually in the options bar up top, or click your middle mouse button to swap sides. And continue routing to your destination. EAGLE will automatically add a via for you.
Route Clearance
Make sure you leave enough space between two different signal traces. PCB fabricators should have clearly defied minimum widths that they'll allow between traces -- probably around 0.006" for standard boards. As a good rule-of-thumb, if you don't have enough space between two traces to fit another (not saying you should), they're too close together.
Ripping Up Traces
Much like the WIRE tool isn't actually used to make wires, the DELETE tool can't actually be used to delete traces. If you need to go back and re-work a route, use the RIPUP tool --  -- to remove traces. This tool turns routed traces back into airwires.
You can also use UNDO and REDO to back/forward-track.
Route Away!
That's about all the simple rules there are. Go have the time of your life solving the routing puzzle! You may want to start on the closest, easiest traces first. Or, you might want to route the important signals -- like power and ground -- first. Here's an example of a fully-routed board:
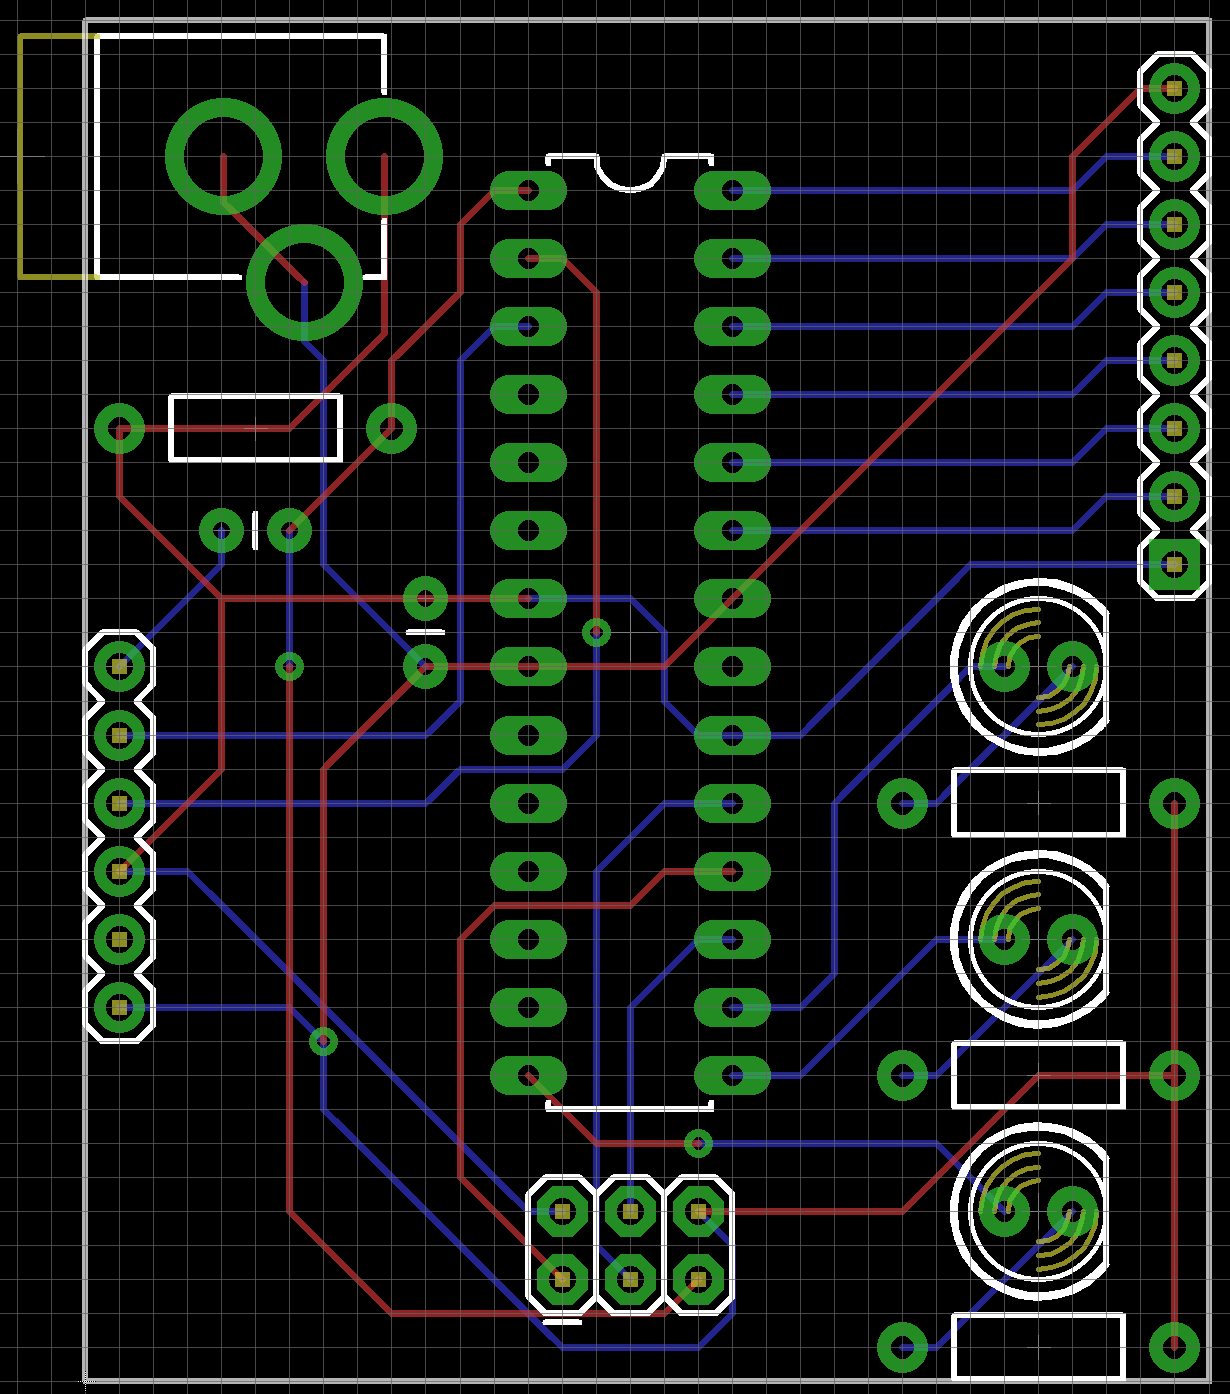
See if you can do a better job than that! Make your board smaller. Or try to avoid using any vias.
After you feel like the routing is done, there are a few checks we can do to make sure it's 100% complete. We'll cover those on the next page.
Or Use the Autorouter (Cheater!)
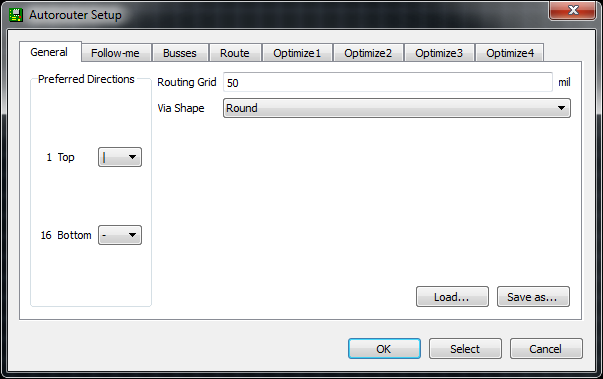
If you're short on time, or having trouble solving the routing puzzle, you can try loading up EAGLE's Autorouter --  -- to see if it can finish the job. Open up the autorouter, don't worry about these other tabs for now, just click OK.
If you don't like the job the autorouter did, you can quickly hit Undo to go back to where you were.
The autorouter won't always be able to finish the job, so it's still important to understand how to manually route pads (plus manual routes look much better). After running the autorouter, check the bottom-left status box to see how it did. If it says anything other than "OptimizeN: 100% finished", you've still got some work to do. If your autorouter couldn't finish the job, try turning Routing Grid down from 50mil 10mil.
There are tons of optimizations and settings to be made in the autorouter. If you want to dig deeper into the subject, consider checking out EAGLE's manual where an entire chapter is devoted to it.