Using EAGLE: Board Layout
 jimblom
Arranging the Board
Create a Board From Schematic
If you haven't already, click the Generate/Switch to Board icon --  -- in the schematic editor to create a new PCB design based on your schematic:
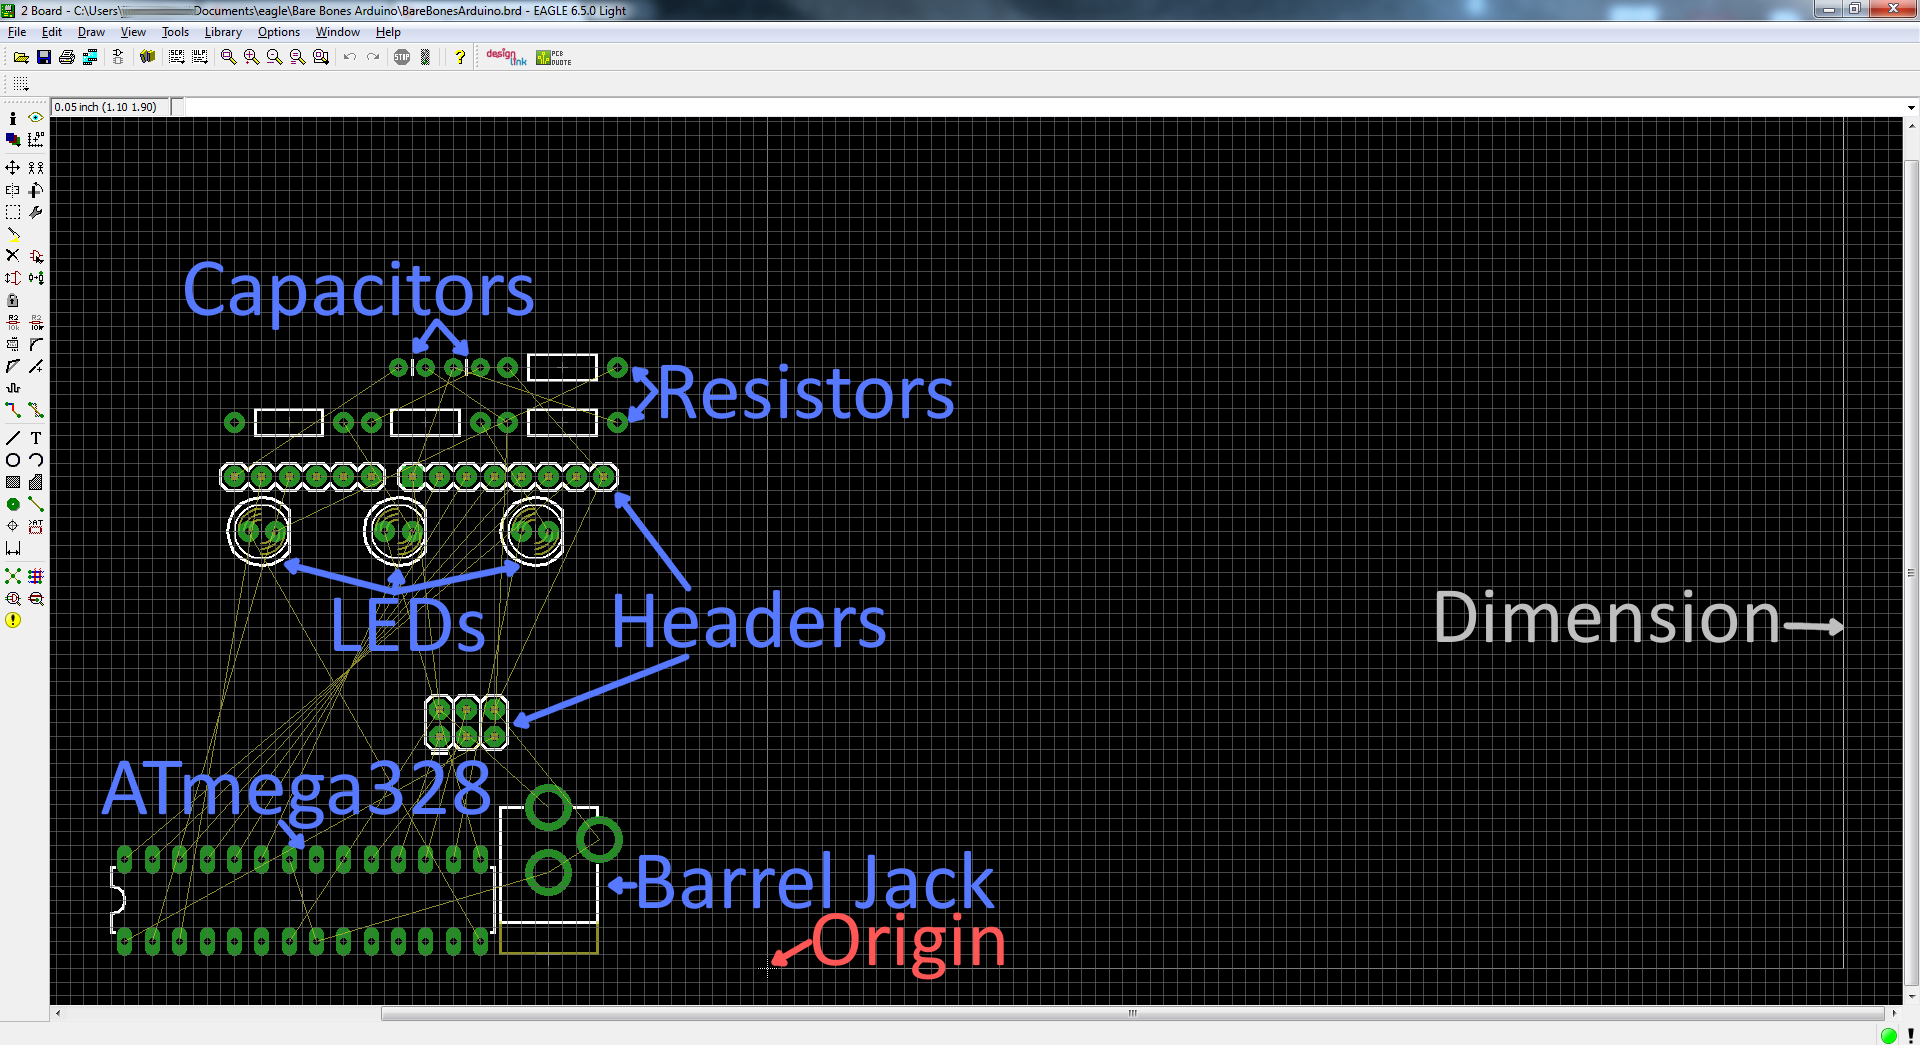
The new board file should show all of the parts from your schematic. The gold lines, called airwires, connect between pins and reflect the net connections you made on the schematic. There should also be a faint, light-gray outline of a board dimension to the right of all of the parts.
Our first job in this PCB layout will be arranging the parts, and then minimizing the area of our PCB dimension outline. PCB costs are usually related to the board size, so a smaller board is a cheaper board.
Understanding the Grid
In the schematic editor we never even looked at the grid, but in the board editor it becomes much more important. The grid should be visible in the board editor. You can adjust the granularity of the grid, by clicking on the GRID icon --  . A 0.05" grid, and 0.005" alternate grid is a good size for this kind of board.
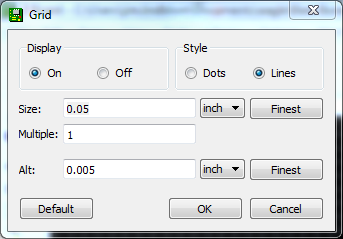
EAGLE forces your parts, traces, and other objects to "snap" to the grid defined in the Size box. If you need finer control, hold down ALT on your keyboard to access the alternate grid, which is defined in the Alt box.
Moving Parts
Using the MOVE tool --  -- you can start to move parts within the dimension box. While you're moving parts, you can rotate them by either right-clicking or changing the angle in the drop-down box near the top.
The way you arrange your parts has a huge impact on how easy or hard the next step will be. As you're moving, rotating, and placing parts, there are some factors you should take into consideration:
- Don't overlap parts: All of your components need some space to breathe. The green via holes need a good amount of clearance between them too. Remember those green rings are exposed copper on both sides of the board, if copper overlaps, streams will cross and short circuits will happen.
- Minimize intersecting airwires: While you move parts, notice how the airwires move with them. Limiting criss-crossing airwires as much as you can will make routing much easier in the long run. While you're relocating parts, hit the RATSNEST button --
 -- to get the airwires to recalculate.
 - Part placement requirements: Some parts may require special consideration during placement. For example, you'll probably want the insertion point of the barrel jack connector to be facing the edge of the board. And make sure that decoupling capacitor is nice and close to the IC.
- Tighter placement means a smaller and cheaper board, but it also makes routing harder.
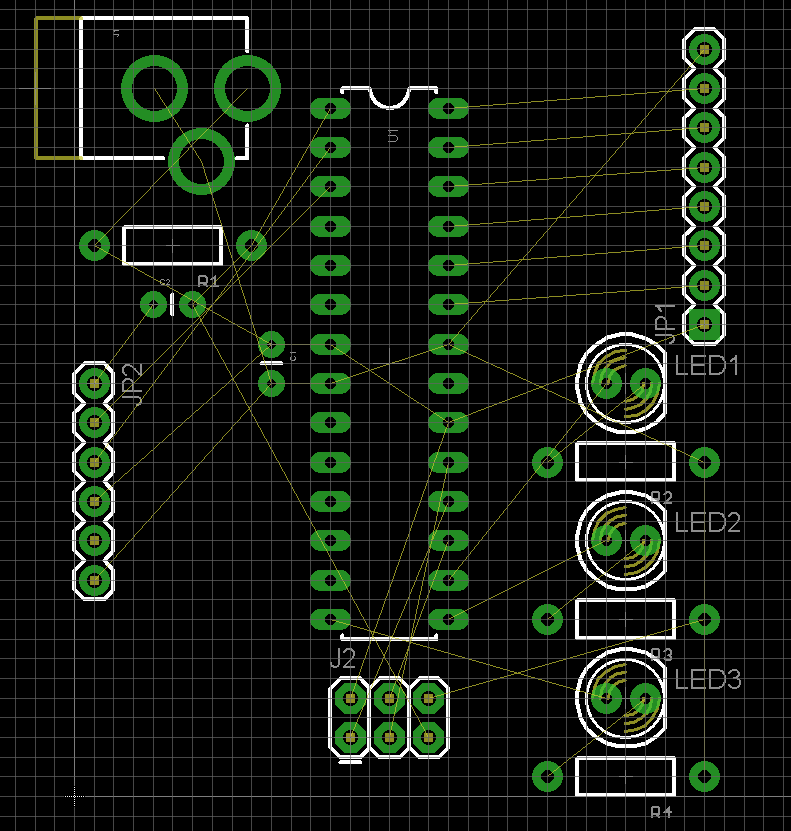
Below is an example of how you might lay out your board while considering those factors. We've minimized airwire intersections by cleverly placing the LEDs and their current-limiting resistors. Some parts are placed where they just have to go (the barrel jack, and decoupling capacitor). And the layout is relatively tight.
Adjusting the Dimension Layer
Now that the parts are placed, we're starting to get a better idea of how the board will look. Now we just need to fix our dimension outline. You can either move the dimensions lines that are already there, or just start from scratch. Use the DELETE tool --  -- to erase all four of the dimension lines.
Then use the WIRE tool -- ( -- to draw a new outline. Before you draw anything though, go up to the options bar and set the layer to 20 Dimension. Also up there, you may want to turn down the width a bit (we usually set it to 0.008").

Then, starting at the origin, draw a box around your parts. Don't intersect the dimension layer with any holes, or they'll be cut off! Make sure you end where you started.
That's a fine start. With the parts laid out, and the dimension adjusted, we're ready to start routing some copper!