Temperature Sensor Comparison
 bboyho
 Round 1: TMP117 vs TMP102 vs TMP36
For simplicity, let's compare three temperature sensors from the SparkFun catalog in this round! We'll be measuring the ambient temperature of the air using these sensors.
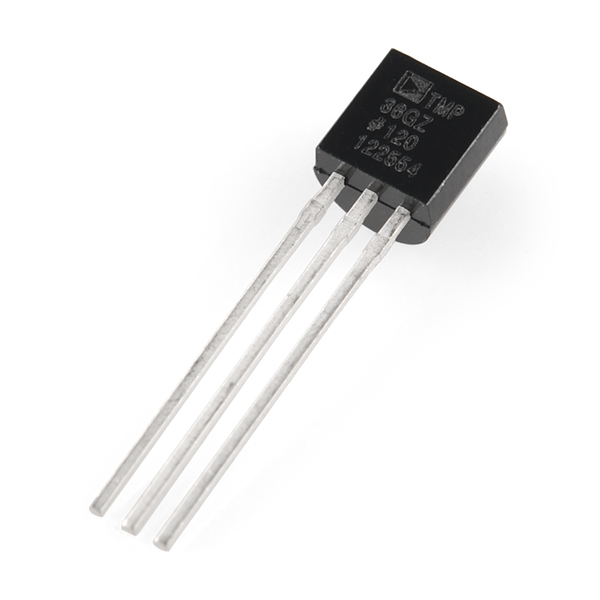
Temperature Sensor - TMP36
SEN-10988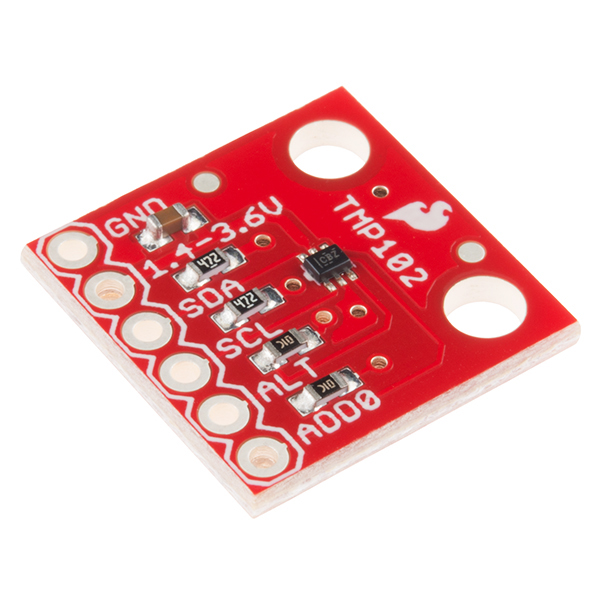
TMP36
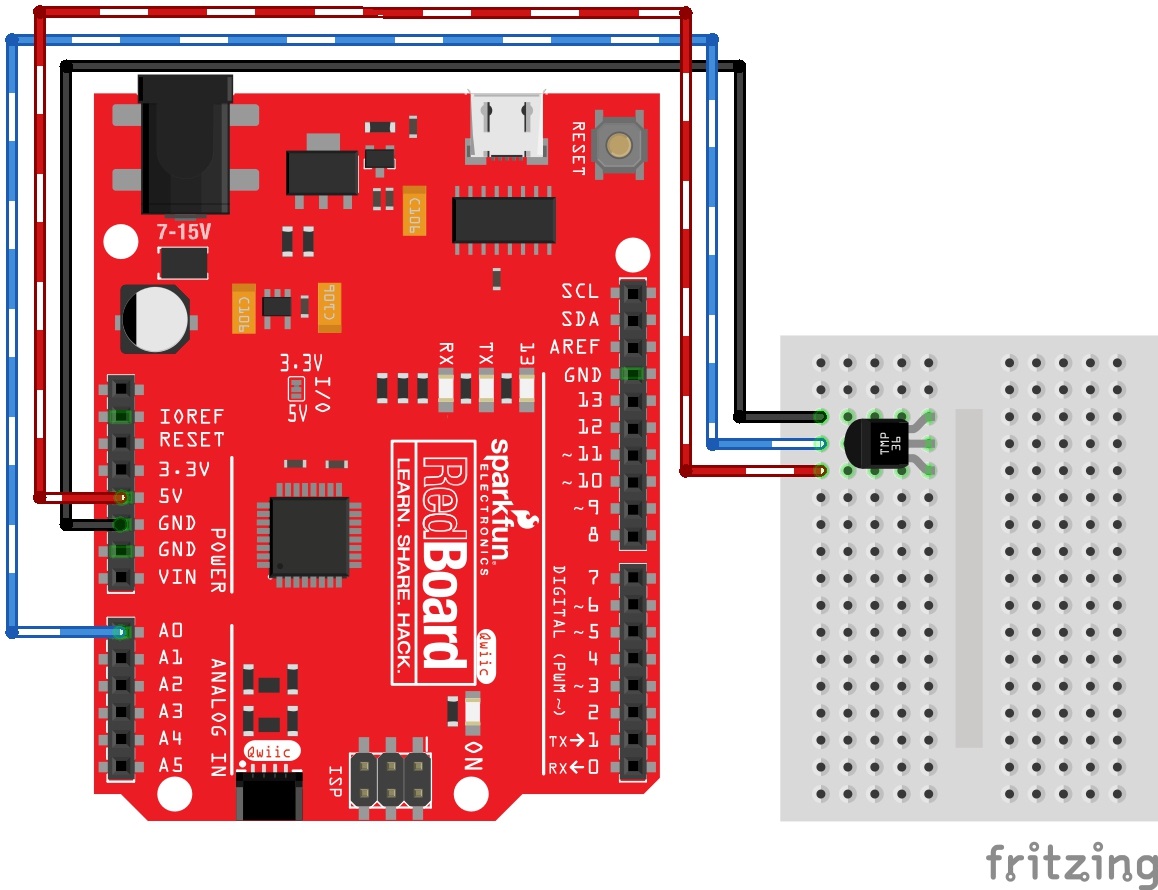
We'll connect the TMP36 using the circuit from the SIK.
 |
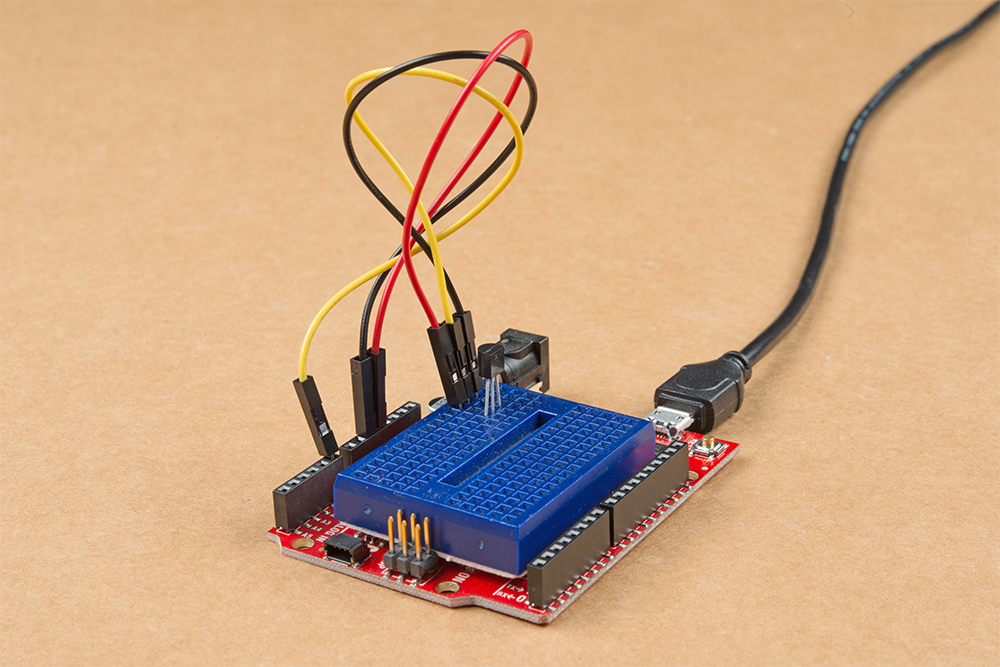 |
| Fritzing Circuit Diagram | RedBoard Qwiic and TMP36 Connected |
Below is the modified example code from the SIK to output to the serial monitor. Grab the code and upload to your Arduino if you are trying to follow along!
language:c
/******************************************************************************
  TMP36.ino
  Written by Ho Yun "Bobby" Chan
  @ SparkFun Electronics
  Date: Nov 4, 2019
  https://gist.github.com/bboyho/c30b70fc308f41b92a6f1b07e5a54838

  Description: This sketch configures temperature sensor and prints the
  temperature in degrees celsius and fahrenheit. Simply adjust the `output_select`
  to view the °C, °F, or both. Open the Serial Monitor or Plotter at 115200 baud
  to view the data.

  Development Environment Specifics:
  Arduino 1.8.9+

  License:
  This code is released under the MIT License (http://opensource.org/licenses/MIT)
  Distributed as-is; no warranty is given.

******************************************************************************/

//variables for TMP36
float tmp36_voltage = 0;                      //the voltage measured from the TMP36
float tmp36_degC = 0;                         //the temperature in Celsius, calculated from the voltage
float tmp36_degF = 0;                         //the temperature in Fahrenheit, calculated from the voltage

//0 = output degrees °C
//1 = output degrees °F
//any other number = output degrees °C and °F
int output_select = 1; //select output

void setup() {
  Serial.begin(115200);    // Start serial communication at 115200 baud
  if (output_select == 0 ) {
    Serial.println("TMP36[°C]");
  }
  else if (output_select == 1) {
    Serial.println("TMP36[°F]");
  }
  else {
    Serial.print("TMP36[°C]");
    Serial.print(",");
    Serial.println("TMP36[°F]");
  }
}// end setup

void loop() {
  //get TMP36 readings and calculate
  tmp36_voltage = analogRead(A0) * 0.004882814;   //convert the analog reading, which varies from 0 to 1023, back to a voltage value from 0-5 volts
  tmp36_degC = (tmp36_voltage - 0.5) * 100.0;     //convert the voltage to a temperature in degrees Celsius
  tmp36_degF = tmp36_degC * (9.0 / 5.0) + 32.0;   //convert the voltage to a temperature in degrees Fahrenheit

  if (output_select == 0 ) {
    // Print temperature in °C
    //Serial.print("Temperature in Celsius: ");
    Serial.println(tmp36_degC);//TMP36 temperature
  }
  else if (output_select == 1) {
    // Print temperature in °F
    //Serial.print("Temperature in Fahrenheit: ");
    Serial.println(tmp36_degF);

  }
  else {
    Serial.print(tmp36_degC);       //TMP36 temperature
    Serial.print(",");              //seperator
    Serial.println(tmp36_degF);
  }

  delay(5); // Delay added for easier readings

}//end loop
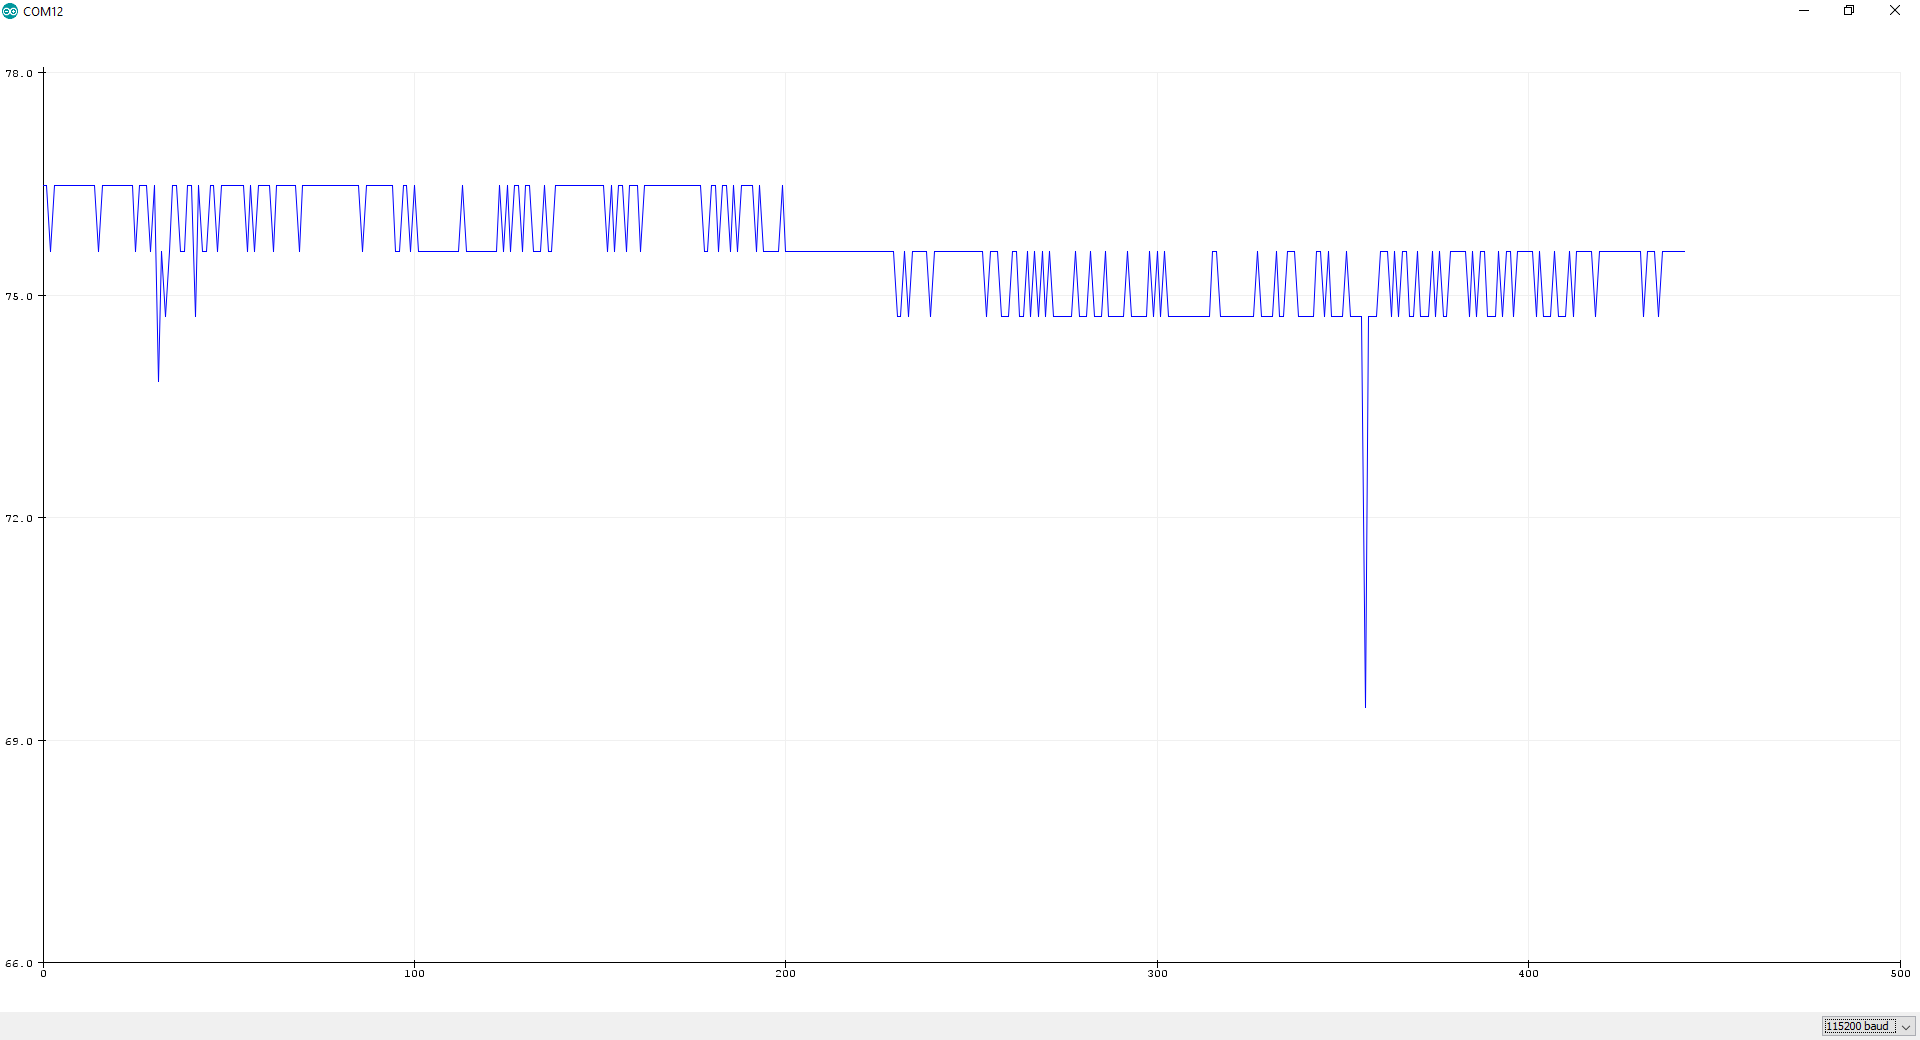
Let's observe the output that was taken at that moment to measure the ambient temperature of the room. The temperature reading seems to jump around between 75.5°F and 76.5°F. Other times, the output would spike. (This was probably due to the TMP36 being built on a breadboard or noise from the power supply). Adding a decoupling capacitor between Vcc and GND helped smooth the signal but I would still get small spikes in the readings.
TMP102 vs TMP36
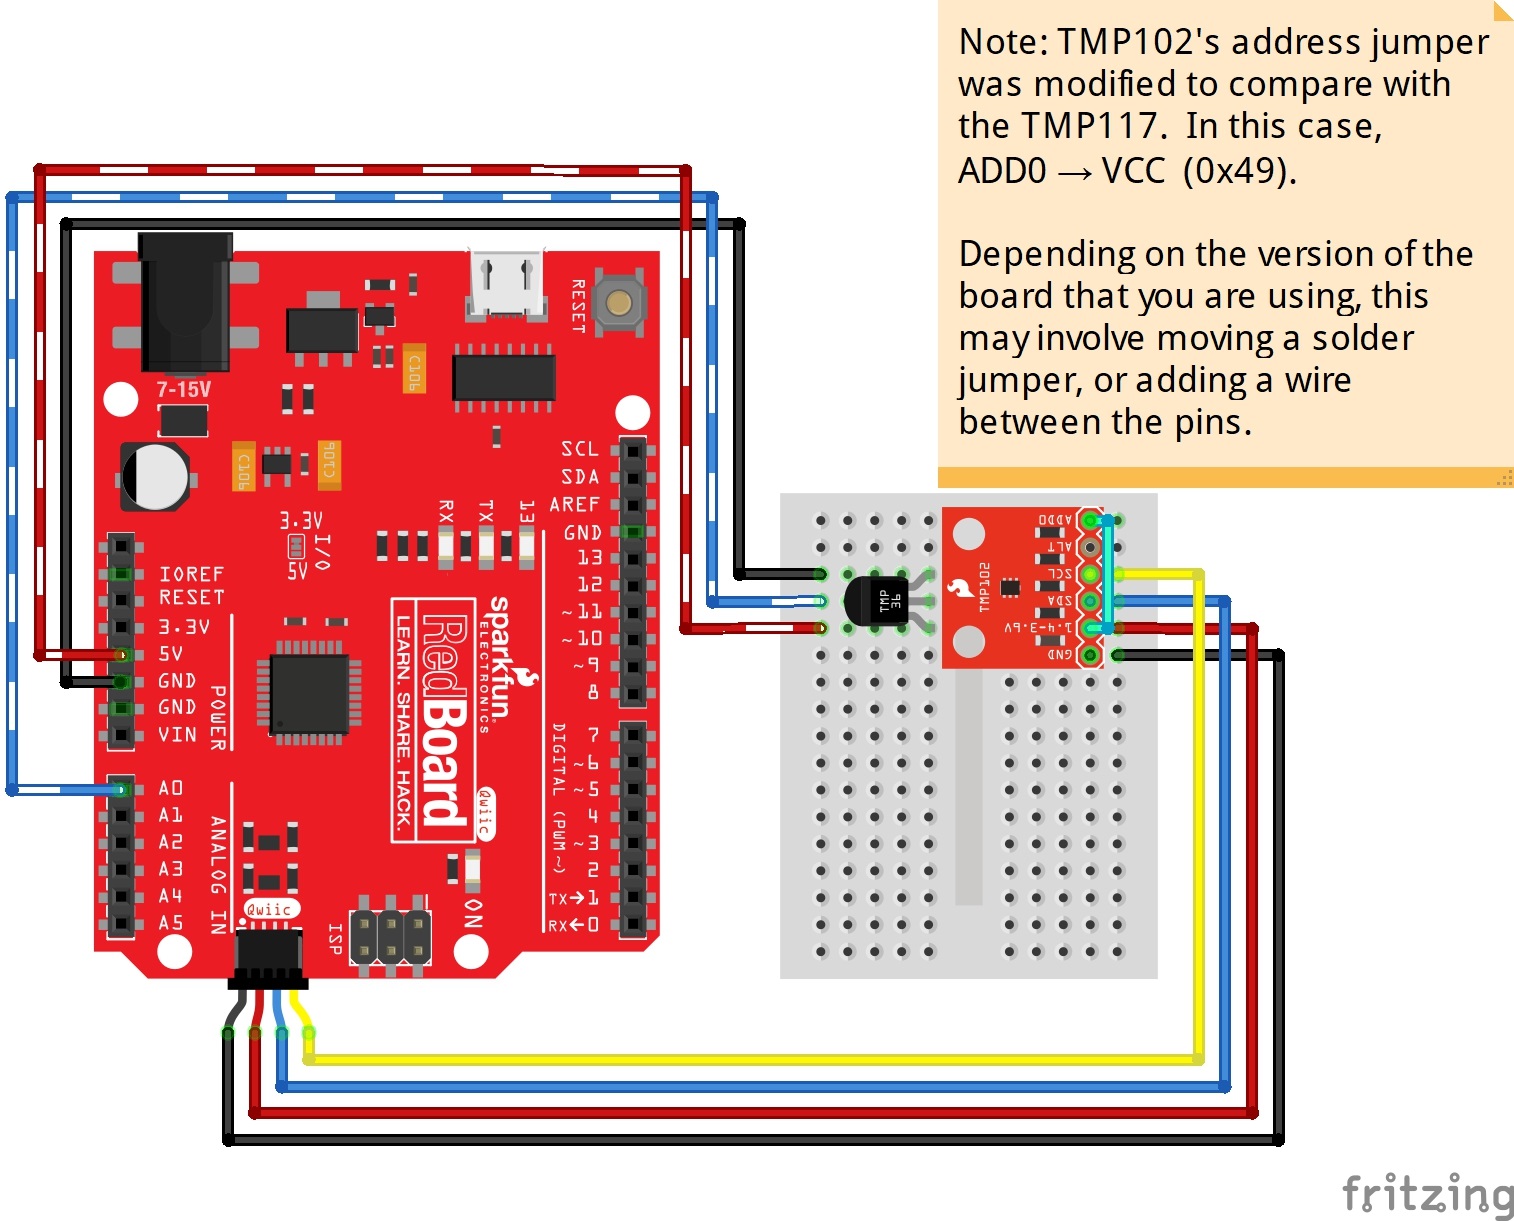
Can we get a more precise reading? Why yes we can! Let's try using a digital temperature sensor to compare. I soldered headers to the TMP102 and included it on the breadboard based off the TMP102 hookup guide. Using the Qwiic cable to breadboard adapter made it quick to connect the sensor to the RedBoard.
 |
 |
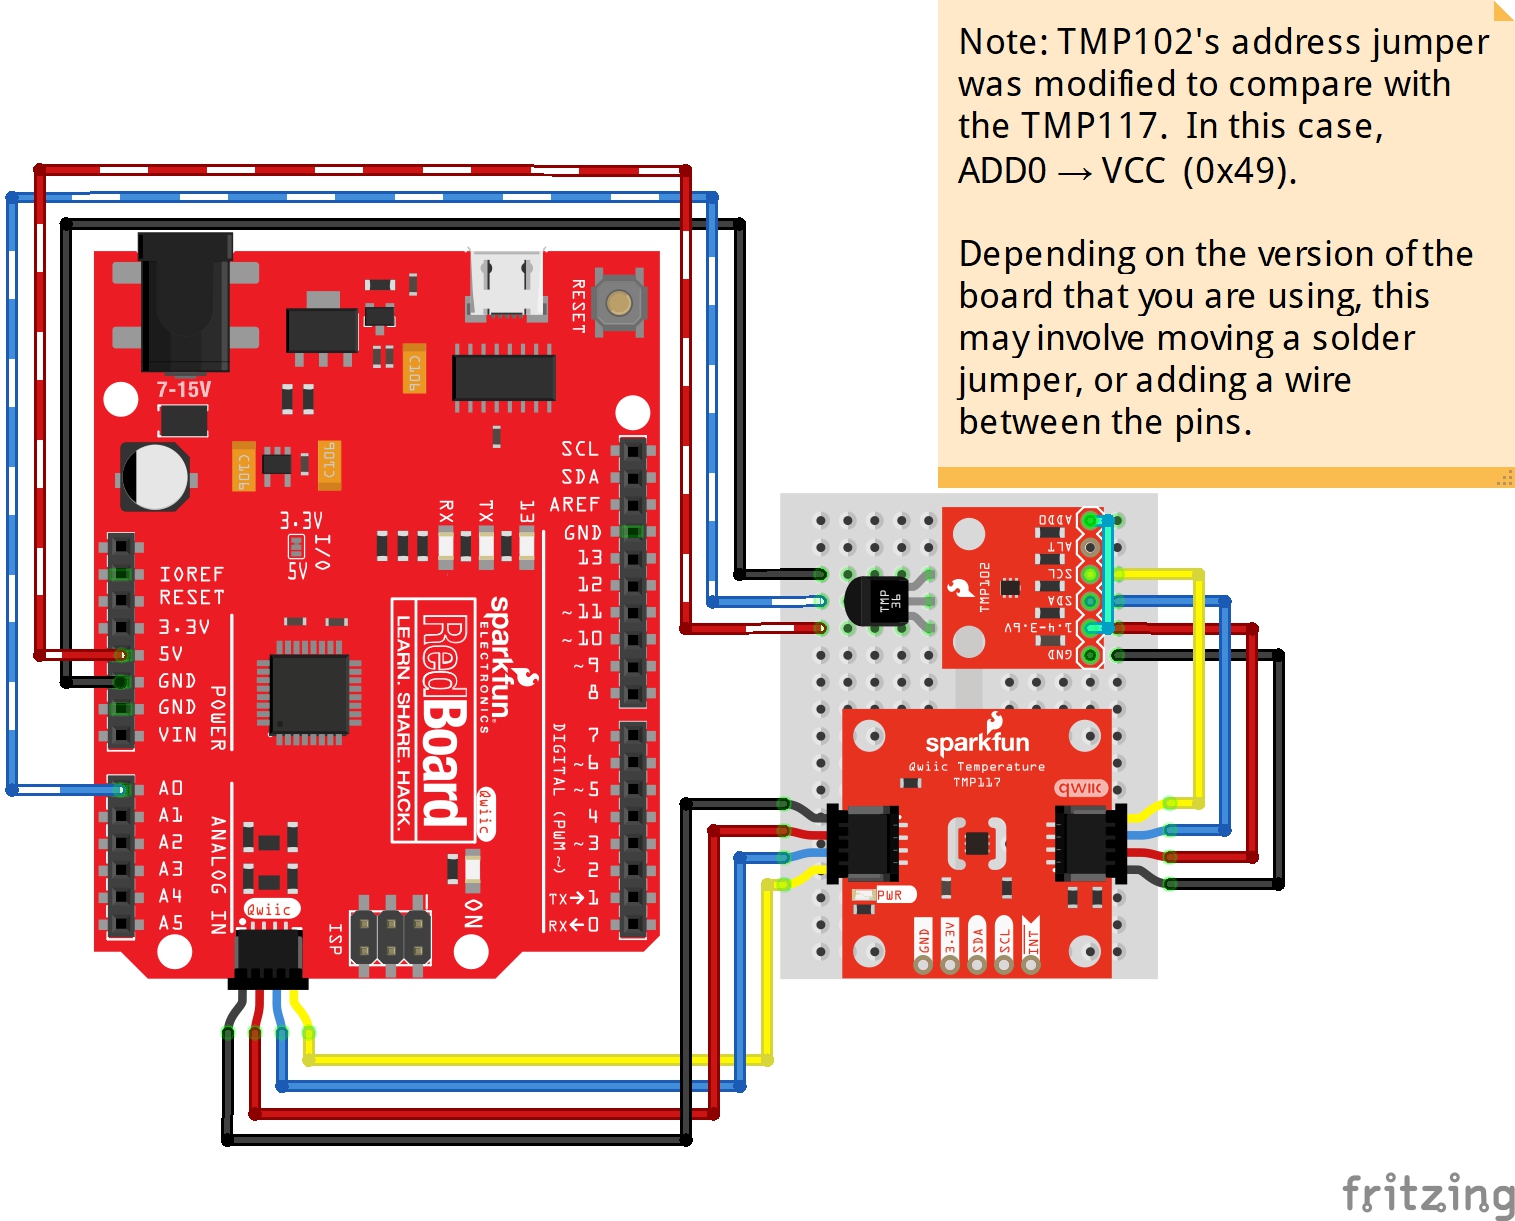
| Fritzing Circuit Diagram | RedBoard Qwiic, TMP36, and TMP102 Connected |
The code was adjusted to output both the TMP36 and TMP102 in the serial monitor for comparison. Additionally, address of the TMP102 was adjusted to 0x49 to compare with the TMP117. Grab the code and upload it to your Arduino if you are trying to follow along!
language:c
/******************************************************************************
  TMP102vsTMP36.ino
  Written by: Ho Yun "Bobby" Chan
  @ SparkFun Electronics
  Date: Nov 4, 2019

  Description: This sketch configures temperature sensors and prints the
  temperature in degrees celsius and fahrenheit. For comparison, the
  TMP102 and TMP36 temperature sensor is also printed to compare the output
  in degrees celsius and fahrenheit. Simply adjust the `output_select`
  to view the °C, °F, or both. Open the Serial Monitor or Plotter at 115200 baud
  to view the data.

  Resources/Libraries:
  Wire.h (included with Arduino IDE)
  SparkFunTMP102.h (included in the src folder) https://github.com/sparkfun/SparkFun_TMP102_Arduino_Library

  Development Environment Specifics:
  Arduino 1.8.9+

  License:
  This code is released under the MIT License (http://opensource.org/licenses/MIT)
  Distributed as-is; no warranty is given.

******************************************************************************/

#include <Wire.h>            // Used to establish serial communication on the I2C bus
#include "SparkFunTMP102.h" // Used to send and recieve specific information from our sensor

// The default address of the device is 0x48 = (GND) like the TMP117
// but it's already being used so we use a different address
TMP102 sensor0; //initialize sensor

//variables for TMP36
float tmp36_voltage = 0;                          //the voltage measured from the TMP36
float tmp36_degC = 0;                         //the temperature in Celsius, calculated from the voltage
float tmp36_degF = 0;                         //the temperature in Fahrenheit, calculated from the voltage


//0 = output degrees °C
//1 = output degrees °F
//any other number = output degrees °C and °F
int output_select = 1; //select output

void setup()
{
  Wire.begin();
  sensor0.begin(0x49);
  Serial.begin(115200);    // Start serial communication at 115200 baud
  Wire.setClock(400000);   // Set clock speed to be the fastest for better communication (fast mode)


  sensor0.wakeup();//turn on TMP102

  if (output_select == 0 ) {
    Serial.println("TMP102[°C]");
    Serial.print(",");
    Serial.println("TMP36[°C]");

  }
  else if (output_select == 1) {
    Serial.print("TMP102[°F]");
    Serial.print(",");
    Serial.println("TMP36[°F]");
  }
  else {
    Serial.println("TMP102[°C]");
    Serial.print(",");
    Serial.print("TMP36[°C]");
    Serial.print(",");
    Serial.print("TMP102[°F]");
    Serial.print(",");
    Serial.println("TMP36[°F]");
  }
}

void loop()
{

  //get TMP102 sensor readings
  float tmp102_tempC = sensor0.readTempC();
  float tmp102_tempF = sensor0.readTempF();

  //get TMP36 readings and calculate
  tmp36_voltage = analogRead(A0) * 0.004882814;   //convert the analog reading, which varies from 0 to 1023, back to a voltage value from 0-5 volts
  tmp36_degC = (tmp36_voltage - 0.5) * 100.0;       //convert the voltage to a temperature in degrees Celsius
  tmp36_degF = tmp36_degC * (9.0 / 5.0) + 32.0; //convert the voltage to a temperature in degrees Fahrenheit


  if (output_select == 0 ) {
    // Print temperature in °C
    //Serial.print("Temperature in Celsius: ");
    Serial.println(tmp102_tempC);  //TMP102 temperature
    Serial.print(",");  //seperator
    Serial.println(tmp36_degC);//TMP36 temperature
  }
  else if (output_select == 1) {
    // Print temperature in °F
    //Serial.print("Temperature in Fahrenheit: ");
    Serial.print(tmp102_tempF);  //TMP102 temperature
    Serial.print(",");  //seperator
    Serial.println(tmp36_degF);

  }
  else {
    Serial.print(tmp102_tempC);//TMP102 temperature
    Serial.print(",");  //seperator
    Serial.print(tmp36_degC);//TMP36 temperature
    Serial.print(",");  //seperator
    Serial.print(tmp102_tempF);
    Serial.print(",");              //seperator
    Serial.println(tmp36_degF);
  }

  delay(50); // Delay added for easier readings
}
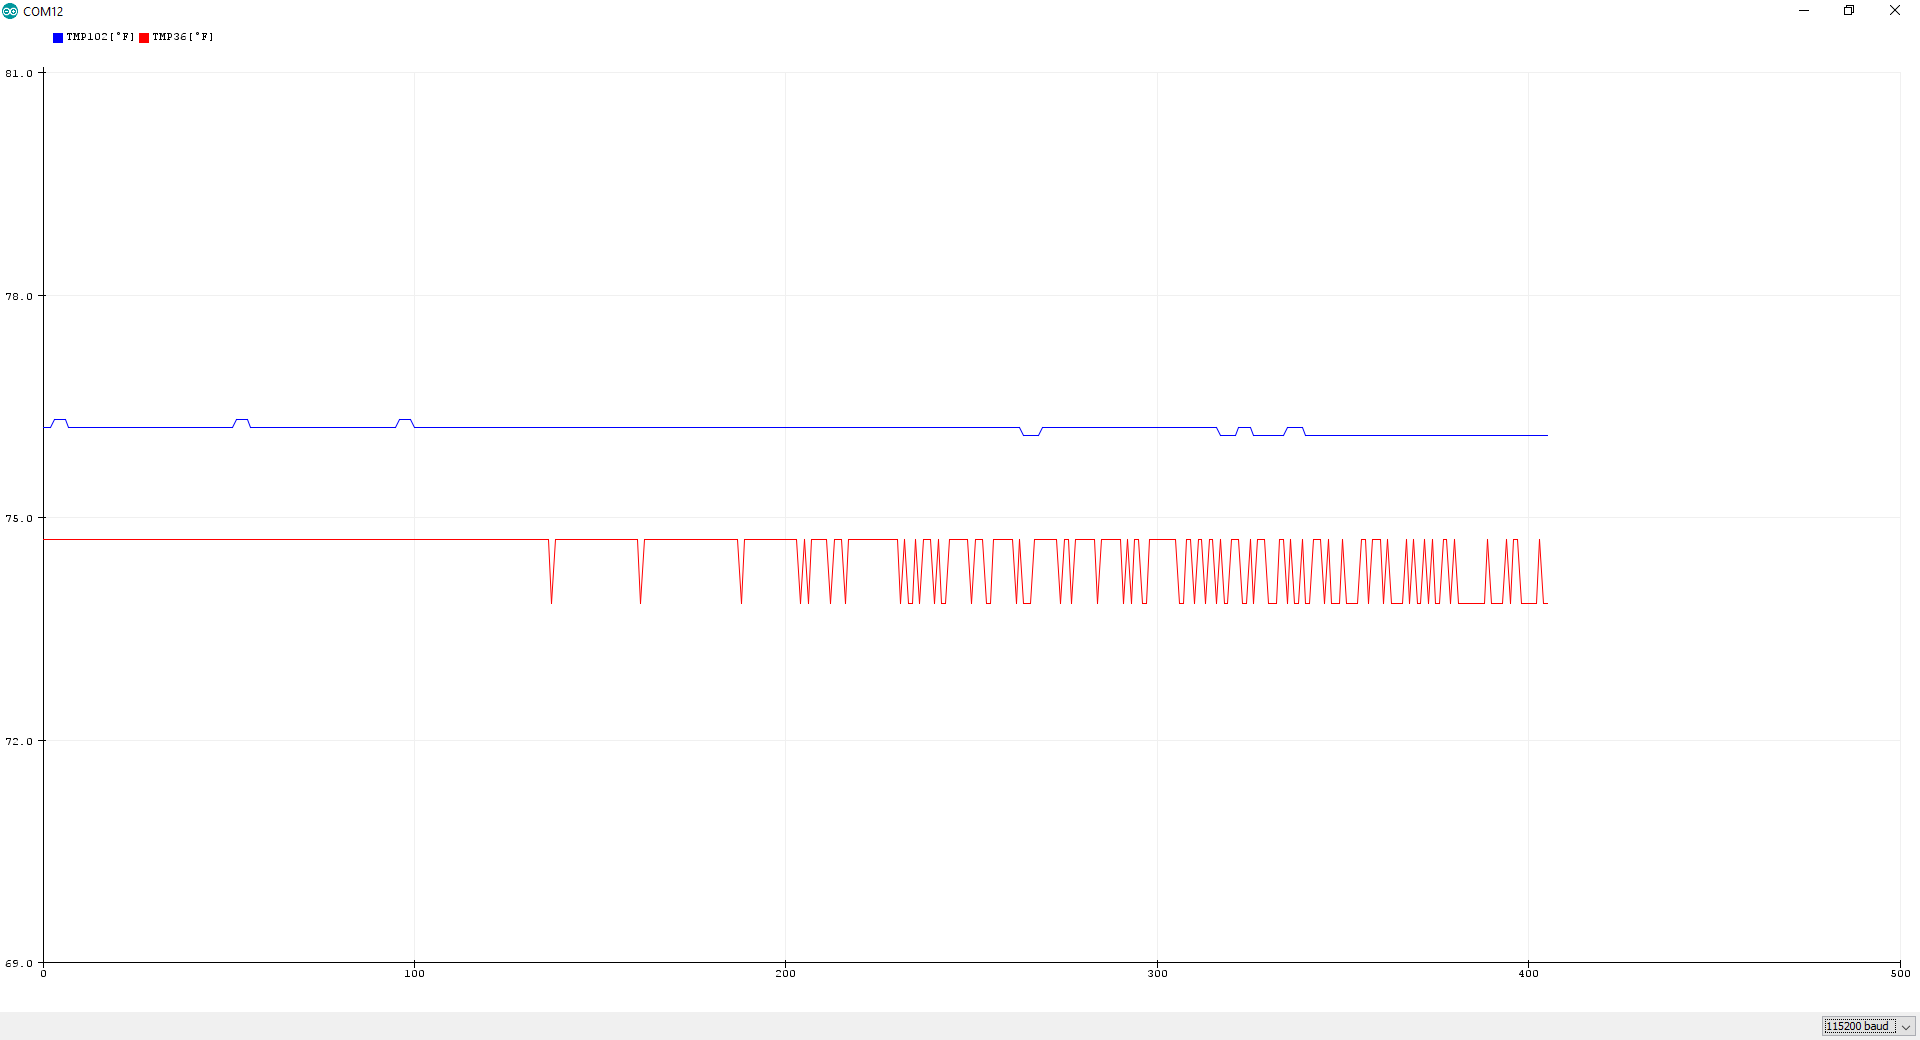
After taking a set of datapoints at a different moment to measure the ambient temperature of the room, the TMP102 performed better. The temperature readings remained stable and was not as noisy. It is a bit difficult to see in the graph but by opening the serial monitor, the temperature readings only jump around 76.52°F and 76.64°F.
TMP117 vs TMP102 vs TMP36
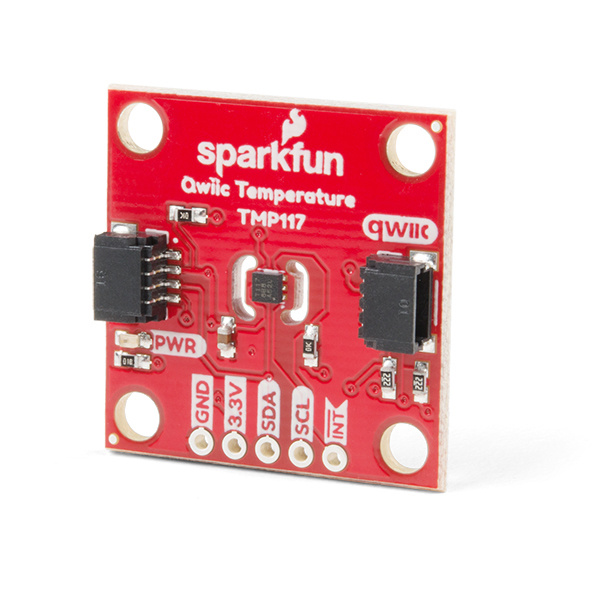
Not bad but can we get an even better temperature reading? Why yes we can! Connecting the TMP117 was easier since all that was needed for the circuit was to add a Qwiic cable between the RedBoard Qwiic and the TMP117.
 |
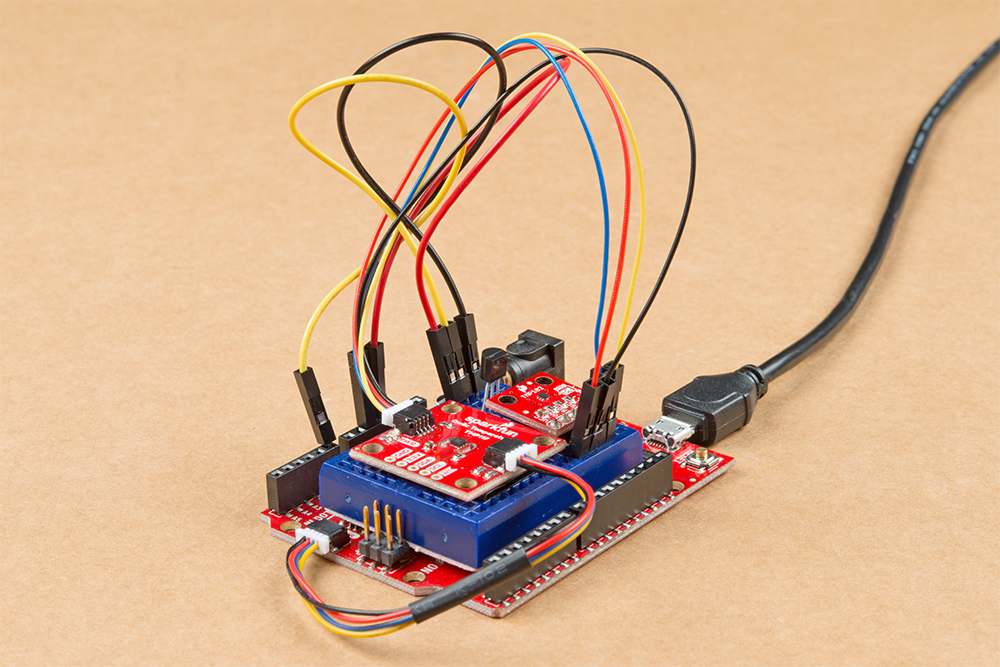 |
| Fritzing Circuit Diagram | RedBoard Qwiic, TMP36, TMP102, and TMP117 Connected |
The code was adjusted once again to compare the TMP117 against the other sensors. Grab the code and upload it to your Arduino if you are trying to follow along!
language:c
/******************************************************************************
  TMP117vsTMP102vsTMP36.ino
  Written by: Ho Yun "Bobby" Chan
  @ SparkFun Electronics
  Date: Nov 4, 2019

  Description: This sketch configures temperature sensors and prints the
  temperature in degrees celsius and fahrenheit. For comparison, the
  TMP117, TMP102, and TMP36 temperature sensor is also printed to compare the output
  in degrees celsius and fahrenheit. Simply adjust the `output_select`
  to view the °C, °F, or both. Open the Serial Monitor or Plotter at 115200 baud
  to view the data.

  Resources/Libraries:
  Wire.h (included with Arduino IDE)
  SparkFunTMP117.h (included in the src folder) http://librarymanager/All#SparkFun_TMP117
  SparkFunTMP102.h (included in the src folder) https://github.com/sparkfun/SparkFun_TMP102_Arduino_Library

  Development Environment Specifics:
  Arduino 1.8.9+

  License:
  This code is released under the MIT License (http://opensource.org/licenses/MIT)
  Distributed as-is; no warranty is given.

******************************************************************************/

/*
  NOTE: For the most accurate readings using the TMP117:
  - Avoid heavy bypass traffic on the I2C bus
  - Use the highest available communication speeds
  - Use the minimal supply voltage acceptable for the system
  - Place device horizontally and out of any airflow when storing
  For more information on reaching the most accurate readings from the sensor,
  reference the "Precise Temperature Measurements with TMP116" datasheet that is
  linked on Page 35 of the TMP117's datasheet
*/

#include <Wire.h>            // Used to establish serial communication on the I2C bus
#include <SparkFun_TMP117.h> // Used to send and recieve specific information from our sensor
#include "SparkFunTMP102.h" // Used to send and recieve specific information from our sensor

// The default address of the device is 0x48 = (GND)
TMP117 sensor; // Initalize sensor

// The default address of the device is 0x48 = (GND) as well
// but it's already being used so we use a different address
TMP102 sensor0; //initialize sensor

//variables for TMP36
float tmp36_voltage = 0;                          //the voltage measured from the TMP36
float tmp36_degC = 0;                         //the temperature in Celsius, calculated from the voltage
float tmp36_degF = 0;                         //the temperature in Fahrenheit, calculated from the voltage


//0 = output degrees °C
//1 = output degrees °F
//any other number = output degrees °C and °F
int output_select = 1; //select output

void setup()
{
  Wire.begin();
  sensor0.begin(0x49);
  Serial.begin(115200);    // Start serial communication at 115200 baud
  Wire.setClock(400000);   // Set clock speed to be the fastest for better communication (fast mode)

  //Serial.println("TMP117 Example 1: Basic Readings");
  if (sensor.begin() == true ) // Function to check if the sensor will correctly self-identify with the proper Device ID/Address
  {
    //Serial.println("Begin");

    sensor0.wakeup();//turn on TMP102

    if (output_select == 0 ) {
      Serial.print("TMP117[°C]");
      Serial.print(",");
      Serial.println("TMP102[°C]");
      Serial.print(",");
      Serial.println("TMP36[°C]");

    }
    else if (output_select == 1) {
      Serial.print("TMP117[°F]");
      Serial.print(",");
      Serial.print("TMP102[°F]");
      Serial.print(",");
      Serial.println("TMP36[°F]");
    }
    else {
      Serial.print("TMP117[°C]");
      Serial.print(",");
      Serial.println("TMP102[°C]");
      Serial.print(",");
      Serial.print("TMP36[°C]");
      Serial.print(",");
      Serial.print("TMP117[°F]");
      Serial.print(",");
      Serial.print("TMP102[°F]");
      Serial.print(",");
      Serial.println("TMP36[°F]");
    }
  }
  else
  {
    Serial.println("Device failed to setup- Freezing code.");
    while (1); // Runs forever
  }
}

void loop()
{
  // Data Ready is a flag for the conversion modes - in continous conversion the dataReady flag should always be high
  if (sensor.dataReady() == true) // Function to make sure that there is data ready to be printed, only prints temperature values when data is ready
  {
    //get TMP117 sensor readings
    float tempC = sensor.readTempC();
    float tempF = sensor.readTempF();

    //get TMP102 sensor readings
    float tmp102_tempC = sensor0.readTempC();
    float tmp102_tempF = sensor0.readTempF();

    //get TMP36 readings and calculate
    tmp36_voltage = analogRead(A0) * 0.004882814;   //convert the analog reading, which varies from 0 to 1023, back to a voltage value from 0-5 volts
    tmp36_degC = (tmp36_voltage - 0.5) * 100.0;       //convert the voltage to a temperature in degrees Celsius
    tmp36_degF = tmp36_degC * (9.0 / 5.0) + 32.0; //convert the voltage to a temperature in degrees Fahrenheit


    if (output_select == 0 ) {
      // Print temperature in °C
      //Serial.print("Temperature in Celsius: ");
      Serial.print(tempC);//TMP117 temperature
      Serial.print(",");  //seperator
      Serial.println(tmp102_tempC);  //TMP102 temperature
      Serial.print(",");  //seperator
      Serial.println(tmp36_degC);//TMP36 temperature
    }
    else if (output_select == 1) {
      // Print temperature in °F
      //Serial.print("Temperature in Fahrenheit: ");
      Serial.print(tempF);
      Serial.print(",");              //seperator
      Serial.print(tmp102_tempF);  //TMP102 temperature
      Serial.print(",");  //seperator
      Serial.println(tmp36_degF);

    }
    else {
      Serial.print(tempC);//TMP117 temperature
      Serial.print(",");  //seperator
      Serial.print(tmp102_tempF);  //TMP102 temperature
      Serial.print(",");  //seperator
      Serial.print(tmp36_degC);//TMP36 temperature
      Serial.print(",");  //seperator
      Serial.print(tempF);
      Serial.print(",");  //seperator
      Serial.print(tmp102_tempF);  //TMP102 temperature
      Serial.print(",");              //seperator
      Serial.println(tmp36_degF);
    }

    //delay(5); // Delay added for easier readings
  }
}
After taking another set of datapoints at a different time, the TMP117 performed better than the TMP102 and TMP36. The datapoints were more smooth and less prone to noise. Looking closer at the values via the serial monitor, the temperature readings would jump between 75.99°F and 76.02°F with the TMP117. In one instance, the TMP36's output started spiking just was we saw in the initial tests using a TMP36.
 |
 |
| Click image for a closer view. | |
Good, Better, Best? Which is the Best?
So, you might ask, which of the three temperature sensors is the best? Well, that really depends on how you plan to use it. In my opinion, the Qwiic TMP117 is a winner in my eyes for this round. It is able to measure the temperature of a room without a lot of jitter and it was easy to connect with the Qwiic system. The sensors performed as expected when looking at the datasheet. The board did not require any soldering. There was no additional circuitry that needed to build or code needed to average the temperature sensor readings. The power supply did not cause as much of a fluctuation with the digital temperature sensors like the analog temperature sensor.
The TMP102 could work as well if I was not looking for such precise temperature reading of the room. While it is not as expensive as the TMP117, it does require some soldering for this version of the TMP102 board [ 1 ]. The TMP36 is good but it would require a bit more effort to filter out the errors.
Other Considerations
For simplicity, three sensors were used as a comparison out of the box to measure the ambient temperature of the air. This did not take into account other factors such as:
- offset temperature of each sensor
- other microcontrollers with higher ADC to compare the analog sensor
- range (e.g. are you measuring the temperature of an object at room temperature or in an oven)
- medium (e.g. are you measuring the temperature of an object in air or submerged in water)
- current consumption
- temperature sensors that have the ability to also measure the humidity, barometric pressure, and altitude
Improving TMP36 Readings
There are also techniques to improve on the TMP36 temperature readings that were:
- averaging the TMP36 values
- adding decoupling capacitor
- adjusting the analog reference voltage to 3.3V for the TMP36