SX1509 I/O Expander Breakout Hookup Guide
 jimblom
Example: LED Driving
One of the SX1509's coolest features is its built-in LED-driving support. Beyond digital or even PWM output, the SX1509 can also autonomously blink or breathe LEDs! Just tell it how long to blink, or how fast to rise/fall, and it'll do the rest for you.
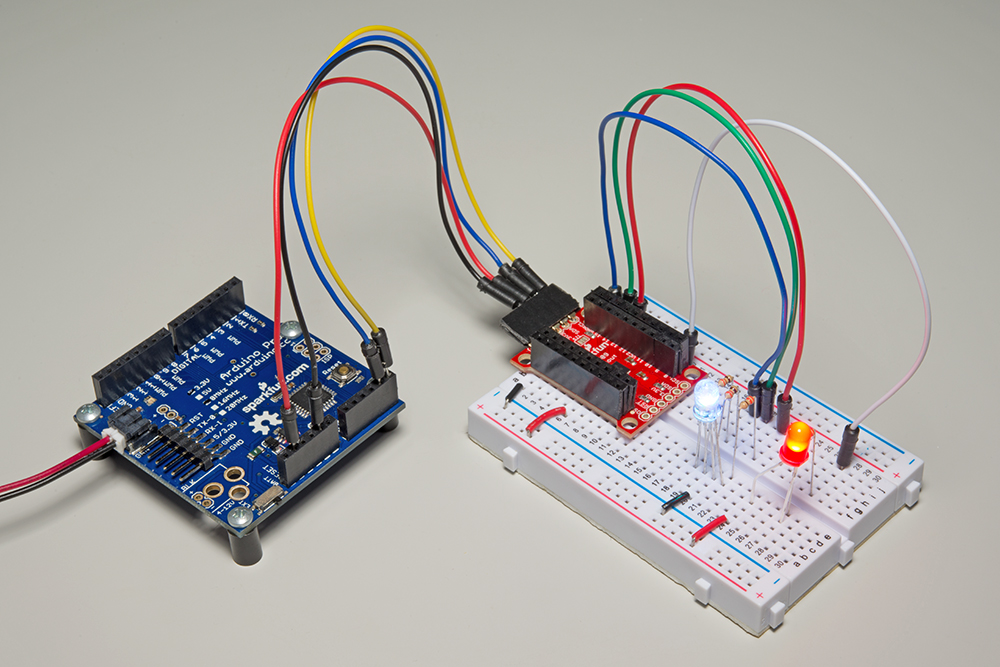
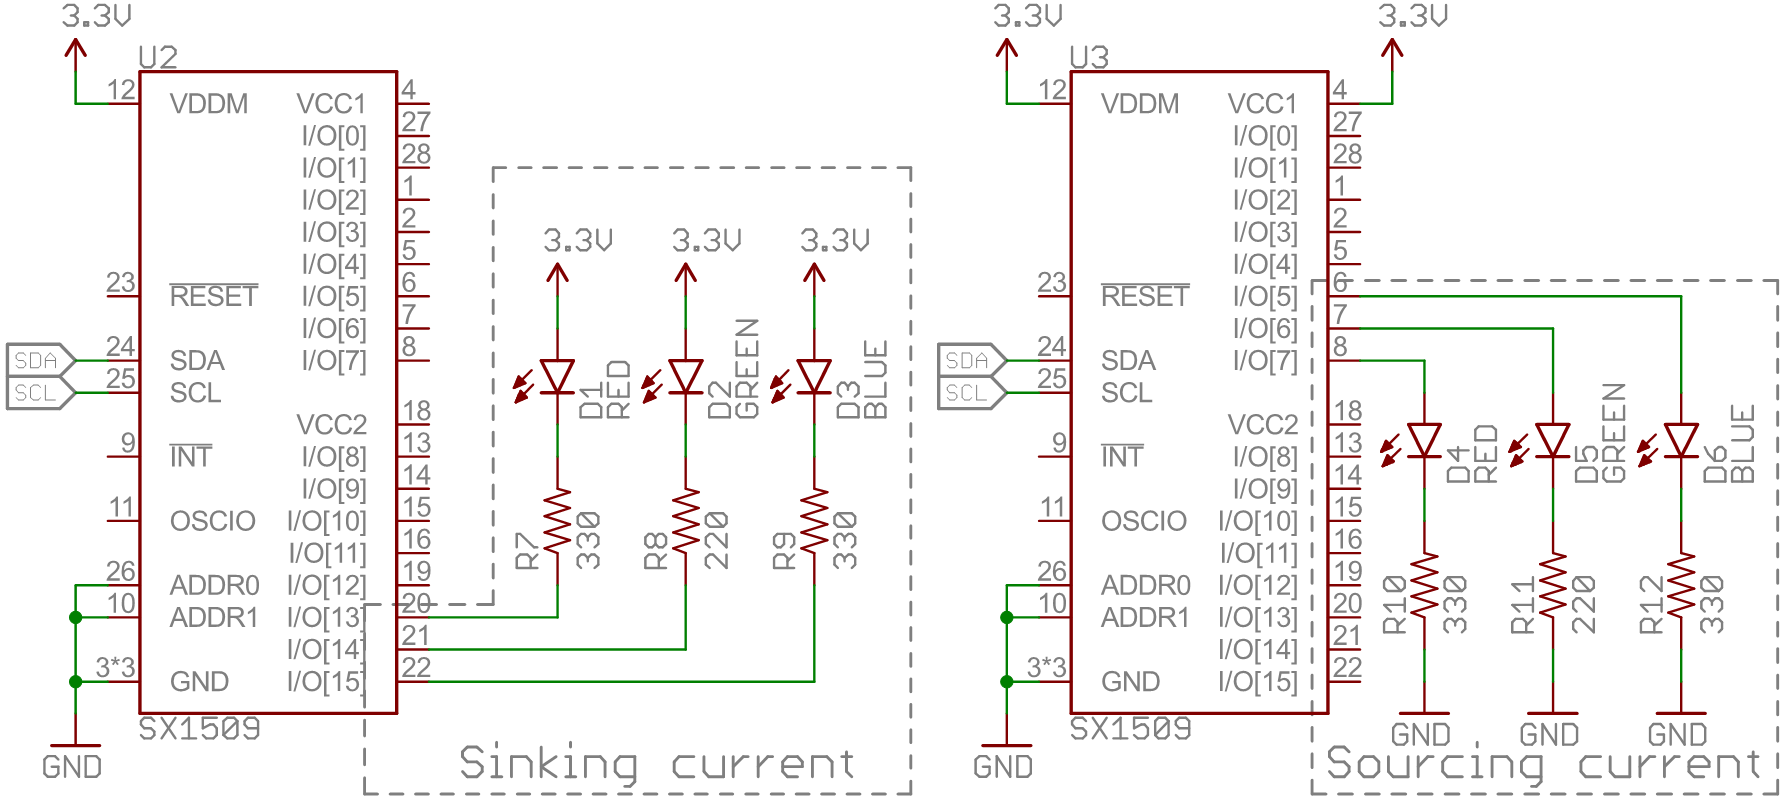
For this example, grab four LEDs and wire them up to pins 8, 13, 14, and 15.
Here's an example that sets an LED tied to pin 15 to blink:
language:c
/*************************************************************
blink.ino
SparkFun SX1509 I/O Expander Example: blink output
Jim Lindblom @ SparkFun Electronics
Original Creation Date: September 21, 2015
https://github.com/sparkfun/SparkFun_SX1509_Arduino_Library

This example demonstrates the SX1509's set-it-and-forget-it
blink function. We'll set the pin up as an OUTPUT, and call
io.blink() all in setup(), then watch the LED blink by itself
in loop().

Hardware Hookup:
    SX1509 Breakout ------ Arduino -------- Breadboard
          GND -------------- GND
          3V3 -------------- 3.3V
          SDA ------------ SDA (A4)
          SCL ------------ SCL (A5)
          15 -------------------------------- LED+
                                         LED- -/\/\/\- GND
                                                330

Development environment specifics:
    IDE: Arduino 1.6.5
    Hardware Platform: Arduino Uno
    SX1509 Breakout Version: v2.0

This code is beerware; if you see me (or any other SparkFun
employee) at the local, and you've found our code helpful,
please buy us a round!

Distributed as-is; no warranty is given.
*************************************************************/

#include <Wire.h>           // Include the I2C library (required)
#include <SparkFunSX1509.h> //Click here for the library: http://librarymanager/All#SparkFun_SX1509

// SX1509 I2C address (set by ADDR1 and ADDR0 (00 by default):
const byte SX1509_ADDRESS = 0x3E; // SX1509 I2C address
SX1509 io;                        // Create an SX1509 object to be used throughout

// SX1509 Pin definition:
const byte SX1509_LED_PIN = 15; // LED to SX1509's pin 15

void setup()
{
  Serial.begin(115200);
  Serial.println("SX1509 Example");

  Wire.begin();

  // Call io.begin(<address>) to initialize the SX1509. If it
  // successfully communicates, it'll return 1.
  if (io.begin(SX1509_ADDRESS) == false)
  {
    Serial.println("Failed to communicate. Check wiring and address of SX1509.");
    while (1)
      ; // If we fail to communicate, loop forever.
  }

  // Set up the SX1509's clock to use the internal 2MHz
  // oscillator. The second parameter divides the oscillator
  // clock to generate a slower LED clock. 4 divides the 2MHz
  // clock by 2 ^ (4-1) (8, ie. 250kHz). The divider parameter
  // can be anywhere between 1-7.
  io.clock(INTERNAL_CLOCK_2MHZ, 4);

  io.pinMode(SX1509_LED_PIN, OUTPUT); // Set LED pin to OUTPUT

  // Blink the LED pin -- ~1000 ms LOW, ~500 ms HIGH:
  io.blink(SX1509_LED_PIN, 1000, 500);
  // The timing parameters are in milliseconds, but they
  // aren't 100% exact. The library will estimate to try to
  // get them as close as possible. Play with the clock
  // divider to maybe get more accurate timing.
}

void loop()
{
  // Relax! The SX1509's got this...
}
The io.blink(<pin>, <low_ms>, <high_ms>) function works most of the magic in this example -- setting the LED pin to blink LOW for 1000ms and HIGH for 500ms. Those timing values will not end up being exact. The SX1509's timing mechanism is dependent on dividing the clock (we're using the internal 2MHz oscillator), and doesn't always divide down perfectly.
Before configuring the pin to blink, we call io.clock(<source>, <divider>) to set the clock that drives our LEDs. In this example we use the SX1509's internal 2MHz clock as the source, and divide that down to 250kHz for the LED clock. Play with that second parameter to see just how much the blink timing depends on it.
Try using the blink function to blink the other LEDs!
LED Breathing
Half of the SX1509's I/O pins are capable of producing "breathing" outputs -- where a pin fades in and out at a set rate. Pins 4-7 and 12-15 have this capability.
Using the same circuit as before, here's a quick example showing off the SX1509's breathe feature:
language:c
/*************************************************************
breathe.ino
SparkFun SX1509 I/O Expander Example: breathe output
Jim Lindblom @ SparkFun Electronics
Original Creation Date: September 21, 2015
https://github.com/sparkfun/SparkFun_SX1509_Arduino_Library

This example demonstrates the SX1509's set-it-and-forget-it
breathe function. The SX1509 will pulse an LED, smoothly
ramping its brightness up-then-down. We'll set the pin up as
an ANALOG_OUTPUT, and call io.breathe() all in setup(), then
watch the LED pulse by itself in loop().

Hardware Hookup:
    SX1509 Breakout ------ Arduino -------- Breadboard
          GND -------------- GND
          3V3 -------------- 3.3V
          SDA ------------ SDA (A4)
          SCL ------------ SCL (A5)
          15 --------------------------------- LED+
                                         LED- -/\/\/\- GND
                                                330

Development environment specifics:
    IDE: Arduino 1.6.5
    Hardware Platform: Arduino Uno
    SX1509 Breakout Version: v2.0

This code is beerware; if you see me (or any other SparkFun
employee) at the local, and you've found our code helpful,
please buy us a round!

Distributed as-is; no warranty is given.
*************************************************************/

#include <Wire.h>           // Include the I2C library (required)
#include <SparkFunSX1509.h> //Click here for the library: http://librarymanager/All#SparkFun_SX1509

// SX1509 I2C address (set by ADDR1 and ADDR0 (00 by default):
const byte SX1509_ADDRESS = 0x3E; // SX1509 I2C address
SX1509 io;                        // Create an SX1509 object to be used throughout

// SX1509 Pin definition:
const byte SX1509_LED_PIN = 15; // LED to SX1509's pin 15

void setup()
{
  Serial.begin(115200);
  Serial.println("SX1509 Example");

  Wire.begin();

  // Call io.begin(<address>) to initialize the SX1509. If it
  // successfully communicates, it'll return 1.
  if (io.begin(SX1509_ADDRESS) == false)
  {
    Serial.println("Failed to communicate. Check wiring and address of SX1509.");
    while (1)
      ; // If we fail to communicate, loop forever.
  }

  // Use the internal 2MHz oscillator.
  // Set LED clock to 500kHz (2MHz / (2^(3-1)):
  io.clock(INTERNAL_CLOCK_2MHZ, 3);

  // To breathe an LED, make sure you set it as an
  // ANALOG_OUTPUT, so we can PWM the pin:
  io.pinMode(SX1509_LED_PIN, ANALOG_OUTPUT);

  // Breathe an LED: 1000ms LOW, 500ms HIGH,
  // 500ms to rise from low to high
  // 250ms to fall from high to low
  io.breathe(SX1509_LED_PIN, 1000, 500, 500, 250);
  // The timing parameters are in milliseconds, but they
  // aren't 100% exact. The library will estimate to try to
  // get them as close as possible. Play with the clock
  // divider to maybe get more accurate timing.
}

void loop()
{
  // Enjoy your hypnotically breathing LED!
}
Make sure you set the pin as an ANALOG_OUTPUT using the pinMode() function. Then call io.breathe(<pin>, <low_ms>, <high_ms>, <rise_ms>, <fall_ms) to set the LOW and HIGH time as well as the number of milliseconds it takes to rise from LOW to HIGH and fall from HIGH to LOW.
Easy-peasy! And now you have the loop() left free for more important tasks. (As if! Nothing's more important than blinking LEDs.)