SparkFun Top pHAT Hookup Guide
OS Configuration: Part 1
Configuring the Raspbian OS for the Top pHAT is relatively simple. The SPI and I2C interfaces need to be enabled along with the overscan disabled. (Users wishing to use the screen on boot will also need to configure the OS to boot to the CLI and run the frame buffer mapping script on startup. Directions will be laid out in OS Configuration: Part 2; however, users should do this last.)
Configuration Methods
There are 2 primary methods for configuring the Raspbian OS. Within the Raspberry Pi PIXEL desktop, the graphical Raspberry Pi Configuration application from the Preferences menu is the most user friendly option. Users can also make changes through the console based raspi-config application.

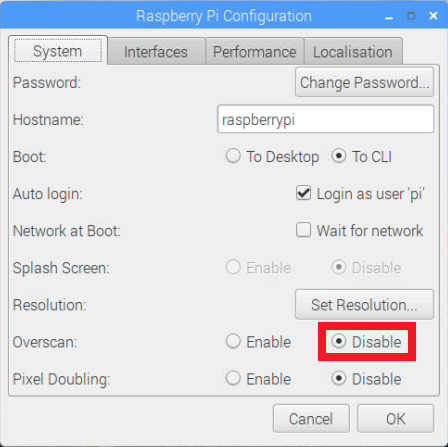
Raspberry Pi Configuration application. (Click to enlarge)
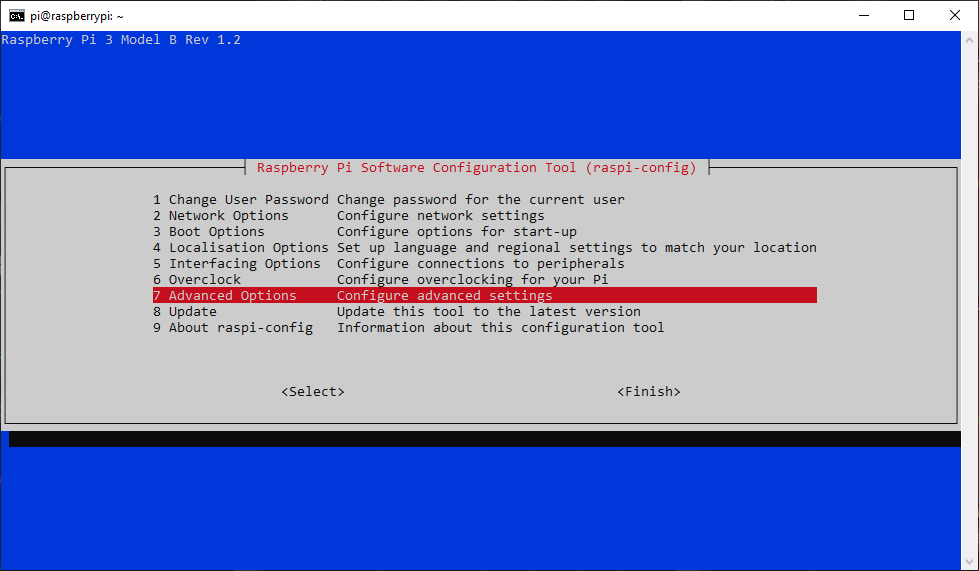
raspi-config application. (Click to enlarge)
(*For more details on the operating system configuration, check out the Raspberry Pi Foundation website.)
Disable Overscan
Users will want to disable overscan through the System or Advanced Options menus.
Raspberry Pi Configuration Application
On the main System tab, disable the Overscan and then move on to the next section to enable the SPI and I2C interfaces.
Raspi-Config Application
From the 7 Advanced Options menu, select the A2 Overscan option and then follow the prompts to disable the overscan. Move on the next section to enable the SPI and I2C interfaces.
Advanced Options menu in the console based raspi-config application. (Click to enlarge) 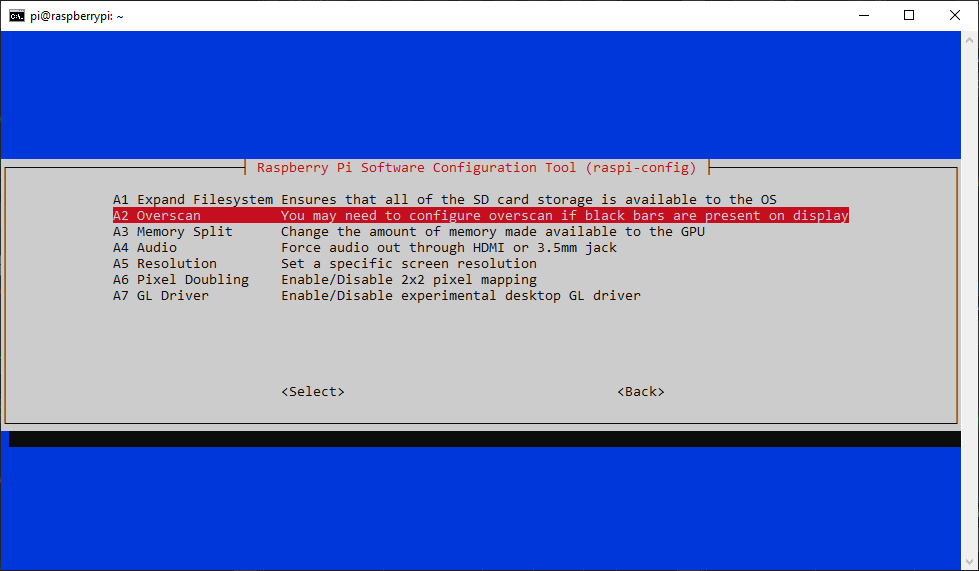
Overscan option to disable it, using the prompts. (Click to enlarge) Enable SPI and I2C
Users will need to enable both the SPI and I2C interfaces through the Interface menu.
Raspberry Pi Configuration Application
From the Interfaces tab, enable both the SPI and I2C interfaces.
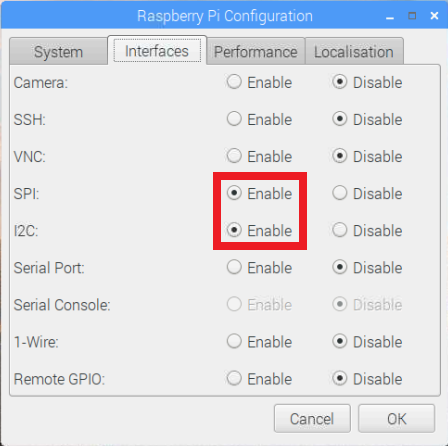
SPI and I2C interfaces through the Raspberry Pi Configuration application. Once done, click the OK button. Reboot the Raspberry Pi when prompted.
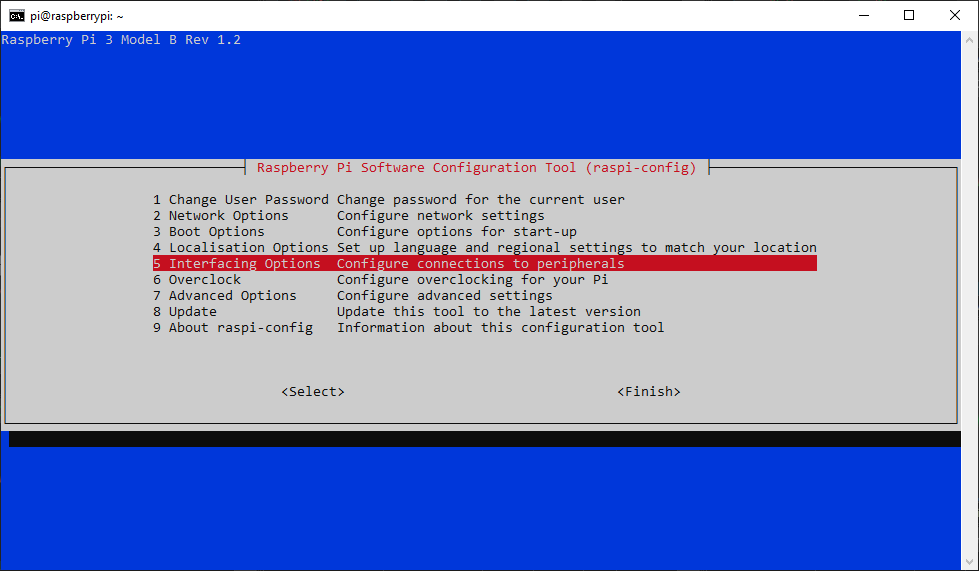
Raspi-Config Application
From the 5 Interfaces Options menu, select the P4 SPI option and then follow the prompts to enable the interface.
Interfaces Options menu in the console based raspi-config application. (Click to enlarge) 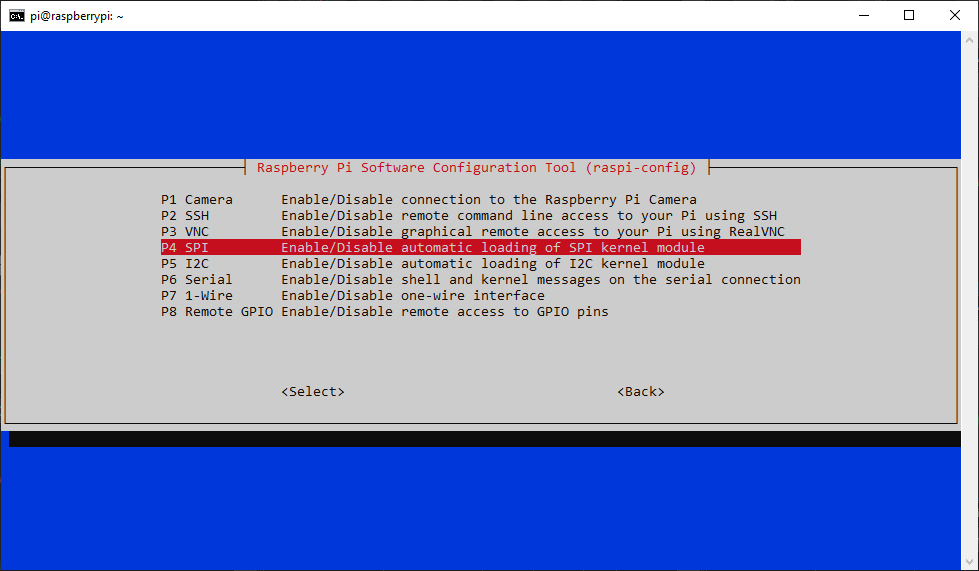
SPI option to enable the interface, using the prompts. (Click to enlarge) Repeat the previous steps, but select the P5 I2C option; again, following the prompts to enable the interface.
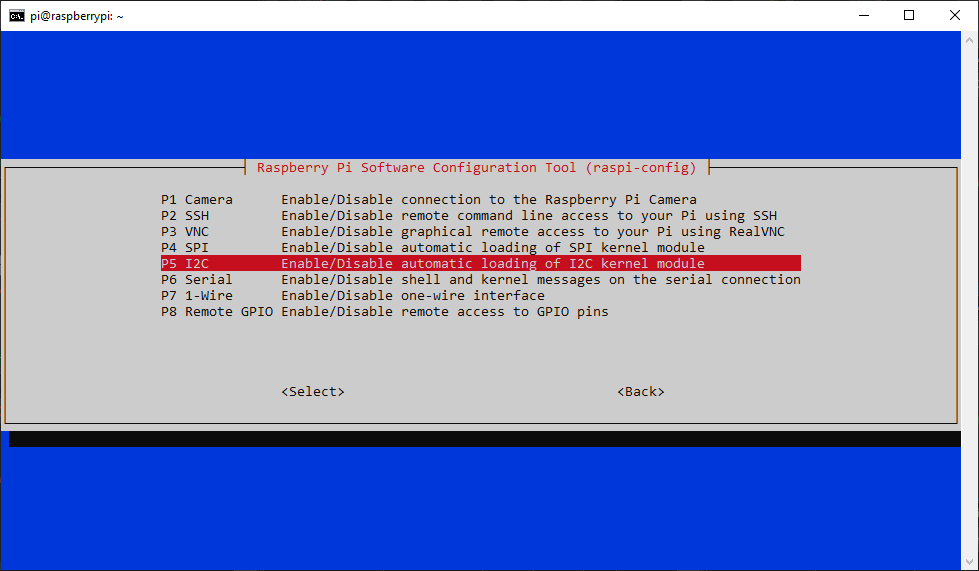
I2C option to enable the interface, using the prompts. (Click to enlarge) Once completed, use the Tab key to select the <Finish> button. Reboot the Raspberry Pi when prompted.