SparkFun Qwiic Shield for Arduino Nano Hookup Guide
Contributors:
 El Duderino
El Duderino Resources and Going Further
For more information, take a look at the resources below.
If you are having trouble getting your Qwiic devices to connect using your newly assembled Qwiic Shield, you may want to take a look at these tutorials for help troubleshooting and reworking your shield.
Now that you have your Qwiic Shield ready to go, it's time to check out some Qwiic-enabled products. Below are a few to get started.
Before you go, here are some other tutorials using the Qwiic Connect System you may want to look through:
Qwiic OpenLog Hookup Guide
The updated Qwiic version of the OpenLog Hookup Guide
Qwiic Atmospheric Sensor (BME280) Hookup Guide
Measure temperature, humidity, barometric pressure with the SparkFun Atmospheric Sensor Breakout BME280 (Qwiic).
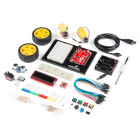
Assembly Guide for SparkFun JetBot AI Kit V2.0
Assembly Guide for the SparkFun JetBot AI Kit v2.0. This tutorial includes photos & comments to assemble the two-layer chassis & additional components unique to the JetBot kit.
smôl Header Hookup Guide
Small in size, small on current draw. It's a smôl world! This guide will get you up and running with the smôl Header.