SparkFun Qwiic Alphanumeric Display Hookup Guide
Arduino Examples - The Fun Stuff
Okay. You got the basics done - you can light up segments, yes? Now lets do a couple of fun things!
Example_08_MultiDisplay
This example tests printing across multiple displays. In order to make this example work, you'll need to do some soldering on the jumpers on the back of the board. For this example, we'll use 0x70 and 0x71 as the addresses, so the jumpers for the second display should look like this:

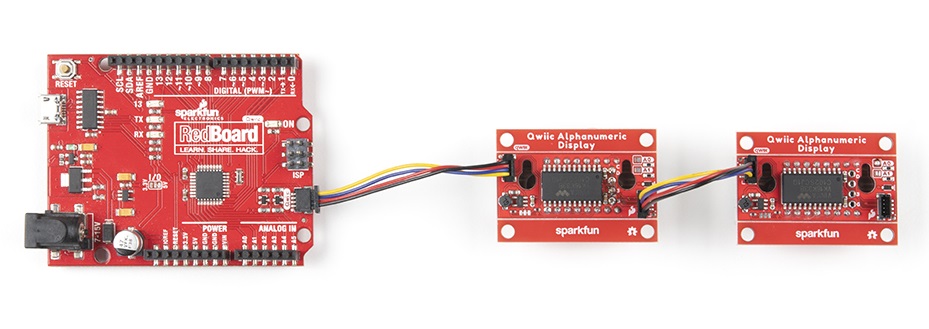
Once your jumper is soldered, go ahead and hook your boards together with your Qwiic cables and plug em on into your RedBoard.
Once your hardware is ready to go, head back to your File Menu and open up File->Examples->SparkFun Qwiic Alphanumeric Display Library->Example_08_MultiDisplay.
Alternatively, you can copy and paste the code below to a shiny new Arduino file:
language:c
/**************************************************************************************
* This example tests printing across multiple alpha displays.
*
* Priyanka Makin @ SparkFun Electronics
* Original Creation Date: February 26, 2020
*
* SparkFun labored with love to create this code. Feel like supporting open source hardware?
* Buy a board from SparkFun! https://www.sparkfun.com/products/16391
*
* This code is Lemonadeware; if you see me (or any other SparkFun employee) at the
* local, and you've found our code helpful, please buy us a round!
*
* Hardware Connections:
* Attach Red Board to computer using micro-B USB cable.
* Attach Qwiic Alphanumeric board to Red Board using Qwiic cable.
* Don't close any of the address jumpers so that it defaults to address 0x70.
* Attach a second Alphanumeric display using Qwiic cable.
* Close address jumper A0 so that this display's address become 0x71.
*
* Distributed as-is; no warranty is given.
*****************************************************************************************/
#include <Wire.h>
#include <SparkFun_Alphanumeric_Display.h> //Click here to get the library: http://librarymanager/All#SparkFun_Qwiic_Alphanumeric_Display by SparkFun
HT16K33 display;
void setup() {
Serial.begin(115200);
Serial.println("SparkFun Qwiic Alphanumeric - Example 8: Multi Display");
Wire.begin(); //Join I2C bus
//check if displays will acknowledge
//The first address in the begin() function should be the left-most display, traveling to the right from there
//This is how the string will print across displays, reading from left to right.
if (display.begin(0x70, 0x71) == false)
{
Serial.println("Device did not acknowledge! Freezing.");
while(1);
}
Serial.println("Displays acknowledged.");
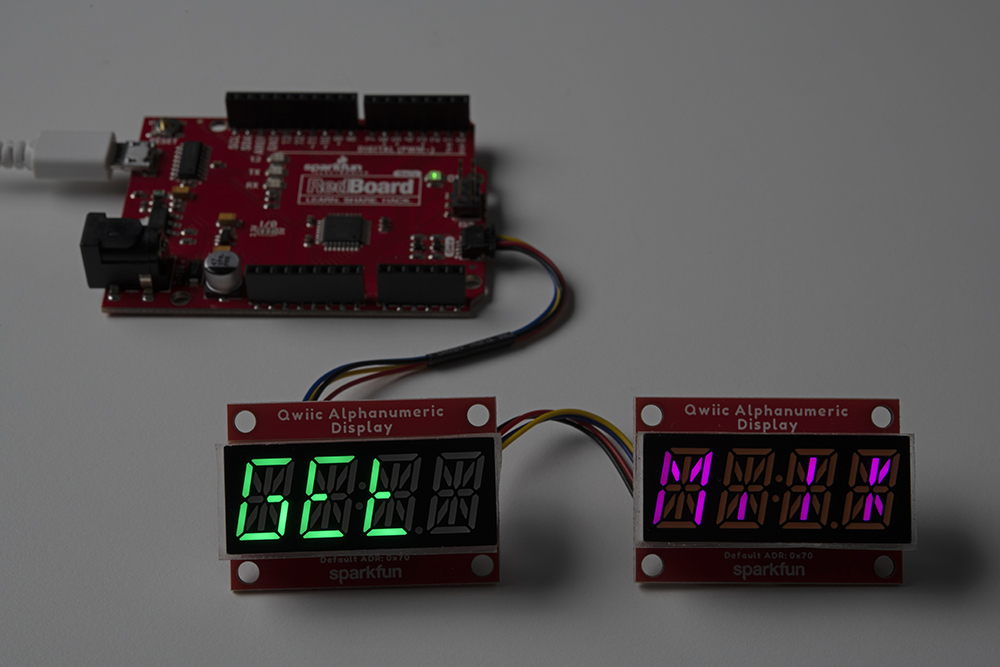
display.print("Get Milk");
}
void loop()
{
}
Once you've got your code, make sure you've got the correct port selected, and then go ahead and click on the upload button. You should see the following:
Example_09_ScrollingString
This example SCROLLS! Let's start by plugging your Alphanumeric board into your RedBoard with your handy dandy Qwiic cables.
Once your hardware is ready to go, head back to your File Menu and open up File->Examples->SparkFun Qwiic Alphanumeric Display Library->Example_09_ScrollingString.
Alternatively, you can copy and paste the code below to a shiny new Arduino file:
language:c
/**************************************************************************************
 * This example tests scrolling functionality of alphanumeric displays.
 *
 * Priyanka Makin @ SparkFun Electronics
 * Original Creation Date: February 26, 2020
 *
 * SparkFun labored with love to create this code. Feel like supporting open source hardware?
 * Buy a board from SparkFun! https://www.sparkfun.com/products/16391
 *
 * This code is Lemonadeware; if you see me (or any other SparkFun employee) at the
 * local, and you've found our code helpful, please buy us a round!
 *
 * Hardware Connections:
 * Attach Red Board to computer using micro-B USB cable.
 * Attach Qwiic Alphanumeric board to Red Board using Qwiic cable.
 *  Don't close any of the address jumpers so that it defaults to address 0x70.
 * Attach a second Alphanumeric display using Qwiic cable.
 *  Close address jumper A0 so that this display's address become 0x71.
 *
 * Distributed as-is; no warranty is given.
 *****************************************************************************************/
#include <Wire.h>

#include <SparkFun_Alphanumeric_Display.h>  //Click here to get the library: http://librarymanager/All#SparkFun_Qwiic_Alphanumeric_Display by SparkFun
HT16K33 display;

void setup() {
  Serial.begin(115200);
  Serial.println("SparkFun Qwiic Alphanumeric - Example 9: Scrolling String");
  Wire.begin(); //Join I2C bus

  //check if displays will acknowledge
  if (display.begin(0x70) == false)
  {
    Serial.println("Device did not acknowledge! Freezing.");
    while(1);
  }
  Serial.println("Display acknowledged.");

  display.print("MILK");
}

void loop()
{
  delay(300);
  display.shiftLeft();
  //Alternatively - you could also shift the string to the right
  //display.shiftRight();
}
Once you've got your code, make sure you've got the correct port selected, and then go ahead and click on the upload button. You should see the following: