SparkFun gator:UV Hookup Guide
 Englandsaurus
 Introduction
Do you have a science experiment involving weather or UV light exposure?
The gator:UV is the perfect tool to monitor the UV exposure in your next experiment. With the VEML6070, the gator:UV can easily be used to measure the levels of UVA (320-400 nm) radiation. This tutorial will show you how to get started using this UV sensor with the gator:bit (v2) in the micro:bit development environment.
Required Materials
To get started, you'll need a micro:bit to control everything. You can purchase one individually on in a kit.

micro:bit Board
DEV-14208
micro:bit Go Bundle
DEV-14336
SparkFun Inventor's Kit for micro:bit
KIT-15228To easily use the gator board ecosystem, a gator:bit (v2) will help breakout the necessary pins and you will also need alligator and/or banana cables to connect the gator:bit to the gator:UV.


Banana to Banana Cable - Right Angle
CAB-15368(*These banana cables have a special diameter on the attachment points designed specifically for use with the micro:bit ecosystem. They may or may not be compatible with the banana cables used on your test equipment.)
You may already have some of these materials, so feel free to modify your cart as necessary.
Suggested Reading
The gator:UV sensor is pretty straight forward to use in application. However, you may find the following concepts useful along the way.
Light
Logic Levels
I2C
micro:climate Kit Experiment Guide
If you aren't familiar with the micro:bit, we recommend reading here for an overview.
We would also recommend taking a look at the following tutorials if you aren't familiar with them.
Getting Started with the micro:bit
Getting Started with MicroPython and the SparkFun Inventor's Kit for micro:bit
How to Load MicroPython on a Microcontroller Board
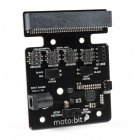
SparkFun gator:bit v2 Hookup Guide
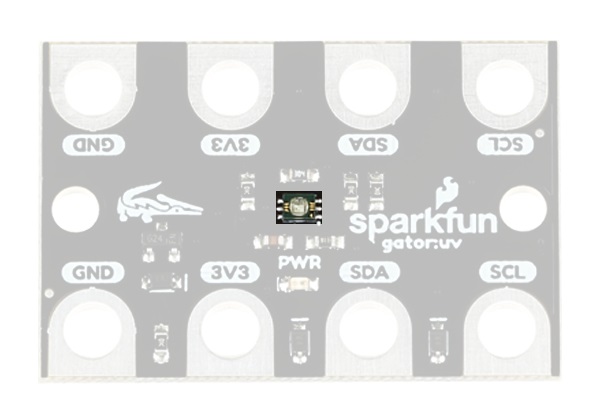
Hardware Overview
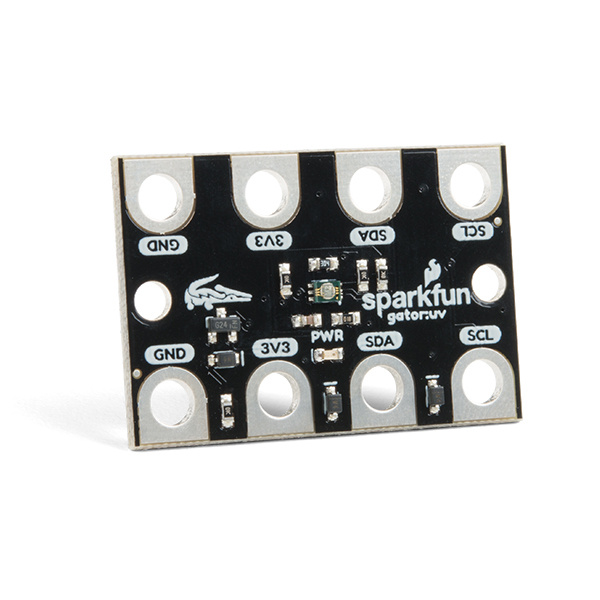
The gator:UV consists of 4 pads for power and data.
| Contacts | Direction | Description |
|---|---|---|
| GND | N/A | Ground: Reference voltage and ground loop. |
| 3.3V | In | Power: Provides 3.3V to sensor. |
| SDA | Bi-directional | Data: Data and commands are transmitted between the sensor and microcontroller. |
| SCL | In | Clock: The microcontroller provides the timing needed to communicate on the data line. |
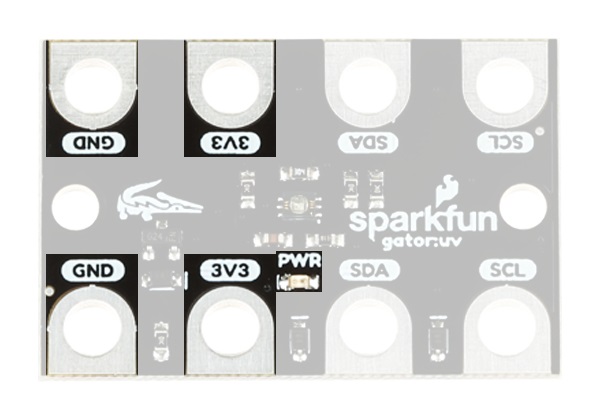
Power
The specified operating voltage for the VEML6070 is between 2.7V - 5.5V. For use with the gator:bit (v2) and micro:bit, you should provide 3.3V through the 3V3 and GND pads to keep the logic levels consistent.
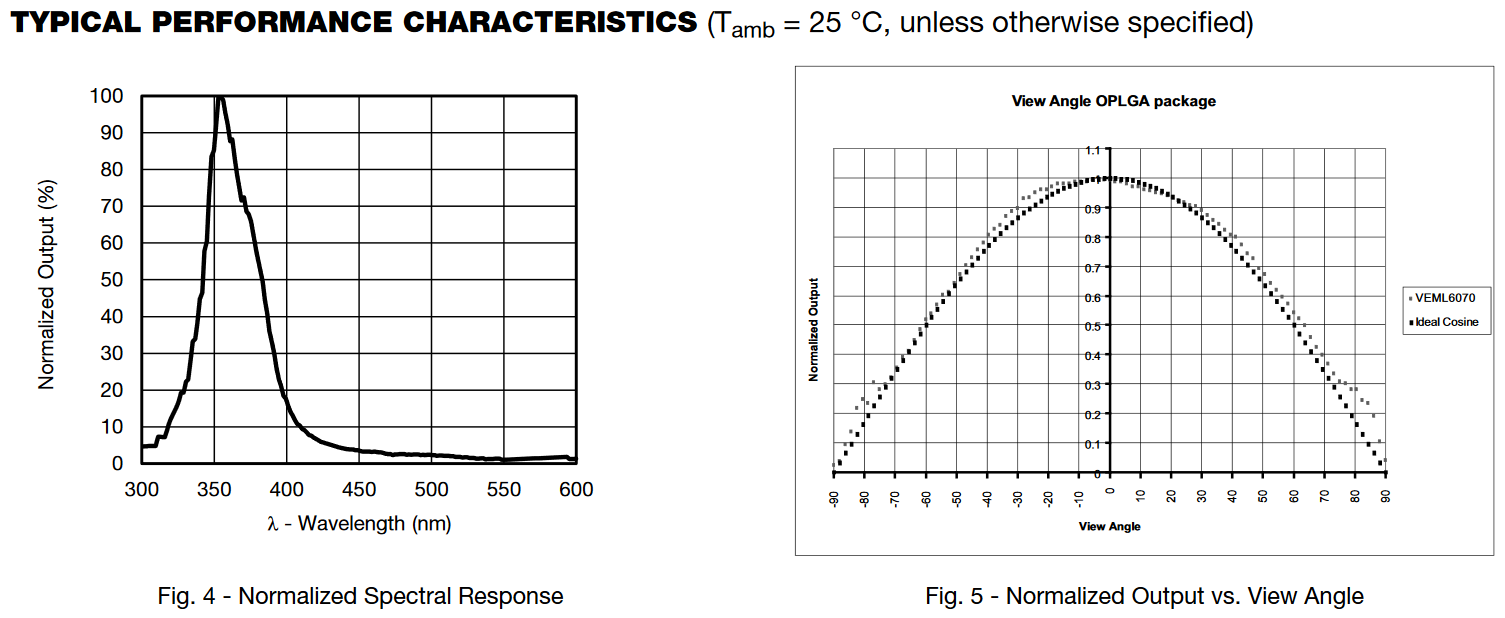
VEML6070
The VEML6070 is a UV sensor that communicates over an I2C bus. The VEML6070 detects UVA radiation up to 328 mW/cm2 with a resolution of 5 µW/cm2. For the most part, users will only need to know I2C addresses to prevent address conflicts with other devices or sensors.
Here are some of the characteristics of the VEML6070 sensor from the datasheet:
| Characteristic | Range |
|---|---|
| Operating Voltage | 2.7V to 5.5V |
| Supply Current | 240 µA |
| UVA Detection | up to 328 mW/cm2 |
| UVA Resolution | 5 µW/cm2/step |
| I2C Address |
0x70 - Write Commands 0x73 - Read MSB of UV Data 0x71 - Read LSB of UV Data |
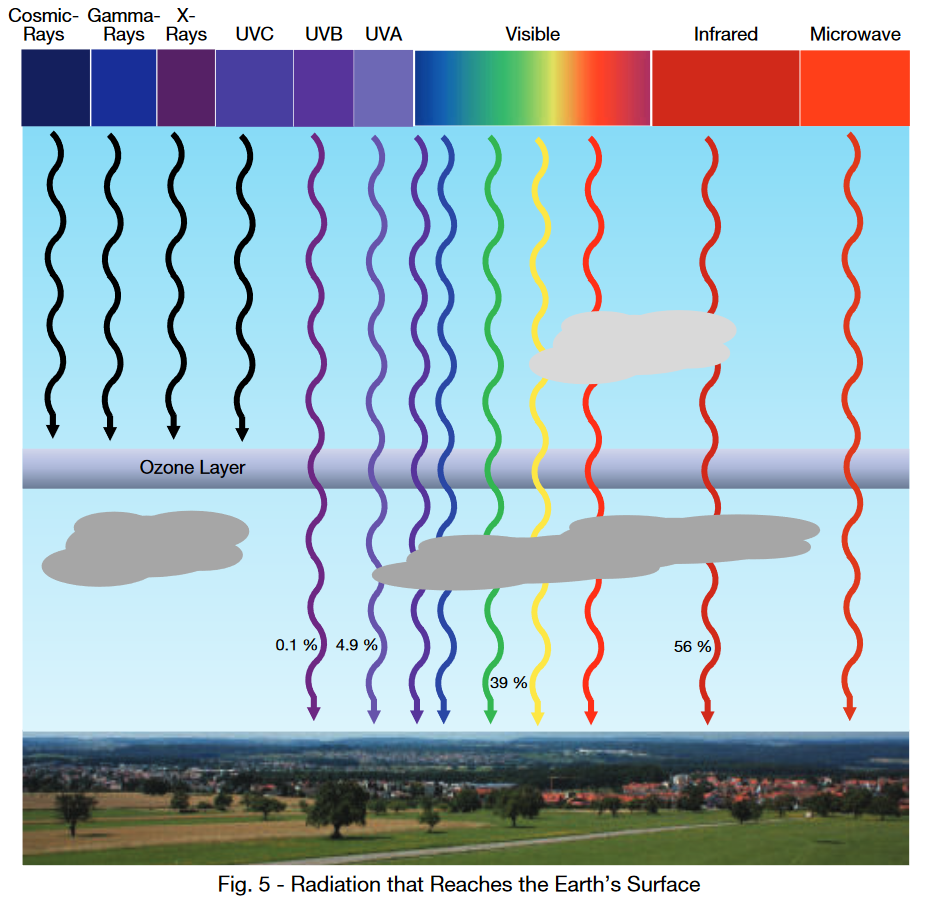
What is UVA Radiation?
UVA radiation is a specific part of the spectrum of the solar radiation from the Sun. UVA light has wavelengths between 320 nm and 400 nm. Approximately, 4.9% of all solar radiation that makes it to the surface of the Earth is UVA light. UVA rays are often associated with photoaging and the formation of skin cancer.
For more details on UV radiation, check out these online resources:
Some experiments and related topics for UVA radiation:
- Absorption and Exposure:
- Sunblock
- Photoexposure:
- Sun Sensitive Paper
- Ben from the Applied Science has a cool video on UV exposure.
- Effects on insects (like flies or bees):
I2C Connection
I2C is a communication protocol used to transfer data between master and slave devices. It is a 2-wire connection consisting of SDA (data) and SCL (clock). The protocol is pretty well defined so it can be shared with multiple devices. This is beneficial for daisy chaining multiple devices together on a single bus. The primary thing users will need to watch out for is address conflicts (you can't have devices with the same address).
Hardware Assembly
Connecting your gator:UV to the to the gator:bit (v2) is simple. The board can also be daisy-chained with other I2C boards. This can easily be done with alligator cables or these special banana cables.
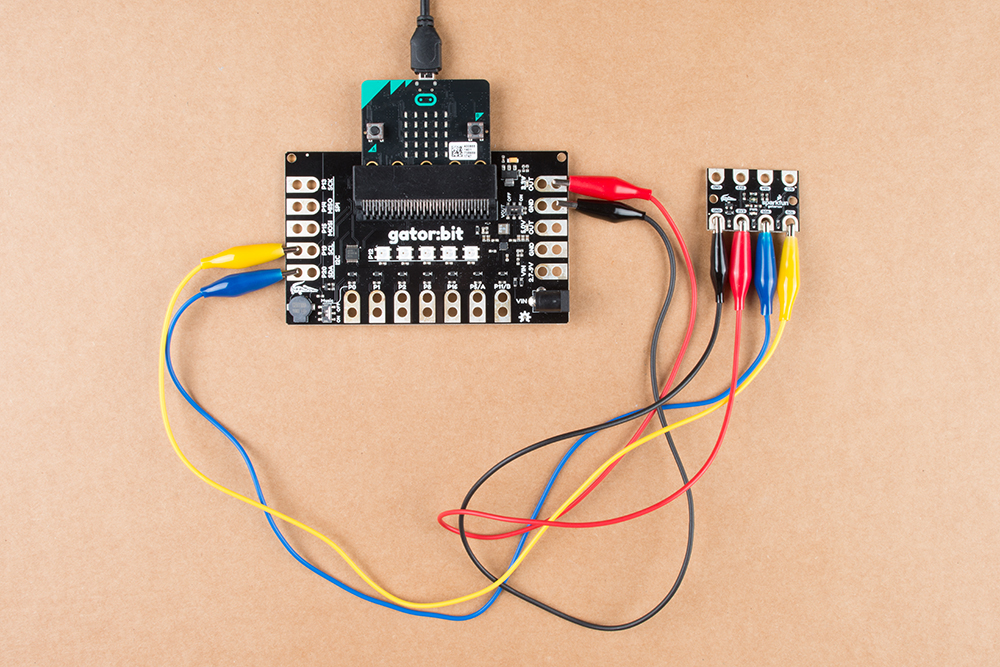
Hardware assembly of connections used in example. Click to enlarge.
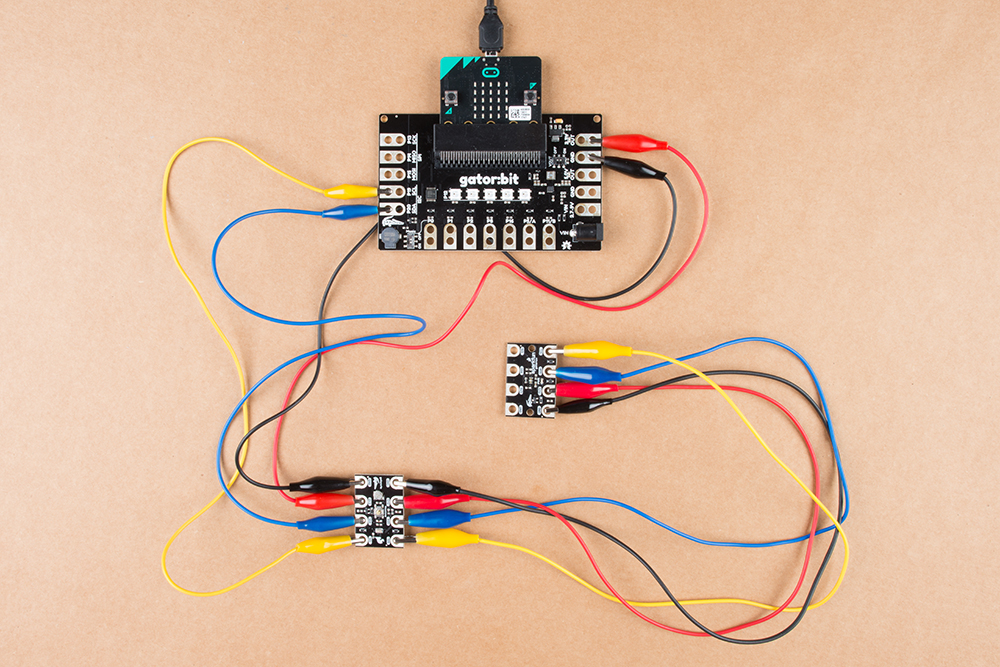
Example of daisy chaining multiple I2C gator boards. Click to enlarge.
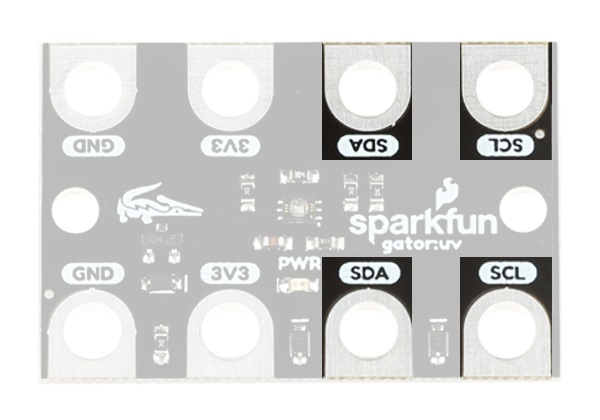
| gator:UV | GND | 3V3 | SDA | SCL |
|---|---|---|---|---|
| gator:bit (v2) | GND | 3.3V OUT | P20 (SDA) | P19 (SCL) |
Adding the MakeCode Extension
- If you have not previously used MakeCode, please check out the Quick Start Guide fro micro:bit.
- If this is your first time using a micro:bit, please review our Getting Started with the micro:bit guide.
- If this is your first time using the gato:bit (v2), please review our SparkFun gator:bit v2 Hookup Guide.
The easiest way to get started using the gator:UV is to use Microsoft MakeCode, a web-based block editor. This tutorial assumes you are familiar with the with MakeCode, the gato:bit (v2), and the micro:bit development board. If this is your first time check out this guides linked in the suggested reading section (above).
Installing Extensions
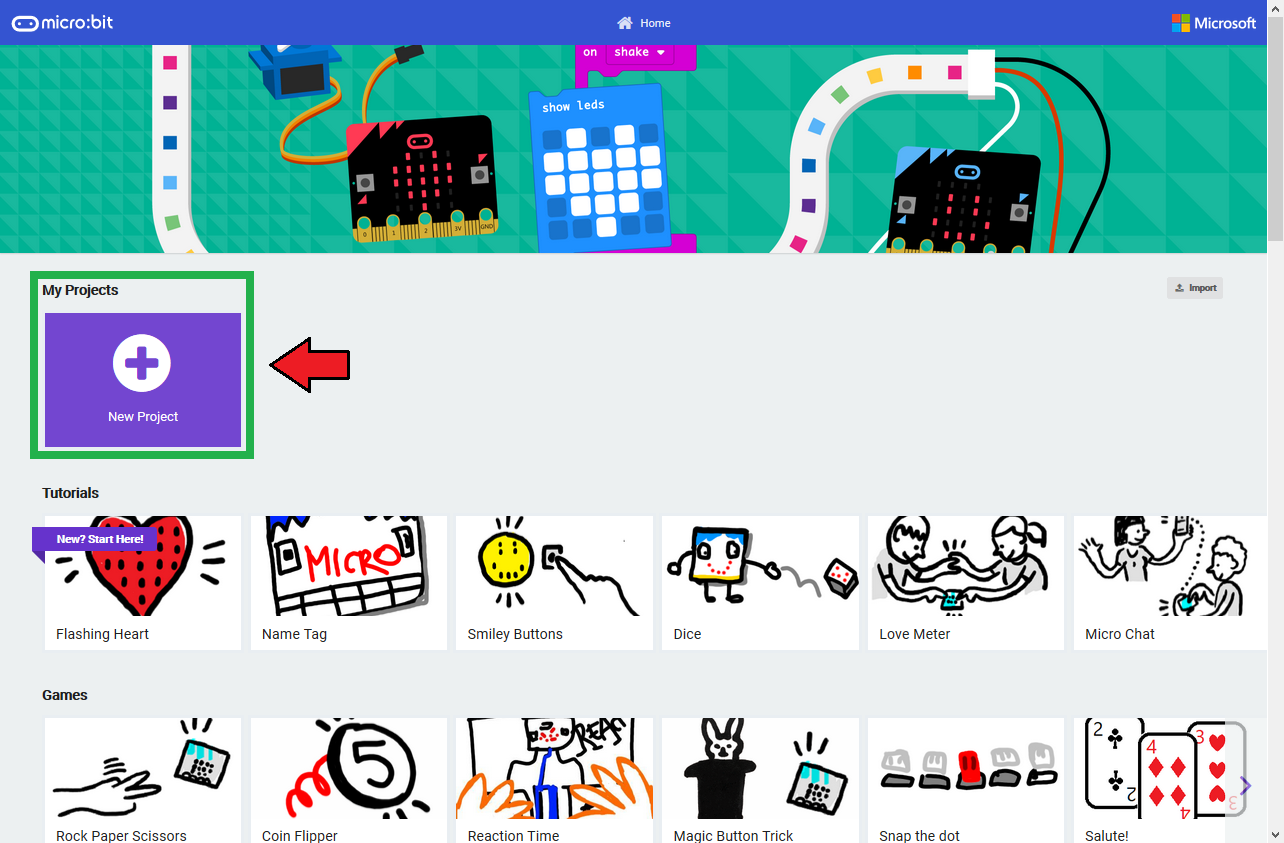
To get started with using MakeCode with the miccro:bit, head over to the MakeCode for micro:bit website by Microsoft. Then, click the New Project button to start a new project and open the Editor. (*Yes, all you only need to get start coding is a computer with internet access, an up-to-date web browser, and an available USB port!)
Once you have the editor up, click on the the Advanced block in the block library to reveal the drop down menu.

Finally, click on the Extensions block. This should bring up the extensions page. (*Alternatively, you could also click on the extensions link from the settings menu.)

There are two methods for finding the gator:UV extension:
- Search for the name used on the extension1.
- Use the link to the GitHub repository for the pxt-package as the search term.

Search for the PXT-Package
Search for the gator:UV extension using the GitHub repository link to the pxt-package:
https://github.com/sparkfun/pxt-gator-UV
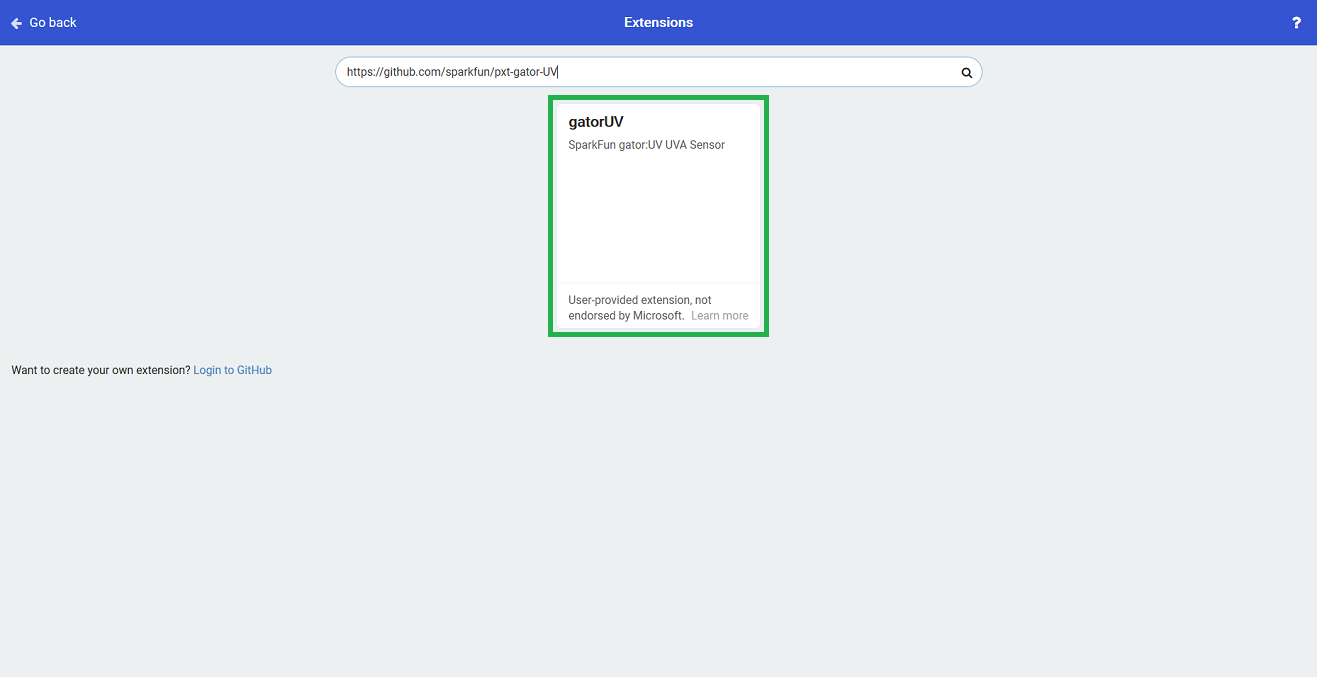
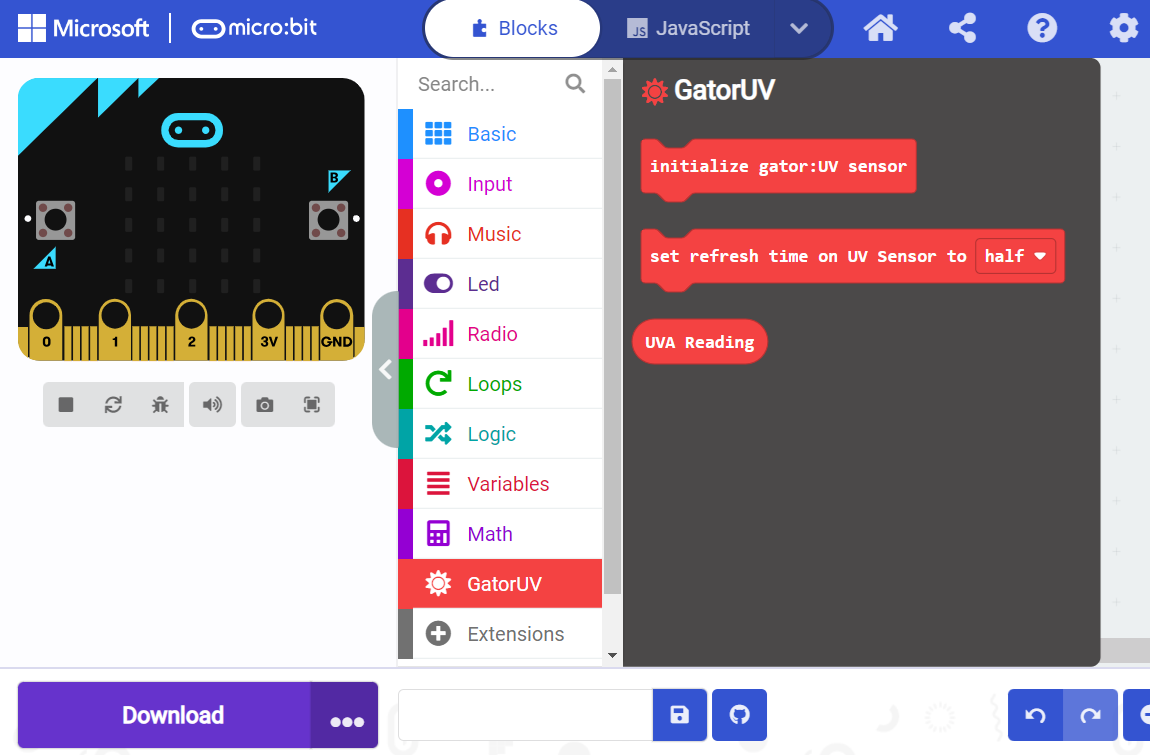
Then, click on the box for the extension to add it to the block library. The gator:UV extension should now appear in the block library.
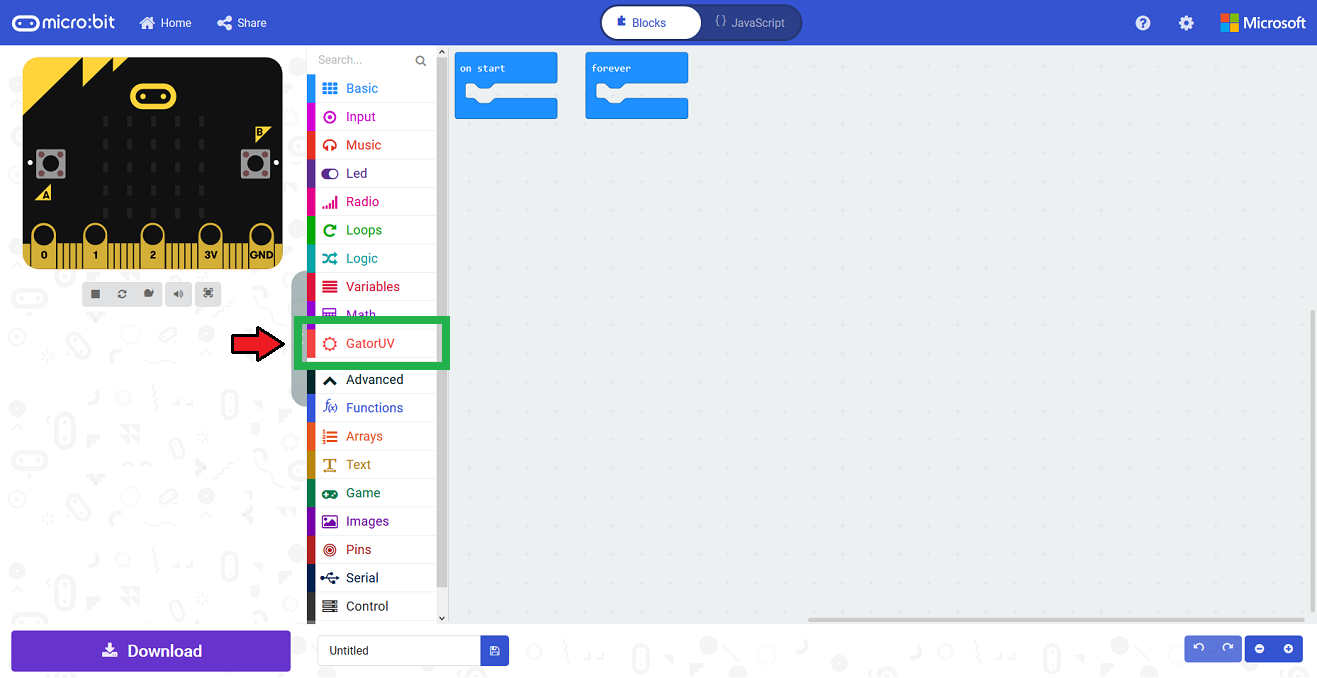
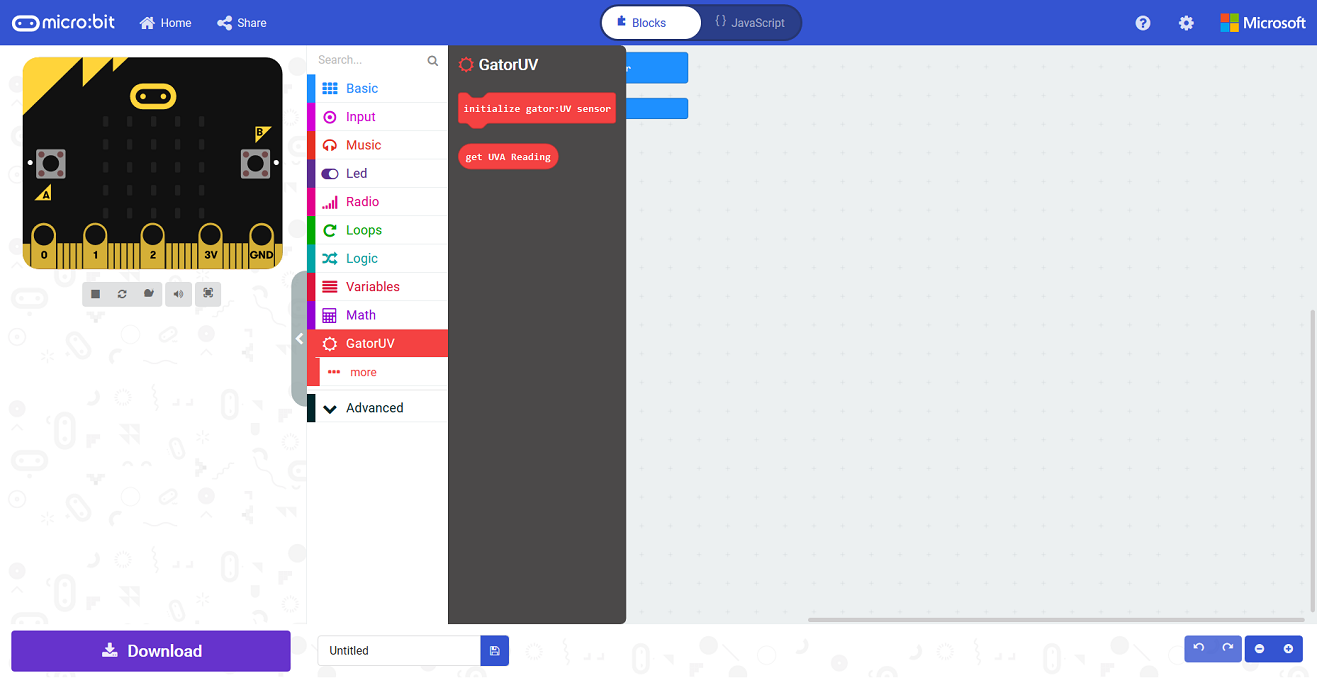
To verify that you have added the extension, click on the gator:UV block to make sure that your drop down menu options match the image below.
MakeCode Examples
Now that you have added the gator:particle extension to the Editor, lets start with some example code. Plug the micro:bit into your computer using an USB micro-B cable after you have assembled your hardware with the instructions from the previous section. The micro:bit should appear on your computer as a removable storage device.

To upload new code, this is where you will be copying the downloaded .hex file to later.
Block Functions
Initialize gator:UV sensor
This block should be pretty self explanatory, it sets the sensor up to be used. You should use this within the on start block.
get UVA Reading
This is a value block as indicated by the block's shape. The output of the block is value measured by the UV sensor.
0to65535- A 16-bit value of the UV sensor reading that can be correlated to the UV-Index.
set refresh time on UV Sensor to _____
This sets the integration time for the UV sensor. The refresh time should be adjusted for the range of values you expect to be measuring.
half- Half of the normal integration time.one- Normal integration time (default).two- Twice the normal integration time.four-Four times the normal integration time.
Note: *Although not exactly correct, it can be interpreted as the time that the sensor spends collecting a data sample.
If you are barely measuring changes between measurement values, you should try to increase the refresh time, which allows the sensor to collect more light. The relation between measured values and the reset time are linear (see table below).
UV Index
The table below maps out UV index to the correlating sensor output values and their respective refresh time (or integration time) setting. The values were extrapolated from the UV index tables provided in the VEML6070 Application Note for an RSET = 300kΩ.
| Int. Time = x0.5 | Int. Time = x1 | Int. Time = x2 | Int. Time = x4 | UVI (Value) | UV-INDEX |
|---|---|---|---|---|---|
| ≥ 1142 | ≥ 2283 | ≥ 4565 | ≥ 9130 | ≥ 11 | Extreme |
| 831 to 1141 | 1661 to 2282 | 3321 to 4464 | 6641 to 9129 | 8 to 10 | Very High |
| 623 to 830 | 1246 to 1660 | 2491 to 3320 | 4981 to 6640 | 6,7 | High |
| 312 to 622 | 623 to 1245 | 1245 to 2490 | 2490 to4980 | 3 to 5 | Moderate |
| 0 to 311 | 0 to 622 | 0 to 1244 | 0 to 2489 | 0 to 2 | Low |
Basic Reading
Below, is a simple example of how to take simple measurements from the sensor. To use this example, there are multiple options for accessing the .hex file:
- Replicate the block functions from the display below to copy the example project. Then download the
.hexfile. - Expand the display widow to pull up the example project. Then download the
.hexfile. - Use this link to pull up the example project. Then download the
.hexfile. Download the
.hexfile from the button below or the link on the bottom of the display.
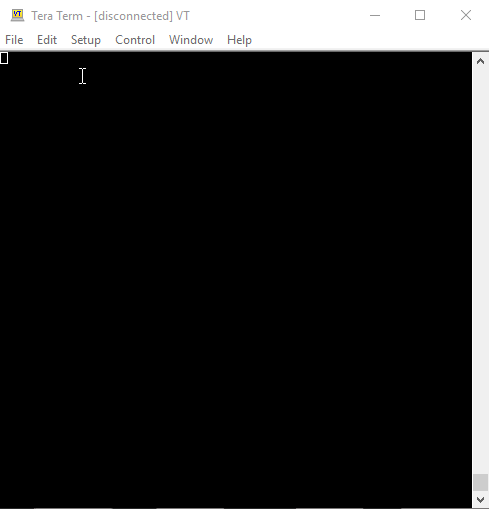
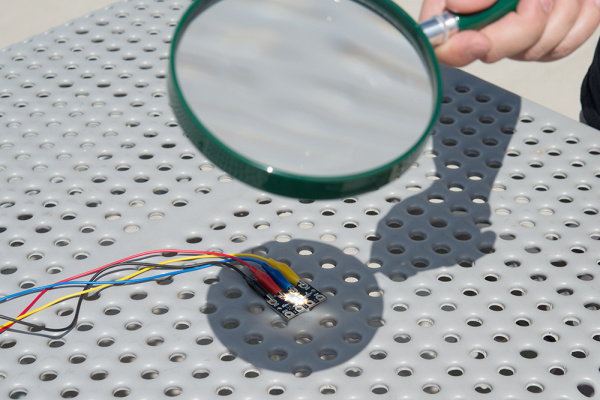
The output is redirected over the serial port to avoid conflicts on pins P0 and P1, which are also used for serial communication. To read the sensor values, pull up your favorite serial terminal emulator. Then, connect to the serial port that the micro:bit is on; the default baud rate is 115200 bps. Below, is an example of the sensor output for the example code (the sensor values are responding to the flashlight on my phone).
Do Not Try This at Home: In case you were thinking about it, do NOT try to replicate this image or attempt to max out your readings with a magnifying glass. You will burn or damaged the board. I had the magnifying glass focused on the board for less than a second for this picture and it started to burn and smolder.
Troubleshooting the Extension
This product's extension has a dependency on Microsoft's build process. If the usual method of installing the MakeCode extension gives an error, you will need to manually install the MakeCode extension. We have provided a local build of this extension that can be uploaded to MakeCode:
To manually install this extension in makecode, go to the "Extensions" tab on the left side of the makecode site:
In the location you'd normally search for an extension, you'll notice an upload button on the right:
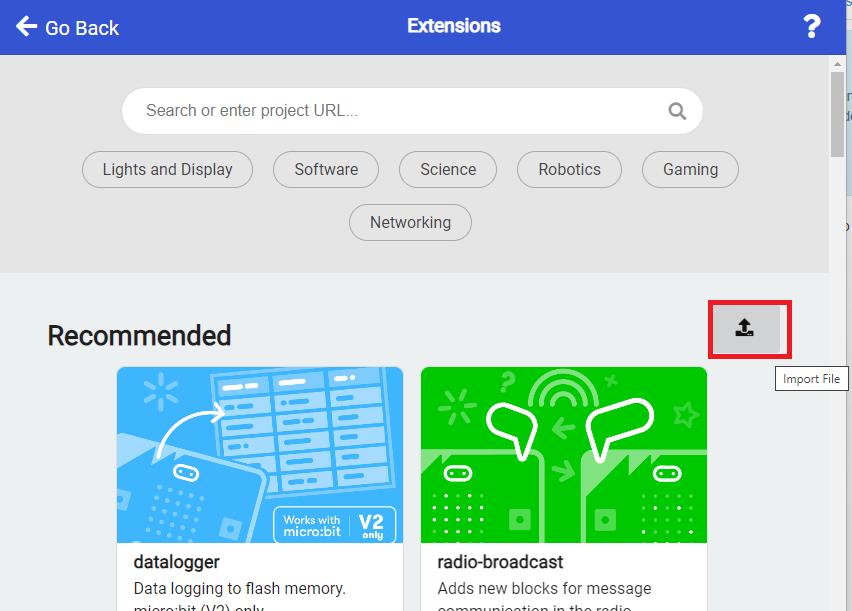
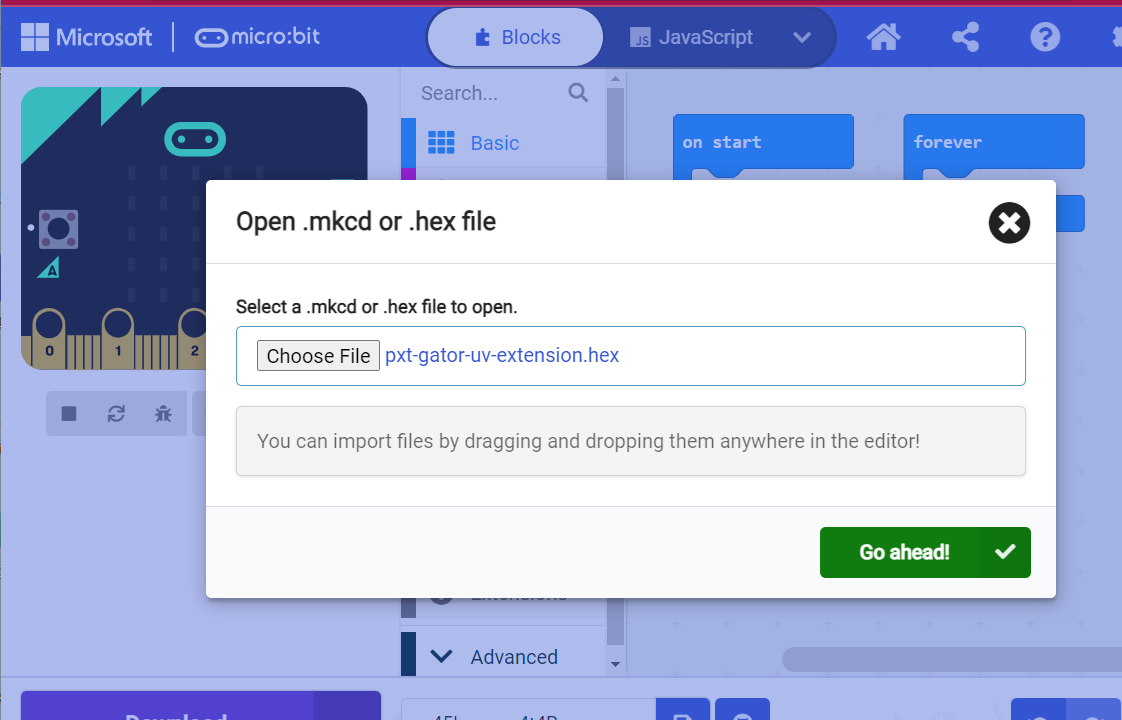
Click on this, and you'll get a window allowing you to upload your own built extension. Navigate to where you saved the above extension hex, and upload it to your project.
You should be able to see the extension and its functions now. In addition, you'll be able to build and download your project to your variant of micro:bit.
Other Troubleshooting Tips
Power and Connections
Check that your power and data connections are correct and that the power VOUT switch is in the ON position on the gator:bit (v2).
UV Filters
Make sure that if you are using a transparent cover over the sensor that it still passes UV light. More modern clear plastics and glass covers (especially for photo or documents) usually have a special UV coating to prevent pigment deterioration and yellowing of paper.
If you still have questions or issues with this product, please create a post on our forum under the Gator Products topic.
Additionally, if you are an educator and you have class or application based questions, please create a post on our forum under the Educational Products topic.
Resources and Going Further
For more product information, check out the resources below:
- Schematic (PDF)
- Eagle Files (ZIP)
- VEML6070 Datasheet (PDF)
- VEML6070 Application Note (PDF)
- gator:UV PXT Package
- GitHub Product Repo
- micro:bit Landing Page
- SFE Product Showcase
Interested in the micro:bit? Check out some of these other micro:bit products:
Need some inspiration for your next project? Check out some of these other micro:bit product tutorials: