Sound Location Part 2 with the Qwiic Sound Trigger and the u-blox ZED-F9x
Introduction
In the previous tutorial, we showed you how to calculate the location of a sound using the new SparkX Qwiic Sound Trigger and the u-blox ZED-F9P GNSS receiver.
Qwiic Sound Trigger
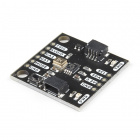
SPX-17979The Qwiic Sound Trigger can be used on its own, or as part of your Qwiic system. It is based on the VM1010 from Vesper Technologies and the TI PCA9536 GPIO expander. The VM1010 is a clever little device which can be placed into a very low power "Wake On Sound" mode. When it detects a sound, it wakes up and pulls its TRIG (DOUT) pin high. The VM1010 can then be placed into "Normal" mode by pulling the MODE pin low; it then functions as a regular microphone. The analog microphone signal is available on the AUDIO (VOUT) pin. All of this happens really quickly, within 50 microseconds (much faster than a capacitive MEMS microphone), so you don't miss the start of the audio signal. This makes it ideal for use as a sound trigger!
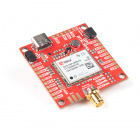
The u-blox ZED-F9P GNSS receiver is an old friend. It is a top-of-the-line module for high accuracy GNSS location solutions including RTK that is capable of 10mm, three-dimensional accuracy. With this board, you will be able to know where your (or any object's) X, Y, and Z location is within roughly the width of your fingernail! Something that doesn’t get discussed as much as it should is that the ZED-F9P can also capture the timing of a signal on its INT pin with nanosecond resolution! It does that through a UBX message called TIM_TM2.
In this tutorial, we take this to the next dimension. Quite literally! Last time, we used two sound trigger systems to calculate where a sound came from along the line from one trigger to the other. That’s a one-dimensional (1D) system. If we add a third sound trigger, we can triangulate the location of a sound in two dimensions (2D) allowing us to plot the position in X and Y or East and North!
Let's talk first about triangulation….

