Simon Splosion Wireless
 bri_huang
Modifications
Step 1 -- Soldering Programming Headers
To program the Simon, we need access to the FTDI pins. Flip your Simon board upside down. To upload code, you will need to connect the silkscreen labelled GRN to GN and BLK to BLK.

|

|
There are six pins here. I like to solder these right-angle headers to the pins.
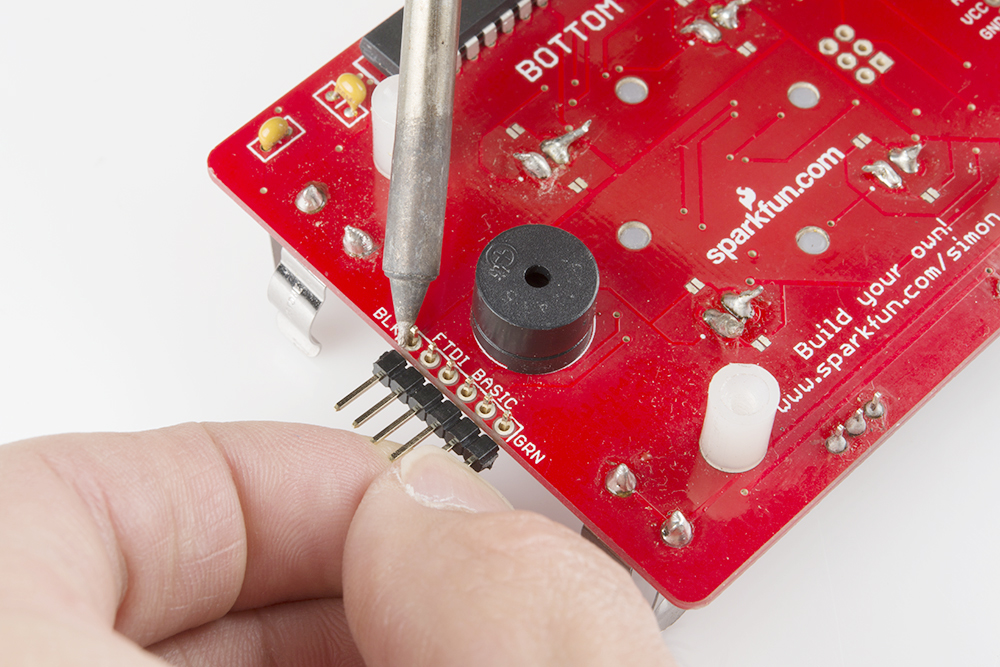
Alternatively, if you don’t have a soldering iron or you don’t want to solder, you can use straight pin headers. Just hold the connector in the holes while programming the device. The holes are what we call plated-through holes. This means that each hole has a cylinder of metal that connects to the pad. If you hold a straight pin header in at an angle, it should make a good electrical connection to the pins.
Step 2 -- Downloading the Default Example Code
If your Simon is an older version or if it doesn't have the two easter eggs, click here for the latest code from github. If you need a refresher on how to use GitHub, visit our tutorial.
Open / Unzip this file to your computer. Note: you must unzip the files in order to use them. Windows will often allow you to view the files within a compressed file, but you won't be able to access all of the files.
Under the folder \Simon-Says-master\Firmware\Simon_Says\ you should find the Arduino code -- Simon_Says.ino
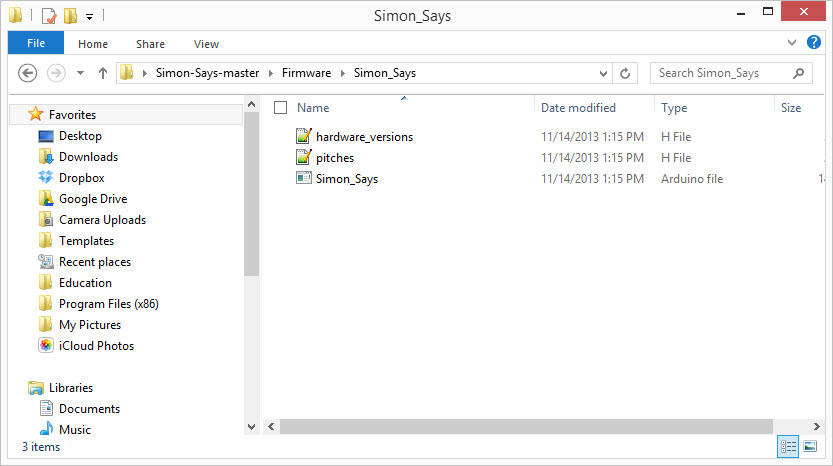
Open this file in Arduino.

Step 3 -- Upload to Simon Says
Using the FTDI Basic and your USB cable, connect the Simon to your computer.
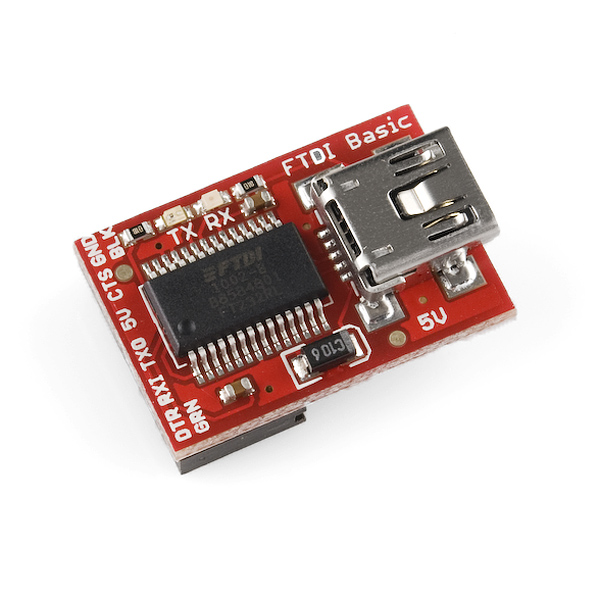
Be careful to line up the BLK and GRN markings on the FTDI Basic with the labels on the Simon.
Setting the Board Type
The Simon Says uses the LilyPad Arduino w/ ATMega328 bootloader. This is because we are using the internal oscillator on the ATMega328 instead of a separate crystal as on the Arduino Uno or on our RedBoard.
Under the Tools menu in Arduino, change the board type to Lilypad Arduino w/ ATMega328.
Select the proper Serial Port (generally the largest COM# for PCs and \dev\tty\usb-serialxxxx for Mac & Linux).
Make sure the Simon has batteries and is turned ON and click upload.
Now - remember there are two easter-eggs in this code. One is triggered by holding down the Lower-Right button when it turns on, the other is triggered by holding down the Upper-Right button.