SIK Keyboard Instrument
 Shawn Hymel
Introduction
The SparkFun Inventor's Kit (SIK) is a great starting place for learning about electronics, programming, and physical computing. We can combine some of the concepts found in the SIK Guide to make our own projects. In this tutorial, we will make a keyboard using parts found in the SIK.
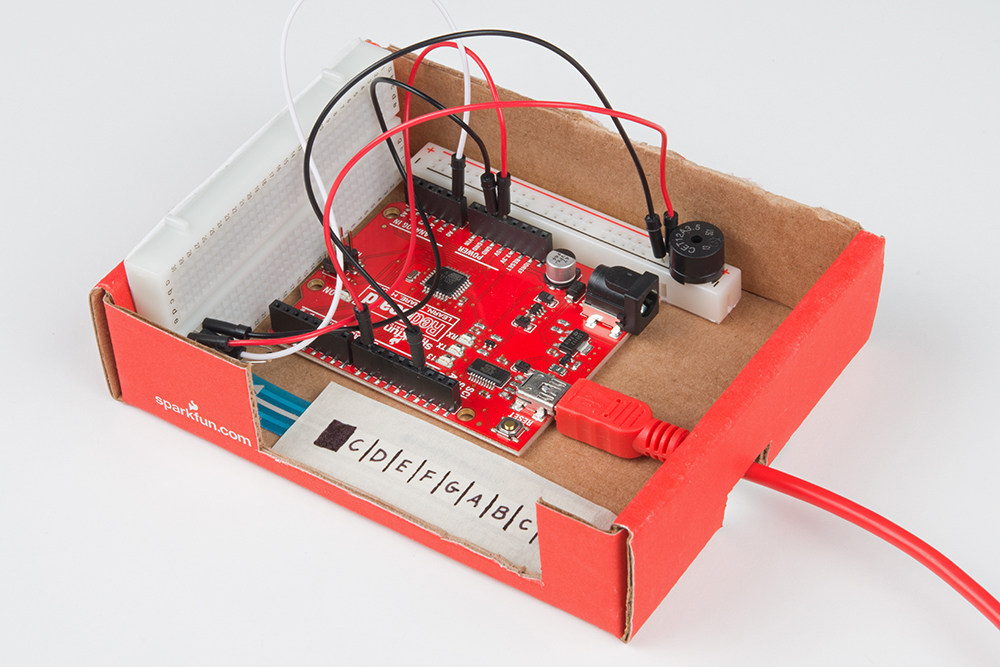
We can use the Arduino to read the location of a touch on the soft potentiometer strip ("soft pot") and use that information to play a particular note from the buzzer. While it may be small, we can divide the soft pot into 8 segments. That's enough for a scale! In this case, we'll use the C major scale.
Required Materials
From the SIK, you will need:
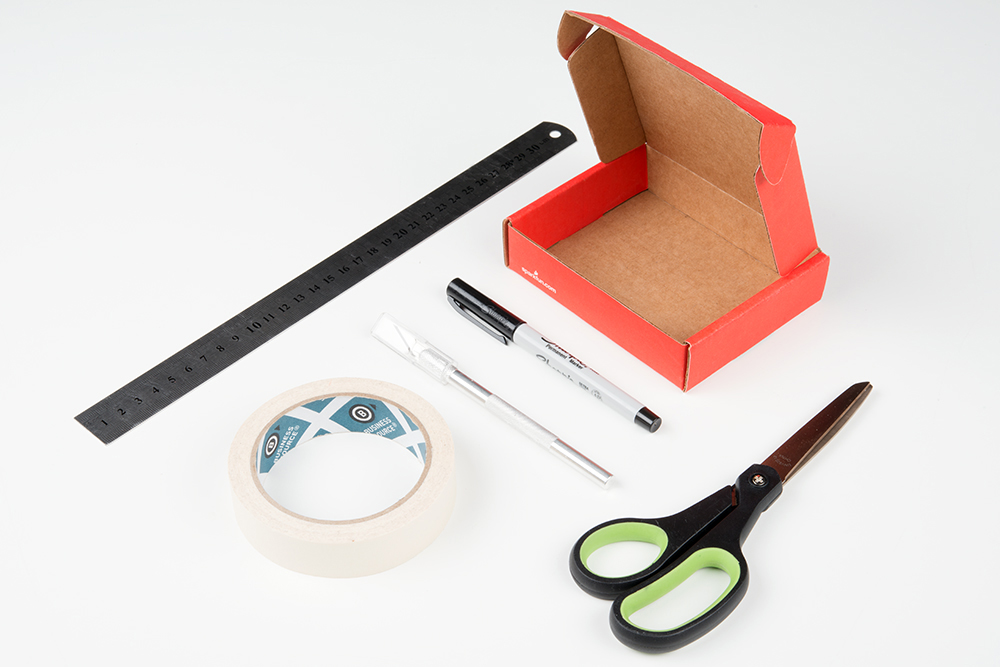
In addition, you will need a few tools:
- Scissors
- Masking tape
- Hobby knife
- Ruler
- Pen or Sharpie
- Cardboard (a small box is preferable)
Suggested Reading
Before continuing with this project, we suggest you be familiar with a few concepts:
Hardware Hookup
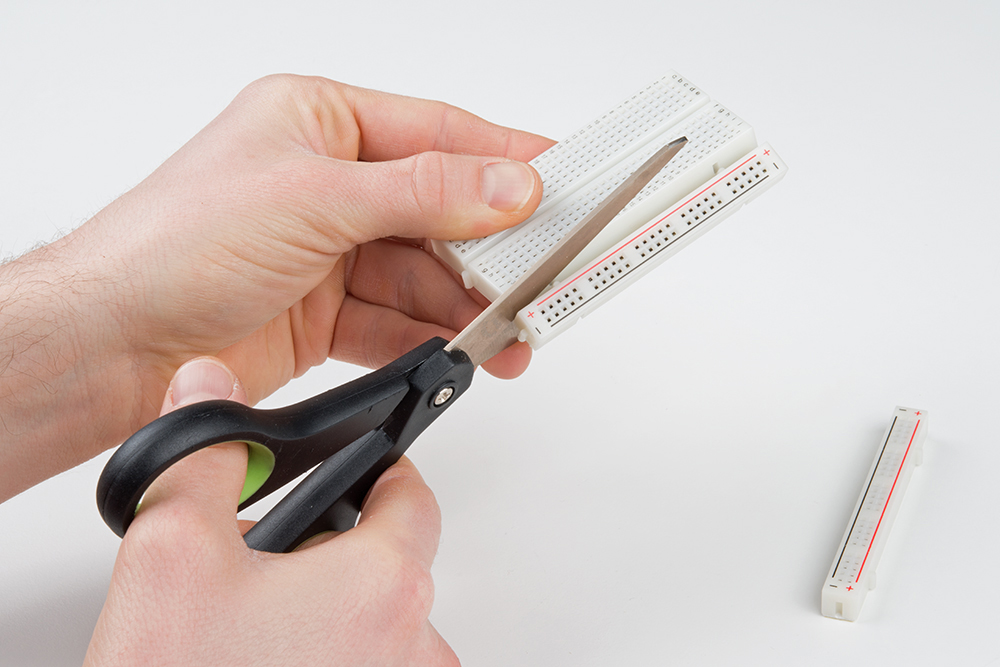
Prepare the Breadboard
Before connecting anything, we recommend separating the breadboard into its three parts. Use a pair of scissors to cut the adhesive backing. This part is optional, but it helps the breadboard fit into the project enclosure later.
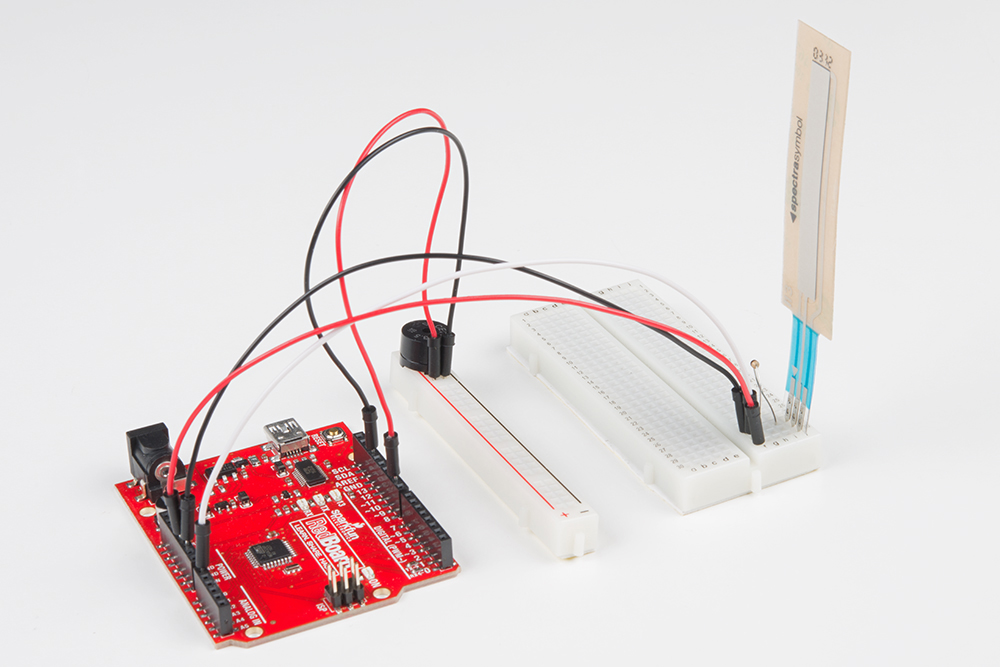
Connect the Components
Once you are ready to connect the components, check out the Fritzing diagram below.
| Polarized Components | Pay special attention to the component’s markings indicating how to place it on the breadboard. Polarized components can only be connected to a circuit in one direction. |
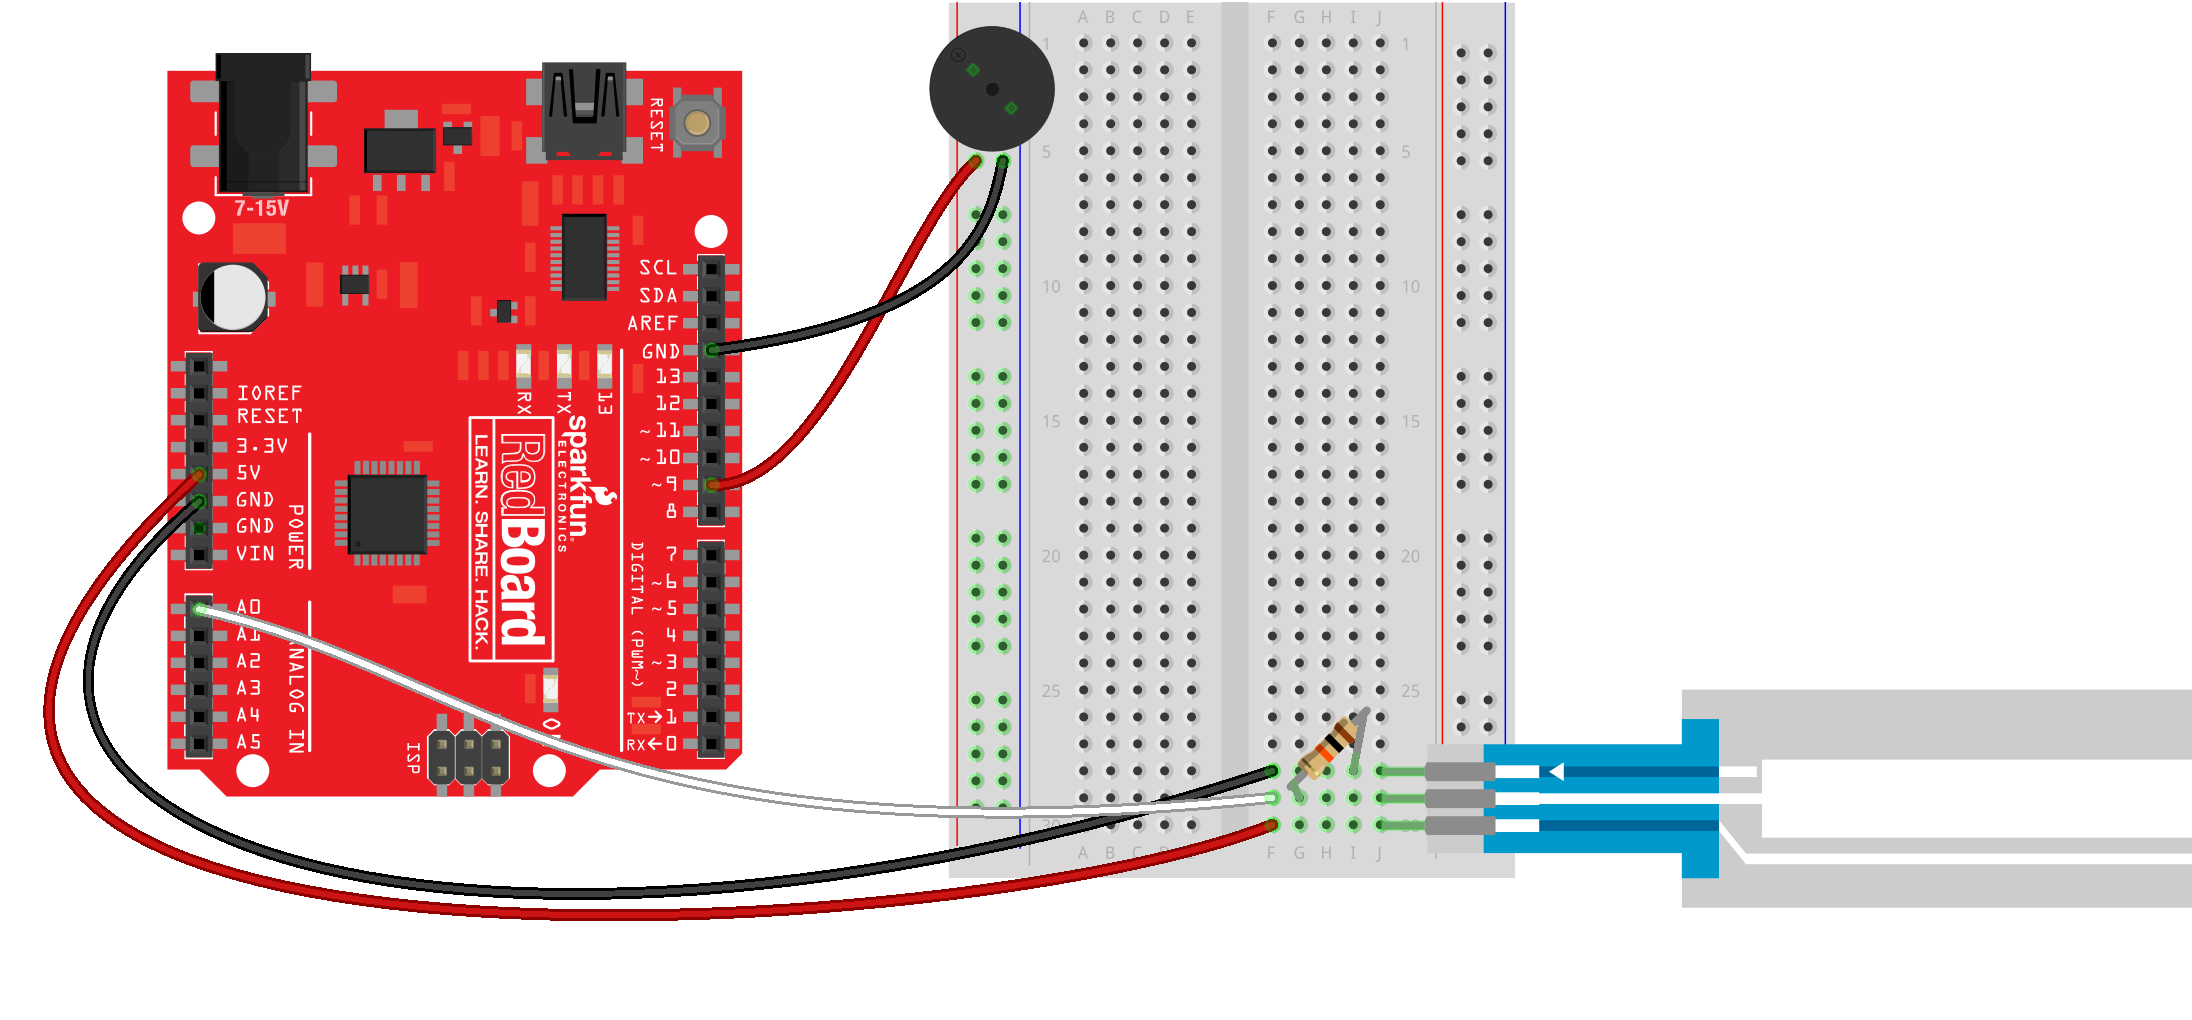
Once you are done, the soft pot should be sticking straight up from the breadboard.
Create the Keyboard
The "keyboard" is actually the soft potentiometer. We will divide up the soft pot into eight (8) segments, and the resistance we read with the Arduino from touching the soft pot will determine the key being pressed.
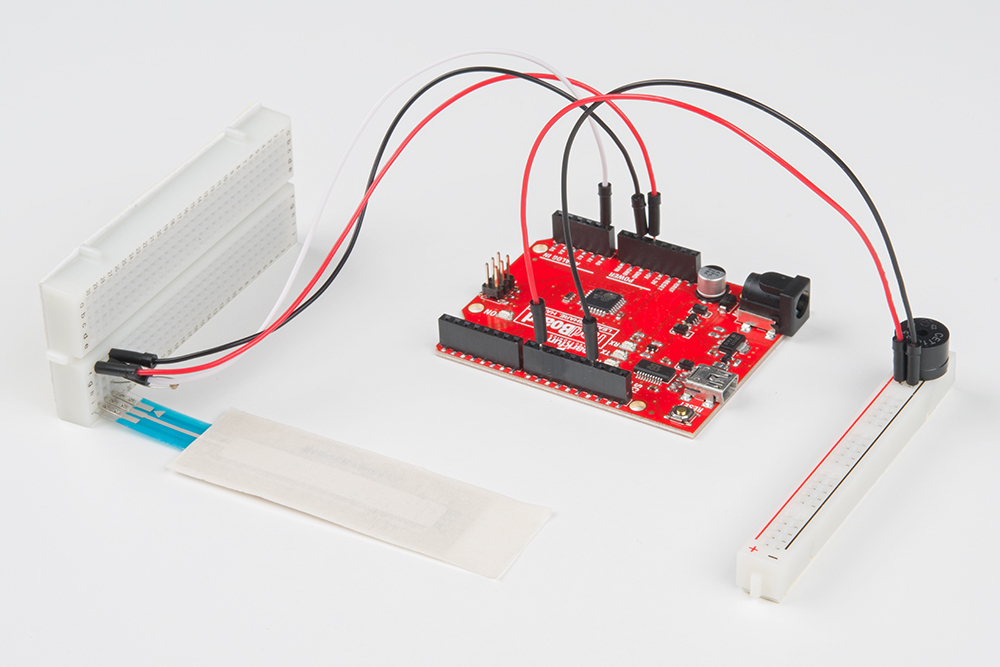
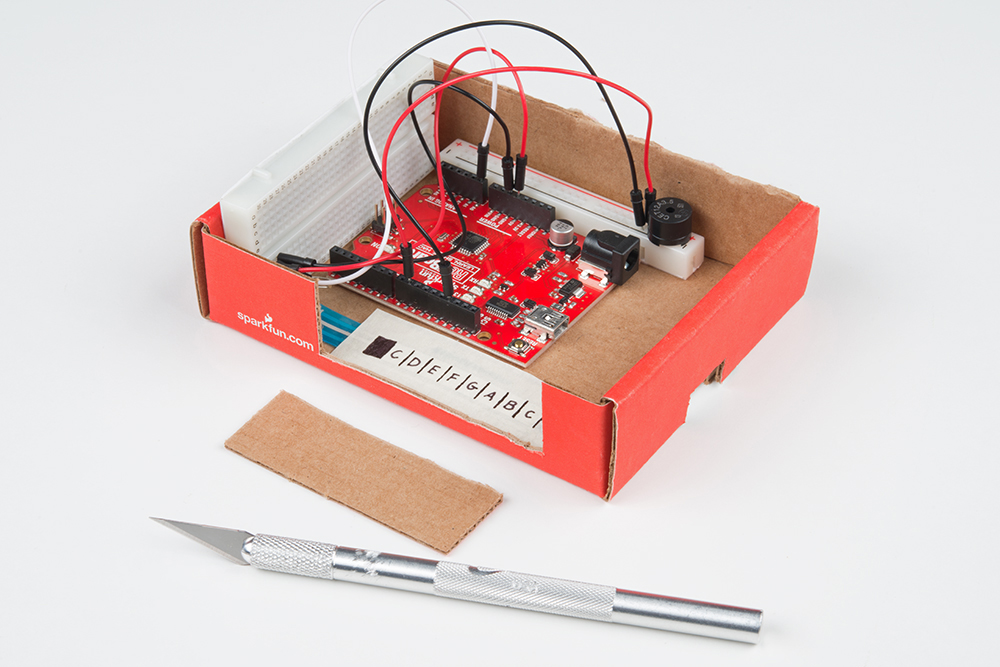
To create something that looks like a keyboard, place a piece of masking tape over the soft pot so it covers the entire length with some overhand (we will use the overhang to attach the soft pot to the box).
Place a ruler next to the touchable (silver) area on the soft pot. Starting from the breadboard end, mark every 6mm. Fill in or note that the first 6mm section is not to be used.
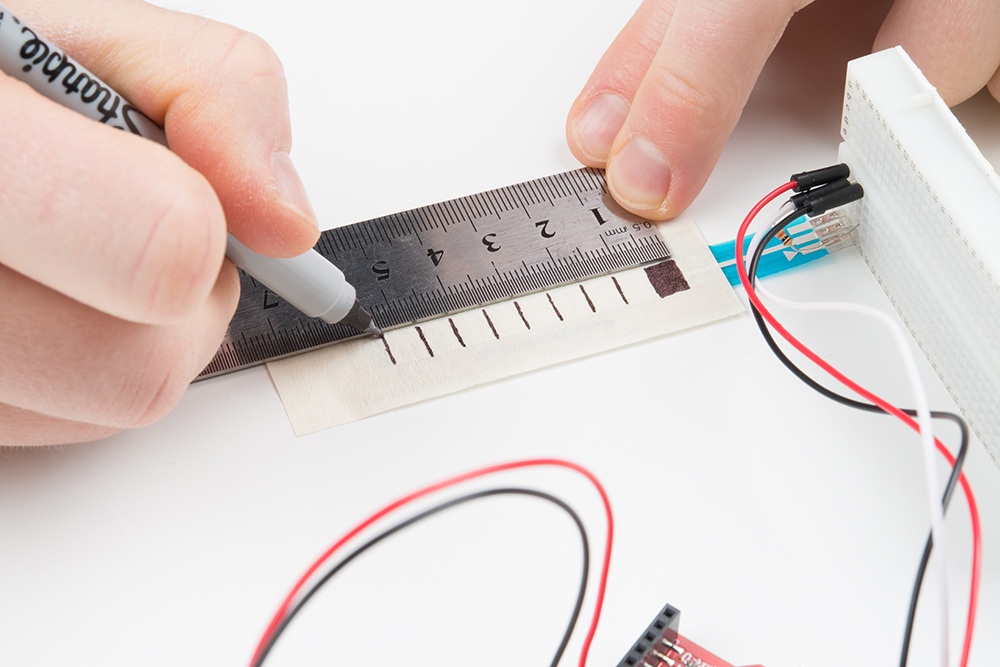
Starting from the breadboard side, write the note of each key in between the marks. We'll use C, D, E, F, G, A, B, C.

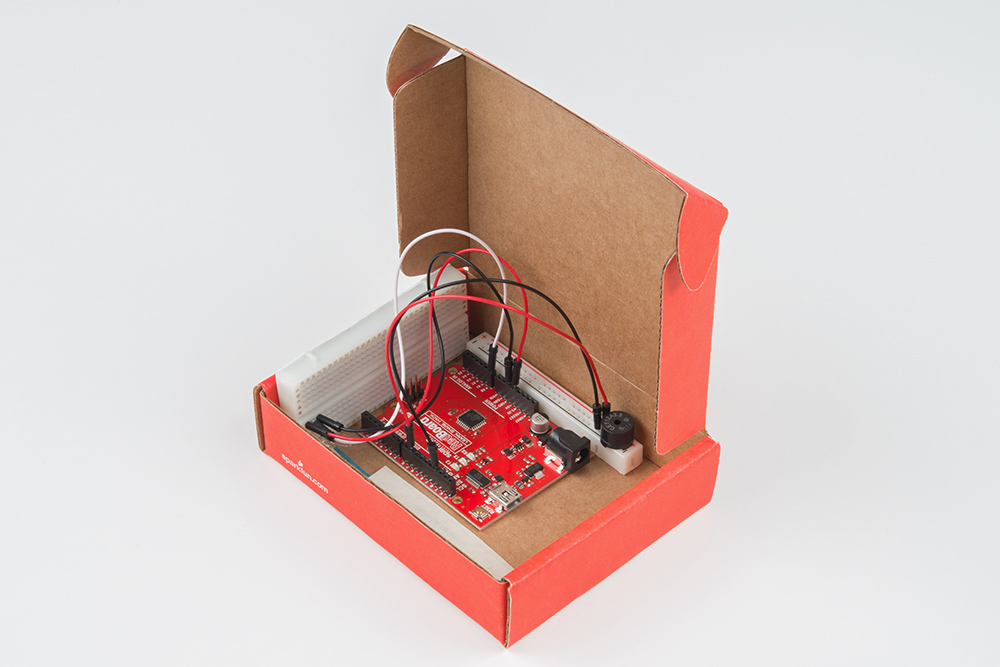
Make the Project Box
While we can play our keyboard on the breadboard, it might be more fun to have it in a project box to add a little stability.
Peel the backing off the two pieces of the breadboard to which we attached components.

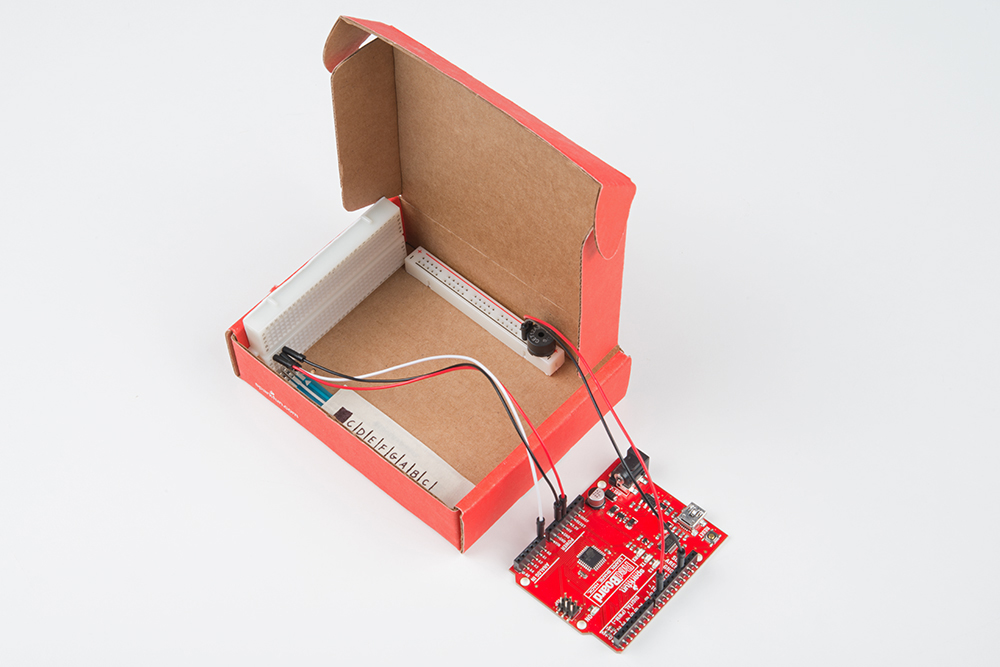
Attach the large breadboard piece to the side of the cardboard box with the soft pot lying flat on the box's floor. Stick the smaller breadboard piece (the one with the buzzer) to the box's floor opposite the soft pot. Stick the overhang tape on the soft pot to the floor of the box.
Fold a piece of tape over (into a loop), and stick it to the RedBoard.
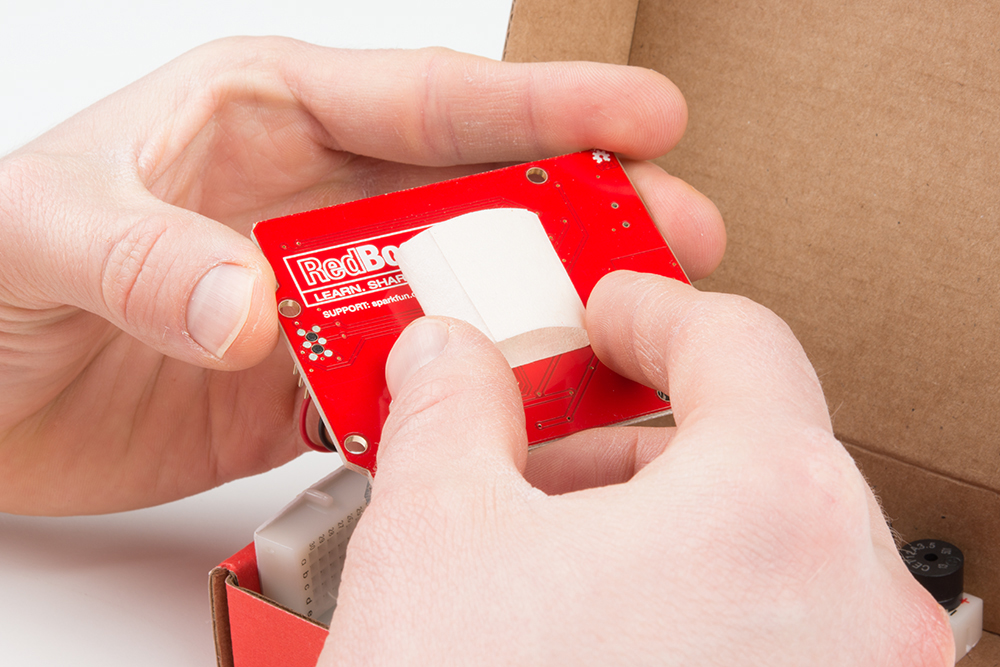
Place the RedBoard in between the soft pot and top breadboard piece.
Use the scissors to remove the top of the box.
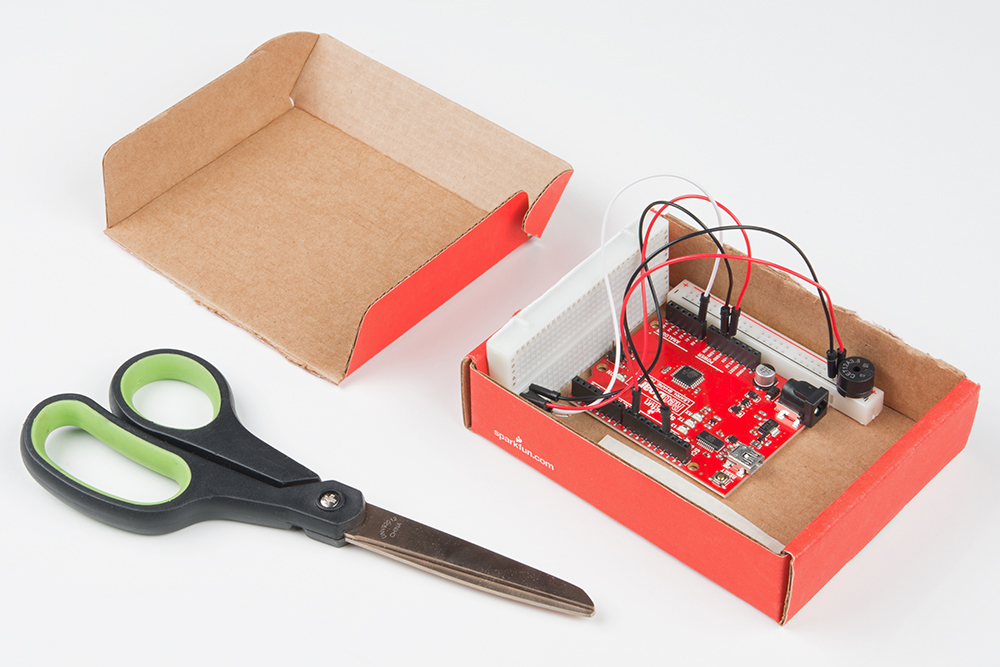
Use the hobby knife to cut a hole in the side of the box so you can pass the USB cable through for power.
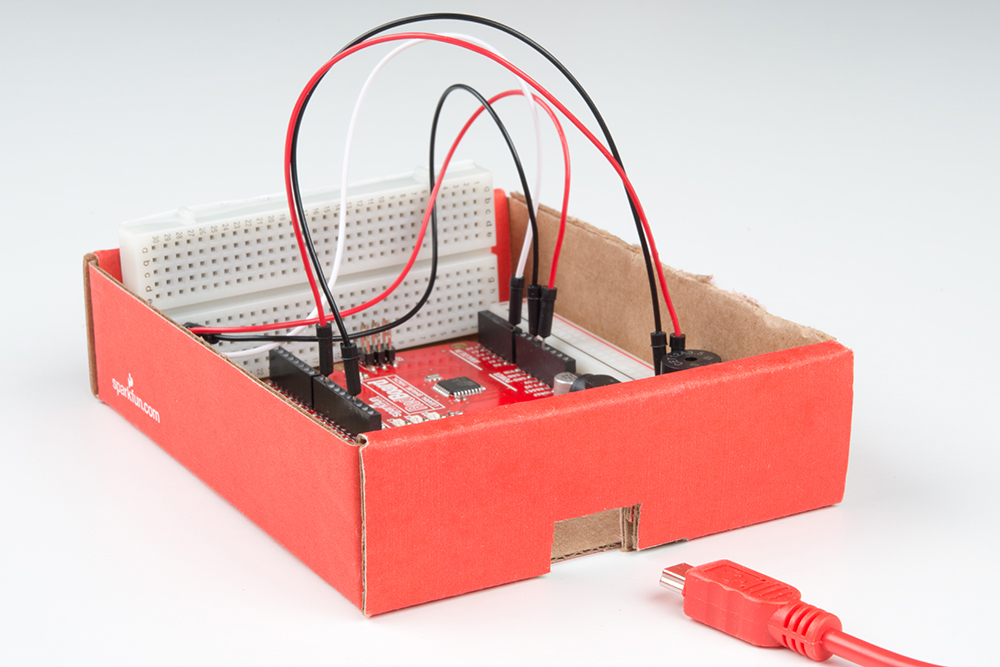
Cut a large notch in the front of the box just above the keyboard. This allows for easier access to the keyboard.
The Code
To program the Arduino from your browser, select SparkFun RedBoard in the first drop-down menu in the window below, select the COM port associated with your RedBoard, and click Run on Arduino.
Note: This example assumes you are using the latest version of the Arduino IDE on your desktop. If this is your first time using Arduino, please review our tutorial on installing the Arduino IDE.
If you have not previously installed an Arduino library, please check out our installation guide.Copy the following code into the editor and click the Upload button.
language:c
/**
 * SparkFun Inventor's Kit Project
 * Keyboard Instrument
 * Date: March 29, 2016
 *
 * Description:
 *  Use the soft touch potentiometer as a keyboard segmented into
 *  8 keys: C, D, E, F, G, A, B, C. When each key is pressed, the
 *  corresponding note is played through a buzzer.
 *
 * Hardware Connections:
 *  Arduino | Soft Pot | Buzzer
 *  ---------------------------
 *    5V    |   pin 3  |
 *    A0    |   pin 2  |
 *    GND   |   pin 1  |
 *    9     |          |   +
 *    GND   |          |   -
 *
 *  You will also need to attach a 10k resistor from pin 2 to
 *  pin 1 (GND) on the soft pot.
 *
 * License:
 *  Public Domain
 */

// Constants
const int SENSOR_PIN = 0;   // Analog input pin for soft pot
const int BUZZER_PIN = 9;   // PWM digital output pin for buzzer
const int DURATION = 10;    // Time (ms) to play a note

// This function is run only once as soon as the Arduino boots
void setup()
{

  // Set the buzzer pin as an output
  pinMode(BUZZER_PIN, OUTPUT);
}

// This gets run over and over right after the setup() function
void loop()
{
  int sensorValue;
  char note = 0;
  int freq;

  // Read the value (0 - 1023) from the ADC
  sensorValue = analogRead(SENSOR_PIN);

  // Map the key pressed to a note
  note = findNote(sensorValue);

  // If it's a note, play it!
  if ( note != 0 ) {
    freq = getFrequency(note);
    tone(BUZZER_PIN, freq, DURATION);
    delay(DURATION);
  }
}

// Given an ADC value (0 - 1023), map it to a note
char findNote(int val)
{

  // Return the note based on the key pressed
  if ( (val > 10) && (val <= 160) )
  {
    return 'c';
  }
  if ( (val > 160) && (val <= 250) )
  {
    return 'd';
  }
  if ( (val > 250) && (val <= 350) )
  {
    return 'e';
  }
  if ( (val > 350) && (val <= 450) )
  {
    return 'f';
  }
  if ( (val > 450) && (val <= 560) )
  {
    return 'g';
  }
  if ( (val > 560) && (val <= 690) )
  {
    return 'a';
  }
  if ( (val > 690) && (val <= 850) )
  {
    return 'b';
  }
  if ( (val > 850) && (val <= 1023) )
  {
    return 'C';
  }

  // Return 0 to show that no key was pressed
  return 0;
}

// Translate a note (a, b, c, d, e, f, g) to its frequency
int getFrequency(char note)
{
  int i;
  const int numNotes = 8;  // number of notes we're storing

  // Arrays containing our notes and frequencies
  char names[] = { 'c', 'd', 'e', 'f', 'g', 'a', 'b', 'C' };
  int frequencies[] = {262, 294, 330, 349, 392, 440, 494, 523};

  // Step though the notes
  for (i = 0; i < numNotes; i++)  // Step through the notes
  {

    // If it matches a note in our list, return the frequency
    if (names[i] == note)
    {
      return(frequencies[i]);
    }
  }

  // If we looked through everything and didn't find a note,
  // return 0, as we still need to return something.
  return(0);
}
Code to Note
We combine the code from Part 10: Reading a Soft Potentiometer and Part 11: Using a Piezo Buzzer in the SIK Guide, and we recommend you read the "Code to Note" sections in each of those to understand how we are getting data from the soft pot as well as playing particular frequencies on the buzzer.
language:c
if ( (val > 10) && (val <= 160) )
{
    return 'c';
}
...
We pass the findNote(int val) function the analog-to-digital (ADC) value read from the soft pot. This information is stored in the val parameter. If we touch the soft pot towards the breadboard end, it will produce a lower value than if we touched it at the other end. The ADC value on the Arduino can be between 0 and 1023 (inclusive). So, we would read a value close to 10 if we touched it on the breadboard end and a value close to 1023 on the other end.
Since we divided up the soft pot's length into 6 mm segments, we also need to divide up the values we might receive from the soft pot. Let's say we touched the soft pot on the third segment (the one we labeled "E"), and the ADC value was 296 as a result. The first two if statements would return false, but the third one would be true, since 296 falls between 250 and 350. So, 'e' is returned as the note we pressed on the soft pot.
What You Should See
Once you have uploaded the code to the RedBoard, try lightly pressing on the soft potentiometer. You should hear some musical notes from the speaker!
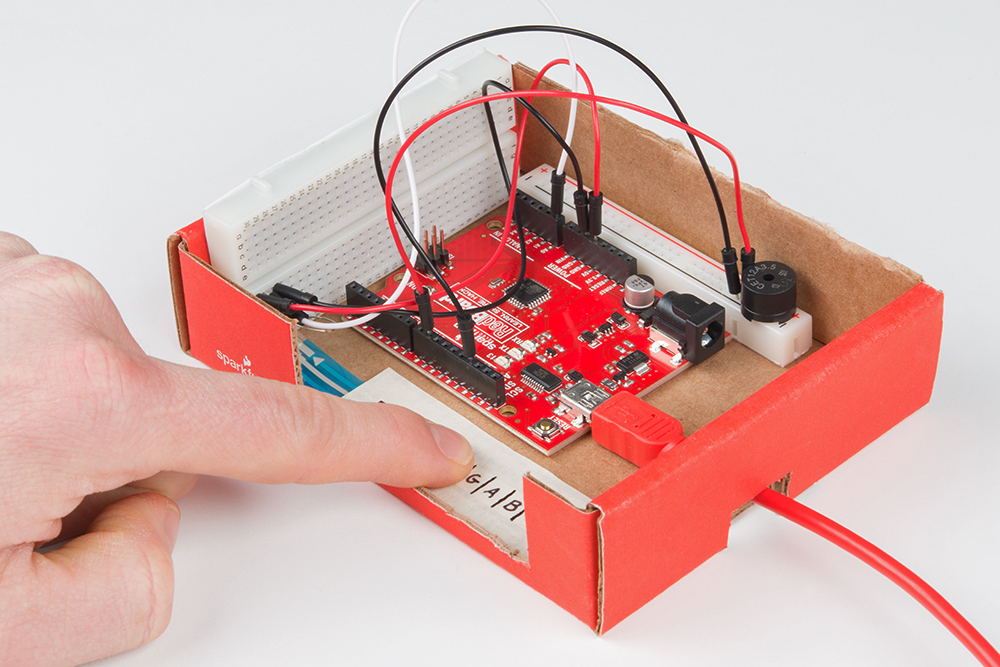
Want to play a song? How about Twinkle, Twinkle, Little Star ('C' is the first 'C' on the left in this case):
F, F, E, E, D, D, C (hold)
What other songs can you play? Here are some ideas to get you started.
Troubleshooting
No Sound
Given the size and shape of the piezo buzzer it is easy to miss the right holes on the breadboard. Try double checking its placement. Additionally, check the wiring for the soft pot.
Can't Press More than One Key
The soft potentiometer is incapable of detecting more than one press at a time. What happens if you try to press two keys at once?
Resources and Going Further
For more information about the SIK Keyboard Instrument, check out the resources below:
Taking the Next Steps
Now that you've built your keyboard and had a chance to play a song, we can look at taking the project a bit further.
- If you haven't already, try playing another song.
- Right now, the keyboard is set up to play a C major scale. Change it so it plays an E major scale, and then play Twinkle, Twinkle, Little Star in the key of E major. (hint: see this notes to frequencies chart)
- Change the keyboard so that it has 12 notes (of your choosing) instead of 8.
Other Projects
Need more inspiration for other Arduino-based projects? See these tutorials: