SIK Experiment Guide for the Arduino 101/Genuino 101 Board (French)
This Tutorial is Retired!
This tutorial covers concepts or technologies that are no longer current. It's still here for you to read and enjoy, but may not be as useful as our newest tutorials.
Expérience 4 : Piloter plusieurs LED
Introduction
Maintenant que vous avez fait clignoter votre LED, il est temps d'aller un peu plus loin en connectant six LED simultanément. Vous testerez également votre carte 101 en créant divers enchaînements lumineux. Cette expérience est parfaite pour commencer à vous entraîner à écrire vos propres programmes et à comprendre comment fonctionne votre carte 101.
En plus de contrôler les LED, vous apprendrez quelques astuces de programmation pour que votre code soit bien ordonné.
Vous aurez besoin des composants suivants :
- 1 plaque Breadboard
- 1 carte Arduino 101 ou Genuino 101
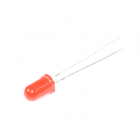
- 6 LED
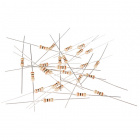
- 6 résistances 100 Ω
- 7 cavaliers
Vous n'avez pas le SIK ?
Pour réaliser cette expérience sans le SIK, nous vous suggérons d'utiliser les composants suivants :
Vous aurez également besoin d'une carte Arduino 101 ou Genuino 101.
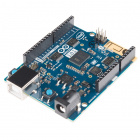
Arduino 101
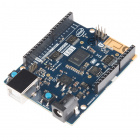
DEV-13787Genuino 101
DEV-13984Branchement du matériel
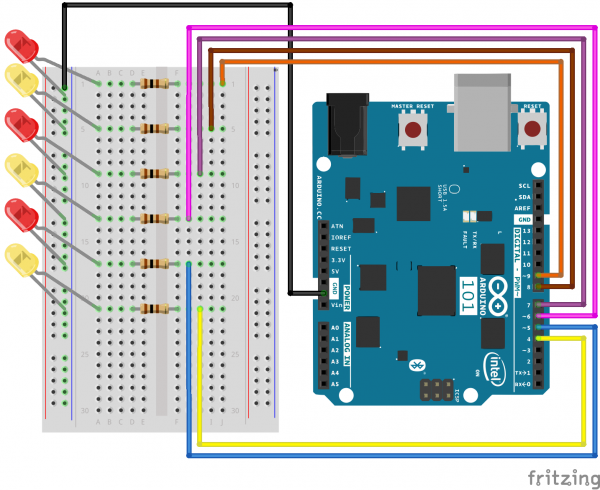
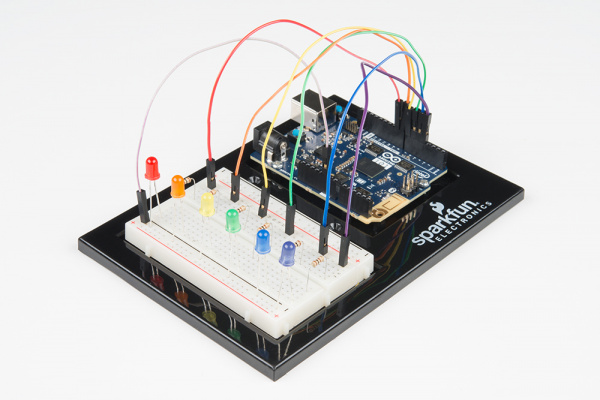
Vous êtes prêt à tout raccorder ? Consultez le schéma de câblage et les photos ci-dessous pour savoir comment faire.
| Composants polarisés | Faites particulièrement attention aux marquages indiquant comment placer les composants sur la plaque breadboard, car les composants polarisés ne peuvent être connectés à un circuit que dans une direction. |
Schéma de câblage de l'expérience
Ouverture du sketch
Ouvrez l'EDI Arduino sur votre ordinateur. Le codage en langage Arduino contrôlera votre circuit. Ouvrez le code du Circuit 4 en accédant au « Code du guide SIK 100 » que vous avez précédemment téléchargé et placé dans votre dossier « Examples ».
Pour ouvrir le code, cliquez sur : File > Examples > 101 SIK Guide Code > Circuit_04
Vous pouvez également copier et coller le code suivant dans l'EDI Arduino. Cliquez sur Télécharger et observez ce qu'il se passe.
language:cpp
/*
SparkFun Inventor's Kit
Example sketch 04

MULTIPLE LEDs

  Make six LEDs dance. Dance LEDs, dance!

This sketch was written by SparkFun Electronics,
with lots of help from the Arduino community.
This code is completely free for any use.
Visit http://learn.sparkfun.com/products/2 for SIK information.
Visit http://www.arduino.cc to learn more about Arduino.
*/

// To keep track of all the LED pins, we'll use an "array."
// An array lets you store a group of variables, and refer to them
// by their position, or "index." Here we're creating an array of
// six integers, and initializing them to a set of values:
int ledPins[] = {4,5,6,7,8,9};

void setup()
{
  //create a local variable to store the index of which pin we want to control
  int index;

  // For the for() loop below, these are the three statements:

  //   1\. index = 0;    Before starting, make index = 0.
  //   2\. index <= 5;   If index is less or equal to 5, run the following code
  //   3\. index++   Putting "++" after a variable means "add one to it".

  // When the test in statement 2 is finally false, the sketch
  // will continue.

  // This for() loop will make index = 0, then run the pinMode()
  // statement within the brackets. It will then do the same thing
  // for index = 2, index = 3, etc. all the way to index = 5.

  for(index = 0; index <= 5; index++)
  {
    pinMode(ledPins[index],OUTPUT);
  }
}

void loop()
{
  // This loop() calls functions that we've written further below.
  // We've disabled some of these by commenting them out (putting
  // "//" in front of them). To try different LED displays, remove
  // the "//" in front of the ones you'd like to run, and add "//"
  // in front of those you don't to comment out (and disable) those
  // lines.

  // Light up all the LEDs in turn
  oneAfterAnotherNoLoop();

  // Same as oneAfterAnotherNoLoop, but less typing
  //oneAfterAnotherLoop();

  // Turn on one LED at a time, scrolling down the line
  //oneOnAtATime();

  // Light the LEDs middle to the edges
  //pingPong();

  // Chase lights like you see on signs
  //marquee();

  // Blink LEDs randomly
  //randomLED();
}

/*
oneAfterAnotherNoLoop()
This function will light one LED, delay for delayTime, then light
the next LED, and repeat until all the LEDs are on. It will then
turn them off in the reverse order.
*/

void oneAfterAnotherNoLoop()
{
// time (milliseconds) to pause between LEDs
  int delayTime = 100;

  // turn all the LEDs on:

  digitalWrite(ledPins[0], HIGH);  //Turns on LED #0 (pin 4)
  delay(delayTime);                //wait delayTime milliseconds
  digitalWrite(ledPins[1], HIGH);  //Turns on LED #1 (pin 5)
  delay(delayTime);                //wait delayTime milliseconds
  digitalWrite(ledPins[2], HIGH);  //Turns on LED #2 (pin 6)
  delay(delayTime);                //wait delayTime milliseconds
  digitalWrite(ledPins[3], HIGH);  //Turns on LED #3 (pin 7)
  delay(delayTime);                //wait delayTime milliseconds
  digitalWrite(ledPins[4], HIGH);  //Turns on LED #4 (pin 8)
  delay(delayTime);                //wait delayTime milliseconds
  digitalWrite(ledPins[5], HIGH);  //Turns on LED #5 (pin 9)
  delay(delayTime);                //wait delayTime milliseconds

  // turn all the LEDs off:

  digitalWrite(ledPins[5], LOW);   //Turn off LED #5 (pin 9)
  delay(delayTime);                //wait delayTime milliseconds
  digitalWrite(ledPins[4], LOW);   //Turn off LED #4 (pin 8)
  delay(delayTime);                //wait delayTime milliseconds
  digitalWrite(ledPins[3], LOW);   //Turn off LED #3 (pin 7)
  delay(delayTime);                //wait delayTime milliseconds
  digitalWrite(ledPins[2], LOW);   //Turn off LED #2 (pin 6)
  delay(delayTime);                //wait delayTime milliseconds
  digitalWrite(ledPins[1], LOW);   //Turn off LED #1 (pin 5)
  delay(delayTime);                //wait delayTime milliseconds
  digitalWrite(ledPins[0], LOW);   //Turn off LED #0 (pin 4)
  delay(delayTime);                //wait delayTime milliseconds
}

/*
oneAfterAnotherLoop()

This function does exactly the same thing as oneAfterAnotherNoLoop(),
but it takes advantage of for() loops and the array to do it with
much less typing.
*/

void oneAfterAnotherLoop()
{
  int index;
  int delayTime = 100; // milliseconds to pause between LEDs
                       // make this smaller for faster switching

  // Turn all the LEDs on:

  // This for() loop will step index from 0 to 5
  // (putting "++" after a variable means add one to it)
  // and will then use digitalWrite() to turn that LED on.

  for(index = 0; index <= 5; index++)
  {
    digitalWrite(ledPins[index], HIGH);
    delay(delayTime);
  }

  // Turn all the LEDs off:

  // This for() loop will step index from 5 to 0
  // (putting "--" after a variable means subtract one from it)
  // and will then use digitalWrite() to turn that LED off.

  for(index = 5; index >= 0; index--)
  {
    digitalWrite(ledPins[index], LOW);
    delay(delayTime);
  }
}

/*
oneOnAtATime()

This function will step through the LEDs,
lighting only one at at time.
*/

void oneOnAtATime()
{
  int index;
  int delayTime = 100; // milliseconds to pause between LEDs
                       // make this smaller for faster switching

  // step through the LEDs, from 0 to 5

  for(index = 0; index <= 5; index++)
  {
    digitalWrite(ledPins[index], HIGH);  // turn LED on
    delay(delayTime);                    // pause to slow down
    digitalWrite(ledPins[index], LOW);   // turn LED off
  }
}

/*
pingPong()

This function will step through the LEDs,
lighting one at at time in both directions.
*/

void pingPong()
{
  int index;
  int delayTime = 100; // milliseconds to pause between LEDs
                       // make this smaller for faster switching

  // step through the LEDs, from 0 to 5

  for(index = 0; index <= 5; index++)
  {
    digitalWrite(ledPins[index], HIGH);  // turn LED on
    delay(delayTime);                    // pause to slow down
    digitalWrite(ledPins[index], LOW);   // turn LED off
  }

  // step through the LEDs, from 5 to 0

  for(index = 5; index >= 0; index--)
  {
    digitalWrite(ledPins[index], HIGH);  // turn LED on
    delay(delayTime);                    // pause to slow down
    digitalWrite(ledPins[index], LOW);   // turn LED off
  }
}

/*
marquee()

This function will mimic "chase lights" like those around signs.
*/

void marquee()
{
  int index;
  int delayTime = 200; // milliseconds to pause between LEDs
                       // Make this smaller for faster switching

  // Step through the first four LEDs
  // (We'll light up one in the lower 3 and one in the upper 3)

  for(index = 0; index <= 2; index++) // Step from 0 to 3
  {
    digitalWrite(ledPins[index], HIGH);    // Turn a LED on
    digitalWrite(ledPins[index+3], HIGH);  // Skip four, and turn that LED on
    delay(delayTime);                      // Pause to slow down the sequence
    digitalWrite(ledPins[index], LOW);     // Turn the LED off
    digitalWrite(ledPins[index+3], LOW);   // Skip four, and turn that LED off
  }
}

/*
randomLED()

This function will turn on random LEDs. Can you modify it so it
also lights them for random times?
*/

void randomLED()
{
  int index;
  int delayTime;

  // The random() function will return a semi-random number each
  // time it is called. See http://arduino.cc/en/Reference/Random
  // for tips on how to make random() even more random.

  index = random(5);    // pick a random number between 0 and 5
  delayTime = 100;

  digitalWrite(ledPins[index], HIGH);  // turn LED on
  delay(delayTime);                    // pause to slow down
  digitalWrite(ledPins[index], LOW);   // turn LED off
}
À propos du code
int ledPins[] = {4,5,6,7,8,9};
Quand vous devez gérer de nombreuses variables, un « tableau » représente un moyen pratique de les regrouper. Voici comment créer un tableau d'entiers (appelé ledPins) contenant six éléments. Chaque élément est référencé par son index. Le premier élément est l'index de [0].
digitalWrite(ledPins[0], HIGH);
Vous faites référence aux éléments d'un tableau en utilisant leur position. Le premier élément se trouve à la position 0, le deuxième à la position 1, etc. Dans la référence « ledPins[x] », x désigne la position. Ici, nous définissons la broche numérique 4 en position Haute, car c'est l'élément 4 du tableau qui se trouve à la position 0.
index = random(5);
Les ordinateurs réalisent la même chose chaque fois. Mais parfois, vous préférez un comportement aléatoire, comme la simulation du lancement d'un dé. La fonction random() est parfaite pour cela. Vous trouverez de plus amples informations sur http://arduino.cc/en/reference/random.
Ce que vous devez voir
Le résultat est similaire à l'expérience 1, mais au lieu d'une LED, toutes les LED doivent clignoter. Dans le cas contraire, vérifiez que vous avez monté correctement le circuit et téléchargé le code sur votre carte. SI le problème persiste, consultez la section Dépannage.
Dépannage
Certaines LED ne s'allument pas
Une LED peut être facilement insérée à l'envers. Vérifiez l'orientation des LED qui ne fonctionnent pas.
Exécution dans un ordre incorrect
Avec huit fils, il est facile d'en manquer deux. Vérifiez que la première LED est connectée à la broche 4 et que les autres suivent.
Tout recommencer à zéro
Un fil peut facilement être à la mauvaise place sans que vous ne vous en rendiez compte. Tout déconnecter et recommencer représente souvent le moyen le plus facile de régler le problème.


