Setting up Raspbian (and DOOM!)
 jimblom
Introduction
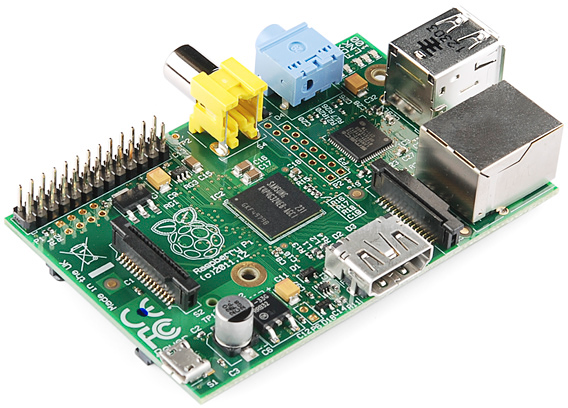
The Raspberry Pi is a cross between a typical embedded system -- like an Arduino -- and a desktop computer. The Pi packs a 700MHz ARM11 Core with 512MB of RAM, HDMI and audio outputs, 2 USB ports, an Ethernet jack, and an SD socket with support for up to a 32GB SD card. In the eyes of some, it's one of the more powerful, cost-effective embedded boards to hit the market. To others, it's one of the most compact, bare-bones personal computers ever to grace the electronics world with it's presence. In either case, it's here to blur the line between the world of embedded electronics and personal computing.
The Raspberry Pi is a great platform on which to learn Linux and programming. It's also a powerful solution for many "Internet-of-Things" projects out there, because it's so easy to get connected to the Internet. It can run Python scripts, or even compile programs written in C. It's a full-blown computer!
And, of course, it can be used to play games.
Covered in This Tutorial
In this tutorial, we'll show you how to quickly get up-and-running with the Raspberry Pi. We'll set the Pi up with the most popular, community-driven Linux distribution available: Raspbian. Next, we'll show you how to set up Raspbian, and access some of the features included with it.
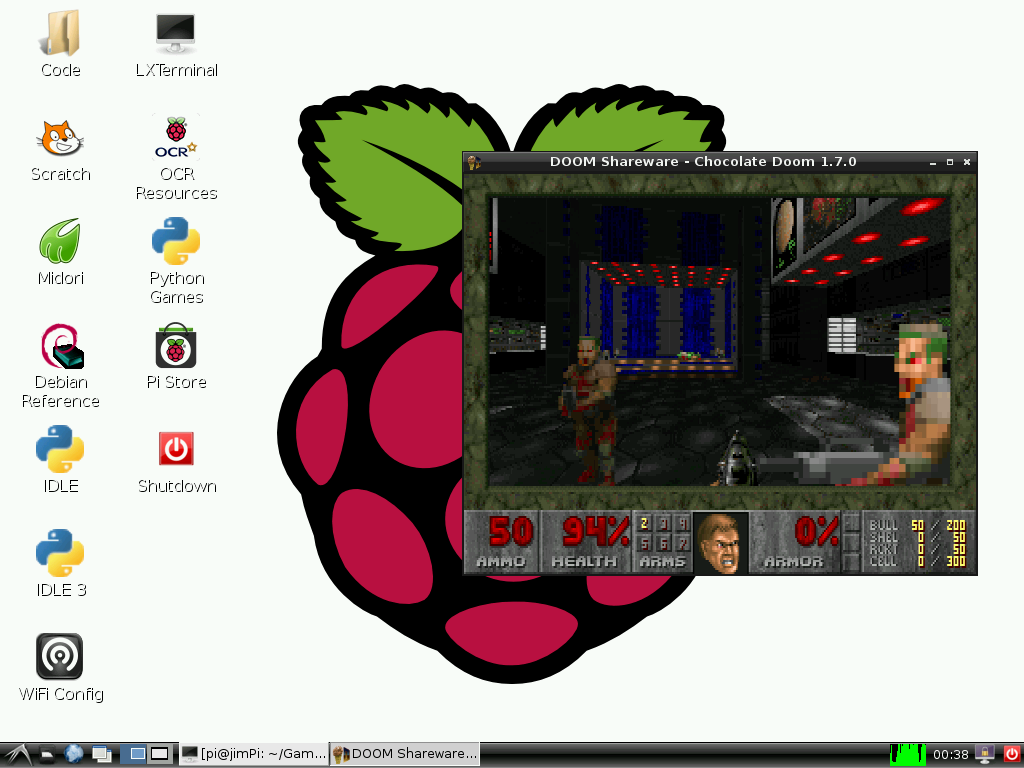
Finally, and most importantly, we'll show you how to set up and run Chocolate Doom, a Doom source port that runs beautifully on the little Pi. Mmmm chocolate pie.
Required Materials
To follow along with this tutorial, you'll need the following materials:
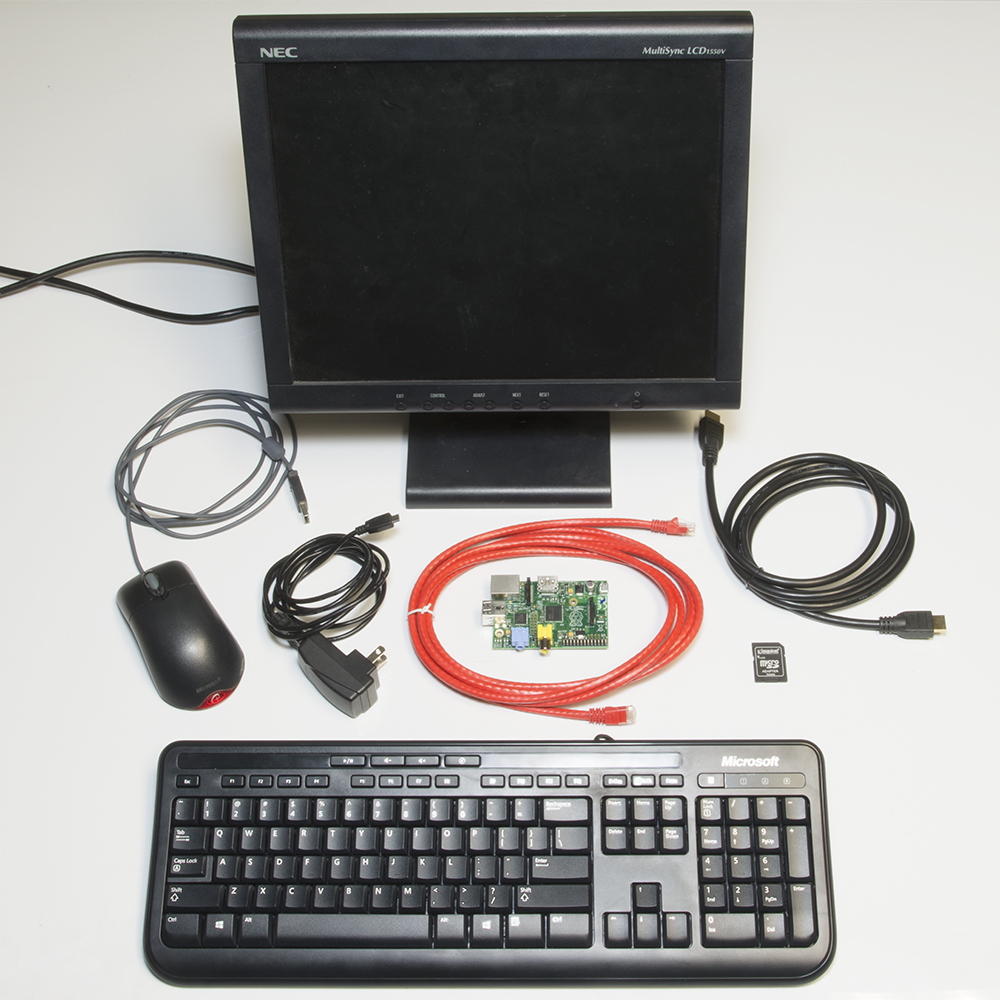
- Raspberry Pi Model B or Model A (has less RAM and no Ethernet)
- A 5V power supply with a micro USB termination. The supply should be able to source at least 700mA. Most phone chargers (with micro USB cables) should work.
- An SD Card no smaller than 4GB, and no less than class 4.
- A USB keyboard and mouse.
- A display connected to either the HDMI or RCA composite video output.
- If your monitor only has a VGA port, there are HDMI to VGA adapters to convert between the two. (You may need a beefier power supply if you're using that.)
- If your monitor only has DVI, converting from HDMI is easy with an HDMI to DVI cable.
- An ethernet cable and a connection to an Internet-connected network. (Optional, but very useful to get software updates [and Doom].)
- Alternatively, you can use a USB WiFi module with the Pi. Check out our Wireless on the Pi tutorial for help setting that up.
- Headphones or speakers with a 3.5mm stereo jack termination (optional, unless, for some reason, you don't want to hear the dying wails of former humans).
Suggested Reading
This tutorial aims to be as Raspberry Pi beginnger-friendly as possible. No previous knowledge of electronics is required. Feel free to jump right in on the next page. If you want to learn a little bit about what's going on behind the scenes, here are some beginner tutorials we recommend reading:
- What is Electricity?
- Voltage, Current, Resistance, and Ohm's Law
- Analog vs. Digital
- Series and Parallel Circuits