Setting up a Raspberry Pi 3 as an Access Point
 Shawn Hymel
Set Up WiFi Access Point
Make sure your Raspberry Pi is connected to the Internet. Open a terminal window (either in a console window or over a serial/SSH connection).
Install Packages
To install the required packages, enter the following into the console:
language:bash
sudo apt-get -y install hostapd dnsmasq
Hostapd is a program that allows you to use the WiFi radio as an access point, and Dnsmasq is a lightweight combination of DHCP and DNS services (handing out IP addresses and translating domain names into IP addresses).
Set Static IP Address
In recent versions of Raspbian, network configuration is managed by the dhcpcd program. As a result, we'll need to tell it to ignore the wireless interface, wlan0, and set a static IP address elsewhere.
Edit the dhcpcd file:
language:bash
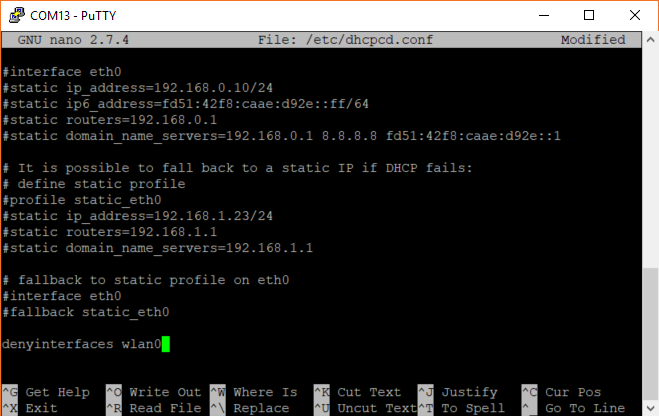
sudo nano /etc/dhcpcd.conf
Scroll down, and at the bottom of the file, add:
language:bash
denyinterfaces wlan0
Your terminal window should look similar to the image below.
Save and exit by pressing ctrl + x and y when asked.
Next, we need to tell the Raspberry Pi to set a static IP address for the WiFi interface. Open the interfaces file with the following command:
language:bash
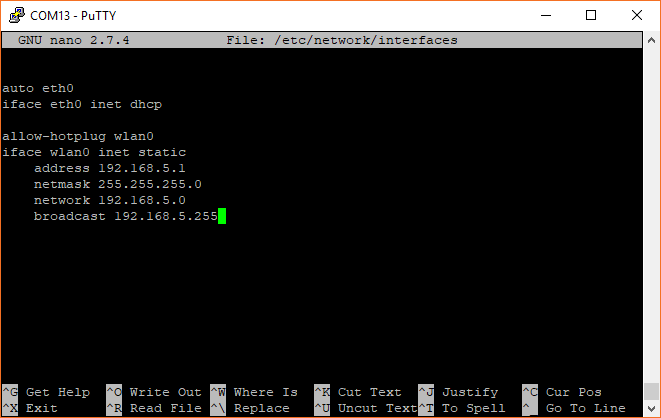
sudo nano /etc/network/interfaces
At the bottom of that file, add the following:
language:bash
auto lo
iface lo inet loopback

auto eth0
iface eth0 inet dhcp

allow-hotplug wlan0
iface wlan0 inet static
    address 192.168.5.1
    netmask 255.255.255.0
    network 192.168.5.0
    broadcast 192.168.5.255
Your terminal window should look similar to the image below.
Save and exit by pressing ctrl + x and y when asked.
Configure Hostapd
We need to set up hostapd to tell it to broadcast a particular SSID and allow WiFi connections on a certain channel. Edit the hostapd.conf file (this will create a new file, as one likely does not exist yet) with this command:
language:bash
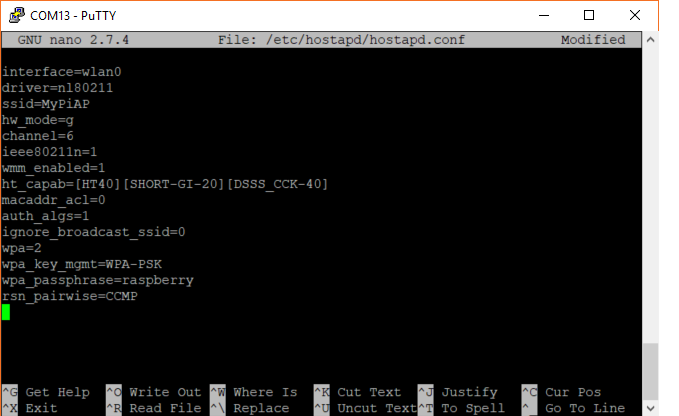
sudo nano /etc/hostapd/hostapd.conf
Enter the following into that file. Feel fee to change the ssid (WiFi network name) and the wpa_passphrase (password to join the network) to whatever you'd like. You can also change the channel to something in the 1-11 range (if channel 6 is too crowded in your area).
language:bash
interface=wlan0
driver=nl80211
ssid=MyPiAP
hw_mode=g
channel=6
ieee80211n=1
wmm_enabled=1
ht_capab=[HT40][SHORT-GI-20][DSSS_CCK-40]
macaddr_acl=0
auth_algs=1
ignore_broadcast_ssid=0
wpa=2
wpa_key_mgmt=WPA-PSK
wpa_passphrase=raspberry
rsn_pairwise=CCMP
Your terminal window should look similar to the image below.
Save and exit by pressing ctrl + x and y when asked.
Unfortunately, hostapd does not know where to find this configuration file, so we need to provide its location to the hostapd startup script. Open /etc/default/hostapd:
language:bash
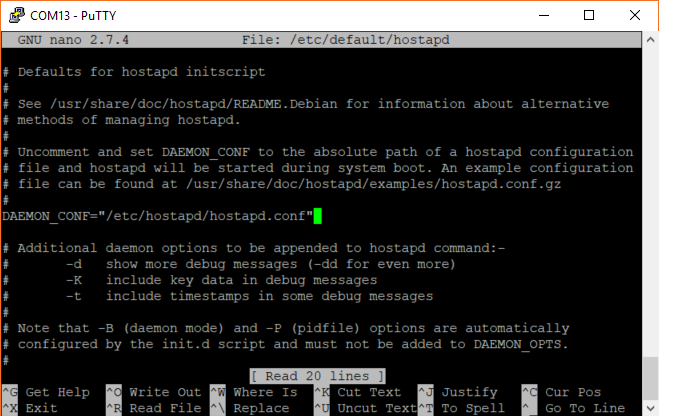
sudo nano /etc/default/hostapd
Find the line #DAEMON_CONF="" and replace it with:
language:bash
DAEMON_CONF="/etc/hostapd/hostapd.conf"
Your terminal window should look similar to the image below.
Save and exit by pressing ctrl + x and y when asked.
Configure Dnsmasq
Dnsmasq will help us automatically assign IP addresses as new devices connect to our network as well as work as a translation between network names and IP addresses. The .conf file that comes with Dnsmasq has a lot of good information in it, so it might be worthwhile to save it (as a backup) rather than delete it. After saving it, open a new one for editing:
language:bash
sudo mv /etc/dnsmasq.conf /etc/dnsmasq.conf.bak
sudo nano /etc/dnsmasq.conf
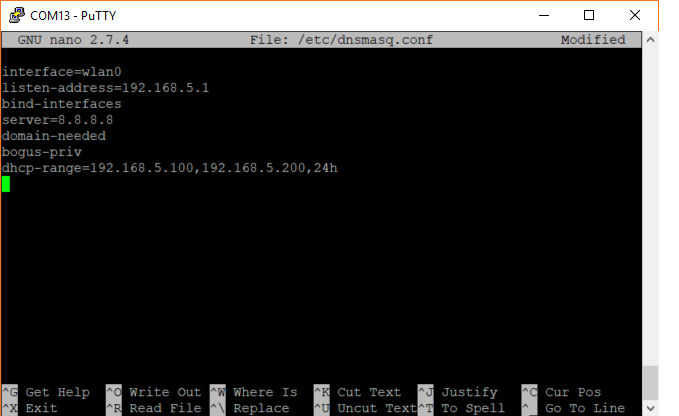
In the blank file, paste in the text below. Note that we set up DHCP to assign addresses to devices between 192.168.5.100 and 192.168.5.200. Remember that 192.168.5.1 is reserved for the Pi. So, anything between 192.168.5.2 - 192.168.5.9 and between 192.168.5.201 - 192.168.5.254 can be used for devices with static IP addresses.
language:bash
interface=wlan0
listen-address=192.168.5.1
bind-interfaces
server=8.8.8.8
domain-needed
bogus-priv
dhcp-range=192.168.5.100,192.168.5.200,24h
Your terminal window should look similar to the image below.
Save and exit by pressing ctrl + x and y when asked.
Test WiFi connection
Restart the Raspberry Pi using the following command:
language:bash
sudo reboot
After your Pi restarts (no need to log in), you should see MyPiAP appear as a potential wireless network from your computer.
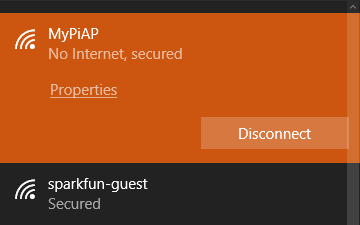
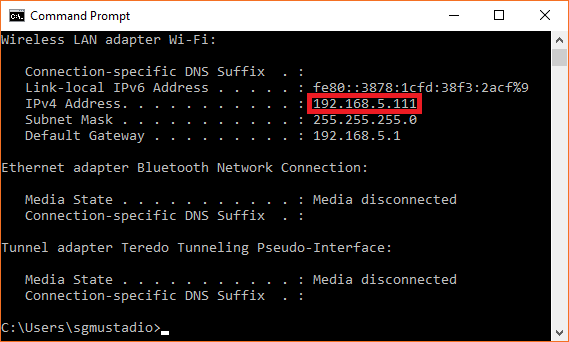
Connect to it (the network password is raspberry, unless you changed it in the hostapd.conf file). Open a terminal on your computer and enter the command ipconfig (Windows) or ifconfig (Mac, Linux). You should see that you have been assigned an IP address in the 192.168.5.100 - 192.168.5.200 range.
Here's an example of what you may see after connecting wirelessly to the Pi.
If you just want to use the Pi as a standalone WiFi access point, you can stop here. If you want to connect it to another network (over Ethernet) in order to share Internet (much like a WiFi router), continue on.