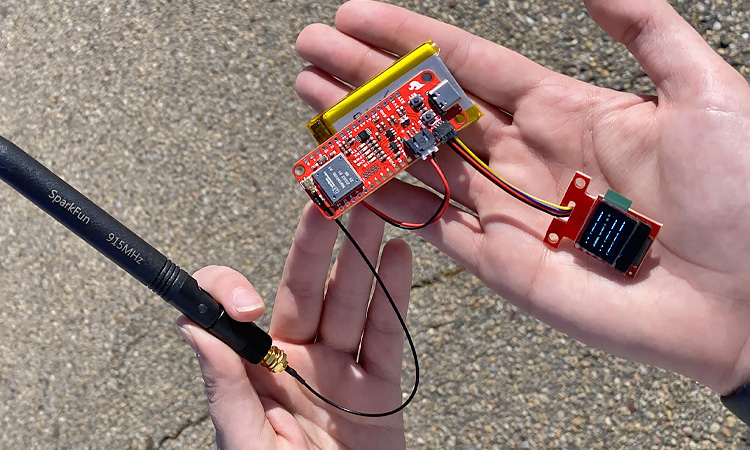
Sending Sensor Data over LoRa
Transmit/Receive Code
Once the libraries are installed, go ahead and open up two separate blank sketches in Arduino. One sketch will house the transmitter program, while the other will be for our receiver:
// Peer to Peer: Monitor Sensor Data using LoRa - Transmitter
// SparkFun Electronics, Mariah Kelly, November 2022
// Original transmit file can be found here: https://cdn.sparkfun.com/assets/learn_tutorials/1/4/9/4/Transmit-v3.ino

// Include necessary libraries
#include <RadioLib.h>         // Transmit & receive - https://github.com/jgromes/RadioLib/archive/refs/heads/master.zip
#include "SparkFunBME280.h"   // Qwiic Atmospheric Sensor library - https://github.com/sparkfun/SparkFun_BME280_Arduino_Library/archive/master.zip

// SX1262 has the following connections:
// NSS pin:   D36
// DIO1 pin:  D40
// NRST pin:  D44
// BUSY pin:  D39
SX1262 radio = new Module(D36, D40, D44, D39, SPI1);
BME280 mySensor;

void setup() {
  Serial.begin(115200);  // Remember to set this value in your serial monitor as well!
  Serial.println("Reading basic values from BME280");

  Wire.begin();   // Begin I2C communication

  if (mySensor.beginI2C() == false) {
    Serial.println("The sensor did not respond. Please check wiring.");
    while (1); //Freeze
  }

  // Initialize SX1262 with default settings
  Serial.print(F("[SX1262] Initializing ... "));

  int state = radio.begin(915.0, 250.0, 7, 5, 0x34, 20, 10, 0, false);;

  if (state == RADIOLIB_ERR_NONE) {
    Serial.println(F("success!"));
  } else {
    Serial.print(F("failed, code "));
    Serial.println(state);
    while (true);
  }
}

void loop() {

  Serial.println(F("[SX1262] Transmitting packet ... "));

  // Retrieve environmental data and declare as integers
  int temp = (int)mySensor.readTempF();
  int humidity = (int)mySensor.readFloatHumidity();
  int alt = (int)mySensor.readFloatAltitudeFeet();

  // Print to serial monitor (use this to double check that your sent data is correct and that your sensor is taking readings)
  Serial.print(temp);
  Serial.print(" Degrees ");
  Serial.print(humidity);
  Serial.print("% ");
  Serial.print(alt);
  Serial.println(" Feet");

  // Create a String to send (data must be sent as a string, so we'll tell our computer friend that we want our integers to be set as strings)
  String myData = String(temp) + " Degrees" + String(humidity) + "% Humid " +    String(alt) + " Feet";  // I added some units for our data here as well

  // Transmit data and units
  int state = radio.transmit(myData);

  if (state == RADIOLIB_ERR_NONE) {
    // The packet was successfully transmitted
    Serial.println(F("Success!"));

    // Print measured data rate
    Serial.print(F("[SX1262] Datarate:\t"));
    Serial.print(radio.getDataRate());
    Serial.println(F(" bps"));

  } else if (state == RADIOLIB_ERR_PACKET_TOO_LONG) {
    // The supplied packet was longer than 256 bytes
    Serial.println(F("Packet size too long!"));

  } else if (state == RADIOLIB_ERR_TX_TIMEOUT) {
    // Timeout occurred while transmitting packet
    Serial.println(F("Timeout!"));

  } else {
    // Some other error occurred
    Serial.print(F("Error"));
    Serial.println(state);
  }

  // Wait for a second before transmitting again
  delay(1000);
}
Once your transmitter is up and running, and you’re getting readings from your atmospheric sensor, we can move on to the receiver!
// Peer to Peer: Monitor Sensor Data using LoRa - Receiver
// SparkFun Electronics, Mariah Kelly, November 2022
// Original receive file can be found here: https://cdn.sparkfun.com/assets/learn_tutorials/1/4/9/4/Receive-v3.ino

// Include necessary libraries
#include <RadioLib.h>
#include <Wire.h>
#include <SFE_MicroOLED.h>  // Include the SFE_MicroOLED library

#define PIN_RESET 9
#define DC_JUMPER 1
MicroOLED oled(PIN_RESET, DC_JUMPER);    // I2C declaration

// SX1262 has the following connections:
// NSS pin:   10
// DIO1 pin:  2
// NRST pin:  3
// BUSY pin:  9
//SX1262 radio = new Module(10, 2, 3, 9);
SX1262 radio = new Module(D36, D40, D44, D39, SPI1);

void setup() {
  Serial.begin(9600);   // Remember to set this value in your serial monitor as well!

  Wire.begin();    // Begin I2C communication

  oled.begin();    // Initialize the OLED
  oled.clear(ALL); // Clear the display's internal memory
  oled.display();  // Display what's in the buffer (splashscreen)
  delay(1000);     // Delay 1000 ms
  oled.setFontType(0);
  oled.clear(PAGE); // Clear the buffer.

  randomSeed(analogRead(A0) + analogRead(A1));

  // initialize SX1262 with default settings
  Serial.print(F("[SX1262] Initializing ... "));

  int state = radio.begin(915.0, 250.0, 7, 5, 0x34, 20, 10, 0, false);

  if (state == RADIOLIB_ERR_NONE) {
    Serial.println(F("success!"));
  } else {
    Serial.print(F("failed, code "));
    Serial.println(state);
    while (true);
  }
}

void loop() {

  Serial.print(F("[SX1262] Waiting for incoming transmission ... "));

  String str;   // Declare a data type to receive (this must be a string)
  int state = radio.receive(str);   // Receive data from transmitter

  if (state == RADIOLIB_ERR_NONE) {
    // The packet was successfully received
    Serial.println(F("Success!"));

    // Print that the receiver was successful to the OLED screen (the back and forth of the "Success" text and data will act as a signifier that data is still being received!)
    oled.clear(PAGE);
    oled.setCursor(0, 0);
    oled.print("Success!");
    oled.display();
    delay(1000);

    // Print the data of the packet to the serial monitor
    Serial.print(F("[SX1262] Data:\t\t"));
    Serial.println(str);

    // Print the data of the packet to the OLED screen
    oled.clear(PAGE);
    oled.setCursor(0, 0);
    oled.print(str);
    oled.display();
    delay(2000);
    oled.clear(PAGE);

    // Print the RSSI (Received Signal Strength Indicator) of the last received packet
    Serial.print(F("[SX1262] RSSI:\t\t"));
    Serial.print(radio.getRSSI());
    Serial.println(F(" dBm"));

    // Print the SNR (Signal-to-Noise Ratio) of the last received packet
    Serial.print(F("[SX1262] SNR:\t\t"));
    Serial.print(radio.getSNR());
    Serial.println(F(" dB"));

  } else if (state == RADIOLIB_ERR_RX_TIMEOUT) {
    // Timeout occurred while waiting for a packet
    Serial.println(F("Timeout!"));    // We won't print this to the screen since the Success/data print will freeze on its own if a timeout occurs

  } else if (state == RADIOLIB_ERR_CRC_MISMATCH) {
    // The packet was received, but is malformed
    Serial.println(F("CRC error!"));

    // Print CRC Error message to OLED screen
    oled.clear(PAGE);
    oled.setCursor(0, 0);
    oled.print("CRC Error!");
    oled.display();
    delay(1000);
    oled.clear(PAGE);

  } else {
    // Some other error occurred
    Serial.print(F("Error"));
    Serial.println(state);

    // Print Error message to OLED screen
    oled.clear(PAGE);
    oled.setCursor(0, 0);
    oled.print("Error! ");
    oled.print(state);
    oled.display();
    delay(1000);
    oled.clear(PAGE);
  }
}
Now that our transmitter and receiver are chatting with each other, we can go out and test how far the signal will reach! Feel free to play around with your settings a bit, just remember to change them in both the transmitter and receiver settings AND to check your regional LoRa Frequency Band parameters (for the U.S. this range is 902 - 928MHz).
We managed to get 0.3 miles away before we had to turn around because of the highway, but were still getting a decent signal from there! Let us know how far you can go!