SAMD21 Mini/Dev Breakout Hookup Guide
 jimblom
Example: Real-Time Clock
Both of the SAMD21 boards have a 32.768kHz crystal connected to their external clock source, and the chips themselves have built-in features that make time-keeping with an RTC super-easy.
RTCs are a critical component for any project that needs a precise idea of how much time has passed. There are all sorts of applications that can take advantage of accurate time-keeping, including web security, data logging, and of course DIY alarm clocks!
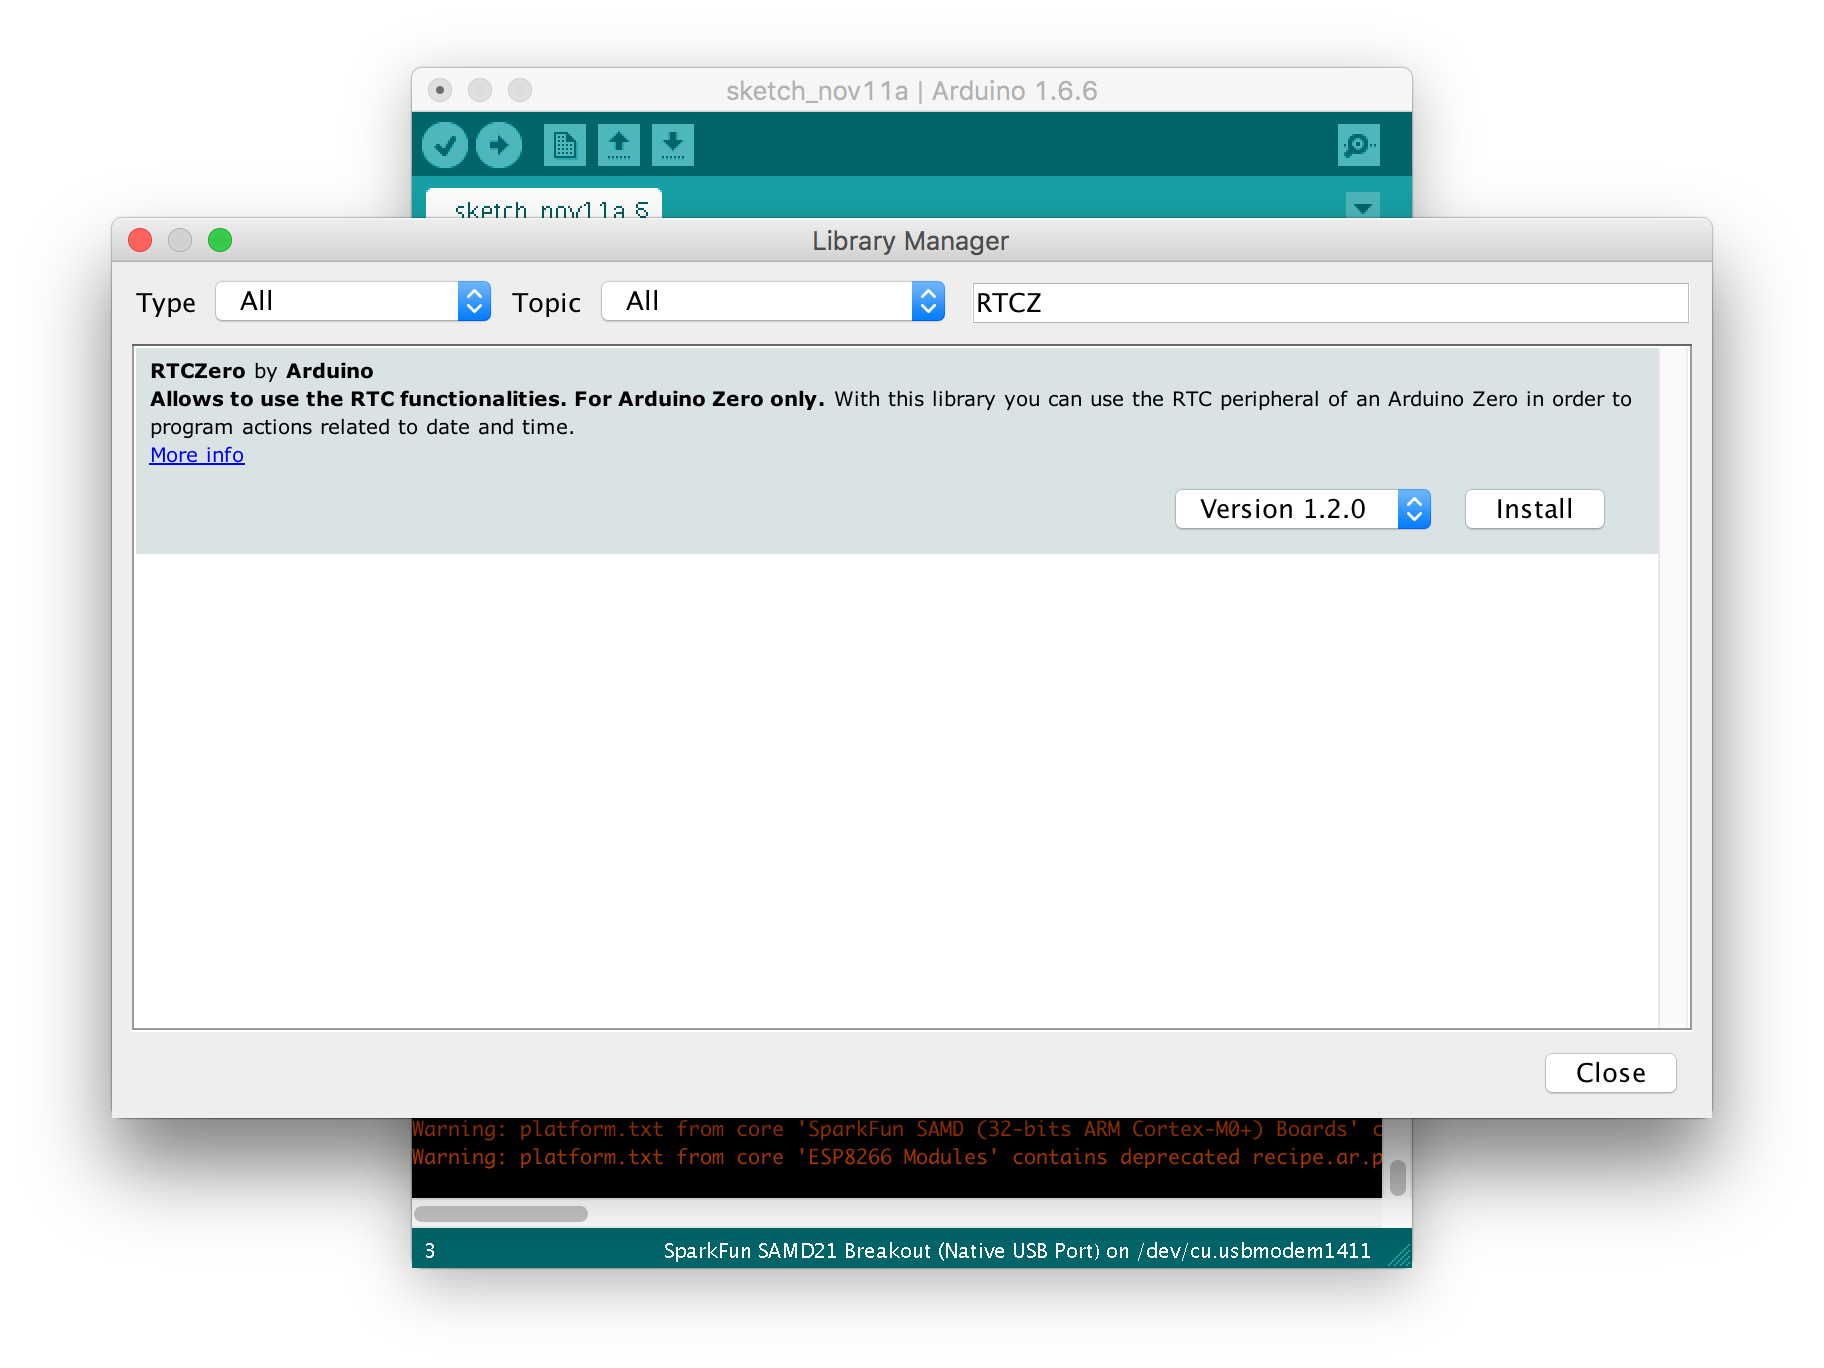
Install the RTCZero Library
To use the RTC in Arduino, you'll first have to install the RTCZero library. This library can be downloaded using Arduino's library manager.
In Arduino, navigate to Sketch > Include Library > Manage Libraries.... In the library manager that pops up, search for "RTCZero", and install the latest version.
Once you've installed the RTCZero library, copy and paste our RTCSerialAlarm sketch from below. No extra components are required, though it's easy to imagine adding displays of all varieties, and/or buttons to set the time and alarm.
language:c
#include <RTCZero.h> // Include RTC library - make sure it's installed!

RTCZero rtc; // Create an RTC object
byte lastSecond = 60;
byte alarmMinute = 1; // Minutes after clock starts to sound alarm
bool alarmTriggered = false;

void setup()
{
  SerialUSB.begin(9600);
  while (!SerialUSB) ; // Wait for Serial monitor to open

  byte hour = prompt("Hour", 0, 23); // Get the hour
  byte minute = prompt("Minute", 0, 59); // Get the minute
  byte second = prompt("Second", 0, 59); // Get the second
  byte day = prompt("Day", 0, 31); // Get the day
  byte month = prompt("Month", 0, 12); // Get the month
  byte year = prompt("Year (YY)", 0, 99); // Get the year

  SerialUSB.println("Press any key to begin");
  while (!SerialUSB.available()) ; // Wait for keypress to start clock

  rtc.begin(); // To use the RTC, first begin it
  rtc.setTime(hour, minute, second); // Then set the time
  rtc.setDate(day, month, year); // And the date
  SerialUSB.println("RTC Started!");

  SerialUSB.println("Setting alarm for " + String(alarmMinute) + " minute(s).");
  SerialUSB.println();
  byte alarmHour = hour + ((alarmMinute + minute) / 60);
  alarmMinute = (alarmMinute + minute) % 60;

  // To set an alarm, use the setAlarmTime function.
  rtc.setAlarmTime(alarmHour, alarmMinute, second);
  // After the time is set, enable the alarm, configuring
  // which time values you want to trigger the alarm
  rtc.enableAlarm(rtc.MATCH_HHMMSS); // Alarm when hours, minute, & second match
  // When the alarm triggers, alarmMatch will be called:
  rtc.attachInterrupt(alarmMatch);
}

void loop()
{
  // If the second value is different:
  if (lastSecond != rtc.getSeconds())
  {
    printTime(); // Print the time
    lastSecond = rtc.getSeconds(); // Update lastSecond

    if (alarmTriggered) // If the alarm has been triggered
    {
      SerialUSB.println("Alarm!"); // Print alarm!
    }
  }
}

void printTime()
{
  // Use rtc.getDay(), .getMonth(), and .getYear()
  // To get the numerical values for the date.
  SerialUSB.print(rtc.getDay()); // Print day
  SerialUSB.print("/");
  SerialUSB.print(rtc.getMonth()); // Print Month
  SerialUSB.print("/");
  SerialUSB.print(rtc.getYear()); // Print year
  SerialUSB.print("\t");

  // Use rtc.getHours, .getMinutes, and .getSeconds()
  // to get time values:
  SerialUSB.print(rtc.getHours()); // Print hours
  SerialUSB.print(":");
  if (rtc.getMinutes() < 10)
    SerialUSB.print('0'); // Pad the 0
  SerialUSB.print(rtc.getMinutes()); // Print minutes
  SerialUSB.print(":");
  if (rtc.getSeconds() < 10)
    SerialUSB.print('0'); // Pad the 0
  SerialUSB.print(rtc.getSeconds()); // Print seconds
  SerialUSB.println();
}

void alarmMatch()
{
  // This function is called when the alarm values match
  // and the alarm is triggered.
  alarmTriggered = true; // Set the global triggered flag
}

// Helper function to prompt for a value, and return
// it if it's within a valid range.
byte prompt(String ask, int mini, int maxi)
{
  SerialUSB.print(ask + "? ");
  while (!SerialUSB.available()) ; // Wait for numbers to come in
  byte rsp = SerialUSB.parseInt();
  if ((rsp >= mini) && (rsp <= maxi))
  {
    SerialUSB.println(rsp);
    return rsp;
  }
  else
  {
    SerialUSB.println("Invalid.");
    return mini;
  }
}
Once uploaded, open the serial monitor, and follow along with the prompts to enter the time and date. Then press another key to start running the clock!
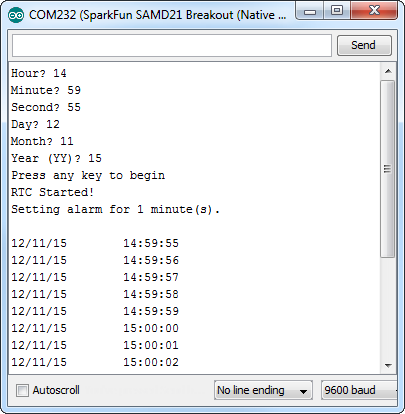
After a minute, the alarm will trigger. You'll need to call disableAlarm() to turn it off. How about adding a button to disable it!?
For help using the RTCZero library, read through the comments in the sketch, or consult Arduino's reference page.