RETIRED - MG2639 Cellular Shield Hookup Guide
This Tutorial is Retired!
This tutorial covers concepts or technologies that are no longer current. It's still here for you to read and enjoy, but may not be as useful as our newest tutorials.
 jimblom
Installing and Using the Arduino Library
Now that all of the nitty-gritty hardware stuff is out of the way, it's time to get to some Arduino coding! First, we'll get you set up with the SFE_MG2639_CellularShield library, then we'll delve into some example sketches.
(That release of Arduino included an improved version of the SoftwareSerial library, which the Cellular Shield library depends on.)
Download and Install the Arduino Library
We've written an Arduino library specifically for the MG2639 Cellular Shield. Click the button below to download it, or clone it from our GitHub repository.
For help installing the library, please check out our Installing an Arduino Library tutorial. You'll need to copy the library into a "libraries" folder within your Arduino sketchbook.
Try the MG2639_GetInfo Example
To prove that your cellular shield is working, try running the most simple example sketch included with the library. MG2639_GetInfo.ino is a simple sketch that turns the shield on, verifies communication with it, and prints all sorts of information like your CIMI, ICCID, and phone number.
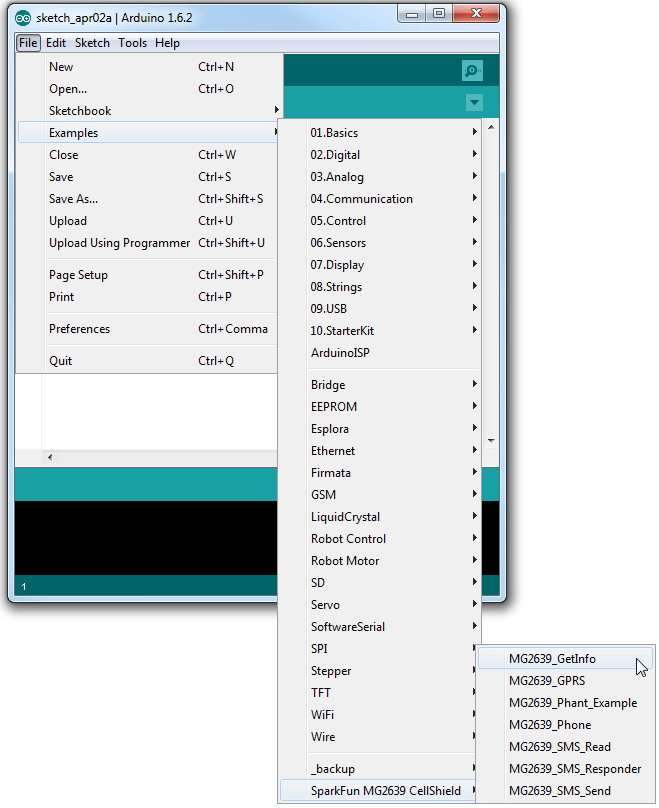
Open the sketch by going to File > Examples > SparkFun MG2639 CellShield > MG2639_GetInfo.
Then, after verifying that your SIM card, antennas, and power supply are all connected, upload the sketch.
To actually set the sketch into motion, open up your serial monitor and send any character. After a few moments, the monitor should respond with a number of information tidbits about your shield:

The sketch will finish faster if you turn the module on before running it. Try holding down the "BOOT" button until you see the "RSSI" blink steadily at 1Hz. It's a good idea to play with the BOOT button until you have a good idea of how it controls the module.
Using the Library: Initialization
This example introduces a handful of functions and code lines you'll become very familiar with as you use the library. To begin, make sure you include the "SFE_MG2639_CellShield" library at the top of any sketch. The library also makes use of the SoftwareSerial library, which you'll need to include as well.
language:c
// The MG2639 library uses the SoftwareSerial library, and
// requires it to be included first.
#include <SoftwareSerial.h>
// Include the SFE_MG2639_CellShield library to access
// the cellular functions.
#include <SFE_MG2639_CellShield.h>
To begin communication the cellular module, and perform some set up, call the cell.begin() function. This initializing function will return with the status of the module after exit -- if it returns 1 the module is on, communicating, and ready to go. If it returns 0 the module is not communicating with the Arduino for some reason.
language:c
// Run cell.begin() to initialize communication with the
// module and set it up.
uint8_t status = cell.begin();
if (status <= 0)
{
// If begin() returns 0 or a negative number, the Arduino
// is unable to communicate with the shield. Make sure
// it's getting enough power. Try again making sure the
// MG2639 is booted up before running the sketch.
  Serial.println("Unable to communicate with shield.");
  while(1)
    ;
}
If your Arduino is not communicating with the module, try turning it on manually (via the BOOT button) and running the sketch again. If that fails, make sure you have enough power supplied to the shield -- the RSSI LED should be steadily blinking at 1Hz after turning on. If you're still not having any luck communicating with the module, get in touch with our tech support team and give them as much information about your setup as possible.
The most important piece of information you'll need is probably your phone number, if you don't already know it. You can use the cell.getPhoneNumber(char * phoneNumber) function for this purpose. For example:
language:c
// getPhoneNumber requires one parameter - a char array
// with enough space to store a phone number (~15 bytes).
// Upon return, cell.getPhoneNumber(myPhone) will return
// a 1 if successful, and myPhone will contain a char array
// of your module's phone number.
status = cell.getPhoneNumber(myPhone);
if (status > 0)
{ // If the function successfully returned, print the #:
  Serial.print("My phone number is: ");
  Serial.println(myPhone);
}
Getting the module's CIMI, ICCID, and other information follows a similar pattern of passing an array by reference. Consult the comments in the sketch for help using those functions.