Qwiic Ultrasonic Distance Sensor (HC-SR04) Hookup Guide
Introduction
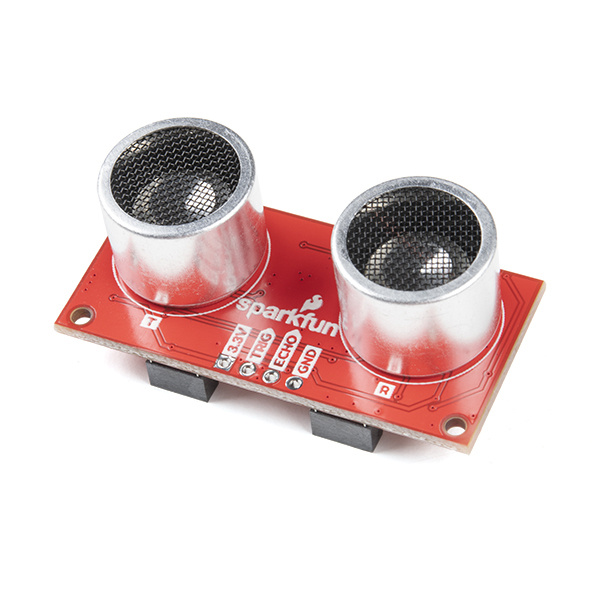
The SparkFun Qwiic Ultrasonic Distance Sensor is great for providing non-contact distance readings from 2cm to 400cm. It improves on the classic HC-SR04 distance sensor by adding a pair of Qwiic connectors to it, so now you can communicate over I2C and daisy chain any other Qwiic product of your choosing.
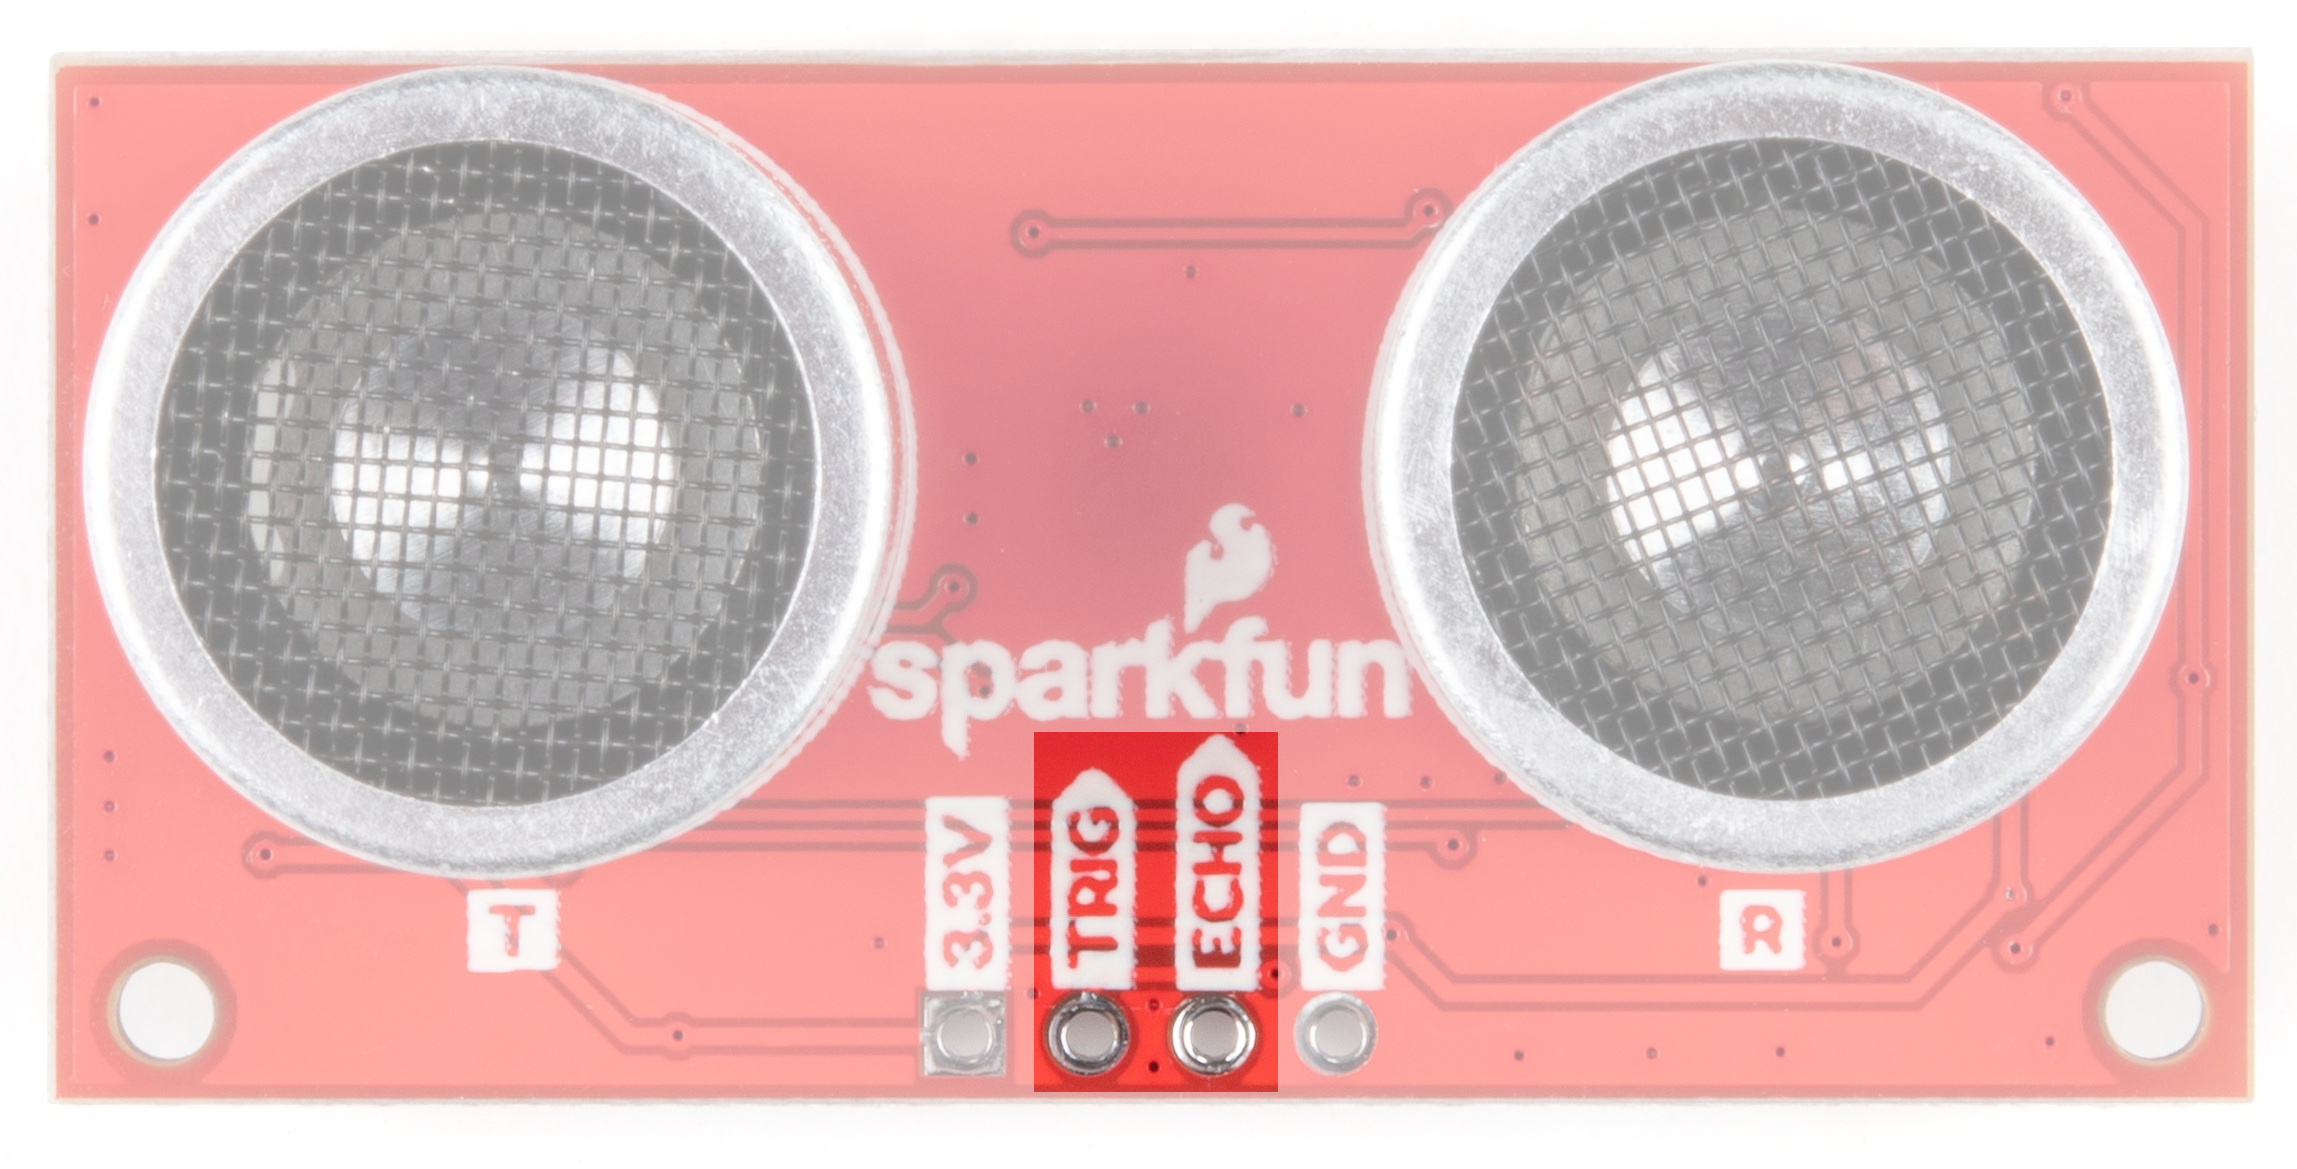
If you prefer to bypass the Qwiic connector and I2C you can also access the VCC, Trigger, Echo, and Ground pins broken out on the edge of the board. Please be aware that this ultrasonic sensor comes uncalibrated and you will need manipulate the raw output for your specific application. Let's have a look at this fun board!
Required Materials
To follow along with this tutorial, you will need the following materials. You may not need everything though depending on what you have. Add it to your cart, read through the guide, and adjust the cart as necessary.
Suggested Reading
If you aren't familiar with the Qwiic system, we recommend reading here for an overview.
| Qwiic Connect System |
We would also recommend taking a look at the following tutorials if you aren't familiar with them.
How to Solder: Through-Hole Soldering
I2C
Serial Terminal Basics
Hardware Overview
Overall Features:
- Operating Voltage 3.3V
- Detecting Angle: 15 degrees
- Sensor range: 2cm to 400cm
- Accuracy: 3mm
- MCU on board: STM8L051
- Default I2C Address: 0x00
- Dimensions: 21.5 x 45.5mm
- Weight 9.2g
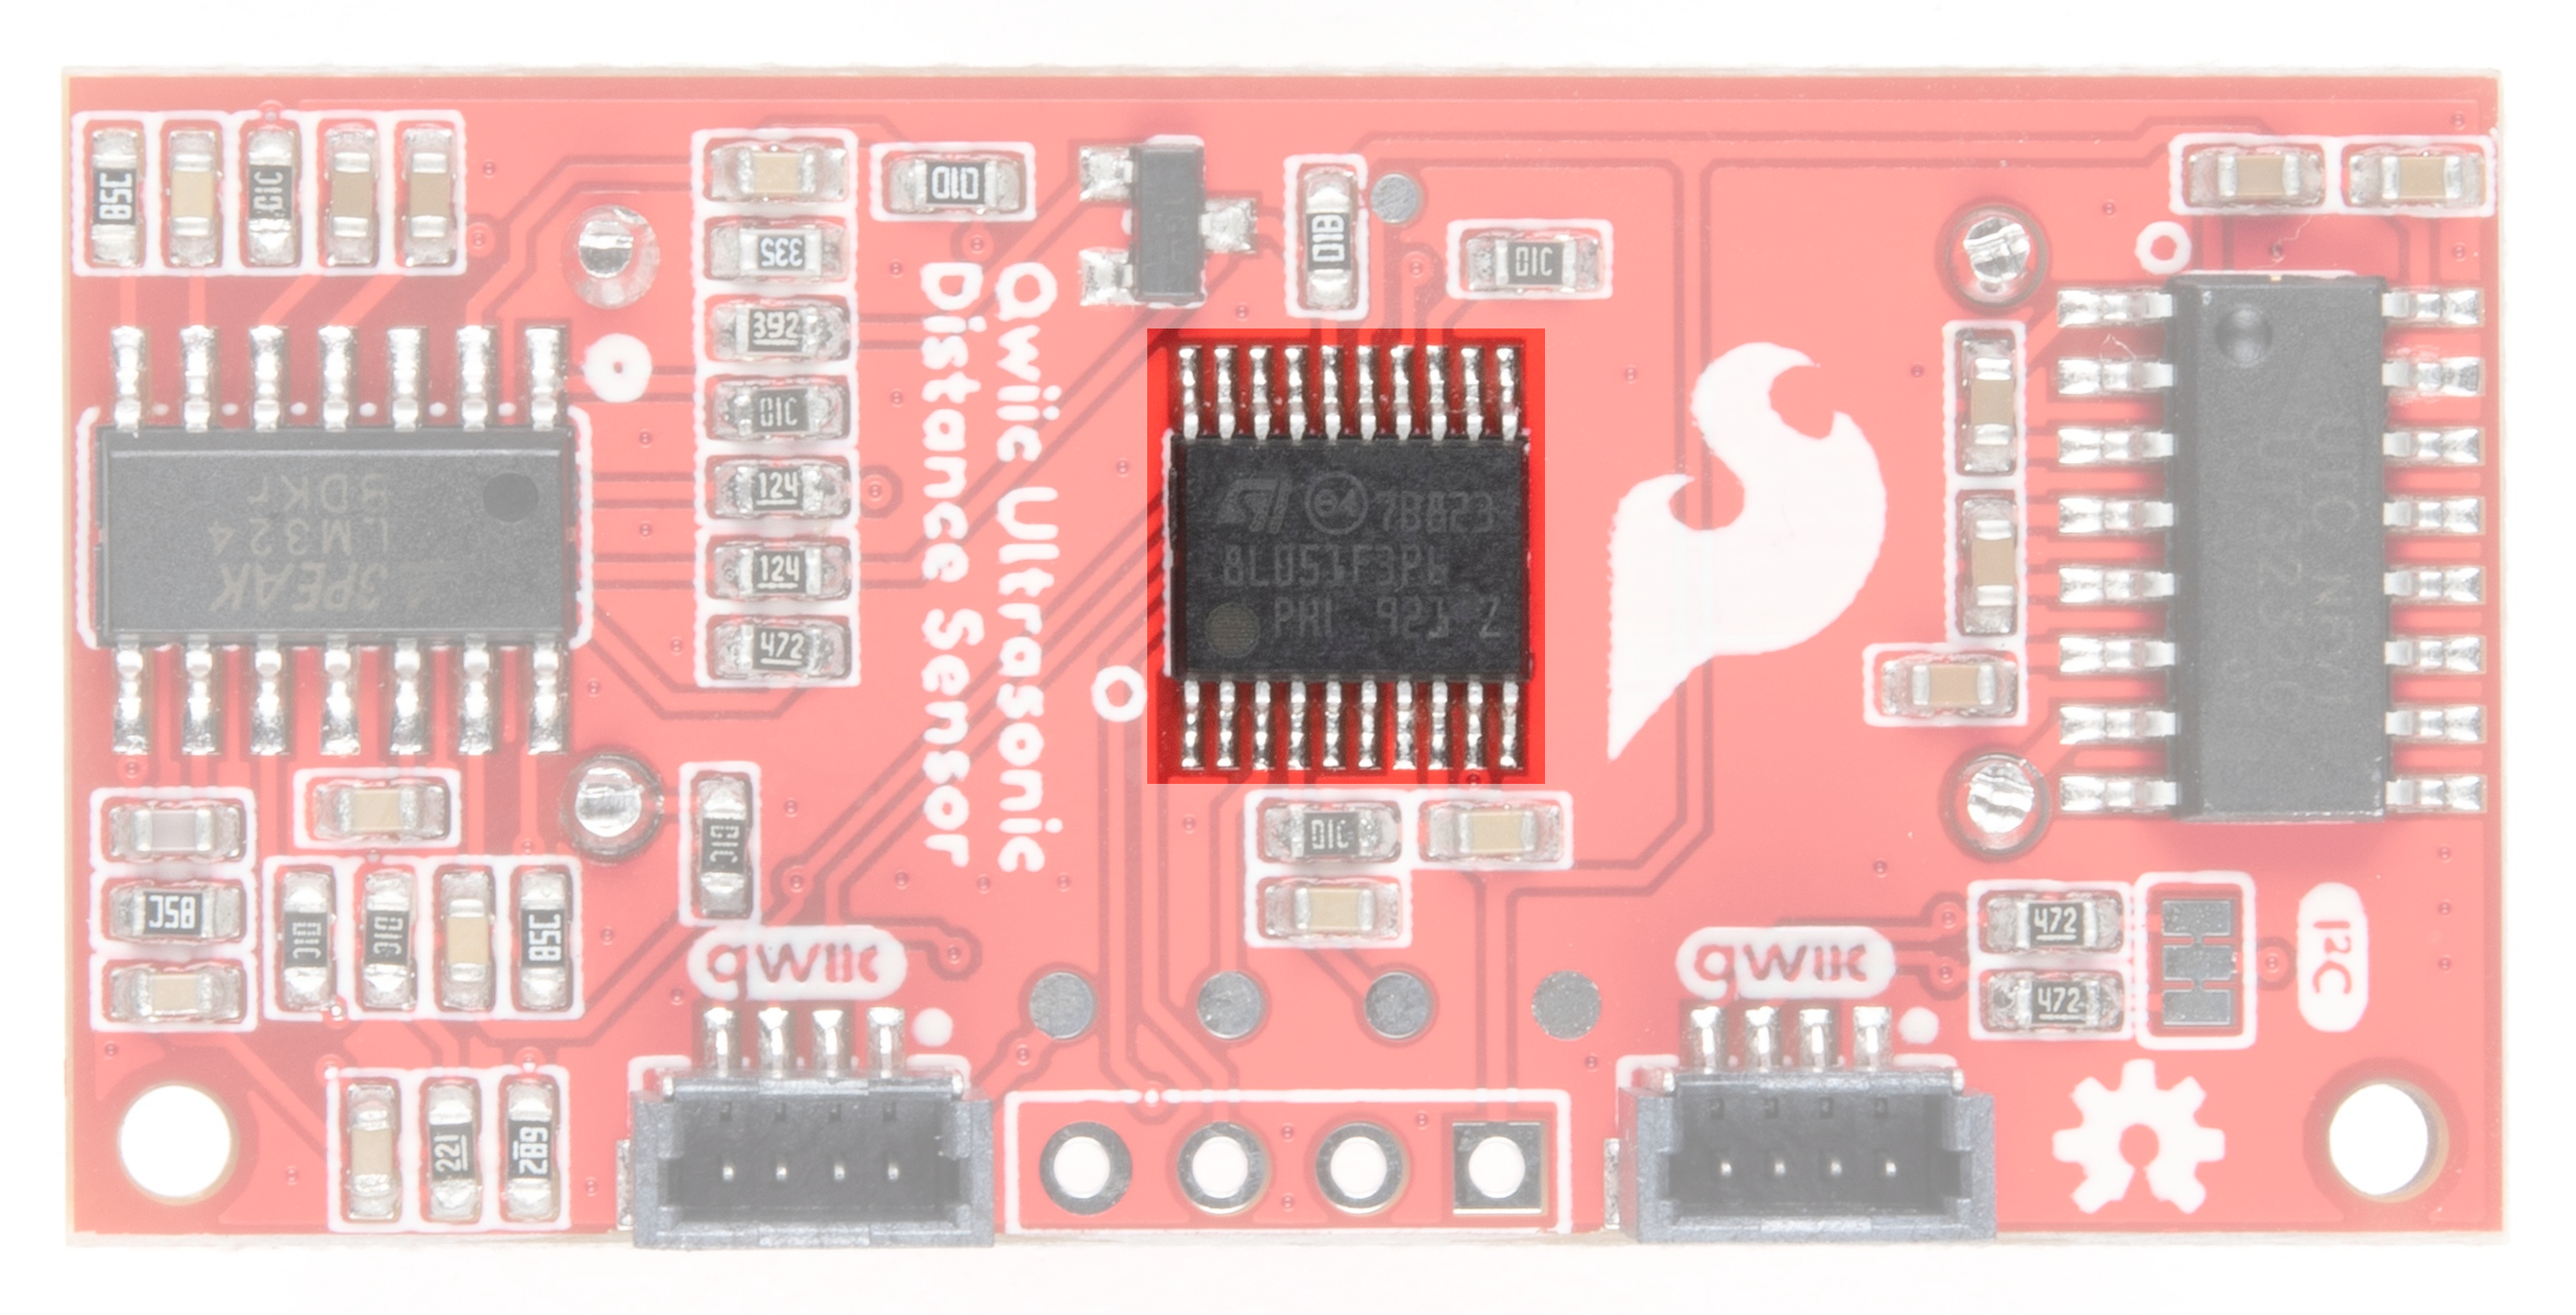
STM8L051 MCU
The 8-bit ultra-low power STM8 MCU Core provides increased processing power (up to 16 MIPS at 16 MHz) while maintaining the advantages of a CISC architecture with improved code density, a 24-bit linear addressing space and an optimized architecture for low power operations. It also features embedded data EEPROM and low power, low-voltage, single-supply program Flash memory. The device incorporates an extensive range of enhanced I/Os and peripherals, a 12-bit ADC, a real-time clock, two 16-bit timers, one 8-bit timer, as well as standard communication interfaces such as an SPI, an I2C interface, and one USART. For more information, refer to the datasheet.
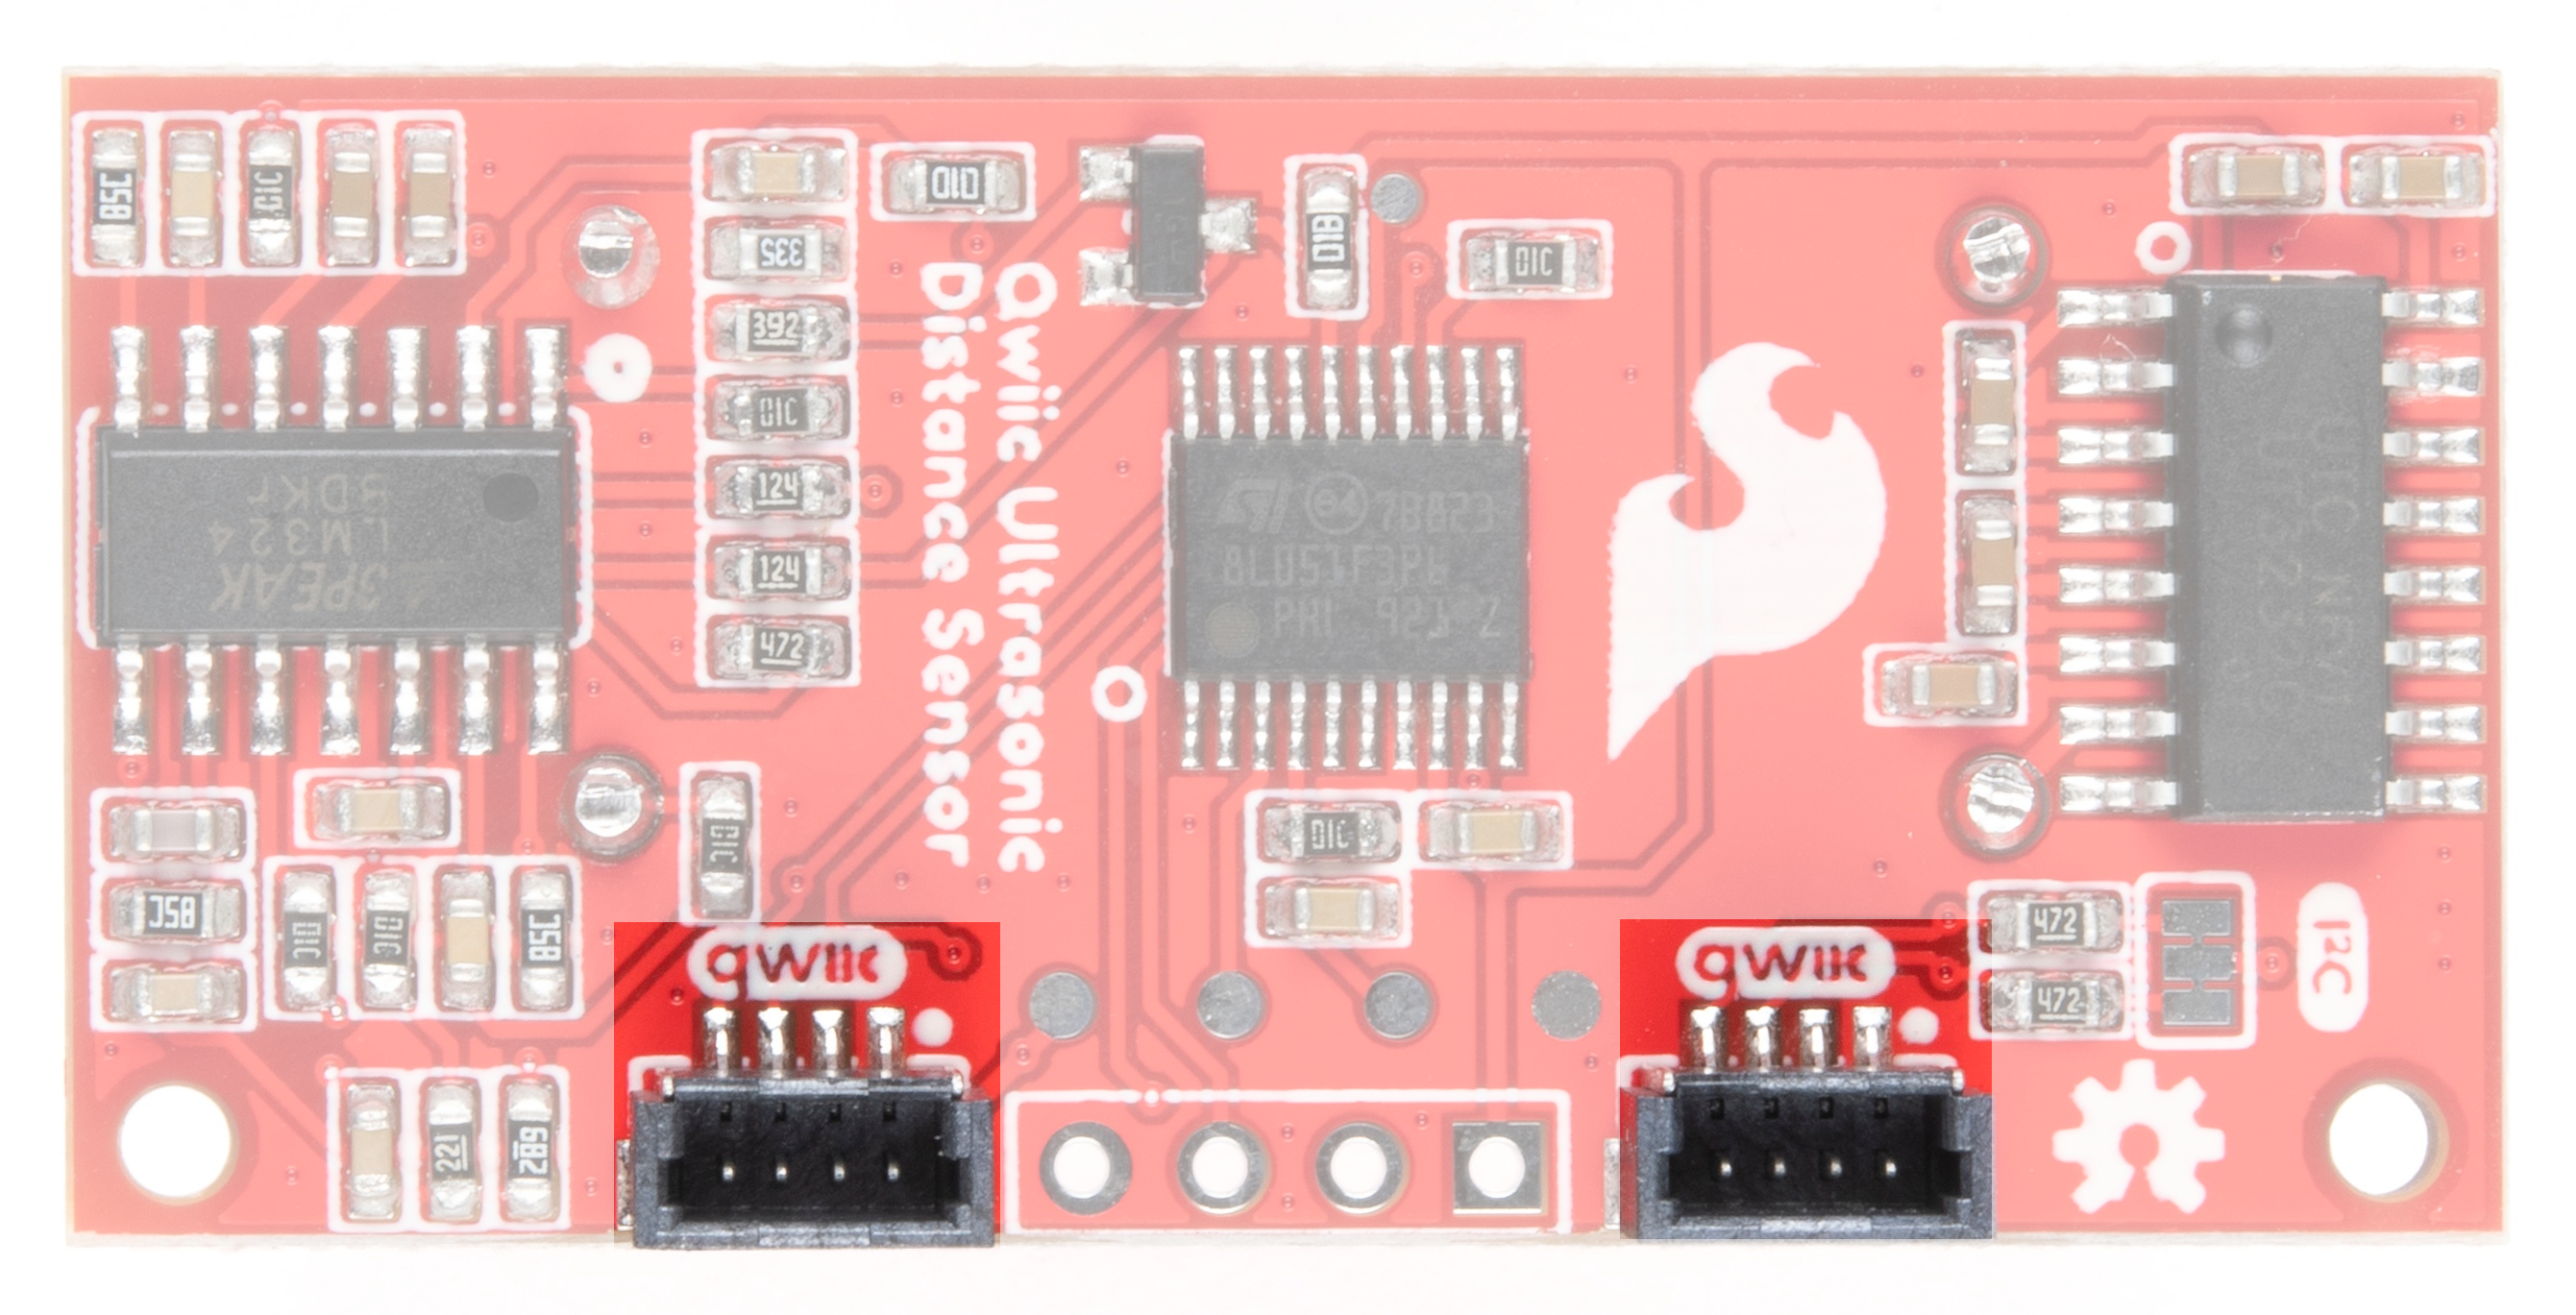
Qwiic Connectors
Our Qwiic Ecosystem makes sensors pretty much plug and play. There are two Qwiic connectors on the side of the Qwiic Distance Sensor board to provide power and I2C connectivity simultaneously.
Power
Ideally, power will be supplied via the Qwiic connectors on either side of the board. Alternatively, power can be supplied through the pins along the bottom side of the board labeled 3V3 and GND. The input voltage range should be between 1.8-3.6V.
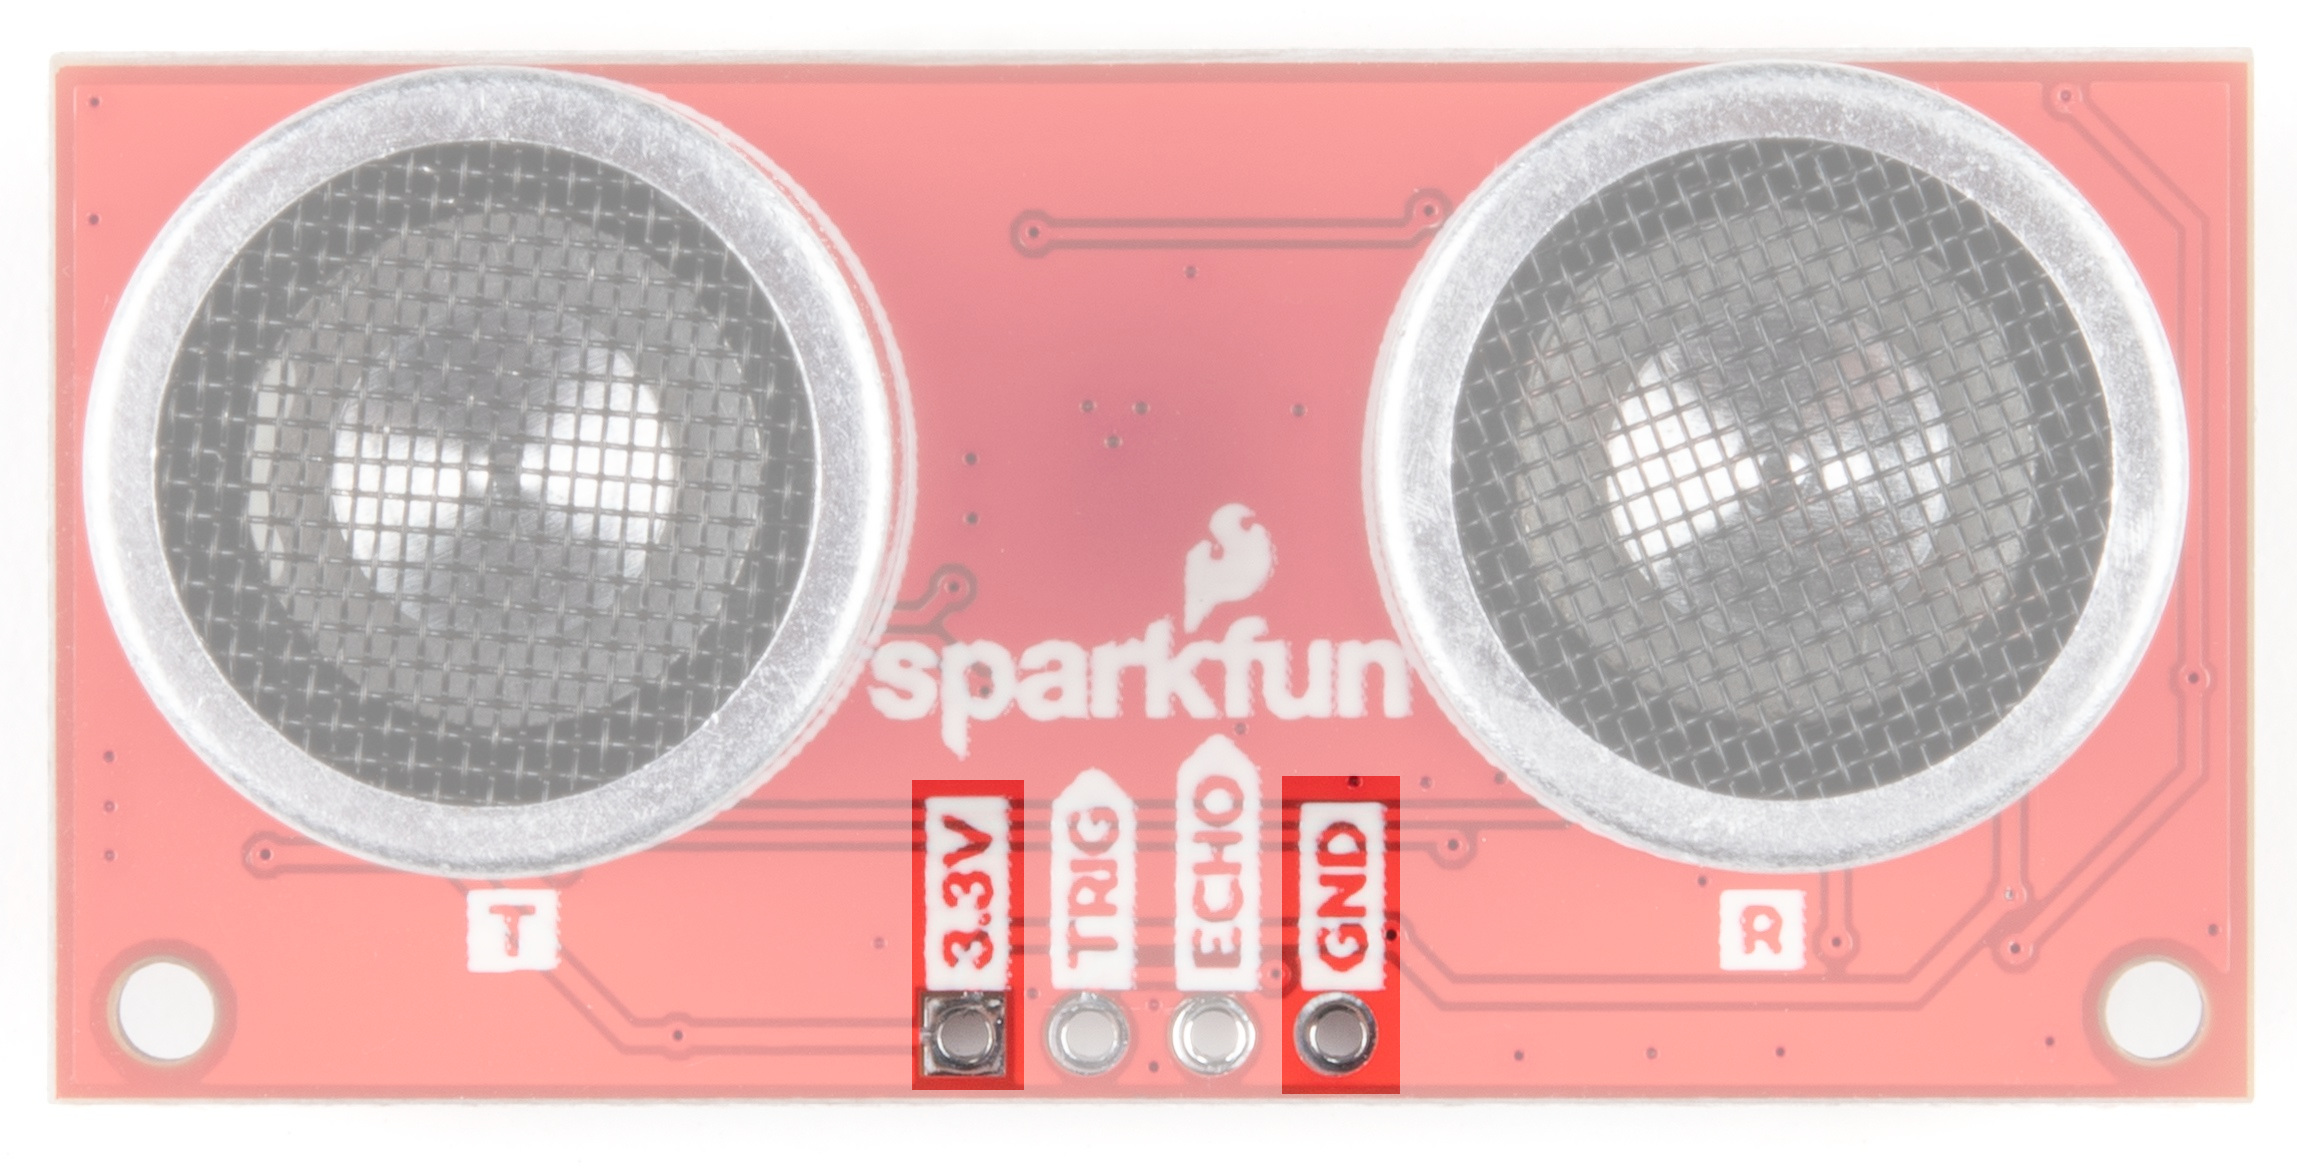
Trigger and Echo Pins
If you (for some crazy reason) don't want to utilize the Qwiic connectors, we've broken out the Trigger and Echo pins as PTH. We've included headers that can be soldered in place.
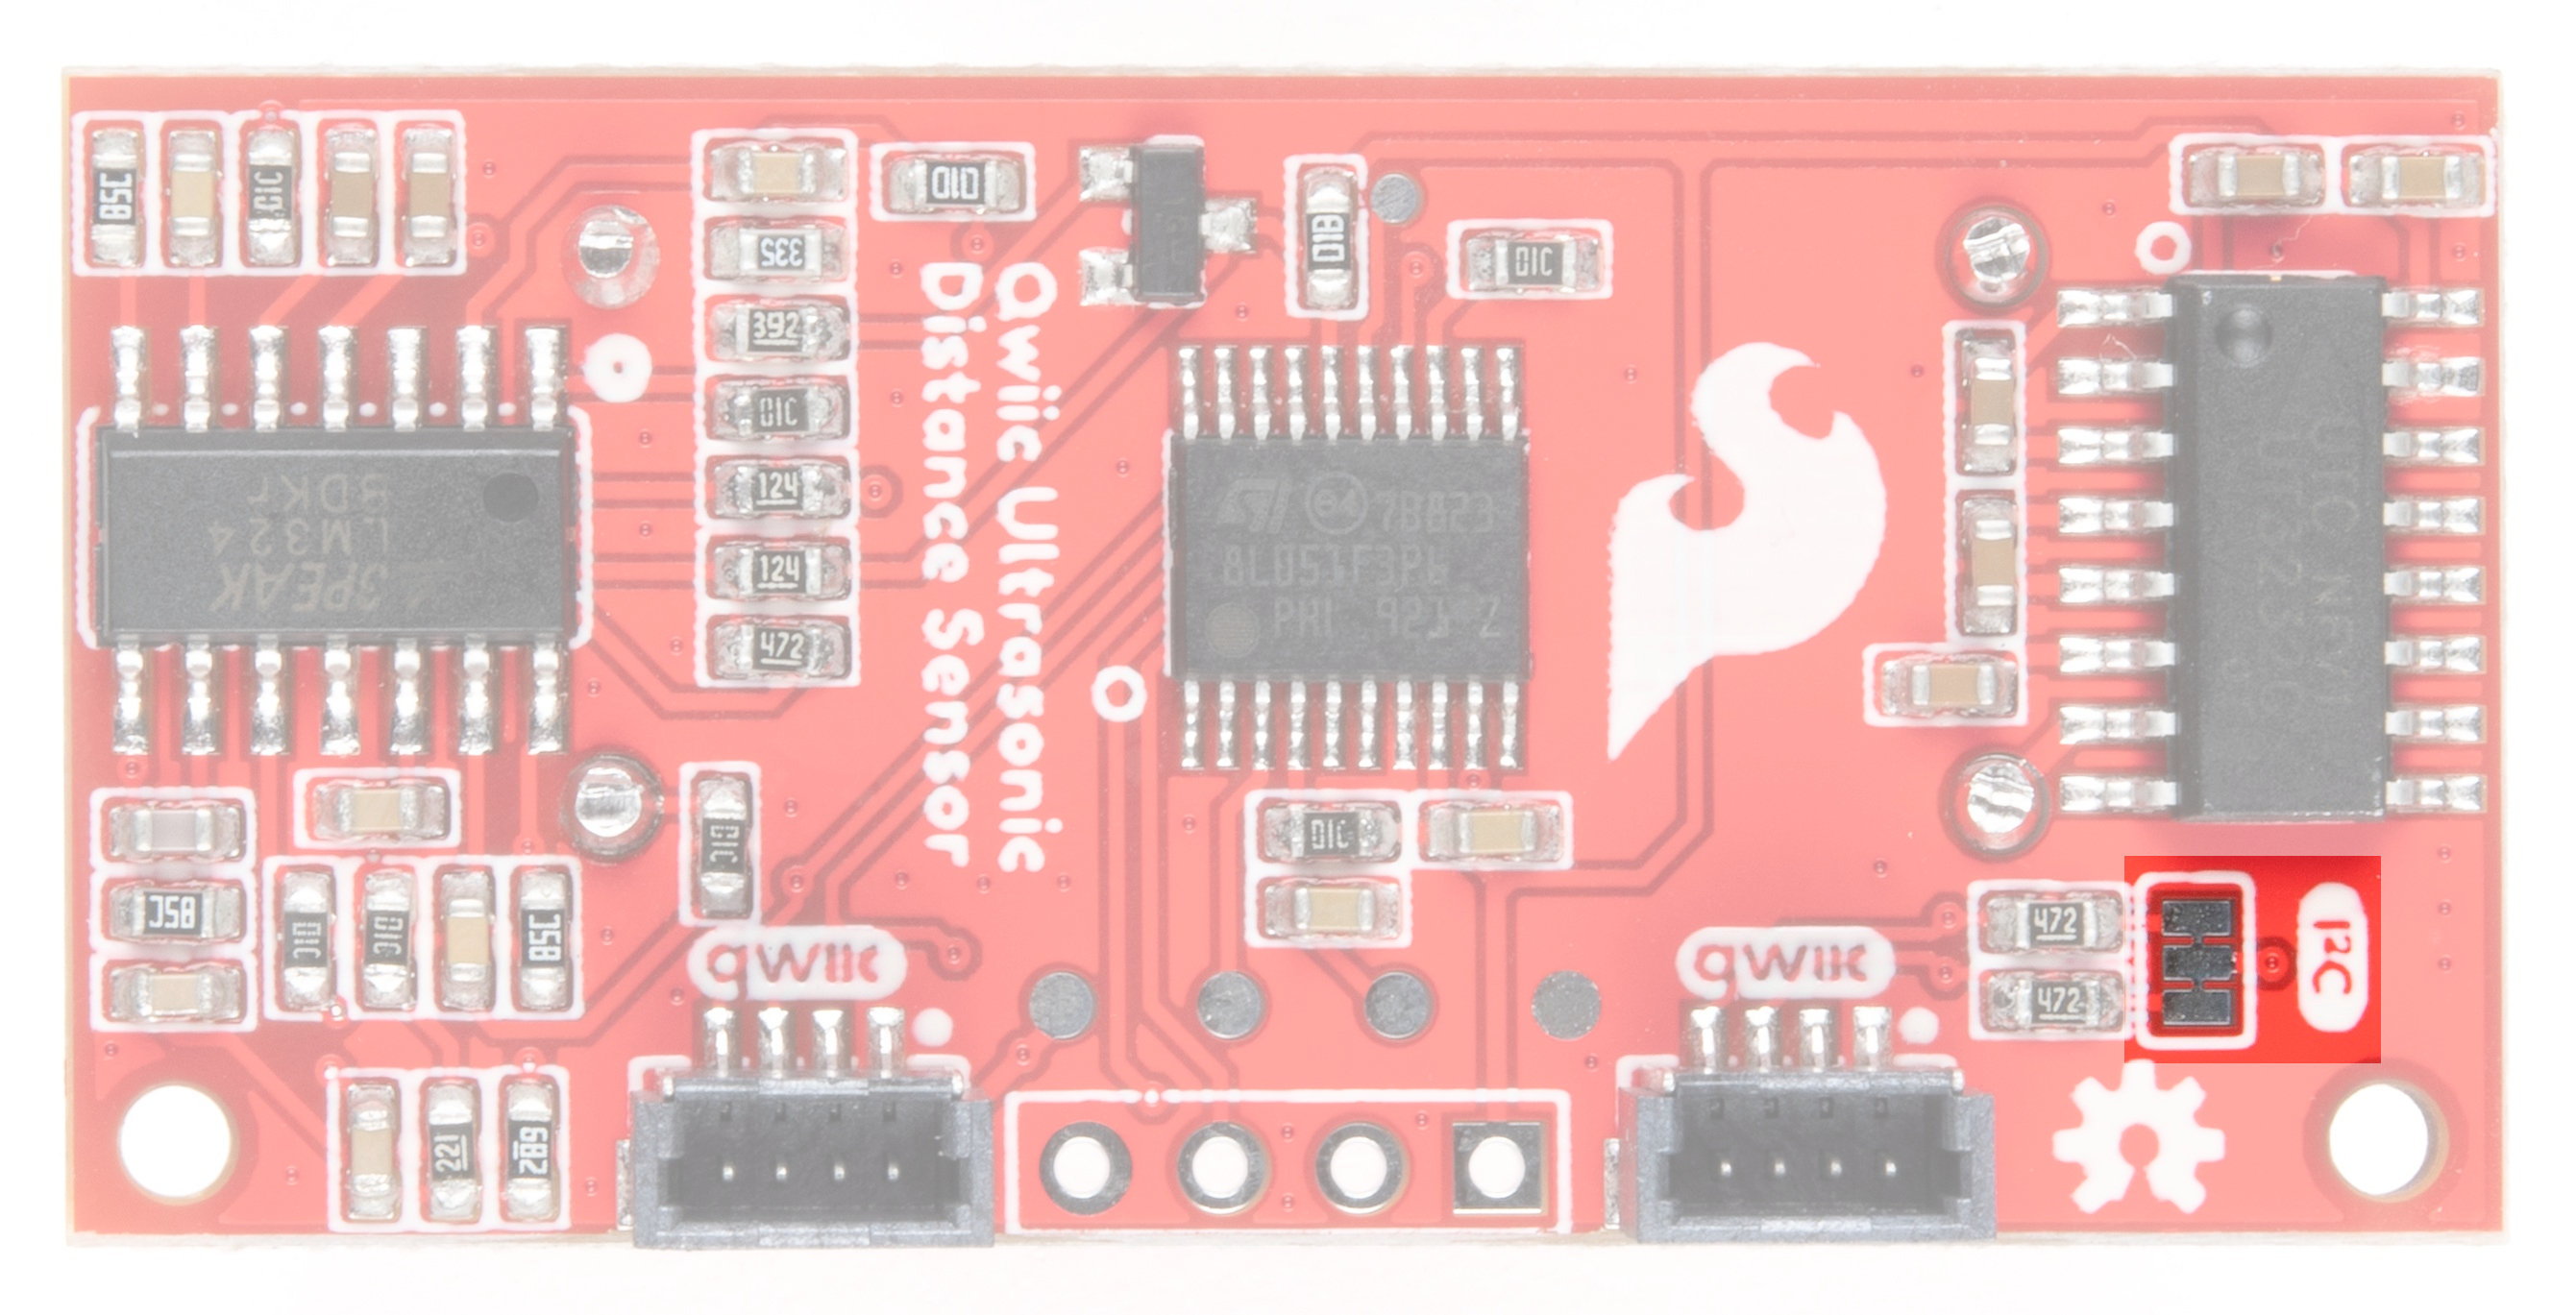
I2C Jumpers
The Qwiic Ultrasonic Distance Sensor has built-in 2.2k pull-up resistors on the SDA and SCL lines. These are needed for normal I2C communication. The I2C jumper has two small traces connecting the pull-ups to 3.3V. For general use you can leave this jumper unmodified. If you have many (over 7) devices on the I2C bus, each with their own pull up resistors, then you may want to cut the I2C jumpers to disconnect the 2.2k resistors on each Qwiic board.
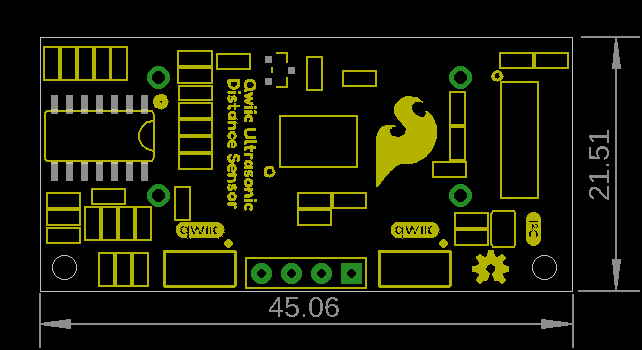
Board Dimensions
Units below are in mm.
Hardware Hookup
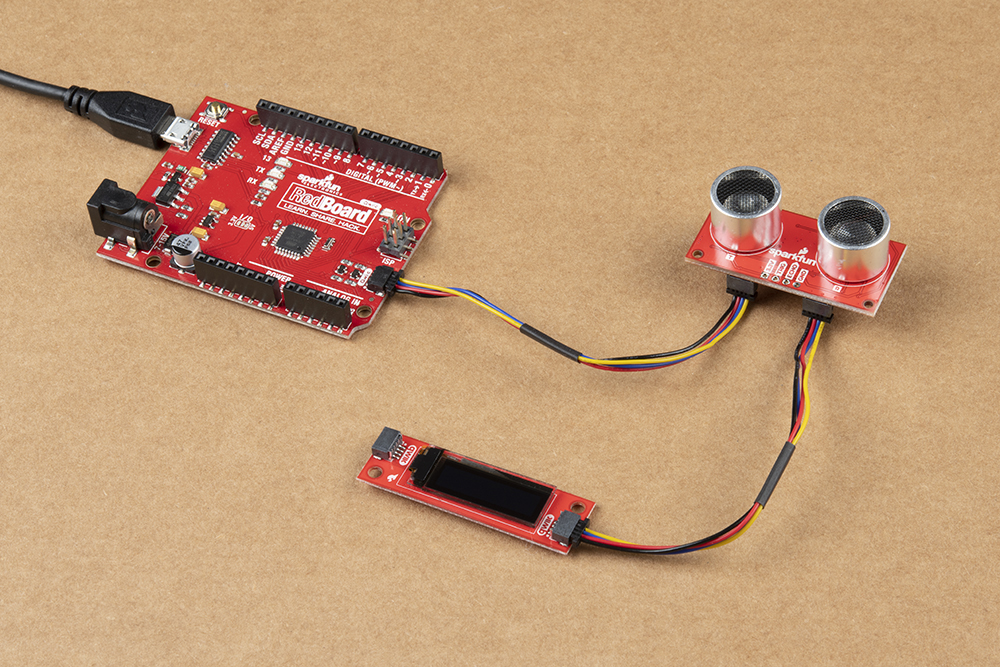
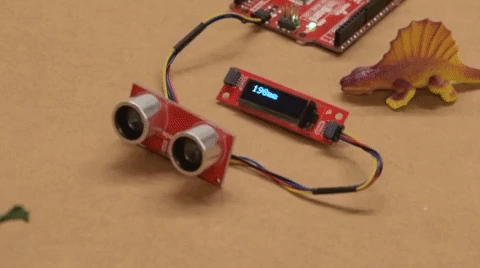
Using the Qwiic system, assembling the hardware is simple. Connect the RedBoard to one of the Ultrasonic Distance Sensor Qwiic ports and the Qwiic OLED Display on the other Qwiic port using your Qwiic cables. Then connect the RedBoard to your computer via the MicroUSB cable and voila! You're ready to rock!
Software Setup and Programming
Our friends over at Zio have provided an example to get you started with this Ultrasonic Distance Sensor. In order to do so, you'll need to install a few libraries first.
To display the sensor readings on the connected Qwiic OLED, we will use three Adafruit libraries:
Adafruit BusIO Library
You can install this library to automatically in the Arduino IDE's Library Manager by searching for "Adafruit BusIO". Or you can manually download it from the GitHub repository.
Adafruit GFX Library
You can install this library to automatically in the Arduino IDE's Library Manager by searching for "Adafruit GFX". Or you can manually download it from the GitHub repository.
Adafruit SSD1306 Library
You can install this library to automatically in the Arduino IDE's Library Manager by searching for "Adafruit SSD1306 Library". Or you can manually download it from the GitHub repository.
Example 1
This example lives in the GitHub Repo in the Arduino folder. Feel free to download the code, alternatively you can copy the code below into a blank Arduino sketch. Select your board (for this example we'd select "SparkFun RedBoard") and the port your board has enumerated on. Go ahead and upload your code.
language:c
#include <Wire.h>
#include <Adafruit_GFX.h>
#include <Adafruit_SSD1306.h>
#define SLAVE_BROADCAST_ADDR 0x00  //default address
#define SLAVE_ADDR 0x00       //SLAVE_ADDR 0xA0-0xAF
uint8_t distance_H = 0;
uint8_t distance_L = 0;
uint16_t distance = 0;

#define SCREEN_WIDTH 128 // OLED display width, in pixels
#define SCREEN_HEIGHT 32 // OLED display height, in pixels

// Declaration for an SSD1306 display connected to I2C (SDA, SCL pins)
#define OLED_RESET     4 // Reset pin # (or -1 if sharing Arduino reset pin)
Adafruit_SSD1306 display(SCREEN_WIDTH, SCREEN_HEIGHT, &Wire, OLED_RESET);


void setup() {
  Wire.begin(); // join i2c bus (address optional for master)
  Serial.begin(9600);  // start serial for output
  display.begin(SSD1306_SWITCHCAPVCC, 0x3C);  // initialize with the I2C addr 0x3C (for the 128x32)
  Serial.println("IIC testing......");
  display.clearDisplay();
  //  Wire.beginTransmission(SLAVE_BROADCAST_ADDR); // transmit to device SLAVE_BROADCAST_ADDR
  //  Wire.write(SLAVE_ADDR);              // Change the SLAVE_ADDR
  //  Wire.endTransmission();    // stop transmitting
}


void loop() {
  Wire.beginTransmission(SLAVE_ADDR); // transmit to device #8
  Wire.write(1);              // measure command: 0x01
  Wire.endTransmission();    // stop transmitting

  Wire.requestFrom(SLAVE_ADDR, 2);    // request 6 bytes from slave device #8
  while (Wire.available()) { // slave may send less than requested
    distance_H = Wire.read(); // receive a byte as character
    distance_L = Wire.read();
    distance = (uint16_t)distance_H << 8;
    distance = distance | distance_L;
    Serial.print(distance);         // print the character
    Serial.println("mm");
    display.setTextSize(2);
    display.setTextColor(WHITE);
    display.setCursor(10, 0);
    display.clearDisplay();
    display.print(distance);
    display.print("mm");
    display.display();
    delay(1);

    delay(100);
  }
}
Try moving an object (like your hand or a dinosaur) closer to the sensor - notice the output of the OLED shows you how close the object is! Grr. Rawr!
Troubleshooting
If you need technical assistance and more information on a product that is not working as you expected, we recommend heading on over to the SparkFun Technical Assistance page for some initial troubleshooting.
If you don't find what you need there, the SparkFun Forums are a great place to find and ask for help. If this is your first visit, you'll need to create a Forum Account to search product forums and post questions.
Resources and Going Further
For more information on the Qwiic Ultrasonic Distance Sensor, check out the following links:
- Schematic (PDF)
- Eagle Files (ZIP)
- Datasheet (PDF)
- Github (Eagle files and Example Code)
Need some inspiration for your next project? Check out some of these other Qwiic product tutorials: