Qwiic Magnetometer (MLX90393) Hookup Guide
Introduction
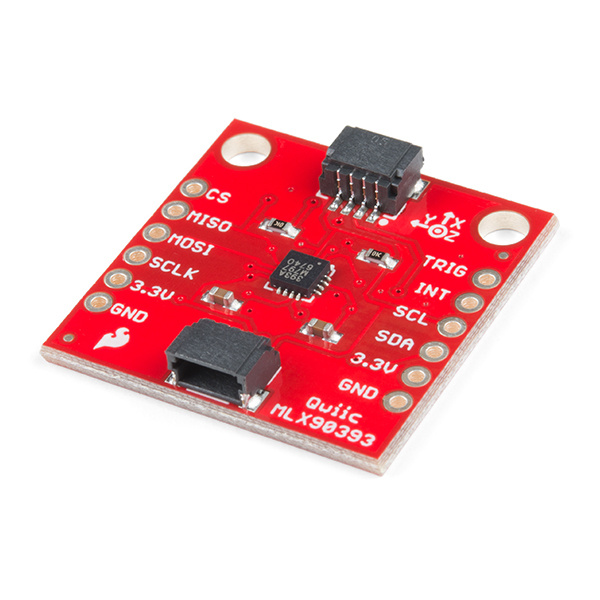
The MLX90393 is a tri-axial magnetic sensor capable of sensing very small fields while behaving as one would want and expect during saturation in larger fields (like a nearby magnet). It turns out the favorite HMC5883L and other such sensors that are intended for compass applications have a low dynamic range but also strange and undefined behavior in large fields. Ted Yapo did an incredibly extensive characterization of the sensor over on Hackaday. He published his controlled experiments testing a few sensors and found the MLX90393 to be superior.
The MLX90393 can be used as a compass sensor but also works well as a non-contact controller (joystick), flow meter (with magnetic impeller), or a linear actuator position sensor. The breakout board is also a part of SparkFun's Qwiic system, so you won't have to do any soldering to figure out what the magnetic fields look like.
In this hookup guide, we'll get going by getting some basic readings from the sensor, then look at how to configure the sensor on different I2C addresses.
Required Materials
To get started, you'll need a microcontroller to control everything in your project.
Particle Photon (Headers)
WRL-13774Raspberry Pi 3
DEV-13825Now, to get your microcontroller into the Qwiic ecosystem, the key will be one of the following Qwiic shields to match your preference of microcontroller:
SparkFun Qwiic Shield for Photon
DEV-14477You will also need a Qwiic cable to connect the shield to your magnetometer, choose a length that suits your needs.
Qwiic Cable - 100mm
PRT-14427Qwiic Cable - 50mm
PRT-14426Qwiic Cable - 200mm
PRT-14428Qwiic Cable - 500mm
PRT-14429Or, here's the wishlist to follow along exactly with this guide:
Suggested Reading
If you aren't familiar with the Qwiic system, we recommend reading here for an overview.
 |
| Qwiic Connect System |
We would also recommend taking a look at the hookup guide for the Qwiic Shield if you haven't already. Brushing up on your skills in I2C is also recommended, as all Qwiic sensors are I2C.
