QuickLogic Thing Plus (EOS S3) Hookup Guide
 bboyho
Getting Started
Running Pre-Loaded Program from Flash
The purpose of the pre-loaded program is to make it very fast and straightforward for a new user to verify the board is functioning correctly. While we do production testing on every QuickLogic Thing Plus before we ship, sometimes things happen during shipping or storage. Running this test takes less than a minute to do, requires no knowledge of the QuickLogic Thing Plus, and will give you peace of mind the QuickLogic Thing Plus is ready for you to start innovating freely.
- Make sure there is no shunt installed at J2 and J3; if there are shunts installed, remove the shunts; save the shunts for future firmware development
- Provide power to the QuickLogic Thing Plus using the Type-C USB cable; the power source can be either a PC or wall adapter. When there is power applied to the board, the LED flashes “white” for a short duration
- Press the “reset” button
- The LED flashes blue color for 5 seconds and then turns off
- Wait for 5 seconds
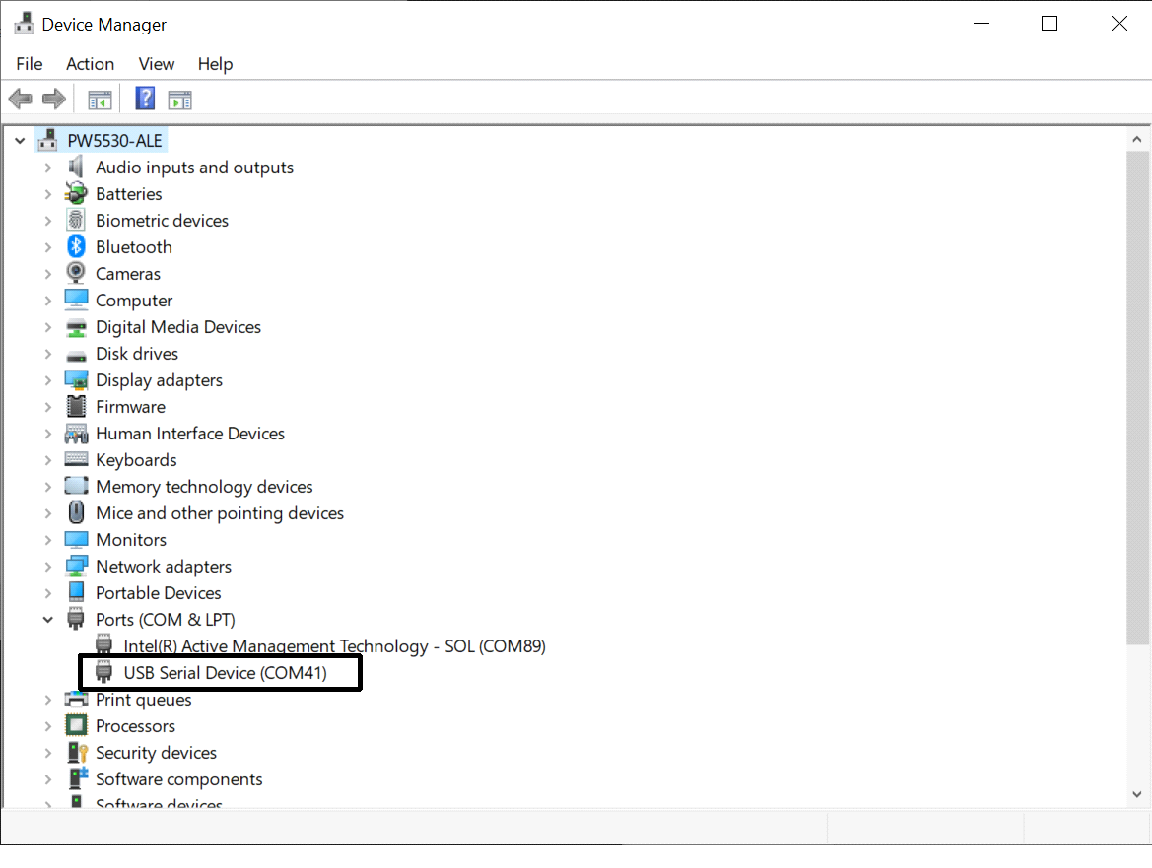
- On Windows 10 machine, open Device Manager to check for the assign COM port
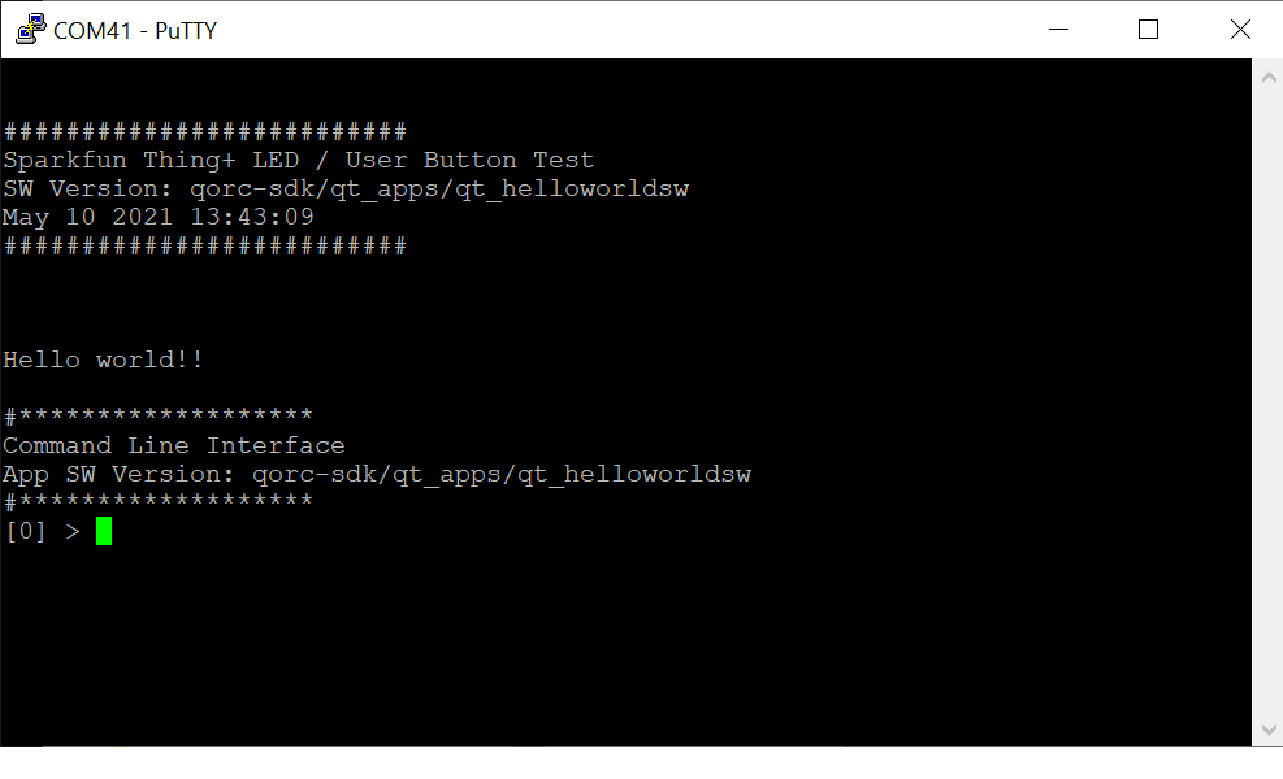
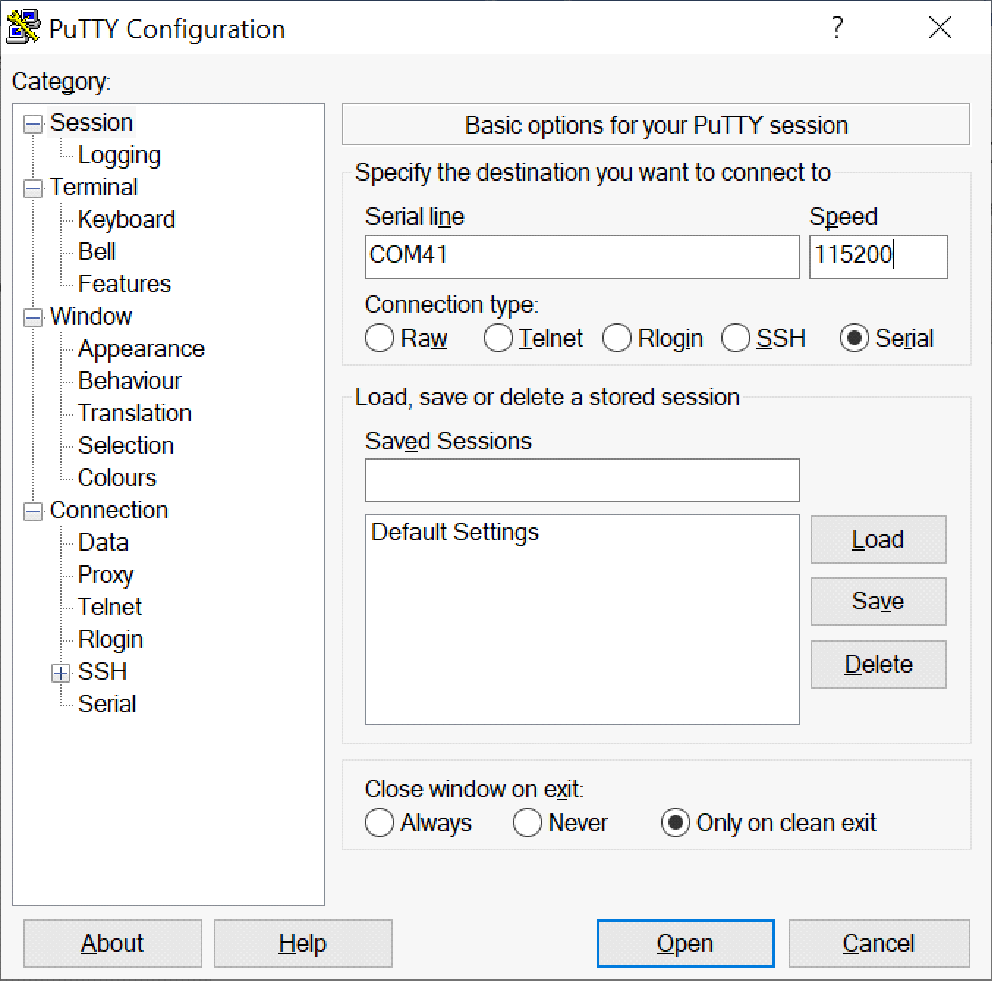
- Launch PuTTY application and configure for Serial access and select “Open”.
8. Perform the followings in the PuTTY terminal:
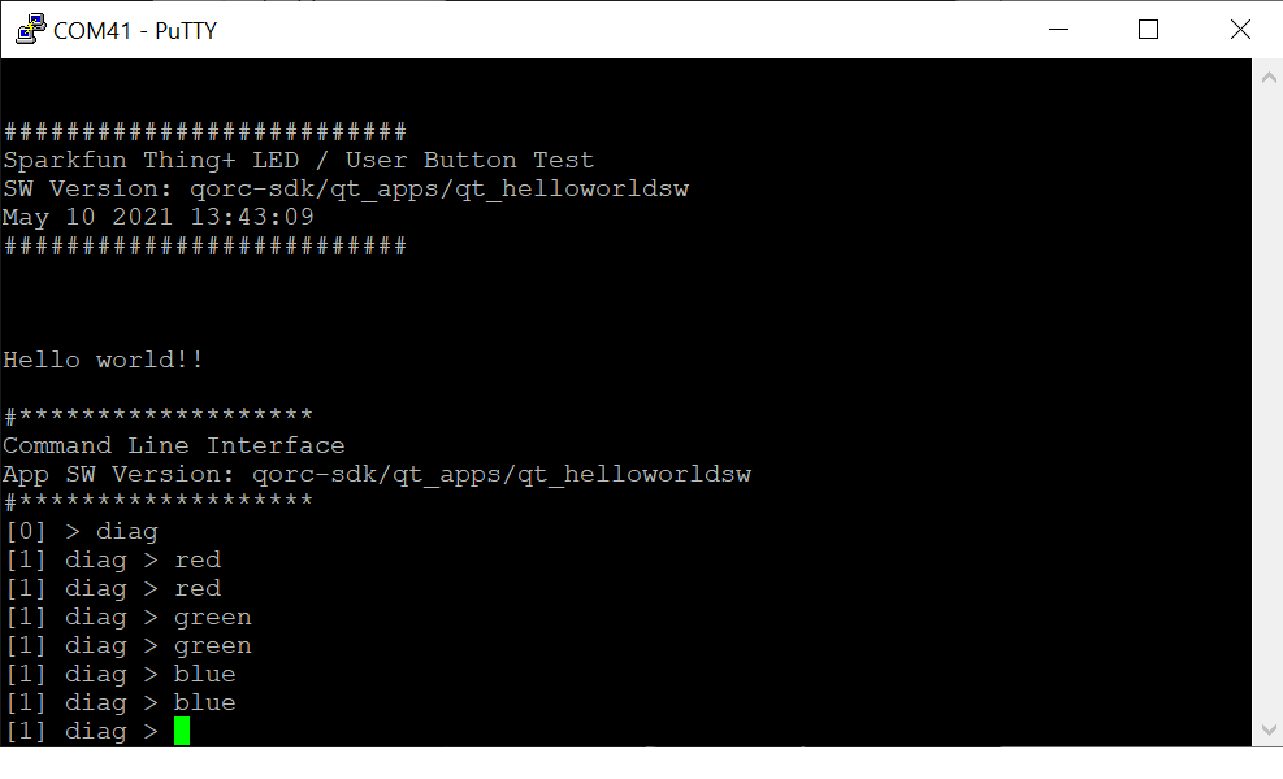
a) Type: “diag” to bring up QuickLogic Thing Plus diagnostic menu
b) Type: “help” to bring up the menu of commands
c.) Type: “red”; the command shows red color for LED
d.) Type: “red”; the LED turns off the LED
e.) Try “green” and “blue” command