QuickLogic Thing Plus (EOS S3) Hookup Guide
Contributors:
 bboyho
bboyho 
Download Binaries using JLink SWD
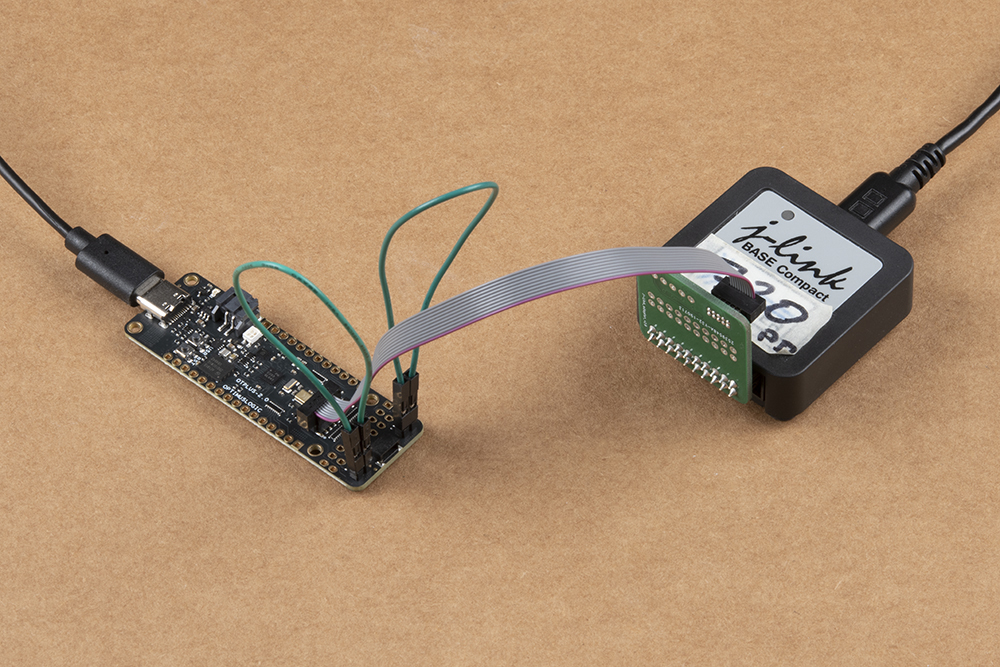
QuickLogic Thing Plus supports loading and testing stand-alone eFPGA design or eFPGA + M4 MCU design, using SWD standard tool such as Segger’s Jlink SWD or OCD. Below are the instructions for system with Windows 10 OS with Segger Jlink pod.
What you need
- Laptop or PC with Windows 10
- Segger Jlink pod and PC connecting USB cable
- Segger Jlink adapter to 10-pin connector and cable
- QuickLogic Thing Plus board and micro USB cable
Download stand-alone FPGA binaries instructions
- Disconnect QuickLogic Thing Plus power; if USB-to-Serial cable connected to the board, remove the connection from PC
- Install shunts at QuickLogic Thing Plus J2 and J3
- Connect micro USB cable from QuickLogic Thing Plus to PC
- Connect 10-pin cable to QuickLogic Thing Plus connector J6; check connector key for correct alignment
- Press reset button
- Open CMD console
- Type: “Jlink.exe -device cortex-m4 -If SWD -speed 4000 -commandFile "Jlink script"”
Note:
- Jlink.exe: Link commander – include reference to the location of executable
- Jlink script: output file symbiflow for EOS S3 FPGA binaries
- Refer to Jlink Commander for more additional information
Download FPGA binaries + M4 MCU binaries instructions
- Disconnect QuickLogic Thing Plus power; if USB-to-Serial cable connected to the board, remove the connection from PC
- Install shunts at QuickLogic Thing Plus J2 and J3
- Connect micro USB cable from QuickLogic Thing Plus to PC
- Connect 10-pin cable to QuickLogic Thing Plus connector J7; check connector key for correct alignment
- Press reset button
- Open CMD console (#1)
- Launch Jlink commander (i.e. type “Jlink.exe”) and follow the on-screen instructions to connect to QuickLogic Thing Plus M4 target
- Execute the followings in Link Commander console
- Type: “r” to reset the EOS S3
- Type: “loadbin qt_helloworldsw.bin 0x0”
- Type: “r”
- Open another CMD console (#2)
- Type: “Jlink.exe -device cortex-m4 -If SWD -speed 4000 -commandFile "Jlink script"”
Note:
- Jlink.exe: Link commander – include reference to the location of executable
- Jlink script: Symbiflow’s output for EOS S3 FPGA binaries
- Refer to Jlink Commander for more additional information
- Return to console #1; type: “g”; the M4 binaries in M4 SRAM will start to run and the eFPGA is configured