Contributors:
 bboyho
 Introduction
Note: This tutorial is to control the 12V non-addressable RGB LED strips. If you are using an addressable LED strip (i.e.
WS2812 or
APA102), you will need to use a different power supply and a micrcontroller to control the LEDs.
Add color to your projects with the non-addressable LED strips! These are perfect if you want to add uniform lighting for your props, car, fish tank, or perhaps under cabinet lighting in your home.
COM-12021
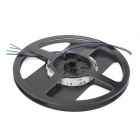
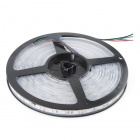
These are bare non-addressable 1 meter long RGB LED strips that come packed with 60 5060 LEDs per meter. As these are bare LE…
COM-12022
These are bare non-addressable 5 meter long RGB LED strips that come packed with 60 5060 LEDs per meter, that's 300 LEDs. As …
Retired
COM-12023
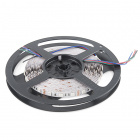
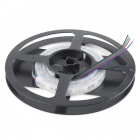
Gone are the days that you have to worry about silicone weather proofing splitting and breaking on you! These are sealed non-…
Retired
COM-12024
Gone are the days that you have to worry about silicone water proofing splitting and breaking on you! These are sealed non-ad…
Retired
Required Materials
To follow along with this tutorial, you will need the following materials. The partial wishlist on the left is for a basic connection with an Arduino. It does not include the potentiometer and buttons. The full wishlist on the right is for the full circuit for additional functionality. You may not need everything though depending on what you have. Add it to your cart, read through the guide, and adjust the cart as necessary.
Microcontroller
To make the most out of your LED strip, you will need a microcontroller. The easiest would be to use the RedBoard Qwiic but you can use any Arduino microcontroller as long as it has a minimum of three PWM pins.
DEV-15123
The SparkFun RedBoard Qwiic is an Arduino-compatible development board with a built in Qwiic connector, eliminating the need …
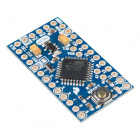
DEV-11114
SparkFun's minimal design approach to Arduino. This is a 3.3V Arduino running the 8MHz bootloader.
CAB-10215
USB 2.0 type A to Micro-B 5-pin. This is a new, smaller connector for USB devices. Micro-B connectors are about half the heig…
Power Supply
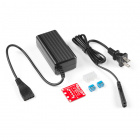
To power your LEDs, you will need a 12V power supply. The amount of current needed depends on the length and density of the LED strip. Below are a few options if you are powering the LEDs from a wall outlet in an installation. You could also use a 9V power supply. It may not be as bright but your LED strip will not be as hot.
TOL-15313
This is a high quality AC to DC 'wall wart' which produces a regulated output of 12VDC at up to 600mA.
KIT-15701
The ATX power connector breaks out the standard 4-pin computer peripheral port for you 12V & 5V devices from one wall adapter…
Retired
Wires and Connectors
The stranded wires from the non-addressable do not have a connector. For prototyping you could use alligator clips with male headers. However, it would be easier to use a polarized connector like the ones from the 4-wire pigtail connector to easily connect and disconnect from your controller.
PRT-11375
There is nothing quite as essential as a neatly organized assortment of colored wire on your workbench. This pack of Hook-Up …
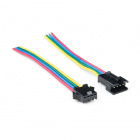
CAB-14576
These 4-pin JST-SM pigtail connectors mate perfectly with LED strips and other applications that require only two lines and a…
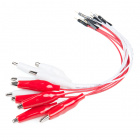
CAB-14303
This is a 10-pack of wires that are pre-terminated with an alligator clip on one end and a male header on the other.
Transistors
If you are using a microcontroller to control the strip, you will need transistors to control each channel. For small lengths, you could use NPN transistors. For longer lengths, you could use n-channel mosfets. Just make sure to get the associated resistors depending on your transistor.
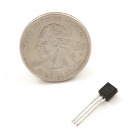
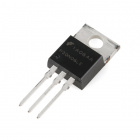
COM-00521
These are very common, high quality BJT NPN transistors made by ST Micro.
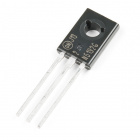
COM-13951
This is the 2N5192G, an NPN silicon transistor. This little transistor can help in your project by being used to help drive l…
COM-10213
This part is no longer available. The recommended replacement is [here](https://www.sparkfun.com/products/24144).
If you'v…
Retired
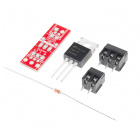
COM-12959
This is the SparkFun MOSFET Power Control Kit, a breakout PTH soldering kit for for the [RFP30N06LE](http://www.sparkfun.com/…
Retired
Input
For options to adjust the color and brightness of your LED strip, you could use the following with a microcontroller.
COM-09806
This 10K trimmable potentiometer has a small knob built right in and it's breadboard friendly to boot!
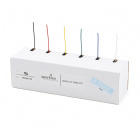
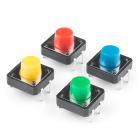
PRT-14460
This is a simple 4-pack of momentary, multicolor buttons, great for all sorts of projects! Unlike previous iterations of mult…
Tools
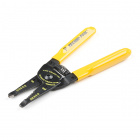
You will need a soldering iron, solder, and general soldering accessories. You may also need some wire strippers if you are cutting and reusing parts of the strip.
TOL-14456
This adjustable-temperature soldering iron is a great tool for when you don't want to break the bank but need a reliable iron…
TOL-09163
This is your basic tube of unleaded (Pb-free) solder with a no clean, water soluble resin core. 0.031" gauge and 15 grams
TOL-14762
These are your basic, run-of-the-mill wire strippers from Techni-Tool with a comfortable grip making them an affordable optio…
Retired
Suggested Reading
If you aren’t familiar with the following concepts, we recommend checking out these tutorials before continuing. If you are looking to customize the control by programming a microcontroller, we recommend looking at the SparkFun Inventor's Kit for Arduino.
Light-Emitting Diodes (LEDs)
Learn the basics about LEDs as well as some more advanced topics to help you calculate requirements for projects containing many LEDs.
LED Light Bar Hookup
A quick overview of SparkFun's LED light bars, and some examples to show how to hook them up.
Transistors
A crash course in bi-polar junction transistors. Learn how transistors work and in which circuits we use them.
SparkFun Inventor's Kit Experiment Guide - v4.1
The SparkFun Inventor's Kit (SIK) Experiment Guide contains all of the information needed to build all five projects, encompassing 16 circuits, in the latest version of the kit, v4.1.2 and v4.1.


