Non-Addressable RGB LED Strip Hookup Guide
 bboyho
Arduino Example Code
Note: This example assumes you are using the latest version of the Arduino IDE on your desktop. If this is your first time using Arduino, please review our tutorial on installing the Arduino IDE.
To follow along, check out the GitHub repository. There are five examples in the repo. Two of which are simple examples to turn on a certain color based on the type of LED that you are using. We'll go over the other three examples.
The three examples from this GitHub Repo that we will go over are listed below. Click on one of the links below to jump to the example!
 |
 |
 |
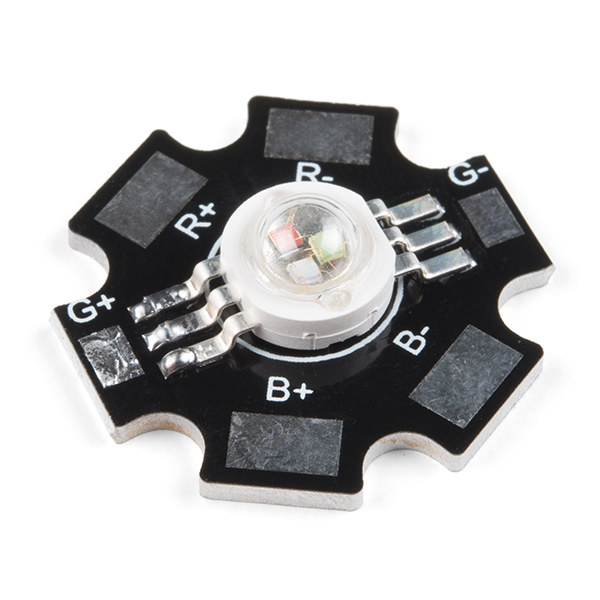 |
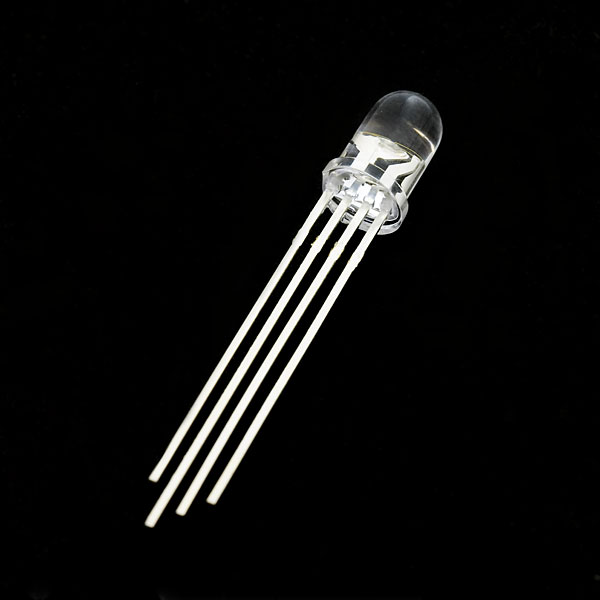
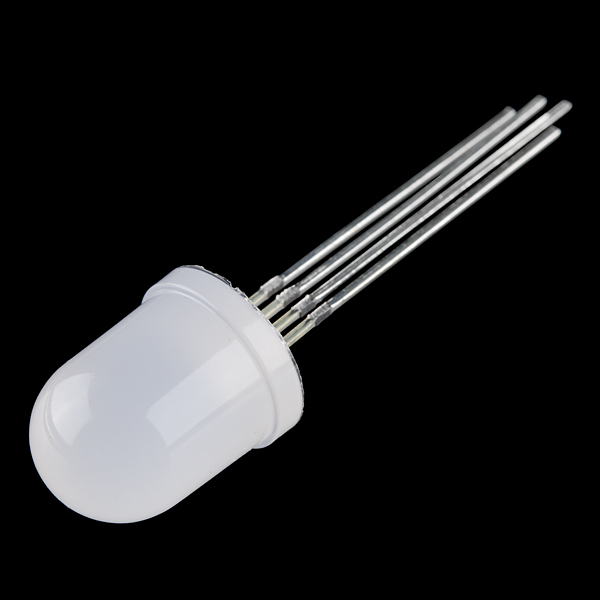
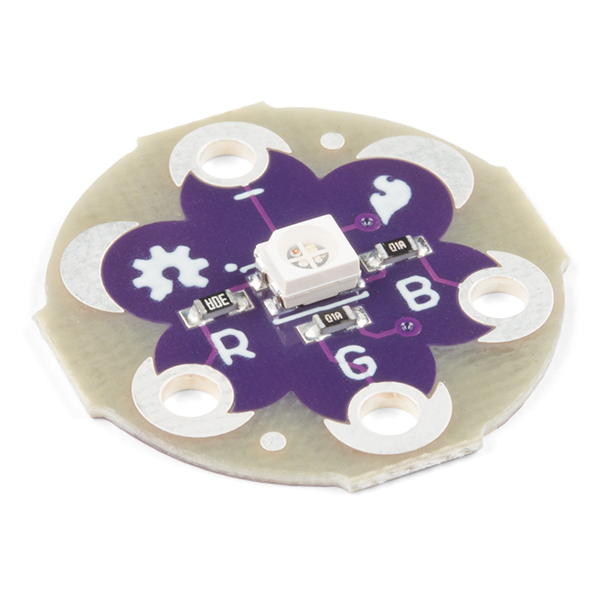
| Clear Common Anode RGB LED- 5mm | Diffused Common Cathode RGB LED- 10mm | SMD Common Cathode RGB LED on a Sewable PCB | High Power RGB LED on a PCB |
Example 1: Custom Color Cycling
This code will cycle through 12 colors and white. This is useful to test to see if you wired the colors correctly or want to show a color. There are options to adjust the brightness, type of LED, and rate at which the colors cycle.
If you have not already, unzip the GitHub repo and open the example code called Example1_RGB-CycleLED.ino. The path of the example code will probably look similar to: ... \ Non-Addresssable_RGB_LED_Strip_Code \ Firmware \ Arduino \ Example1_RGB-CycleLED. You can also copy the code below and paste it into the Arduino IDE. Select the board (in this case the Arduino/Genuino Uno) and COM port that the board enumerated to. Then hit the upload button to upload to your Arduino.
language:c
/******************************************************************************
  Example1_RGB-CycleLED.ino

  Non-Addressable RGB LED Custom Color Cycle
  WRITTEN BY: Ho Yun "Bobby" Chan @ SparkFun Electronics
  DATE: November 4, 2019
  GITHUB REPO: https://github.com/sparkfun/Non-Addresssable_RGB_LED_Strip_Code
  DEVELOPMENT ENVIRONMENT SPECIFICS:
    Firmware developed using Arduino IDE v1.8.9

  ============================== DESCRIPTION ==============================
  Expand your color options using analogWrite() and a non-addressable RGB LED.
  This code will cycle through 12 colors and white. There are options to adjust
  the brightness, type of LED, and rate at which the colors cycle.

  This example code works with an individual common anode and common cathode
  RGB LED. If you have a transistor or constant current LED driver, you can
  also use it to control an RGB LED strip or a higher power RGB LED.
  We'll assume that you are using a common anode LEDs in the strip. For more
  information checkout our tutorial: https://learn.sparkfun.com/tutorials/731

  Notes: There are twelve rainbow colors (primary, secondary, tertiary).
  Unlike digitalWrite(), which can be only HIGH (on) or LOW (off),
  analogWrite() lets you smoothly change the brightness from 0 (off) to 255 (fully on).
  When analogWrite() is used with the RGB LED, you can create millions of colors!
  For simplicity, we'll use 12 rainbow colors and white.  We will be blinking
  between each color.

  In the analogWrite() functions:
    0 is off
    128 is halfway on (used for the tertiary colors)
    255 is full brightness.

  ========== TUTORIAL ==========
  Non-Addressable RGB LED Strip Hookup Guide
  https://learn.sparkfun.com/tutorials/731

  Transistors | Applictions I: Switches
  https://learn.sparkfun.com/tutorials/transistors/all#applications-i-switches

  ==================== PRODUCTS THAT USE THIS CODE ====================
    LED RGB Strip (1M Bare) - https://www.sparkfun.com/products/12021
    LED RGB Strip (1M Sealed) - https://www.sparkfun.com/products/12023
    LED RGB Strip (5B Bare) - https://www.sparkfun.com/products/12022
    LED RGB Strip (5M Sealed) - https://www.sparkfun.com/products/12024
    Triple Output High Power RGB LED - https://www.sparkfun.com/products/15200

    PicoBuck LED Driver - https://www.sparkfun.com/products/13705
    N-Channel MOSFET Power Control Kit - https://www.sparkfun.com/products/12959

  ==================== HARDWARE CONNECTIONS ====================
  The hardware connection depends on your hardware and setup. Below is one possible
  arrangement.

  RGB Common Anode LED Strip => BJT/MOSFET => Arduino PWM Pin
      R pin => transistor => 5
      G pin => transistor => 6
      B pin => transistor => 9
      - pin                  -

  LICENSE: This code is released under the MIT License (http://opensource.org/licenses/MIT)

  ******************************************************************************/

//Debug mode, comment one of these lines out using a syntax
//for a single line comment ("//"):
//#define DEBUG 0     //0 = LEDs only
#define DEBUG 1     //1 = LEDs w/ serial output

// Define our LED pins to a PWM Pin
#define redPin 5
#define greenPin 6
#define bluePin 9

// Create integer variables for our LED color value
int redValue = 0;
int greenValue = 0;
int blueValue = 0;

//Create brightness variable
//Ranging from 0.0-1.0:
//  0.0 is off
//  0.5 is 50%
//  1.0 is fully on
float brightnessLED = 0.1;

//Create variables for type of LED and if it is used with a transistor
boolean commonAnode = false;
boolean commonCathode = true; //i.e.) When pin is HIGH, LED will also go HIGH without a transistor/PicoBuck

// Note:
//  Common Anode is `commonAnode`
//  Common Cathode LED is `commonCathode`
//  Common Anode RGB LED Strip with transistor is `!commonAnode`
//  RGB High Power LED with PicoBuck is also  `!commonAnode`
boolean rgbType = !commonAnode;

int blinkRate = 1000; //in milliseconds


void setup() {

  // Make all of our LED pins outputs:
  pinMode(redPin, OUTPUT);
  pinMode(greenPin, OUTPUT);
  pinMode(bluePin, OUTPUT);

  allOFF(); //initialize LEDs with it turned off
  rgbCalc();//calculate for RGB type
  rgbShow(); //make sure to show it happening

#if DEBUG
  Serial.begin(9600); //initialize Serial Monitor
  //while (!Serial); // Comment out to wait for serial port to connect to Serial Monitor. Option for native USB.
  Serial.println("Custom Color Cycling w/ an RGB LED. This example will cycle through 13 colors.");
  Serial.println(" ");
  Serial.println("Note: Make sure to adjust the code for a common cathode or common anode.");
  Serial.println(" ");
#endif

}//end setup()


void loop()
{
  //used to visually check when Arduino is initialized
#if DEBUG
  Serial.print("RED");
  Serial.print(" | Brightness % = ");
  Serial.println(brightnessLED * 100);
#endif
  redON();
  rgbCalc();
  rgbShow();
  delay(blinkRate);

#if DEBUG
  Serial.print("ORANGE");
  Serial.print(" | Brightness % = ");
  Serial.println(brightnessLED * 100);
#endif
  orangeON();
  rgbCalc();
  rgbShow();
  delay(blinkRate);

#if DEBUG
  Serial.print("YELLOW");
  Serial.print(" | Brightness % = ");
  Serial.println(brightnessLED * 100);
#endif
  yellowON();
  rgbCalc();
  rgbShow();
  delay(blinkRate);

#if DEBUG
  Serial.print("CHARTRUESE");
  Serial.print(" | Brightness % = ");
  Serial.println(brightnessLED * 100);
#endif
  chartrueseON();
  rgbCalc();
  rgbShow();
  delay(blinkRate);

#if DEBUG
  Serial.print("GREEN");
  Serial.print(" | Brightness % = ");
  Serial.println(brightnessLED * 100);
#endif
  greenON();
  rgbCalc();
  rgbShow();
  delay(blinkRate);

#if DEBUG
  Serial.print("SPRING GREEN");
  Serial.print(" | Brightness % = ");
  Serial.println(brightnessLED * 100);
#endif
  springGreenON();
  rgbCalc();
  rgbShow();
  delay(blinkRate);

#if DEBUG
  Serial.print("CYAN");
  Serial.print(" | Brightness % = ");
  Serial.println(brightnessLED * 100);
#endif
  cyanON();
  rgbCalc();
  rgbShow();
  delay(blinkRate);

#if DEBUG
  Serial.print("AZURE");
  Serial.print(" | Brightness % = ");
  Serial.println(brightnessLED * 100);
#endif
  azureON();
  rgbCalc();
  rgbShow();
  delay(blinkRate);

#if DEBUG
  Serial.print("BLUE");
  Serial.print(" | Brightness % = ");
  Serial.println(brightnessLED * 100);
#endif
  blueON();
  rgbCalc();
  rgbShow();
  delay(blinkRate);

#if DEBUG
  Serial.print("VIOLET");
  Serial.print(" | Brightness % = ");
  Serial.println(brightnessLED * 100);
#endif
  violetON();
  rgbCalc();
  rgbShow();
  delay(blinkRate);

#if DEBUG
  Serial.print("MAGENTA");
  Serial.print(" | Brightness % = ");
  Serial.println(brightnessLED * 100);
#endif
  magentaON();
  rgbCalc();
  rgbShow();
  delay(blinkRate);

#if DEBUG
  Serial.print("ROSE");
  Serial.print(" | Brightness % = ");
  Serial.println(brightnessLED * 100);
#endif
  roseON();
  rgbCalc();
  rgbShow();
  delay(blinkRate);

#if DEBUG
  Serial.print("WHITE");
  Serial.print(" | Brightness % = ");
  Serial.println(brightnessLED * 100);
#endif
  whiteON();
  rgbCalc();
  rgbShow();
  delay(blinkRate);

#if DEBUG
  Serial.print("OFF");
  Serial.print(" | Brightness % = ");
  Serial.println(brightnessLED * 100);
#endif
  allOFF();
  rgbCalc();
  rgbShow();
  delay(blinkRate);

}//end loop


// ==================== CUSTOM FUNCTIONS DEFINED BELOW ====================
void allOFF() {
  // Black (all LEDs off)
  // RGB LEDs:
  redValue = 0;
  greenValue =  0;
  blueValue = 0;
}

void redON() {
  // Red
  redValue = 255;
  greenValue =  0;
  blueValue = 0;
}

void orangeON() {
  // Orange
  redValue = 255;
  greenValue = 128;
  blueValue = 0;
}

void yellowON() {
  // Yellow
  redValue = 255;
  greenValue = 255;
  blueValue = 0;
}

void chartrueseON() {
  // Chartruese
  redValue = 128;
  greenValue = 255;
  blueValue = 0;
}

void greenON() {
  // Green
  redValue = 0;
  greenValue = 255;
  blueValue = 0;
}

void springGreenON() {
  // Spring Green
  redValue = 0;
  greenValue = 255;
  blueValue = 128;
}

void cyanON() {
  // Cyan
  redValue = 0;
  greenValue = 255;
  blueValue = 255;
}

void azureON() {
  // Azure
  redValue = 0;
  greenValue = 128;
  blueValue = 255;
}

void blueON() {
  // Blue
  redValue = 0;
  greenValue = 0;
  blueValue = 255;
}

void violetON() {
  // Violet
  redValue = 128;
  greenValue = 0;
  blueValue = 255;
}

void magentaON() {
  // Magenta
  redValue = 255;
  greenValue = 0;
  blueValue = 255;
}

void roseON() {
  // Rose
  redValue = 255;
  greenValue = 0;
  blueValue = 128;
}

void whiteON() {
  // White (all LEDs on)
  redValue = 255;
  greenValue = 255;
  blueValue = 255;
}


void rgbCalc() {
  //use this to correctly light up LED depending on the setup
  if (rgbType == commonAnode) {
    /* If using a common anode LED, a pin
       should turn ON the LED when the pin is LOW.*/
    redValue = 255 - redValue;
    greenValue = 255 - greenValue;
    blueValue = 255 - blueValue;

  }
  else {
    /* If using a common cathode LED, an analog pin
       should turn on the LED when the pin is HIGH. The
       logic is flipped when using a Common Anode RGB LED
       strip, NPN BJT/N-Channel MOSFET, and microcontroller

       Leave RGB values as is, we're good!*/
  }

  redValue = int(redValue * brightnessLED);
  greenValue = int(greenValue * brightnessLED);
  blueValue = int(blueValue * brightnessLED);
}

void rgbShow() {
  //once value is calculated, show the LED color
  analogWrite(redPin, redValue);
  analogWrite(greenPin, greenValue);
  analogWrite(bluePin, blueValue);
}
Once the code has been uploaded, the RGB LED will cycle through each of the 12 colors, white, and then turn off. Each color has its own function. When the function is called, the custom color will have a certain analog value for red, green, and blue. Before displaying the color, the values are calculated depending on the type of LED being used (either a common cathode or common anode). By default, we are assuming that the strip uses common anode LEDs but we are using a transistor to control them so rgbType is set to !commonAnode. The color is further calculated based on the intensity of the LED. After calculating the LED color lights up whenever the function rgbShow() is called.
Open the Arduino Serial Monitor set to 9600 baud to see the output as the color changes. Try adjusting the brightness or blink rate. If you are not seeing the correct color associated with the output, make sure to check your connections and ensure that the correct type of RGB LED is selected.

Example 2: Fading
This code will fade through 12 colors and white. There are options to adjust the brightness, type of LED, and rate at which the colors fade.
If you have not already, unzip the GitHub repo and open the example code called Example2_RGB-FadeLED.ino. The path of the example code will probably look similar to: ...Non-Addresssable_RGB_LED_Strip_Code\Firmware\Arduino\Example2_RGB-FadeLED.ino. You can also copy the code below and paste it into the Arduino IDE. Select the board (in this case the Arduino/Genuino Uno) and COM port that the board enumerated to. Then hit the upload button to upload to your Arduino.
language:c
/******************************************************************************
  Example2_RGB-FadeLED.ino

  Non-Addressable RGB LED Custom Color Fade
  WRITTEN BY: Ho Yun "Bobby" Chan @ SparkFun Electronics
  DATE: November 4, 2019
  GITHUB REPO: https://github.com/sparkfun/Non-Addresssable_RGB_LED_Strip_Code
  DEVELOPMENT ENVIRONMENT SPECIFICS:
    Firmware developed using Arduino IDE v1.8.9

  ============================== DESCRIPTION ==============================
  Expand your color options using analogWrite() and a non-addressable RGB LED.
  This code will fade through 12 colors and white. There are options to adjust
  the brightness, type of LED, and rate at which the colors fade.

  This example code works with an individual common anode and common cathode
  RGB LED. If you have a transistor or constant current LED driver, you can
  also use it to control an RGB LED strip or a higher power RGB LED.
  We'll assume that you are using a common anode LEDs in the strip. For more
  information checkout our tutorial: https://learn.sparkfun.com/tutorials/731

  Notes: There are twelve rainbow colors (primary, secondary, tertiary).
  Unlike digitalWrite(), which can be only HIGH (on) or LOW (off),
  analogWrite() lets you smoothly change the brightness from 0 (off) to 255 (fully on).
  When analogWrite() is used with the RGB LED, you can create millions of colors!
  For simplicity, we'll use 12 rainbow colors and white.  We will be fading
  between each color.

  In the analogWrite() functions:
    0 is off
    128 is halfway on (used for the tertiary colors)
    255 is full brightness.

  ========== TUTORIAL ==========
  Non-Addressable RGB LED Strip Hookup Guide
  https://learn.sparkfun.com/tutorials/731

  Transistors | Applictions I: Switches
  https://learn.sparkfun.com/tutorials/transistors/all#applications-i-switches

  ==================== PRODUCTS THAT USE THIS CODE ====================
    LED RGB Strip (1M Bare) - https://www.sparkfun.com/products/12021
    LED RGB Strip (1M Sealed) - https://www.sparkfun.com/products/12023
    LED RGB Strip (5B Bare) - https://www.sparkfun.com/products/12022
    LED RGB Strip (5M Sealed) - https://www.sparkfun.com/products/12024
    Triple Output High Power RGB LED - https://www.sparkfun.com/products/15200

    PicoBuck LED Driver - https://www.sparkfun.com/products/13705
    N-Channel MOSFET Power Control Kit - https://www.sparkfun.com/products/12959

  ==================== HARDWARE CONNECTIONS ====================
  The hardware connection depends on your hardware and setup. Below is one possible
  arrangement.

  RGB Common Anode LED Strip => BJT/MOSFET => Arduino PWM Pin
      R pin => transistor => 5
      G pin => transistor => 6
      B pin => transistor => 9
      - pin                  -

  LICENSE: This code is released under the MIT License (http://opensource.org/licenses/MIT)

  ******************************************************************************/

//Debug mode, comment one of these lines out using a syntax
//for a single line comment ("//"):
//#define DEBUG 0     //0 = LEDs only
#define DEBUG 1     //1 = LEDs w/ serial output

// Define our LED pins to a PWM Pin
#define redPin 5
#define greenPin 6
#define bluePin 9

// Create integer variables for our LED color value
int redValue = 0;
int greenValue = 0;
int blueValue = 0;

//Create brightness variable
//Ranging from 0.0-1.0:
//  0.0 is off
//  0.5 is 50%
//  1.0 is fully on
float brightnessLED = 0.1;

//Create variables for type of LED and if it is used with a transistor
boolean commonAnode = false;
boolean commonCathode = true;//i.e.) When pin is HIGH, LED will also go HIGH without a transistor/PicoBuck

// Note:
//  Common Anode is `commonAnode`
//  Common Cathode LED is `commonCathode`
//  Common Anode RGB LED Strip with transistor is `!commonAnode`
//  RGB High Power LED with PicoBuck is also  `!commonAnode`
boolean rgbType = !commonAnode;

int colorMode = 1; //color mode to control LED color

//Variables for fading LED
int prevFadeVal = 0;
int currentFadeVal = 0;
boolean increasing = true;
int fadeVal = 5; //value to step when increasing/decreasing, recommended to be 1 or 5, larger numbers will have problems lighting up
int fadeMAX = 255; //maximum fade value
int fadeMIN = 0;   //minimum fade value
int fadeDelay = 30;//delay between each step


void setup() {

  // Make all of our LED pins outputs
  pinMode(redPin, OUTPUT);
  pinMode(greenPin, OUTPUT);
  pinMode(bluePin, OUTPUT);

  allOFF(); //make sure to initialize LEDs with it turned off
  rgbCalc();//calculate for RGB type
  rgbShow(); //make sure to show it happening

#if DEBUG
  Serial.begin(9600); //initialize Serial Monitor
  //while (!Serial); // Comment out to wait for serial port to connect to Serial Monitor. Option for native USB.
  Serial.println("Custom Color Fading w/ an RGB LED.");
  Serial.println(" ");
  Serial.println("Note: Make sure to adjust the code for a common cathode or common anode.");
  Serial.println(" ");
#endif

}//end setup()

void loop()
{


  switch (colorMode) {
    case 1://FADE RED
      redValue = currentFadeVal;
      greenValue = 0;
      blueValue = 0;

      rgbCalc();
      break;
    //========== END FADE RED ==========

    case 2://FADE ORANGE
      redValue = currentFadeVal;
      greenValue = currentFadeVal * 0.498; // 128/255 = ~0.498039
      blueValue = 0;

      rgbCalc();

      if (redValue > 0 && greenValue == 0) {
        //tertiary component is 1/2, so when it calculates to decimal with fade value,
        //it will be basically be off, make sure to turn off other color so that
        //it does not just show the other color
        redValue = 0;
      }

      // takes x amount of steps if you do not set it to zero for certain brightness (i.e. takes 8 more steps to turn off for 0.1)
      //Serial.print("Red Value =");
      //Serial.println( int((currentFadeVal) * brightnessLED));

      //Serial.print("Green Value =");
      //Serial.println( int((currentFadeVal * 0.498) * brightnessLED));
      break;
    //========== END FADE ORANGE ==========

    case 3://FADE YELLOW
      redValue = currentFadeVal;
      greenValue = currentFadeVal;
      blueValue = 0;

      rgbCalc();
      break;
    //========== END FADE YELLOW ==========

    case 4://FADE CHARTRUESE
      redValue = currentFadeVal * 0.498; // 128/255 = ~0.498039
      greenValue = currentFadeVal;
      blueValue = 0;

      rgbCalc();

      if (greenValue > 0 && redValue == 0) {
        //tertiary component is 1/2, so when it calculates to decimal with fade value,
        //it will be basically be off, make sure to turn off other color so that
        //it does not just show the other color
        greenValue = 0;
      }
      break;
    //========== END FADE CHARTRUESE ==========

    case 5://FADE GREEN
      redValue = 0;
      greenValue = currentFadeVal;
      blueValue = 0;

      rgbCalc();
      break;
    //========== END FADE GREEN ==========

    case 6://FADE SPRING GREEN
      redValue = 0;
      greenValue = currentFadeVal;
      blueValue = currentFadeVal * 0.498; // 128/255 = ~0.498039

      rgbCalc();

      if (greenValue > 0 && blueValue == 0) {
        //tertiary component is 1/2, so when it calculates to decimal with fade value,
        //it will be basically be off, make sure to turn off other color so that
        //it does not just show the other color
        greenValue = 0;
      }
      break;
    //========== END FADE SPRING GREEN ==========

    case 7://FADE CYAN
      redValue = 0;
      greenValue = currentFadeVal;
      blueValue = currentFadeVal;

      rgbCalc();
      break;
    //========== END FADE CYAN ==========

    case 8://FADE AZURE
      redValue = 0;
      greenValue = currentFadeVal * 0.498; // 128/255 = ~0.498039
      blueValue = currentFadeVal;

      rgbCalc();

      if (blueValue > 0 && greenValue == 0) {
        //tertiary component is 1/2, so when it calculates to decimal with fade value,
        //it will be basically be off, make sure to turn off other color so that
        //it does not just show the other color
        blueValue = 0;
      }
      break;
    //========== END FADE AZURE ==========

    case 9://FADE BLUE
      redValue = 0;
      greenValue = 0;
      blueValue = currentFadeVal;

      rgbCalc();
      break;
    //========== END FADE BLUE ==========

    case 10://FADE VIOLET
      redValue = currentFadeVal * 0.498;
      greenValue = 0;
      blueValue = currentFadeVal;

      rgbCalc();

      if (blueValue > 0 && redValue == 0) {
        //tertiary component is 1/2, so when it calculates to decimal with fade value,
        //it will be basically be off, make sure to turn off other color so that
        //it does not just show the other color
        blueValue = 0;
      }
      break;
    //========== END FADE VIOLET ==========

    case 11://FADE MAGENTA
      redValue = currentFadeVal;
      greenValue = 0;
      blueValue = currentFadeVal;

      rgbCalc();
      break;
    //========== END FADE MAGENTA ==========

    case 12://FADE ROSE
      redValue = currentFadeVal;
      greenValue = 0;
      blueValue = currentFadeVal * 0.498;

      rgbCalc();

      if (redValue > 0 && blueValue == 0) {
        //tertiary component is 1/2, so when it calculates to decimal with fade value,
        //it will be basically be off, make sure to turn off other color so that
        //it does not just show the other color
        redValue = 0;
      }
      break;
    //========== END FADE ROSE ==========

    case 13://FADE WHITE
      redValue = currentFadeVal;
      greenValue = currentFadeVal;
      blueValue = currentFadeVal;

      rgbCalc();
      break;
    //========== END FADE WHITE ==========

    default:
      allOFF();
      rgbCalc();
      break;
  }


#if DEBUG
  Serial.print("Color Fading = ");
  if (colorMode == 1) {
    Serial.print("RED");
  }
  else if (colorMode == 2) {
    Serial.print("ORANGE");
  }
  else if (colorMode == 3) {
    Serial.print("YELLOW");
  }
  else if (colorMode == 4) {
    Serial.print("CHARTRUESE");
  }
  else if (colorMode == 5) {
    Serial.print("GREEN");
  }
  else if (colorMode == 6) {
    Serial.print("SPRING GREEN");
  }
  else if (colorMode == 7) {
    Serial.print("CYAN");
  }
  else if (colorMode == 8) {
    Serial.print("AZURE");
  }
  else if (colorMode == 9) {
    Serial.print("BLUE");
  }
  else if (colorMode == 10) {
    Serial.print("VIOLET");
  }
  else if (colorMode == 11) {
    Serial.print("MAGENTA");
  }
  else if (colorMode == 12) {
    Serial.print("ROSE");
  }
  else if (colorMode == 13) {
    Serial.print("WHITE");
  }
  else {
    Serial.print("OFF");
  }
  Serial.print(" | Brightness % = ");
  Serial.print(brightnessLED * 100);
  Serial.print("%");

  Serial.print(" | Fade Val Before Calc= ");
  Serial.println(currentFadeVal);
#endif

  rgbShow();
  delay(fadeDelay);


  if (increasing == true) {
    //increasing
    currentFadeVal += fadeVal;
  }
  else {
    //decreasing
    currentFadeVal -= fadeVal;
  }

  if (currentFadeVal > fadeMAX) {
    increasing = false;
    prevFadeVal -= fadeVal;//undo addition

    currentFadeVal = prevFadeVal;
  }
  else if (currentFadeVal < fadeMIN) {
    increasing = true;
    prevFadeVal += fadeVal;//undo subtraction

    currentFadeVal = prevFadeVal;

    colorMode += 1;//next color
    if (colorMode > 13) {
      colorMode = 0;
    }
  }

  prevFadeVal = currentFadeVal;

}//END LOOP


// ==================== CUSTOM FUNCTIONS DEFINED BELOW ====================
void allOFF() {
  // Black (all LEDs off)
  // RGB LEDs:
  redValue = 0;
  greenValue =  0;
  blueValue = 0;

  rgbCalc();
}

void redON() {
  // Red
  redValue = 255;
  greenValue =  0;
  blueValue = 0;

  rgbCalc();
}

void orangeON() {
  // Orange
  redValue = 255;
  greenValue = 128;
  blueValue = 0;

  rgbCalc();
}

void yellowON() {
  // Yellow
  redValue = 255;
  greenValue = 255;
  blueValue = 0;

  rgbCalc();
}

void chartrueseON() {
  // Chartruese
  redValue = 128;
  greenValue = 255;
  blueValue = 0;

  rgbCalc();
}

void greenON() {
  // Green
  redValue = 0;
  greenValue = 255;
  blueValue = 0;

  rgbCalc();
}

void springGreenON() {
  // Spring Green
  redValue = 0;
  greenValue = 255;
  blueValue = 128;

  rgbCalc();
}

void cyanON() {
  // Cyan
  redValue = 0;
  greenValue = 255;
  blueValue = 255;

  rgbCalc();
}

void azureON() {
  // Azure
  redValue = 0;
  greenValue = 128;
  blueValue = 255;

  rgbCalc();
}

void blueON() {
  // Blue
  redValue = 0;
  greenValue = 0;
  blueValue = 255;

  rgbCalc();
}

void violetON() {
  // Violet
  redValue = 128;
  greenValue = 0;
  blueValue = 255;

  rgbCalc();
}

void magentaON() {
  // Magenta
  redValue = 255;
  greenValue = 0;
  blueValue = 255;

  rgbCalc();
}

void roseON() {
  // Rose
  redValue = 255;
  greenValue = 0;
  blueValue = 128;

  rgbCalc();
}

void whiteON() {
  // White (all LEDs on)
  redValue = 255;
  greenValue = 255;
  blueValue = 255;

  rgbCalc();
}


void rgbCalc() {
  //use this to correctly light up LED depending on the setup
  if (rgbType == commonAnode) {
    /* If using a common anode LED, a pin
       should turn ON the LED when the pin is LOW.*/
    redValue = 255 - redValue;
    greenValue = 255 - greenValue;
    blueValue = 255 - blueValue;

  }
  else {
    /* If using a common cathode LED, an analog pin
       should turn on the LED when the pin is HIGH. The
       logic is flipped when using a Common Anode RGB LED
       strip, NPN BJT/N-Channel MOSFET, and microcontroller

       Leave RGB values as is, we're good!*/
  }

  redValue = int(redValue * brightnessLED);
  greenValue = int(greenValue * brightnessLED);
  blueValue = int(blueValue * brightnessLED);
}

void rgbShow() {
  //once value is calculated, show the LED color
  analogWrite(redPin, redValue);
  analogWrite(greenPin, greenValue);
  analogWrite(bluePin, blueValue);
}
Once the code has been uploaded, you should see the colors fading in and out. Open the serial monitor at 9600 to see what color is fading and its respective fade value. Due to the calculations and serial output, the fading can appear to be slow. You may want to adjust the baud rate to a higher value like 115200, adjust the fade delay, or turn off the debugging by defining DEBUG as 0. Additionally, the LEDs may turn off if the fade value and brightness is too small. This is due to the minimum voltage required to turn on the LEDs. You should see something similar to the GIF below. The GIF repeats a small sample of the colors fading. You will see all of the colors cycling in your setup.

Example 3: Full Demo
// in front of this line of code.
//brightnessLED = analogRead(knobPin) / 1023.0; //potentiometer for Brightnessloop().
This code will turn on a color, blink, fade, or cycle through 12 colors depending on the button input. The color cycle used in this demo will fade between each of the 12 colors. There are options to adjust the brightness, type of LED, and rate at which the colors cycle. The RedBoard will only change the color and pattern after pressing the button again.
If you have not already, unzip the GitHub repo and open the example code called Example3_RGB-FullDemoLED.ino. The path of the example code will probably look similar to: ...Non-Addresssable_RGB_LED_Strip_Code\Firmware\Arduino\Example3_RGB-FullDemoLED. You can also copy the code below and paste it into the Arduino IDE. Select the board (in this case the Arduino/Genuino Uno) and COM port that the board enumerated to. Then hit the upload button to upload to your Arduino.
language:c
/******************************************************************************
  Example3_RGB-FullDemoLED.ino

  Non-Addressable RGB LED Full Demo
  WRITTEN BY: Ho Yun "Bobby" Chan @ SparkFun Electronics
  DATE: November 4, 2019
  GITHUB REPO: https://github.com/sparkfun/Non-Addresssable_RGB_LED_Strip_Code
  DEVELOPMENT ENVIRONMENT SPECIFICS:
    Firmware developed using Arduino IDE v1.8.9

  ============================== DESCRIPTION ==============================
  Expand your color options using analogWrite() and a non-addressable RGB LED.
  This code will either turn on a color, blink, fade, or cycle through 12
  colors and white depending on the button input. There are options to adjust
  the brightness, type of LED, and rate at which the colors blink/fade/cycle.

  This example code works with an individual common anode and common cathode
  RGB LED. If you have a transistor or constant current LED driver, you can
  also use it to control an RGB LED strip or a higher power RGB LED.
  We'll assume that you are using a common anode LEDs in the strip. For more
  information checkout our tutorial: https://learn.sparkfun.com/tutorials/731

  Notes: There are twelve rainbow colors (primary, secondary, tertiary).
  Unlike digitalWrite(), which can be only HIGH (on) or LOW (off),
  analogWrite() lets you smoothly change the brightness from 0 (off) to 255 (fully on).
  When analogWrite() is used with the RGB LED, you can create millions of colors!
  For simplicity, we'll use 12 rainbow colors and white.

  In the analogWrite() functions:
    0 is off
    128 is halfway on (used for the tertiary colors)
    255 is full brightness.

  ========== TUTORIAL ==========
  Non-Addressable RGB LED Strip Hookup Guide
  https://learn.sparkfun.com/tutorials/731

  Transistors | Applictions I: Switches
  https://learn.sparkfun.com/tutorials/transistors/all#applications-i-switches

  ==================== PRODUCTS THAT USE THIS CODE ====================
    LED RGB Strip (1M Bare) - https://www.sparkfun.com/products/12021
    LED RGB Strip (1M Sealed) - https://www.sparkfun.com/products/12023
    LED RGB Strip (5B Bare) - https://www.sparkfun.com/products/12022
    LED RGB Strip (5M Sealed) - https://www.sparkfun.com/products/12024
    Triple Output High Power RGB LED - https://www.sparkfun.com/products/15200

    PicoBuck LED Driver - https://www.sparkfun.com/products/13705
    N-Channel MOSFET Power Control Kit - https://www.sparkfun.com/products/12959

  ==================== HARDWARE CONNECTIONS ====================
  The hardware connection depends on your hardware and setup. Below is one possible
  arrangement.

  RGB Common Anode LED Strip => BJT/MOSFET => Arduino PWM Pin
      R pin => transistor => 5
      G pin => transistor => 6
      B pin => transistor => 9
      - pin                  -

  LICENSE: This code is released under the MIT License (http://opensource.org/licenses/MIT)

  ******************************************************************************/

//Debug mode, comment one of these lines out using a syntax
//for a single line comment ("//"):
//#define DEBUG 0     //0 = LEDs only
#define DEBUG 1     //1 = LEDs w/ serial output

// Define our LED pins to a PWM Pin
#define redPin 5
#define greenPin 6
#define bluePin 9

// Create integer variables for our LED color value
int redValue = 0;
int greenValue = 0;
int blueValue = 0;

// Define our Potentiometer to a Analog Pin for Brightness
// This is needed if you use a Potentiometer
#define knobPin A0

//Create brightness variable
//Ranging from 0.0-1.0:
//  0.0 is off
//  0.5 is 50%
//  1.0 is fully on
float brightnessLED = 0.1;

//Create variables for type of LED and if it is used with a transistor
boolean commonAnode = false;
boolean commonCathode = true;//i.e.) When pin is HIGH, LED will also go HIGH without a transistor/PicoBuck

// Note:
//  Common Anode LED is `commonAnode`
//  Common Cathode LED is `commonCathode`
//  Common Anode RGB LED Strip with transistor is `!commonAnode`
//  RGB High Power LED with PicoBuck is also  `!commonAnode`
boolean rgbType = !commonAnode;

//Variables to keep track of color and pattern
int colorMode = 0; //color mode to control LED color
int pattern = 0; //pattern to turn off, stay on, fade, blink

//Variables for fading LED
int prevFadeVal = 0;
int currentFadeVal = 0;
boolean increasing = true;
int fadeVal = 5; //value to step when increasing/decreasing, recommended to be 1 or 5, larger numbers will have problems lighting up
int fadeMAX = 255; //maximum fade value
int fadeMIN = 0;   //minimum fade value
int fadeDelay = 30;//delay between each step

//Variables for blinking LED
int blinkVal = 0;
boolean blinkON = false;
int counter = 0; //use as a "delay"
int blinkRate = 750; //in milliseconds

//Variables to transition between RGB in a rainbow
int rainbowRedVal = 0;
int rainbowGreenVal = 0;
int rainbowBlueVal = 0;
int rainbowTransitionVal = 0;
int rainbowDelay = 5; //in milliseconds to transition between colors

//Note: You'll want to not make `rainbowDelay` too long as this will
//      cause delays with button presses

//Button variables for color
const int button1Pin = 2;
boolean button1State = false;
boolean prevbutton1State = false;
boolean currentbutton1State = false;

//Button variables for pattern
const int button2Pin = 3;
boolean button2State = false;
boolean prevbutton2State = false;
boolean currentbutton2State = false;


void setup() {

  // Make all of our LED pins outputs:
  pinMode(redPin, OUTPUT);
  pinMode(greenPin, OUTPUT);
  pinMode(bluePin, OUTPUT);

  if (rgbType == commonAnode) {
    //set values 255 to turn off OFF if common anode
    rainbowRedVal = 255;
    rainbowGreenVal = 255;
    rainbowBlueVal = 255;
  }

  sequenceTest();//visually initialization
  allOFF(); //make sure to initialize LEDs with it turned off
  rgbCalc();//calculate for RGB type
  rgbShow(); //make sure to show it happening

  pinMode(button1Pin, INPUT_PULLUP); //use internal pullup resistor with button
  pinMode(button2Pin, INPUT_PULLUP); //use internal pullup resistor with button

#if DEBUG
  Serial.begin(9600); //initialize Serial Monitor
  //while (!Serial); // Comment out to wait for serial port to connect to Serial Monitor. Option for native USB.
  Serial.println("Custom Color Mixing Demo w/ an RGB LED. Toggling the buttons will adjust the color and pattern.");
  Serial.println(" ");
  Serial.println("Note: Make sure to adjust the code for a common cathode or common anode.");
  Serial.println("Default is set to no color and off!");
  Serial.println(" ");
#endif

}//end setup()


void loop()
{
  button1State = digitalRead(button1Pin);// button for Color Mode
  button2State = digitalRead(button2Pin);// button for Pattern

  //==================== CHECK POTENTIOMETER FOR BRIGHTNESS ====================
  //Uncomment the line below if you are using a potentiometer or photoresistor (i.e. light sensor)
  //brightnessLED = analogRead(knobPin) / 1023.0; //potentiometer for Brightness

  /* Note: If you do not have a potentiometer or analog sensor attached,
    the LEDs will flicker when the LED pulls a certain amount of power
    due to the pin floating. Make sure to also GND the sensor close to your
    Arduino to reduce the noise.

    The LEDs can flicker at low values when using the fade mode. Make sure
    to adjust the potentiometer to a certain brightness or fade values
    for smooth fading.*/

  /*
    #if DEBUG
    Serial.print(" Brightness Value % = ");
    Serial.println(brightnessLED * 100);
    #endif
  */
  //==================== END CHECK POTENTIOMETER FOR BRIGHTNESS ====================

  //==================== CHECK BUTTON FOR COLOR MODE ====================
  //if button is pressed, it will be pulled low
  if (button1State == LOW) {
    currentbutton1State = true; // button has been pressed once

    if (prevbutton1State != currentbutton1State) { //check to see if button is still being pressed
      colorMode = colorMode + 1; //change color MODE after button has been pressed
#if DEBUG
      Serial.print("Color Mode = ");
      if (colorMode == 1) {
        Serial.println("RED");
      }
      else if (colorMode == 2) {
        Serial.println("ORANGE");
      }
      else if (colorMode == 3) {
        Serial.println("YELLOW");
      }
      else if (colorMode == 4) {
        Serial.println("CHARTRUESE");
      }
      else if (colorMode == 5) {
        Serial.println("GREEN");
      }
      else if (colorMode == 6) {
        Serial.println("SPRING GREEN");
      }
      else if (colorMode == 7) {
        Serial.println("CYAN");
      }
      else if (colorMode == 8) {
        Serial.println("AZURE");
      }
      else if (colorMode == 9) {
        Serial.println("BLUE");
      }
      else if (colorMode == 10) {
        Serial.println("VIOLET");
      }
      else if (colorMode == 11) {
        Serial.println("MAGENTA");
      }
      else if (colorMode == 12) {
        Serial.println("ROSE");
      }
      else if (colorMode == 13) {
        Serial.println("WHITE");
      }
      else {
        Serial.println("OFF");
      }
#endif

      //Cycle through colors when pressing buttons
      if (colorMode < 0 || colorMode > 13) {
        //reset ledMode
        colorMode = 0;
        allOFF();
        rgbCalc();
        rgbShow();
      }
    }
    else { //do nothing because finger is still on button
    }
    prevbutton1State = currentbutton1State;//update button1 state
  }


  //button has not been pressed, it will be high
  else {
    currentbutton1State = false;
    prevbutton1State = currentbutton1State;//update button1 state
  }

  //==================== END CHECK BUTTON FOR COLOR MODE ====================

  //==================== CHECK BUTTON FOR PATTERN ====================
  if (button2State == LOW) {
    currentbutton2State = true; //button has been pressed once

    if (prevbutton2State != currentbutton2State) { //check to see if button is still being pressed
      pattern = pattern + 1; //change LED pattern after button has been pressed

#if DEBUG
      Serial.print("Pattern = ");
      if (pattern == 1) {
        Serial.println("ON");//print what pattern
      }
      else if (pattern == 2) {
        Serial.println("FADE");//print what pattern
      }
      else if (pattern == 3) {
        Serial.println("BLINK");//print what pattern
      }
      else if (pattern == 4) {
        Serial.println("RAINBOW");//print what pattern
      }
      else {
        Serial.println("OFF");//print what pattern
      }
#endif


      if (pattern < 0 || pattern > 4) {
        //reset pattern
        pattern = 0;
      }
    }


    else { //do nothing because finger is still on button
    }
    prevbutton2State = currentbutton2State; //update button2 state
  }

  //button has not been pressed, it will be high
  else {
    currentbutton2State = false;
    prevbutton2State = currentbutton2State; //update button2 state
  }
  switch (pattern) {
    case 1:
      patternON();
      break;
    case 2:
      patternFade();
      break;
    case 3:
      patternBlink();
      break;
    case 4:
      patternRainbow();
      break;
    default:
      allOFF();
      rgbCalc();
      rgbShow();
      break;
  }
  //==================== END CHECK BUTTON FOR PATTERN ====================


}//end loop


// ==================== CUSTOM FUNCTIONS DEFINED BELOW ====================
void allOFF() {
  // Black (all LEDs off)
  // RGB LEDs:
  redValue = 0;
  greenValue =  0;
  blueValue = 0;
}

void redON() {
  // Red
  redValue = 255;
  greenValue =  0;
  blueValue = 0;
}

void orangeON() {
  // Orange
  redValue = 255;
  greenValue = 128;
  blueValue = 0;
}

void yellowON() {
  // Yellow
  redValue = 255;
  greenValue = 255;
  blueValue = 0;
}

void chartrueseON() {
  // Chartruese
  redValue = 128;
  greenValue = 255;
  blueValue = 0;
}

void greenON() {
  // Green
  redValue = 0;
  greenValue = 255;
  blueValue = 0;
}

void springGreenON() {
  // Spring Green
  redValue = 0;
  greenValue = 255;
  blueValue = 128;
}

void cyanON() {
  // Cyan
  redValue = 0;
  greenValue = 255;
  blueValue = 255;
}

void azureON() {
  // Azure
  redValue = 0;
  greenValue = 128;
  blueValue = 255;
}

void blueON() {
  // Blue
  redValue = 0;
  greenValue = 0;
  blueValue = 255;
}

void violetON() {
  // Violet
  redValue = 128;
  greenValue = 0;
  blueValue = 255;
}

void magentaON() {
  // Magenta
  redValue = 255;
  greenValue = 0;
  blueValue = 255;
}

void roseON() {
  // Rose
  redValue = 255;
  greenValue = 0;
  blueValue = 128;
}

void whiteON() {
  // White (all LEDs on)
  redValue = 255;
  greenValue = 255;
  blueValue = 255;
}


//-------------------- sequenceTest() FUNCTION --------------------

void sequenceTest() {
  //used to visually check when Arduino is initialized
  redON();
  rgbCalc();
  rgbShow();
  delay(50);

  orangeON();
  rgbCalc();
  rgbShow();
  delay(50);

  yellowON();
  rgbCalc();
  rgbShow();
  delay(50);

  chartrueseON();
  rgbCalc();
  rgbShow();
  delay(50);

  greenON();
  rgbCalc();
  rgbShow();
  delay(50);

  springGreenON();
  rgbCalc();
  rgbShow();
  delay(50);

  cyanON();
  rgbCalc();
  rgbShow();
  delay(50);

  azureON();
  rgbCalc();
  rgbShow();
  delay(50);

  blueON();
  rgbCalc();
  rgbShow();
  delay(50);

  violetON();
  rgbCalc();
  rgbShow();
  delay(50);

  magentaON();
  rgbCalc();
  rgbShow();
  delay(50);

  roseON();
  rgbCalc();
  rgbShow();
  delay(50);

  whiteON();
  rgbCalc();
  rgbShow();
  delay(50);

  allOFF();
  rgbCalc();
  rgbShow();
  delay(50);
}//-------------------- END sequenceTest() FUNCTION --------------------

void rgbCalc() {
  //use this to correctly light up LED depending on the setup
  if (rgbType == commonAnode) {
    /* If using a common anode LED, a pin
       should turn ON the LED when the pin is LOW.*/
    redValue = 255 - redValue;
    greenValue = 255 - greenValue;
    blueValue = 255 - blueValue;

  }
  else {
    /* If using a common cathode LED, an analog pin
       should turn on the LED when the pin is HIGH. The
       logic is flipped when using a Common Anode RGB LED
       strip, NPN BJT/N-Channel MOSFET, and microcontroller

       Leave RGB values as is, we're good!*/
  }

  redValue = int(redValue * brightnessLED);
  greenValue = int(greenValue * brightnessLED);
  blueValue = int(blueValue * brightnessLED);
}

void rgbShow() {
  //once value is calculated, show the LED color
  analogWrite(redPin, redValue);
  analogWrite(greenPin, greenValue);
  analogWrite(bluePin, blueValue);
}

//-------------------- patternON() FUNCTION --------------------

void patternON() {
  // button is pressed, change LED color/sequence
  switch (colorMode)
  {
    case 1:
      redON();
      rgbCalc();
      break;
    case 2:
      orangeON();
      rgbCalc();
      break;
    case 3:
      yellowON();
      rgbCalc();
      break;
    case 4:
      chartrueseON();
      rgbCalc();
      break;
    case 5:
      greenON();
      rgbCalc();
      break;
    case 6:
      springGreenON();
      rgbCalc();
      break;
    case 7:
      cyanON();
      rgbCalc();
      break;
    case 8:
      azureON();
      rgbCalc();
      break;
    case 9:
      blueON();
      rgbCalc();
      break;
    case 10:
      violetON();
      rgbCalc();
      break;
    case 11:
      magentaON();
      rgbCalc();
      break;
    case 12:
      roseON();
      rgbCalc();
      break;
    case 13:
      whiteON();
      rgbCalc();
      break;
    default:
      allOFF();
      rgbCalc();
      break;
  }//end switch

  rgbShow();
}//-------------------- end patternON() FUNCTION --------------------


//-------------------- patternFade() FUNCTION --------------------
void patternFade() {

  switch (colorMode) {
    case 1://FADE RED
      redValue = currentFadeVal;
      greenValue = 0;
      blueValue = 0;

      rgbCalc();
      break;
    //========== END FADE RED ==========

    case 2://FADE ORANGE
      redValue = currentFadeVal;
      greenValue = currentFadeVal * 0.498; // 128/255 = ~0.498039
      blueValue = 0;

      rgbCalc();

      if (redValue > 0 && greenValue == 0) {
        //tertiary component is 1/2, so when it calculates to decimal with fade value,
        //it will be basically be off, make sure to turn off other color so that
        //it does not just show the other color
        redValue = 0;
      }
      // takes x amount of steps if you do not set it to zero for certain brightness (i.e. takes 8 more steps to turn off for 0.1)
      //Serial.print("Red Value =");
      //Serial.println( int((currentFadeVal) * brightnessLED));

      //Serial.print("Green Value =");
      //Serial.println( int((currentFadeVal * 0.498) * brightnessLED));
      break;
    //========== END FADE ORANGE ==========

    case 3://FADE YELLOW
      redValue = currentFadeVal;
      greenValue = currentFadeVal;
      blueValue = 0;

      rgbCalc();
      break;
    //========== END FADE YELLOW ==========

    case 4://FADE CHARTRUESE
      redValue = currentFadeVal * 0.498; // 128/255 = ~0.498039
      greenValue = currentFadeVal;
      blueValue = 0;

      rgbCalc();

      if (greenValue > 0 && redValue == 0) {
        //tertiary component is 1/2, so when it calculates to decimal with fade value,
        //it will be basically be off, make sure to turn off other color so that
        //it does not just show the other color
        greenValue = 0;
      }
      break;
    //========== END FADE CHARTRUESE ==========

    case 5://FADE GREEN
      redValue = 0;
      greenValue = currentFadeVal;
      blueValue = 0;

      rgbCalc();
      break;
    //========== END FADE GREEN ==========

    case 6://FADE SPRING GREEN
      redValue = 0;
      greenValue = currentFadeVal;
      blueValue = currentFadeVal * 0.498; // 128/255 = ~0.498039

      rgbCalc();

      if (greenValue > 0 && blueValue == 0) {
        //tertiary component is 1/2, so when it calculates to decimal with fade value,
        //it will be basically be off, make sure to turn off other color so that
        //it does not just show the other color
        greenValue = 0;
      }
      break;
    //========== END FADE SPRING GREEN ==========

    case 7://FADE CYAN
      redValue = 0;
      greenValue = currentFadeVal;
      blueValue = currentFadeVal;

      rgbCalc();
      break;
    //========== END FADE CYAN ==========

    case 8://FADE AZURE
      redValue = 0;
      greenValue = currentFadeVal * 0.498; // 128/255 = ~0.498039
      blueValue = currentFadeVal;

      rgbCalc();
      if (blueValue > 0 && greenValue == 0) {
        //tertiary component is 1/2, so when it calculates to decimal with fade value,
        //it will be basically be off, make sure to turn off other color so that
        //it does not just show the other color
        blueValue = 0;
      }
      break;
    //========== END FADE AZURE ==========

    case 9://FADE BLUE
      redValue = 0;
      greenValue = 0;
      blueValue = currentFadeVal;

      rgbCalc();
      break;
    //========== END FADE BLUE ==========

    case 10://FADE VIOLET
      redValue = currentFadeVal * 0.498;
      greenValue = 0;
      blueValue = currentFadeVal;

      rgbCalc();

      if (blueValue > 0 && redValue == 0) {
        //tertiary component is 1/2, so when it calculates to decimal with fade value,
        //it will be basically be off, make sure to turn off other color so that
        //it does not just show the other color
        blueValue = 0;
      }
      break;
    //========== END FADE VIOLET ==========

    case 11://FADE MAGENTA
      redValue = currentFadeVal;
      greenValue = 0;
      blueValue = currentFadeVal;

      rgbCalc();
      break;
    //========== END FADE MAGENTA ==========

    case 12://FADE ROSE
      redValue = currentFadeVal;
      greenValue = 0;
      blueValue = currentFadeVal * 0.498;

      rgbCalc();

      if (redValue > 0 && blueValue == 0) {
        //tertiary component is 1/2, so when it calculates to decimal with fade value,
        //it will be basically be off, make sure to turn off other color so that
        //it does not just show the other color
        redValue = 0;
      }
      break;
    //========== END FADE ROSE ==========

    case 13://FADE WHITE
      redValue = currentFadeVal;
      greenValue = currentFadeVal;
      blueValue = currentFadeVal;

      rgbCalc();
      break;
    //========== END FADE WHITE ==========

    default:
      allOFF();
      rgbCalc();
      break;
  }

  rgbShow();
  delay(fadeDelay);


  if (increasing == true) {
    currentFadeVal += fadeVal;
  }
  else { //decreasing
    currentFadeVal -= fadeVal;
  }

  if (currentFadeVal > fadeMAX) {
    increasing = false;
    prevFadeVal -= fadeVal;//undo addition

    currentFadeVal = prevFadeVal;

  }
  else if (currentFadeVal < fadeMIN) {
    increasing = true;
    prevFadeVal += fadeVal;//unto subtraction

    currentFadeVal = prevFadeVal;
  }

  prevFadeVal = currentFadeVal;
}//-------------------- END patternFade() FUNCTION --------------------


//-------------------- patternBlink() FUNCTION --------------------
void patternBlink() {

  switch (colorMode) {
    case 1://RED
      redValue = blinkVal;
      greenValue = 0;
      blueValue = 0;

      rgbCalc();
      break;

    case 2://ORANGE
      redValue = blinkVal;
      greenValue = blinkVal * 0.498;
      blueValue = 0;

      rgbCalc();
      break;

    case 3://YELLOW
      redValue = blinkVal;
      greenValue = blinkVal;
      blueValue = 0;

      rgbCalc();
      break;

    case 4://CHARTREUSE
      redValue = blinkVal * 0.498;
      greenValue = blinkVal;
      blueValue = 0;

      rgbCalc();
      break;

    case 5://GREEN
      redValue = 0;
      greenValue = blinkVal;
      blueValue = 0;

      rgbCalc();
      break;

    case 6://SRING GREEN
      redValue = 0;
      greenValue = blinkVal;
      blueValue = blinkVal * 0.498;

      rgbCalc();
      break;

    case 7://CYAN
      redValue = 0;
      greenValue = blinkVal;
      blueValue = blinkVal;

      rgbCalc();
      break;

    case 8://AZURE
      redValue = 0;
      greenValue = blinkVal * 0.498;
      blueValue = blinkVal;

      rgbCalc();
      break;

    case 9://BLUE
      redValue = 0;
      greenValue = 0;
      blueValue = blinkVal;

      rgbCalc();
      break;

    case 10://VIOLET
      redValue = blinkVal * 0.498;
      greenValue = 0;
      blueValue = blinkVal;

      rgbCalc();
      break;

    case 11://MAGENTA
      redValue = blinkVal;
      greenValue = 0;
      blueValue = blinkVal;

      rgbCalc();
      break;

    case 12://ROSE
      redValue = blinkVal;
      greenValue = 0;
      blueValue = blinkVal * 0.498;

      rgbCalc();
      break;
    case 13://WHITE
      redValue = blinkVal;
      greenValue = blinkVal;
      blueValue = blinkVal;

      rgbCalc();
      break;

    default:
      allOFF();
      rgbCalc();
      break;
  }

  rgbShow();

  if (counter == blinkRate) {
    if (blinkON == true) {
      blinkVal = 0;
      blinkON = false;
    }
    else { //it was on, so turn off
      blinkVal = 255;
      blinkON = true;
    }
    counter = 0;
  }
  else {
    counter = counter + 1;
  }
}//-------------------- patternBlink() FUNCTION //--------------------


//-------------------- patternRainbow() FUNCTION --------------------
void patternRainbow() {
  if (rgbType == commonCathode) {
    if (rainbowTransitionVal == 0) {
      //RED
      rainbowRedVal += 5;
      if (rainbowRedVal >= 255) {
        rainbowTransitionVal = 1;
      }
    }
    else if (rainbowTransitionVal == 1) {
      //RED TO ORANGE TO YELLOW
      rainbowGreenVal += 5;

      if (rainbowGreenVal >= 255) {
        rainbowTransitionVal = 2;
      }
    }
    else if (rainbowTransitionVal == 2) {
      //YELLOW to CHARTREUSE to GREEN
      rainbowRedVal -= 5;

      if (rainbowRedVal <= 0) {
        rainbowTransitionVal = 3;
      }
    }
    else if (rainbowTransitionVal == 3) {
      //GREEN to SPRING GREEN to CYAN
      rainbowBlueVal += 5;

      if (rainbowBlueVal >= 255) {
        rainbowTransitionVal = 4;
      }
    }
    else if (rainbowTransitionVal == 4) {
      //CYAN to AZURE to BLUE
      rainbowGreenVal -= 5;

      if (rainbowGreenVal <= 0) {
        rainbowTransitionVal = 5;
      }
    }
    else if (rainbowTransitionVal == 5) {
      //BLUE to VIOLET to MAGENTA
      rainbowRedVal += 5;

      if (rainbowRedVal >= 255) {
        rainbowTransitionVal = 6;
      }
    }
    else if (rainbowTransitionVal == 6) {
      //MAGENTA to ROSE to RED
      rainbowBlueVal -= 5;

      if (rainbowBlueVal <= 0) {
        rainbowTransitionVal = 1;
      }
    }
  }//end check for commonCathode


  else {
    if (rainbowTransitionVal == 0) {
      //RED
      rainbowRedVal -= 5;
      if (rainbowRedVal <= 0) {
        rainbowTransitionVal = 1;
      }
    }
    else if (rainbowTransitionVal == 1) {
      //RED TO ORANGE TO YELLOW
      rainbowGreenVal -= 5;

      if (rainbowGreenVal <= 0) {
        rainbowTransitionVal = 2;
      }
    }
    else if (rainbowTransitionVal == 2) {
      //YELLOW to CHARTREUSE to GREEN
      rainbowRedVal += 5;

      if (rainbowRedVal >= 255) {
        rainbowTransitionVal = 3;
      }
    }
    else if (rainbowTransitionVal == 3) {
      //GREEN to SPRING GREEN to CYAN
      rainbowBlueVal -= 5;

      if (rainbowBlueVal <= 0) {
        rainbowTransitionVal = 4;
      }
    }
    else if (rainbowTransitionVal == 4) {
      //CYAN to AZURE to BLUE
      rainbowGreenVal += 5;

      if (rainbowGreenVal >= 255) {
        rainbowTransitionVal = 5;
      }
    }
    else if (rainbowTransitionVal == 5) {
      //BLUE to VIOLET to MAGENTA
      rainbowRedVal -= 5;

      if (rainbowRedVal <= 0) {
        rainbowTransitionVal = 6;
      }
    }
    else if (rainbowTransitionVal == 6) {
      //MAGENTA to ROSE to RED
      rainbowBlueVal += 5;


      if (rainbowBlueVal >= 255) {
        rainbowTransitionVal = 1;
      }
    }
  }//end check for commonAnode

  redValue = int(rainbowRedVal * brightnessLED);
  greenValue = int(rainbowGreenVal * brightnessLED);
  blueValue = int(rainbowBlueVal * brightnessLED);

  // Note: the rainbow function calculates the function here so
  // we do not need to call the `rgbCalc()` function

  rgbShow();

  delay(rainbowDelay);
}//-------------------- END patternRainbow() FUNCTION --------------------


// ==================== END CUSTOM FUNCTIONS DEFINED ====================
Once the code has been uploaded, the demo will cycle through the defined colors. Pressing the buttons will cycle through the color or pattern. Opening the Arduino serial monitor at 9600 will show the current color mode or pattern after every button press.