My Drunk Kitchen Apron
 Dia
Dia 
Mix It Up
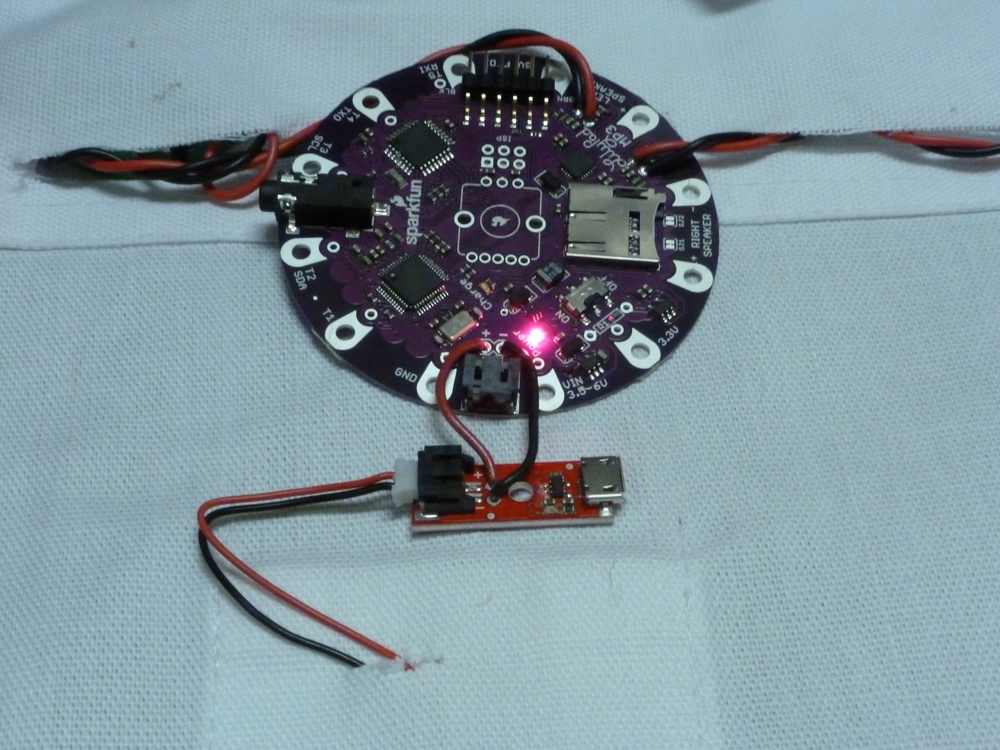
We're working with the LilyPad MP3 trigger, a very cool piece of hardware that will let us play sound clips through the apron. To get there, we'll have to add speakers, and we're also going to throw in a lithium polymer battery charger to make it easy to charge the apron up when the batteries die. For this portion of the apron, we're going to do a little bit of soldering. Wire will give us better sound running to the speakers than thread would. The wire will also form a very solid connection to the charger, which is likely to take a little bit of stress when plugging and unplugging the battery.
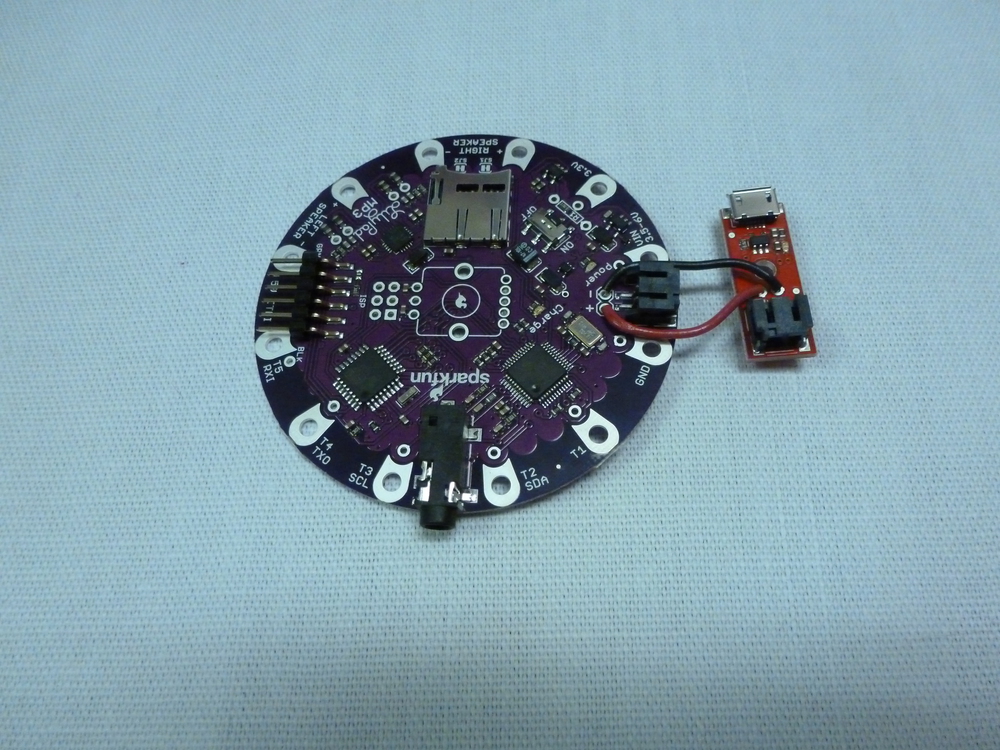
Start with the charger. Both the charge board and the MP3 trigger have a black JST connector on them. Behind the connector, each board has two small through-holes, labeled positive and negative. Using stranded hookup wire, connect these, positive to positive and negative to negative. To power your circuit, you will plug the Lithium Polymer battery into the JST connector on the red charge board. To charge the circuit, plug a micro USB cable into the silver connector on the red board. An LED will illuminate to let you know it's charging.
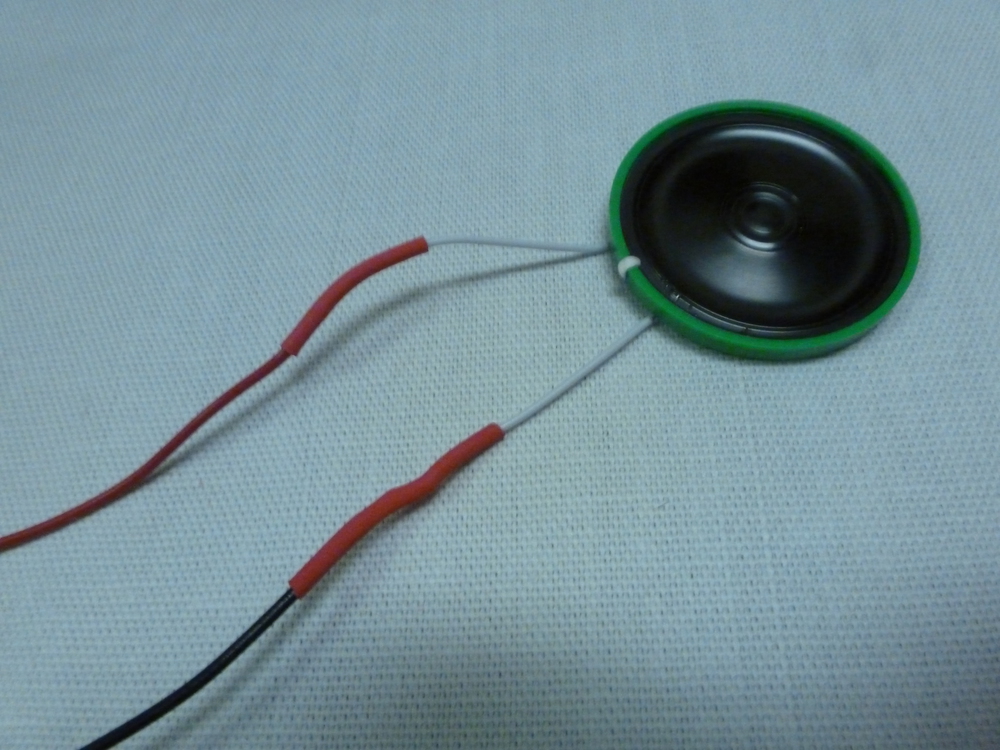
Next, the speakers. The white wires on your speakers aren't long enough to reach the top of the apron where you need them, so you're going to extend them with more hookup wire. Strip and solder the ends. Once they're solidly connected, cover the junction up with a bit of heatshrink to help protect it.

Over the sew tabs for the left and right speakers, there are two pairs of through-hole solder holes. If you flip the board over, those holes are labeled L and R for left and right. Each set also has a positive and negative.
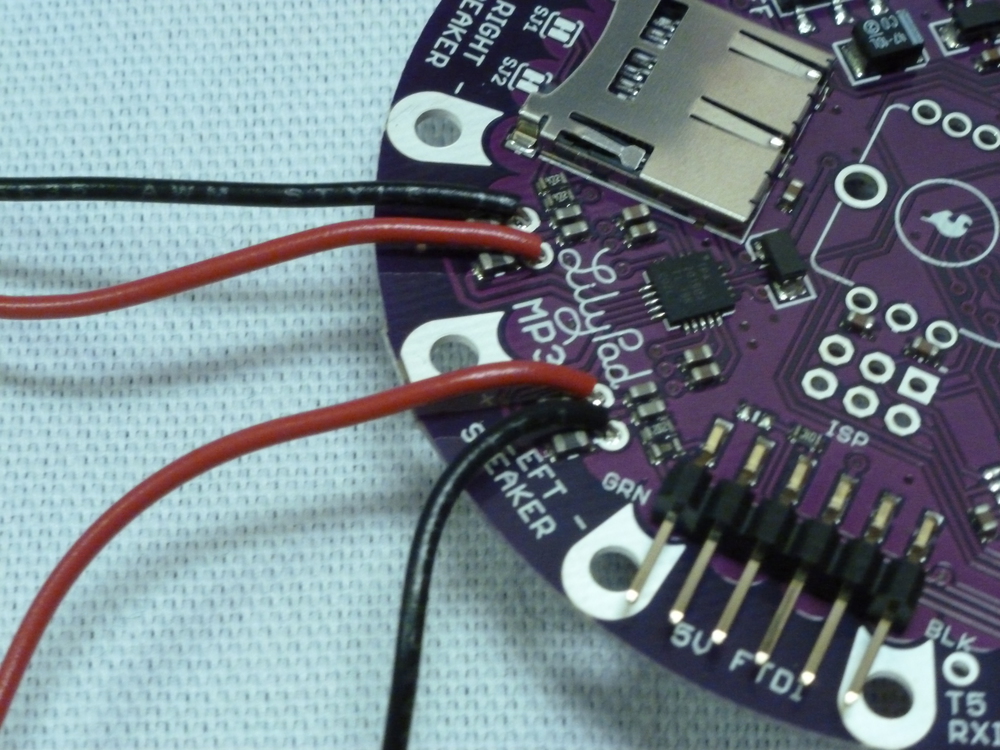
Go ahead and solder both sides of one speaker into the left set of through holes, and both sides of the other speaker into the right set.Notice the tiny '+' and '-' signs on the back of the speakers. Match each wire accordingly.

Next, you'll want to get these parts placed on the apron. Ours had two key features that we really liked: a wide double-thickness hem at the top edge and a pencil pocket. We made heavy use of these features, so if you don't have them, you might have to get a little creative.
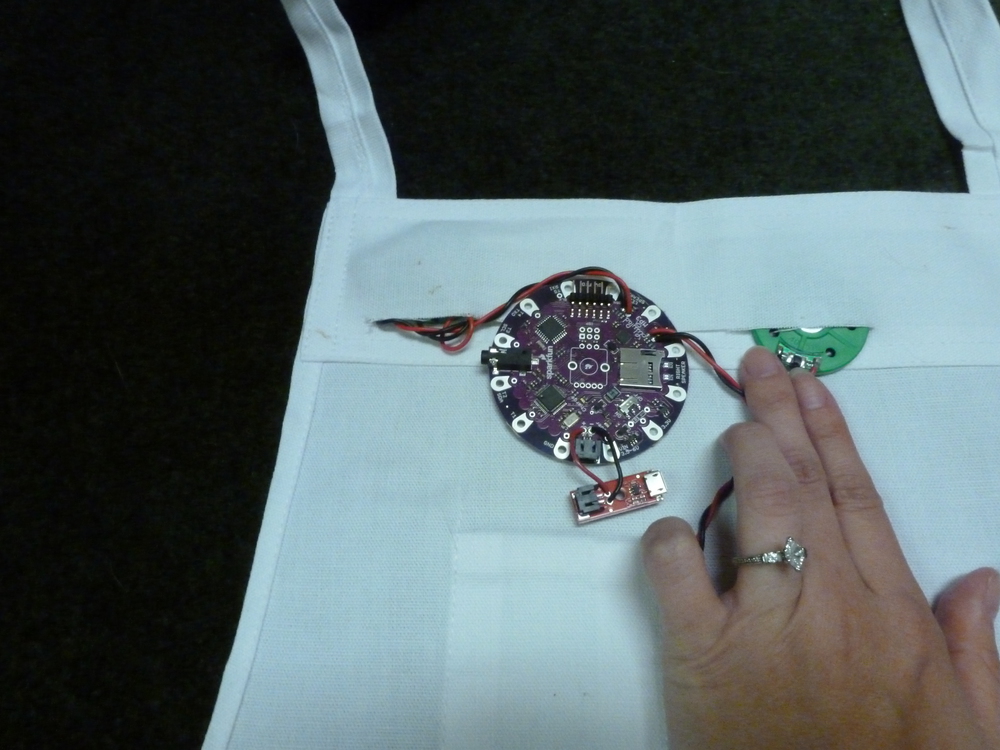
First, we cut a slit along the bottom of that wide top hem, turning it into a sort of inverted pocket. We slid the two speakers into that pocket, black sides facing towards what will be the front of the apron. Once we were happy with them, we secured them with a couple of small dots of hot glue on the back sides.

Next, we cut a tiny hole in the back of the pocket.
This allowed us to drop the lithium polymer battery into the pocket, then poke the wire through the back and plug it into the red charge board. Turn on the power switch on the MP3 trigger, and you should see an LED light up.
You could use another couple of drops of hot glue to hold these boards on, but you'll be doing it on a single-thickness of fabric, so it could show through. I recommend a couple of quick stitches with regular, non-conductive thread to hold everything in place while you sew your traces.
With your speakers and charger attached, you're ready to get down to some serious sewing!