My Drunk Kitchen Apron
 Dia
Dia 
Cookin' Along
Here's a diagram of how you're going to want to put this bad boy together. All of these traces can be sewn by machine -- I used a machine because that allowed me to use a white top thread and a conductive bottom thread, which made the stitches nearly invisible from the front of the apron. If you hand sew, they're going to be a little more visible. Regardless of the route you choose, you'll need to hand stitch the MP3 trigger and button edges onto the ends of the traces. You can do this by winding your conductive thread around the trace and knotting it before you sew down the corresponding component tab. It's easy and effective!
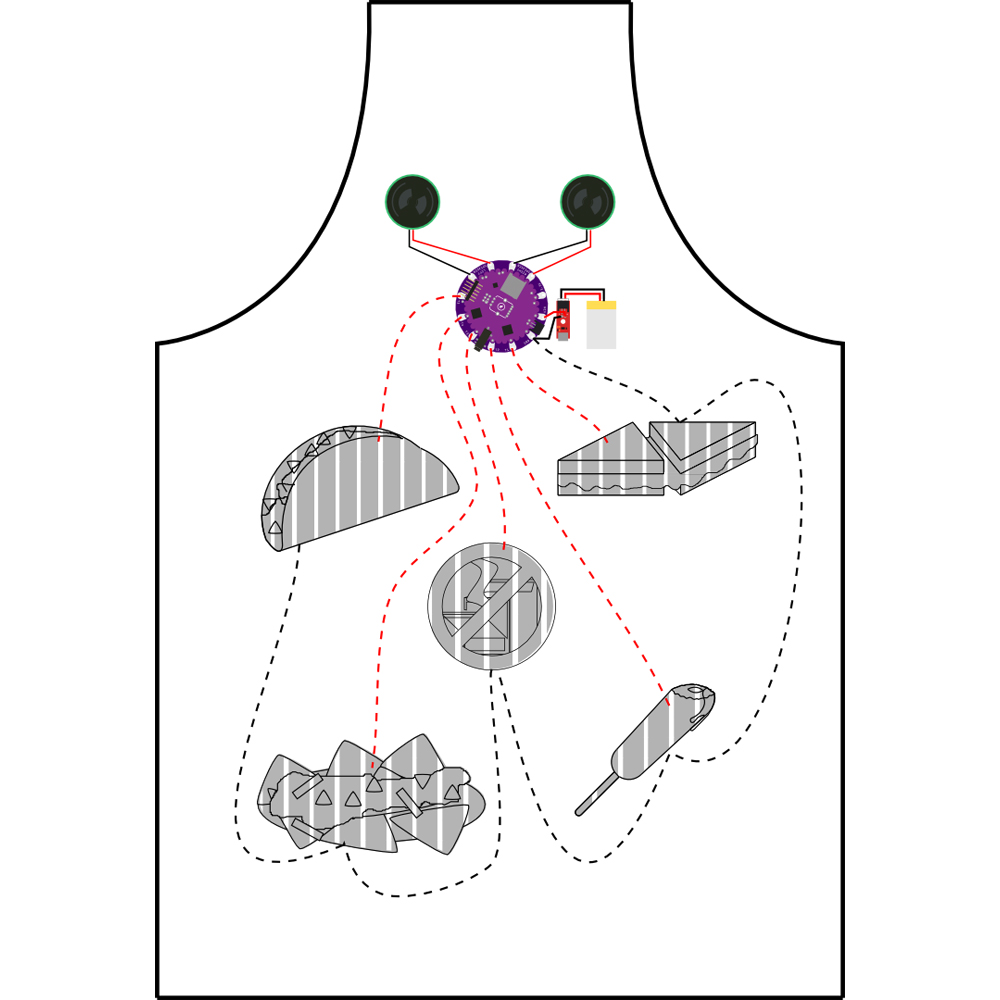
A quick note on placement: we wanted the buttons on the front of the apron, but the circuitry on the back where you couldn't see it. So, when you're looking at the diagram, grey components are on the opposite side of the fabric as the colored components.
As shown in the diagram, you're linking one side of each button to a numbered track tab on the MP3 player. The other sides of the buttons will all meet at the GND pin. It's fine for those threads to touch, cross, or contact each other -- they're all going to the same place! It's also important to note that when I say 'side' of the button, I mean those two conductive edges you made while you were following the button tutorial, which are the two spots that aren't conductively connected to each other unless the button is being pushed. The end result should be that when you press a button, connecting the two sides of it, you're also connecting the associated numbered pin to ground. That's what tells the MP3 trigger to play a sound.
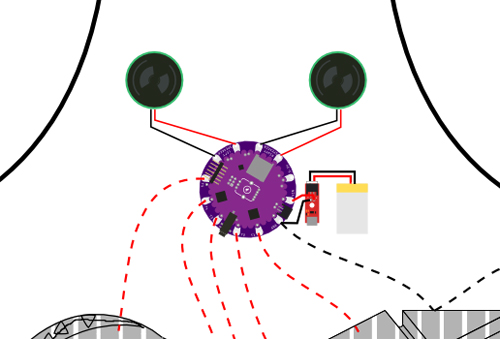
Here's a quick detail shot of the top of the apron, so you can see the connections to the MP3 board.