MIDI BLE Tutorial
 MTaylor
Development Hardware
Hardware Hookup
Prepare the nRF52832 Breakout board by adding a header to the FTDI serial pins. Prepare the MIDI shield by soldering in the two MIDI jacks.
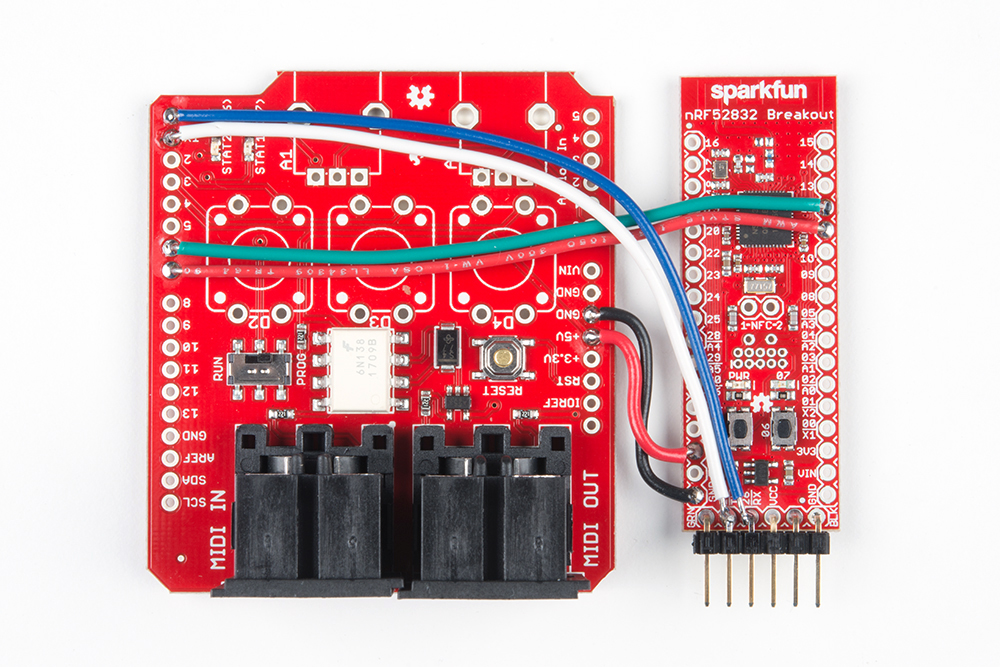
Make the following connections with loose wires. The RX and TX through holes are occupied by the FTDI pin header, tack them on to the backside of the pins.
| nRF52832 Breakout Board Pin |
MIDI Shield Pin |
|---|---|
| GND | GND |
| 3.3V |
5V |
| 26(RX) |
RX |
| 27(TX) |
TX |
| 11 | 7 (Red LED) |
| 12 |
6 (Green LED) |
Sanity Check
Take a moment to make sure the development chain is all up and working.
Can Code be Uploaded to the nRF52832?
Make sure that a basic blink sketch works. Try out driving the 3 status LEDs, active low. Test that serial messages are getting to your computer. After programming, the nRF82832 likes to freeze up its serial bus and requires a manual reset by the button. Familiarize yourself with getting the board into bootloader mode.
Are the Required Libraries Present?
Note: The examples assumes you are using the latest version of the Arduino IDE on your desktop. If this is your first time using Arduino, please review our tutorial on installing the Arduino IDE. If you have not previously installed an Arduino library, please check out our installation guide.
Make sure that the following includes can be added without breaking the build process.
language:c
#include <MIDI.h>
#include <BLEPeripheral.h>
Also, make sure that the MIDI library in use not baked into Arduino or from a dubious source. It should be the latest and greatest from FortySevenEffects' GitHub, and should be manually installed:
With verbose debugging on, the build log reveals that MIDI.cpp is being sourced from the local sketchbook library folder.
"C:\ArduinoConfigurations\arduino-1.8.2_nRF52\localSB\libraries\arduino_midi_library\src\MIDI.cpp" -o
Is the MIDI Shield Configured for "PROG"?
The switch on the midi shield directs the flow of data to the processor. When switched to "RUN" both the MIDI IN port and the FTDI's TX pin are connected to the nRF52832. Due to the way it's wired, the MIDI IN will overpower the FTDI and programs won't load. Alternately, in the "PROG" position, the MIDI IN port is disconnected and programming can occur.
Do You Have a Tasty Beverage?
Working with protocols can require a bit of patience. Hang in there!