MicroSD Shield and SD Breakout Hookup Guide
 a_cavis
Introduction
The SparkFun microSD Shield makes it easy to add mass storage to your project.
Required Materials
- 1x SparkFun microSD Shield
- 1x pack of R3 stackable headers for the shield.
- 1x microSD card of your choice, up to 32GB, like SparkFun's 8GB card and adapter pack
- 1x SparkFun RedBoard or Arduino Uno and a USB cable
Assembly
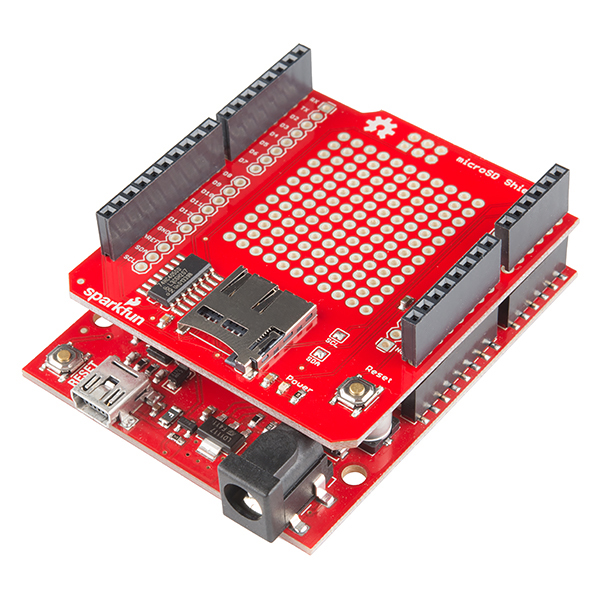
Before use, you will need to solder headers to your shield. Take a look at the Shield Assembly tutorial if you need a refresher. The microSD Shield uses the Uno R3 footprint with 1x 10-pin, 2x 8-pin, and 1x 6-pin headers.
Suggested Reading
- What is an Arduino? - New to Arduino? Start here.
- Installing the Arduino IDE - A refresher on using the Arduino environment.
- Arduino Shield Basics - Covers shields from a general standpoint.
- Serial Peripheral Interface (SPI) - This tutorial shows you how to communicate with an SD card over SPI.
- SD Cards and Writing Images - Learn the basics of SD and microSD cards.
Hardware Overview
The features of the microSD Shield are as follows:
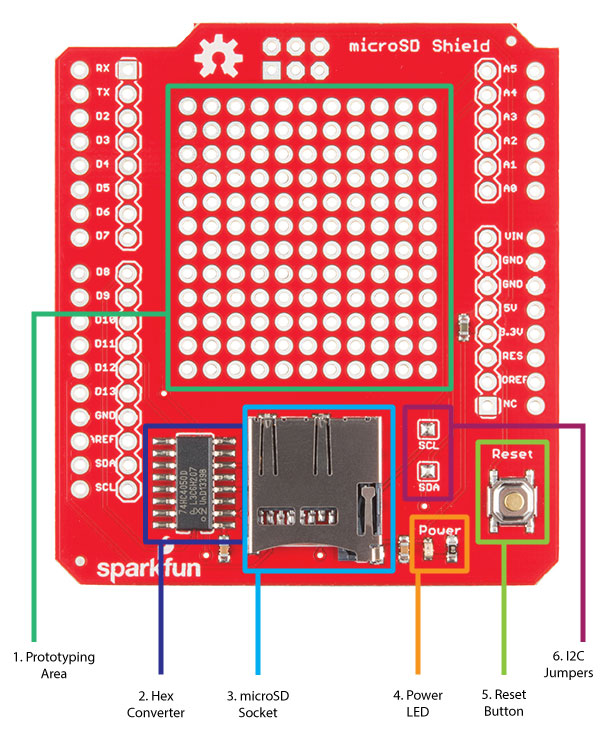
A large protoyping area where you can solder other parts for your project.
A hex converter IC (which acts as a voltage level shifter between the Arduino's 5V logic and the microSD card's 3.3V-tolerant pins). The datatsheet for that IC can be found here.
A microSD socket.
A power LED. Lights up as soon as the Arduino is powered.
A reset button connected to the Arduino's reset line.
SCL and SDA jumpers that tie the SDA and SCL pins (broken out on the R3 shield footprint) to the A4 and A5 pins to provide backward compatibility for older UNO models. These jumpers can be opened to free up pins A4 and A5 when using boards with a different I2C pin assignment like the Leonardo, Mega, and Due.
Code Example
Press your completed microSD Shield onto your Arduino, and connect the board to your computer with the Arduino's USB cable.
For this example, you will use the SD library that comes with every Arduino IDE installation. There are additional reference materials for the SD library on the Arduino site. The SD library example sketches are in your Arduino examples folder under Files > Examples > SD
The SparkFun microSD shield uses Pin 8 as the chip select line. To use the SD library with the shield, you'll need to change the line const int chipSelect = 4; to const int chipSelect = 8; in the CardInfo.ino sketch (the sketch below is already modified if you'd like to copy and paste it instead), then press Upload.
language:c
/*
  SD card test

  created  28 Mar 2011
  by Limor Fried
  modified 9 Apr 2012
  by Tom Igoe

  Hookup for the SparkFun microSD shield
  on a SparkFun RedBoard/Arduino Uno R3

  MOSI - 11
  MISO - 12
  CLK - 13
  CS - 8
*/

// include the SD library:
#include <SPI.h>
#include <SD.h>

// set up variables using the SD utility library functions:
Sd2Card card;
SdVolume volume;
SdFile root;

// The Sparkfun microSD shield uses pin 8 for CS
const int chipSelect = 8;

void setup()
{
  // Open serial communications and wait for port to open:
  Serial.begin(9600);
  while (!Serial) {
    ; // wait for serial port to connect. Needed for Leonardo only
  }


  Serial.print("\nInitializing SD card...");

  // Note that even if it's not used as the CS pin, the hardware SS pin
  // (10 on most Arduino boards, 53 on the Mega) must be left as an output
  // or the SD library functions will not work.

  pinMode(10, OUTPUT);


  // we'll use the initialization code from the utility libraries
  // since we're just testing if the card is working!
  if (!card.init(SPI_HALF_SPEED, chipSelect)) {
    Serial.println("initialization failed. Things to check:");
    Serial.println("* is a card is inserted?");
    Serial.println("* Is your wiring correct?");
    Serial.println("* did you change the chipSelect pin to match your shield or module?");
    return;
  } else {
    Serial.println("Wiring is correct and a card is present.");
  }

  // print the type of card
  Serial.print("\nCard type: ");
  switch (card.type()) {
    case SD_CARD_TYPE_SD1:
      Serial.println("SD1");
      break;
    case SD_CARD_TYPE_SD2:
      Serial.println("SD2");
      break;
    case SD_CARD_TYPE_SDHC:
      Serial.println("SDHC");
      break;
    default:
      Serial.println("Unknown");
  }

  // Now we will try to open the 'volume'/'partition' - it should be FAT16 or FAT32
  if (!volume.init(card)) {
    Serial.println("Could not find FAT16/FAT32 partition.\nMake sure you've formatted the card");
    return;
  }


  // print the type and size of the first FAT-type volume
  uint32_t volumesize;
  Serial.print("\nVolume type is FAT");
  Serial.println(volume.fatType(), DEC);
  Serial.println();

  volumesize = volume.blocksPerCluster();    // clusters are collections of blocks
  volumesize *= volume.clusterCount();       // we'll have a lot of clusters
  volumesize *= 512;                            // SD card blocks are always 512 bytes
  Serial.print("Volume size (bytes): ");
  Serial.println(volumesize);
  Serial.print("Volume size (Kbytes): ");
  volumesize /= 1024;
  Serial.println(volumesize);
  Serial.print("Volume size (Mbytes): ");
  volumesize /= 1024;
  Serial.println(volumesize);


  Serial.println("\nFiles found on the card (name, date and size in bytes): ");
  root.openRoot(volume);

  // list all files in the card with date and size
  root.ls(LS_R | LS_DATE | LS_SIZE);
}


void loop(void) {

}
Open your Arduino serial monitor by going to Tools > Serial Monitor to see the results of the card test.
Once your card is detected, you can move on to using that extra space for something! Below is a simple analog data logging sketch from the SD card library with the same modification- changing the CS pin to 8. const int chipSelect = 8;
language:c
#include <SPI.h>
#include <SD.h>

// On the Ethernet Shield, CS is pin 4. Note that even if it's not
// used as the CS pin, the hardware CS pin (10 on most Arduino boards,
// 53 on the Mega) must be left as an output or the SD library
// functions will not work.
const int chipSelect = 8;

void setup()
{
  // Open serial communications and wait for port to open:
  Serial.begin(9600);
  while (!Serial) {
    ; // wait for serial port to connect. Needed for Leonardo only
  }


  Serial.print("Initializing SD card...");
  // make sure that the default chip select pin is set to
  // output, even if you don't use it:
  pinMode(10, OUTPUT);

  // The chipSelect pin you use should also be set to output
  pinMode(chipSelect, OUTPUT);

  // see if the card is present and can be initialized:
  if (!SD.begin(chipSelect)) {
    Serial.println("Card failed, or not present");
    // don't do anything more:
    return;
  }
  Serial.println("card initialized.");
}

void loop()
{
  // make a string for assembling the data to log:
  String dataString = "";

  // read three sensors and append to the string:
  for (int analogPin = 0; analogPin < 3; analogPin++) {
    int sensor = analogRead(analogPin);
    dataString += String(sensor);
    if (analogPin < 2) {
      dataString += ",";
    }
  }

  // open the file. note that only one file can be open at a time,
  // so you have to close this one before opening another.
  File dataFile = SD.open("datalog.txt", FILE_WRITE);

  // if the file is available, write to it:
  if (dataFile) {
    dataFile.println(dataString);
    dataFile.close();
    // print to the serial port too:
    Serial.println(dataString);
  }
  // if the file isn't open, pop up an error:
  else {
    Serial.println("error opening datalog.txt");
  }
SD Card Breakout Boards
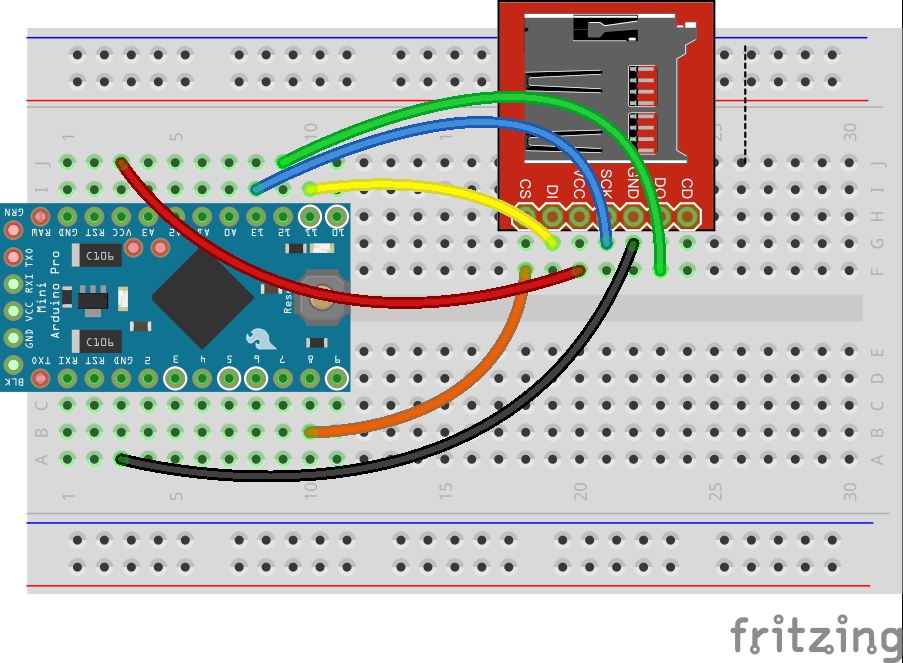
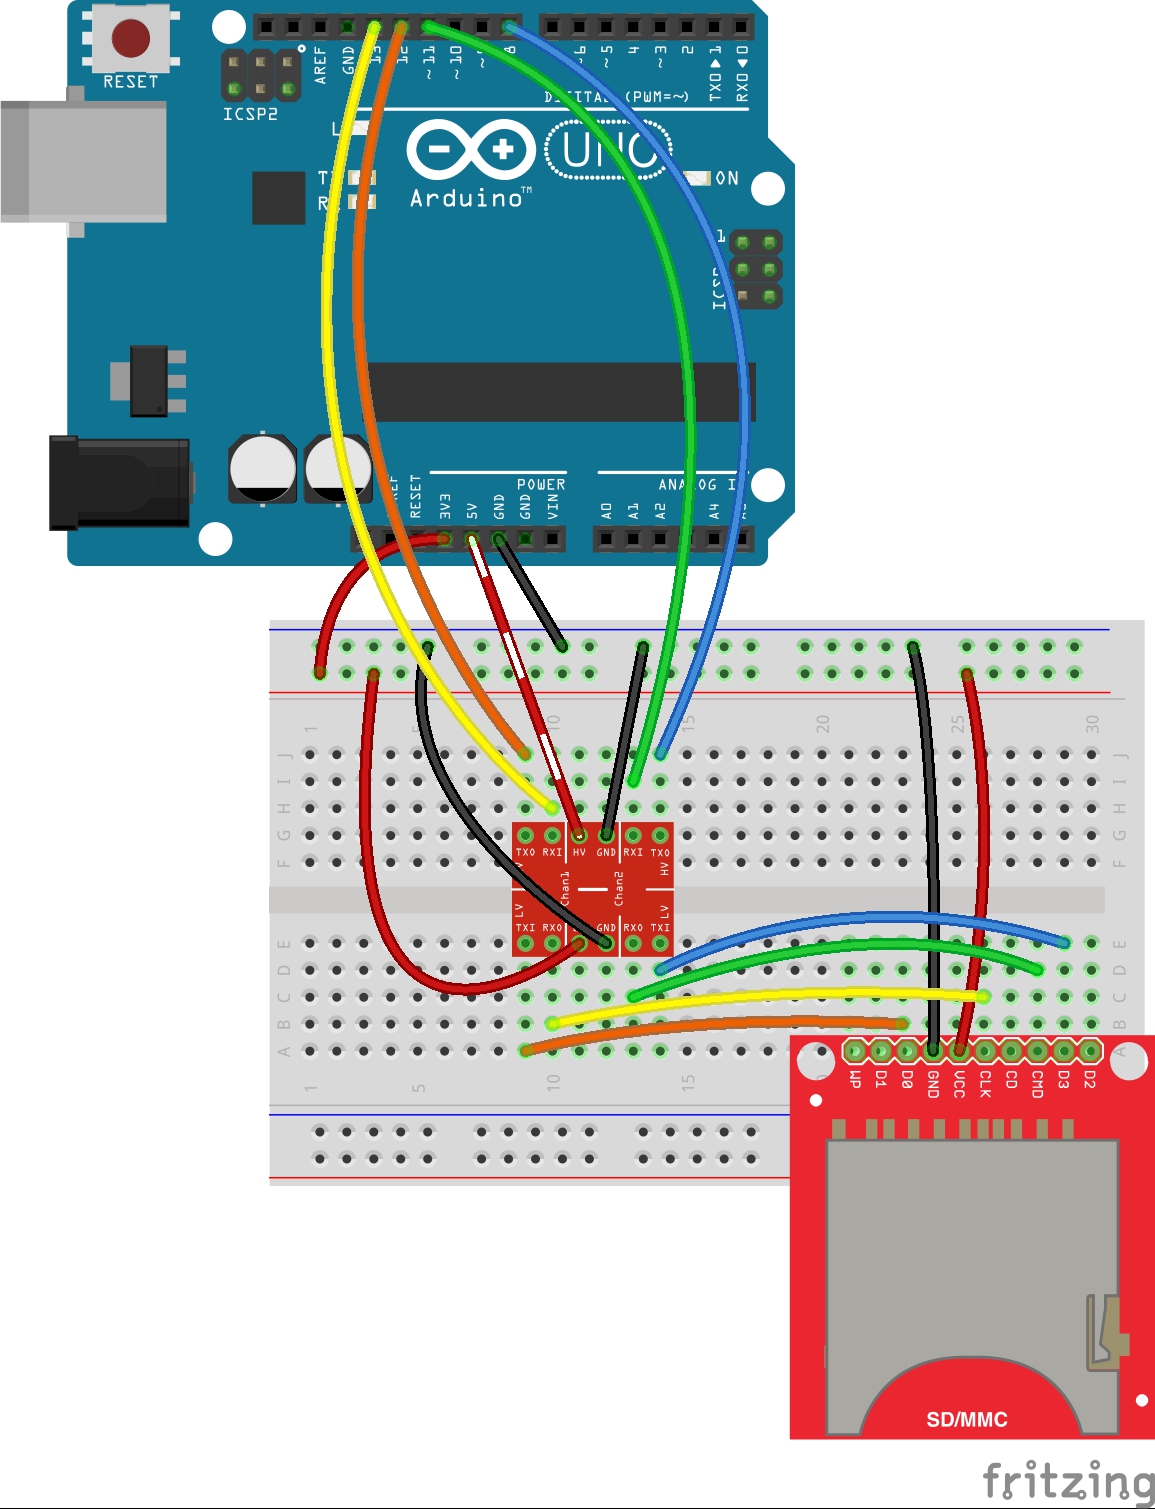
If you have a smaller Arduino (or you'd like to put a full-size SD card in your project), you can use the SparkFun microSD Transflash Breakout or the SparkFun SD/MMC Card Breakout with the SD card library.
Since these smaller breakouts don't have built-in level shifting, make sure you have a logic level shifter like the SparkFun Logic Level Converter in the circuit, or use a 3.3V Arduino like the SparkFun Pro Mini 3.3V/8Mhz
Both examples use Pin 8 as the chip select line, just like the shield example above.
Troubleshooting
Arduino has troubleshooting tips on their Notes on the Arduino SD Card Library page, including instructions for formatting new cards (if needed) and using the library with other Arduino boards.
Resources and Going Further
Now that you know how to add more storage to your Arduino projects, it's time to get out there and create something amazing. Need some inspiration? Check out these other SparkFun tutorials.
- SD cards are a great way to add more storage to Internet of Things projects. You can add a microSD Shield to a WiFly Shield to serve up larger web pages or hold more data. You can also use the CC3000 Shield, which has a microSD card slot built in.
- Need more power than your Arduino can provide? Check out the Edison, which also has a microSD card Block to add more storage to larger projects.
- Logging data is a common use for SD cards. Take your logging project to the next level with the Logomatic.