MicroMod GNSS Carrier Board (ZED-F9P) Hookup Guide
 bboyho,
  Elias The Sparkiest
Hardware Assembly
If you have not already, make sure to check out the Getting Started with MicroMod: Hardware Hookup for information on inserting your Processor Board to your Carrier Board. Just insert the MicroMod Processor Board at an angle of about 25° into the M.2 socket, push down, and secure with the screw.
Getting Started with MicroMod
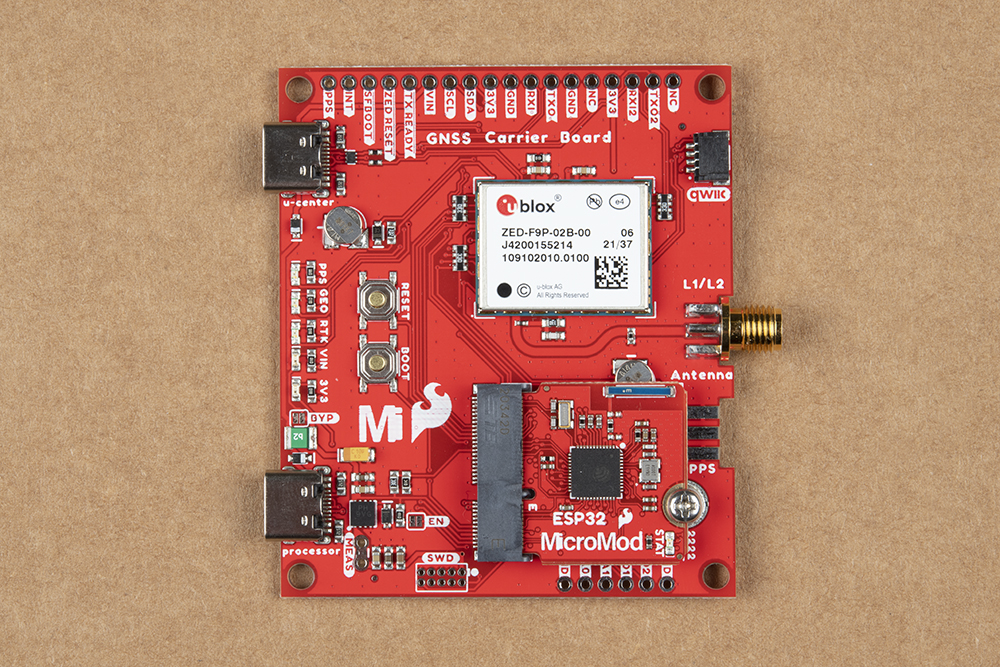
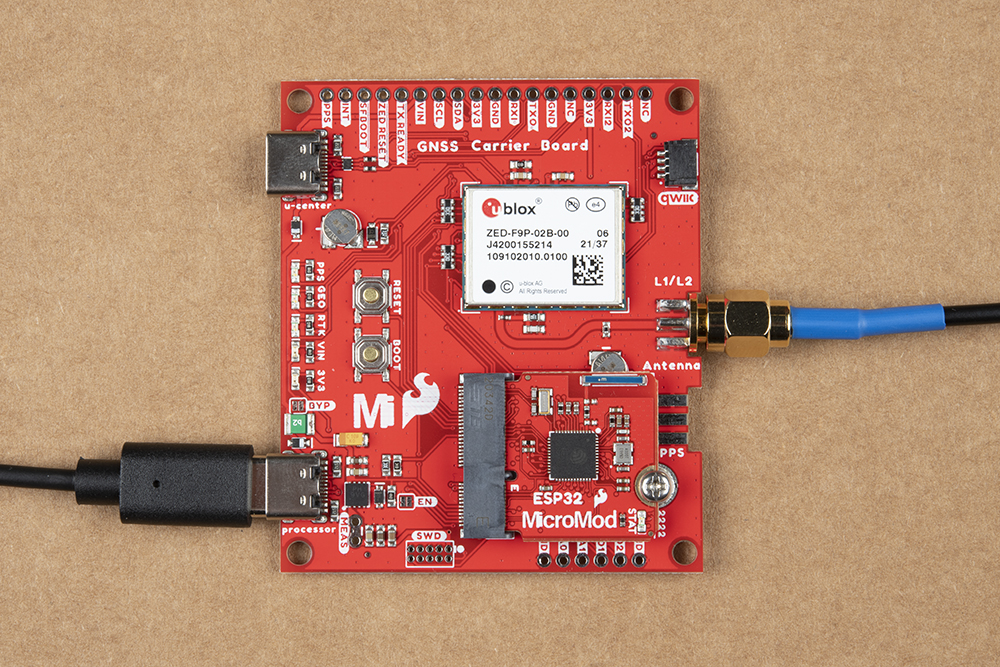
At a minimum, your setup should look like the image below. In this case, we had the MicroMod ESP32 Processor Board secured in the M.2 connector.
GNSS Multi-band Antenna
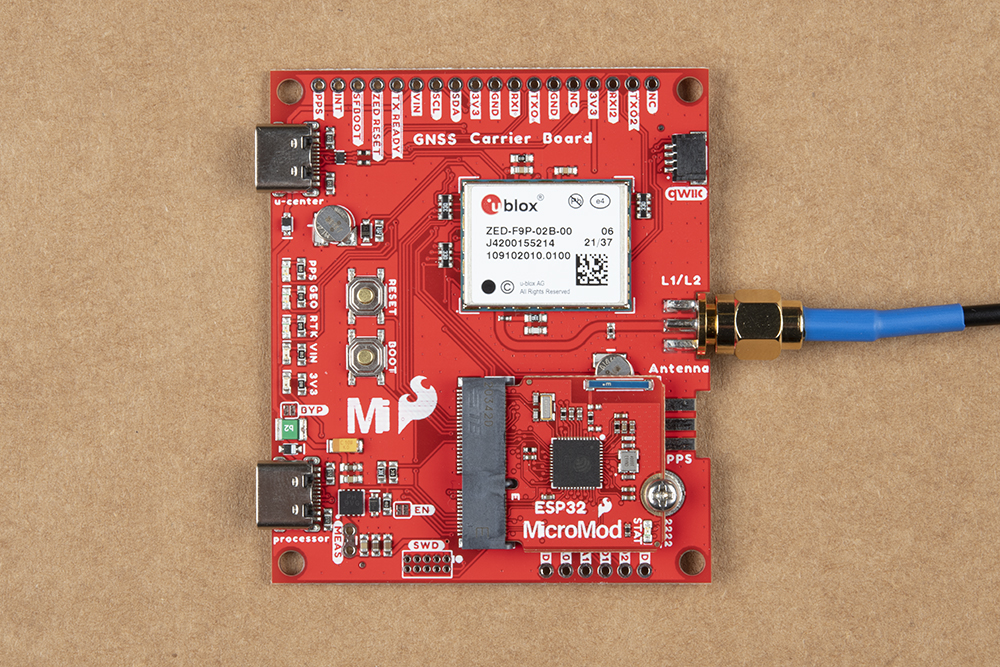
As stated earlier, you'll need a multi-band antenna and a metal ground plate to make the best use of the ZED-F9P. Connect the two SMA connectors together and tighten the nut. You'll simply need the nut to be finger tight.
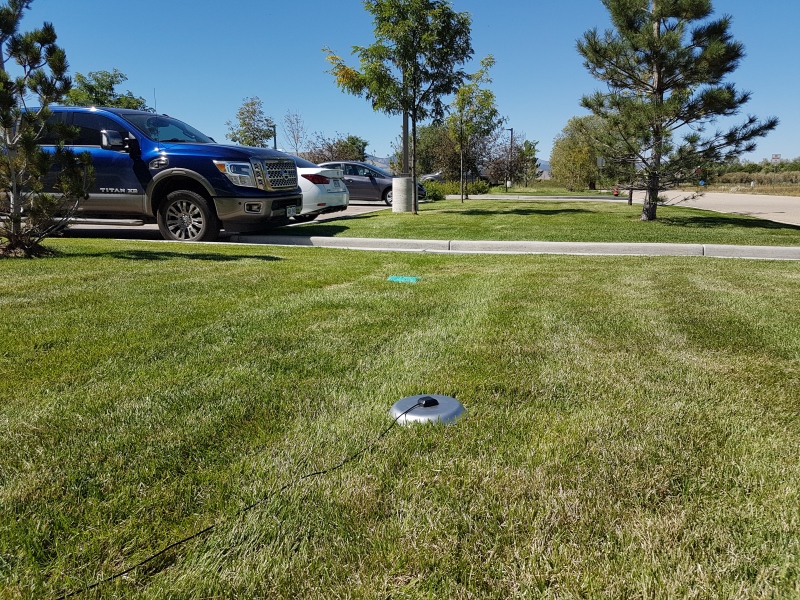
If you’re indoors you must run a SMA extension cable long enough to locate the antenna where it has a clear view of the sky. That means no trees, buildings, walls, vehicles, or concrete metally things between the antenna and the sky. Be sure to mount the antenna on a 4”/10cm metal ground plate to increase reception.
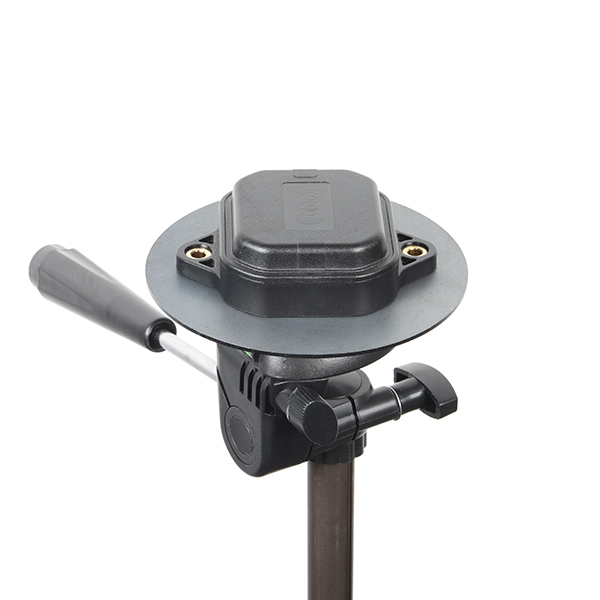
Of course, you could also attach the ground plate on a camera tripod. Just make sure to secure it with weights if there are heavy winds when using the ZED-F9P.
USB-C Cable
To program and power the microcontroller, insert the USB-C cable into the USB-C connector labeled as Processor.
To update the ZED-F9P's firmware or configure the module, insert the USB-C cable into the USB-C connector labeled as u-center.

You can have both USB cables connected at the same time since there are protection diodes connected on the voltage lines.