LilyPad RGB LED Hookup Guide
Attaching to a LilyPad Arduino
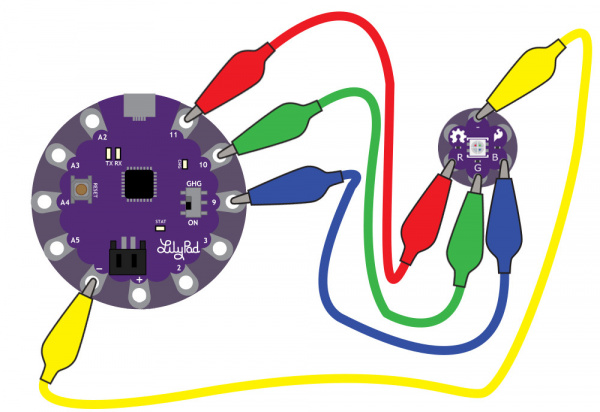
To follow along with the code examples in this tutorial, connect the RGB LED to a LilyPad Arduino as shown below. Use alligator clips to temporarily connect the R (Red) tab on the LED to 11, G (Green) to 10, B (Blue) to 9, and (-) to (-). When you are finished prototyping, replace the alligator clips with conductive thread traces for permanent installation in your project.
Additional Board Hookup
If you'd like to use RGB LED with the LilyPad ProtoSnap Plus, attach the R, G, and B tabs to the ProtoSnap's expansion ports. You will not be able to follow along with the Custom Color Mixing example unless you snap the ProtoSnap Plus apart and connect the RGB LED directly to tabs on the LilyPad USB Plus on pin 6, A7, and A8. Make sure to adjust the pins definitions in the example code when using the LilyPad ProtoSnap Plus.
