LilyPad Development Board Hookup Guide
 jimblom,
  Gella
Gella 
Hardware Overview and Features
The LilyPad Development Board features twelve LilyPad components connected to a LilyPad Arduino Simple microcontroller by conductive pathways called traces. Many of these traces are hidden, but for reference, each component on the ProtoSnap has a nearby label printed in white silkscreen with the number of the LilyPad Arduino Simple sew tab it is connected to.
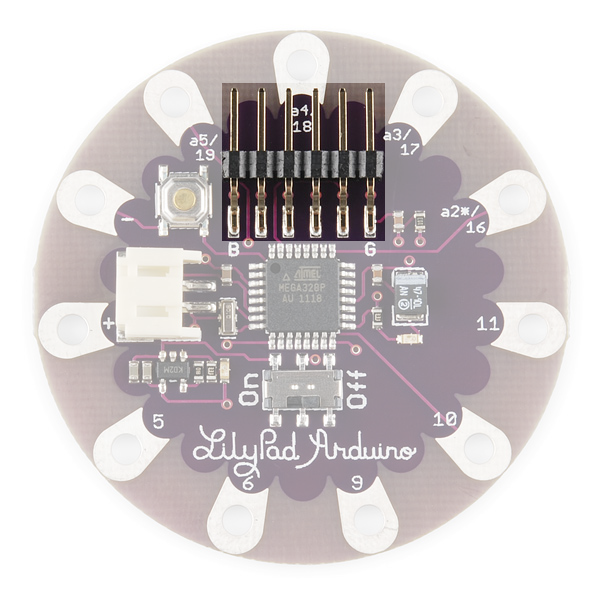
If you've used an Arduino before, you're probably familiar with its pins -- both digital and analog. An Arduino has 14 digital pins, and six to eight analog pins, all of which can be used to interface with other components; for instance, those surrounding the Arduino on the ProtoSnap LilyPad Development Board.
It's important to know which pin on the Arduino is tied to which component. Should you ever need a reminder of what pin connects to what, all you really need to do is look down.

- An 'A' in front of the number denotes a tab that can function as an analog input. These sew tabs can read sensors that output a varying voltage like the light sensor built into the LilyPad Arduino Simple.
- Referring to the annotated image above of the LilyPad Development Board, a '~' symbol in front of the number indicates that tab supports PWM (Pulse Width Modulation) output. These tabs can output an "analog" signal that can be used to vary the brightness on LEDs, etc.
Note: The "A" in front of analog sew tab numbers in your code is optional. However, do not include the "~" symbol for PWM outputs. It is only provided to make it easy for you to check which pins can produce PWM (analog) output and is not used in programming.
But, in case your eyes aren't up to reading that tiny text, here's a list of the components that are connected to the LilyPad Arduino Simple:
| LilyPad Component | Arduino Pin | Connected to LilyPad Arduino Simple Sew Tab | Description |
|---|---|---|---|
| LilyPad Vibe Board | ~3 | Haptic feedback is provided with the motor's vibration and is controlled by the LilyPad Arduino Simple. | |
| LilyPad Tri-Color (RGB) LED - Red | ~9 | ✓ | The tri-color LED's red is controlled by the LilyPad Arduino Simple. |
| LilyPad Tri-Color (RGB) LED - Blue | ~10 | ✓ | The tri-color LED's blue is controlled by the LilyPad Arduino Simple. |
| LilyPad Tri-Color (RGB) LED - Green | ~11 | ✓ | The tri-color LED's green is controlled by the LilyPad Arduino Simple. |
| LilyPad Button | A5 | ✓ | LilyPad Arduino Simple receives button presses as an input. |
| LilyPad Slide Switch | 2 | LilyPad Arduino Simple receives switch state (on/off) input. | |
| LilyPad White LEDs | ~5, ~6, A2, A3, A4 | ✓ (all 5 LEDs) | A set of white LEDs controlled by the LilyPad Arduino Simple. |
| LilyPad Buzzer (+) | 7 | A buzzer that create tones controlled by the LilyPad Arduino Simple. | |
| LilyPad Buzzer (-) | 12 | A buzzer that create tones controlled by the LilyPad Arduino Simple. While normally connected to GND, it can be connected to an Arduino pin. | |
| LilyPad Light Sensor | A6 | LilyPad Arduino Simple receives ambient light level input from light sensor. | |
| LilyPad Temperature Sensor | A1 | LilyPad Arduino Simple receives temperature from a physical touch based on body heat and ambient conditions with the analog sensor. |
For example, if you decide to snap the components off and use the light sensor instead of a white LED, you will need to reconnect the light sensor to another analog pin (like A2-A5). By replacing the connection of one of the components, the sensor will be able to be controlled by the LilyPad Arduino Simple again. Replacing the LED on A3, will require the code to be adjusted for the LilyPad light sensor on A3.
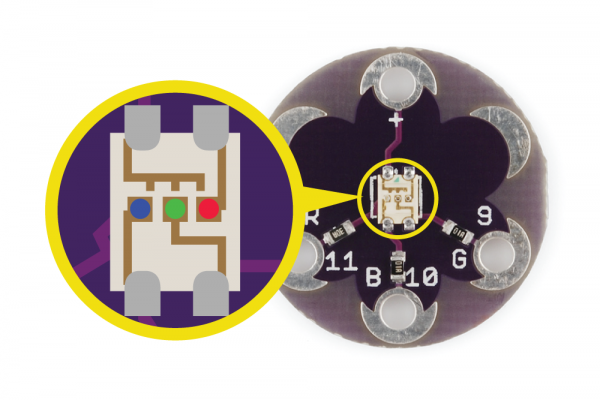
LilyPad Tri-Color LED
Inside an RGB LED are three smaller LEDs - a red, green, and blue. Each of these LEDs is connected to a sew tab on the Tri-Color LED, and they are all connected through a common anode (positive) pin. Unlike other RGB LEDs, this configuration means that to light up the LED you need to ground the individual red, green, and blue LEDs instead of sending them power.
LilyPad Arduino Simple Board
Most of the individual boards on the ProtoSnap LilyPad Development Board are relatively simple; they've got one big component, and maybe a few small supporting components, like resistors. But there are a few complexities to the LilyPad Arduino Simple we should overview.
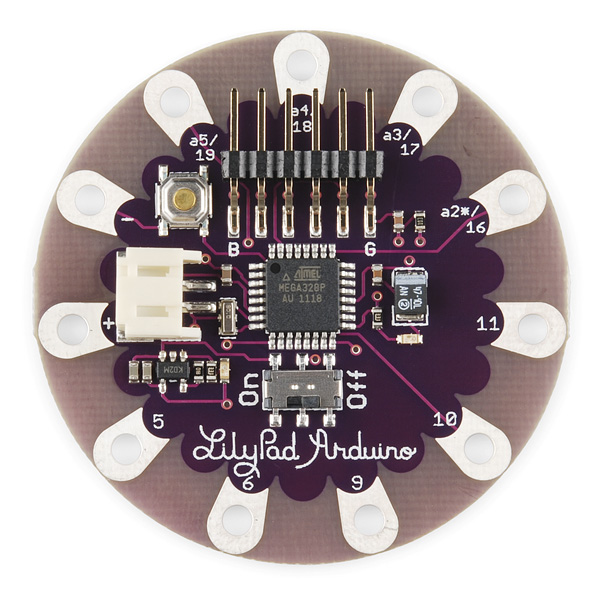
Features:
- 5 Digital I/O pins
- 4 Analog pins
- ATmega328P
- Built-in LED on pin 13
- Built-in ON/OFF switch
- Built-in power supply socket (JST connector) for a 3.7V LiPo battery and charging circuit (no additional battery charger needed)
- Simplified layout with less pins, giving more space for sewing or less complex projects
Central to the Simple board is the ATmega328 -- the big black square in the middle of the board. This is the microprocessor, the "brains of the operation." This is what stores and executes your Arduino sketch. Surrounding the ATmega328 are a few passive supporting components, nothing all that important to you.
To the right of the ATmega328 (though it'll be hard to see unless it's lit) is a tiny little LED. This could be classified as the most important component on the Arduino. The LED is tied to Arduino pin 13, and can be used for all your blinking needs. At the top left, there's a momentary push button, used to reset the ATmega328. This will make whatever sketch the Arduino is running start from the very top again.

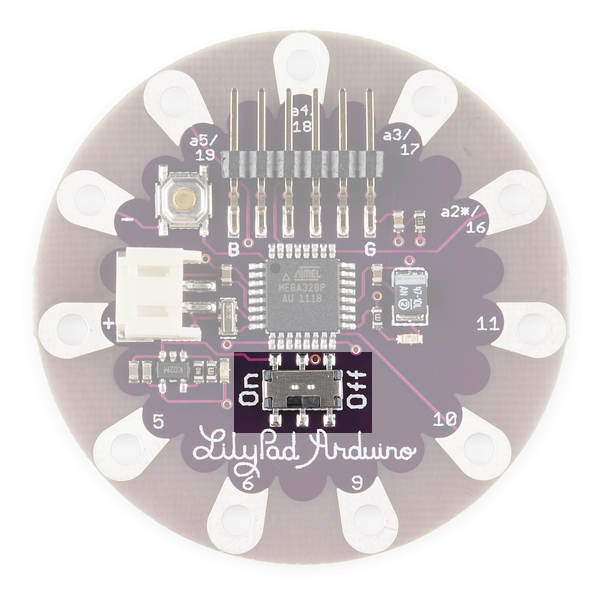
There's an On/Off slide switch under the ATmega328. The functionality of that is pretty obvious, but it can be a little misleading. There are a few ways to power the ProtoSnap LilyPad Development Board, and in most cases, you'll probably use the included FTDI board to power it using your computer's USB. If the board is powered by the FTDI board, the On/Off switch will do absolutely nothing. The switch only controls power to the Arduino if you're powering it via that little white connector to the left of the ATmega.
The white connector on the Simple board is a somewhat common power connector, hailing from the JST family of connectors. It's mainly geared towards connecting one of our Lithium Polymer batteries. LiPo's are rechargable batteries, so we've also included a battery charger on the LilyPad Arduino Simple. So if you have the battery plugged in, and an FTDI Basic Breakout connected, you can charge the battery from your computer.
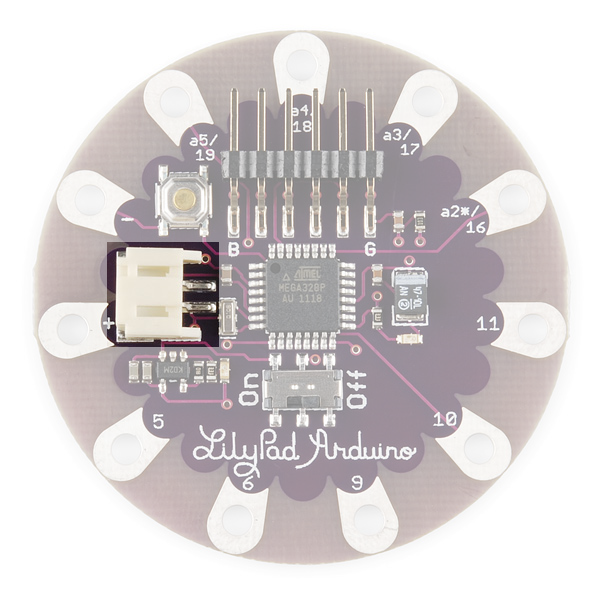
Oh, and where do you connect the FTDI board? Well, spiking up at the top of the Arduino Simple is a right-angle six-pin male header. The female header on the FTDI board should slide smoothly onto that connector.
Powering the LilyPad Development Board
The LilyPad LilyPad Development Board can be powered in two ways:
If you have a USB power source available (a computer, 5V USB wall adapter, USB battery pack, etc.), you can run the board from a USB cable and FTDI.
If you'd like your project to be more portable, you can easily attach a rechargable Lithium-polymer battery to the board. See Technical Notes section for more information on batteries and charging.