LilyPad Development Board Hookup Guide
 jimblom,
  Gella
Gella 
Exploring the Sample Circuit
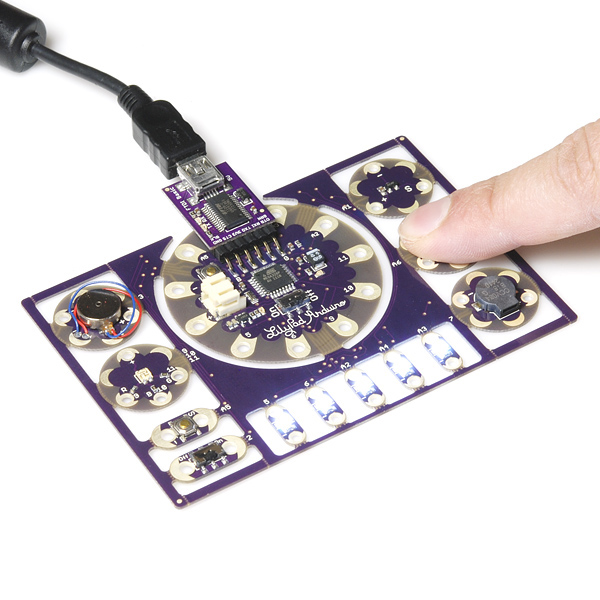
The LilyPad Development Board ships with pre-loaded code that showcases all of the LilyPad pieces connected to it. To power up the LilyPad Development Board, connect it to your computer using a FTDI and mini-B USB cable, or attach an E-Textiles Battery. Then slide the switch on the right side of the LilyPad Arduino Simple to the ON position.
First the white LEDs turn on individually one at a time. Then the RGB LED will blink each color. Once the sequence completes, the LilyPad Development Board will be ready to take inputs! Try placing your finger over the temperature sensor. Once the sensor reads a certain threshold, the red LED will light up. Placing your finger over the light sensor will turn on the white LEDs. Pressing on the momentary push button will cause the buzzer to make some noise. Flipping the LilyPad slide switch (located on the bottom left side of the board) to the ON position will cause the vibe motor to begin vibrating for haptic feedback.