Light Up Pennant with E-Textiles
 maya.,
  Gella
Gella 
Introduction
Here's a fun way to decorate a game room, classroom, or office - a twinkling pennant. Rather than walk you step-by-step through one project, we'll be showing you some general tips for creating your own unique pennant with a few different types of LilyPad components.

Suggested Reading
This is a beginner to intermediate project, depending on the type of hardware you choose. You should be comfortable sewing a LilyPad LED using conductive thread.
Here are a few tutorials we suggest reading before you begin:
Materials and Tools
This project is pretty open ended - like a choose your own adventure! If you'd like to go with a non-programming project, we recommend using a LilyTwinkle or LilyTiny (you can always reprogram them later). You can also create this project using a LilyPad Arduino Simple Board and LEDs (or any additional LilyPad components you'd like). Choose one of the following options for your project:
Option A: Protosnap LilyTwinkle
The Protosnap LilyTwinkle is a great choice if you'd like a twinkling effect and the ability to test out the circuit before you get to sewing.
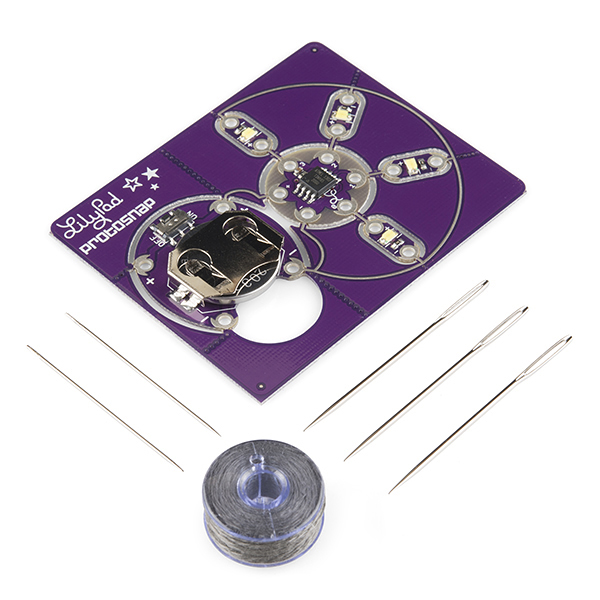
LilyTwinkle ProtoSnap
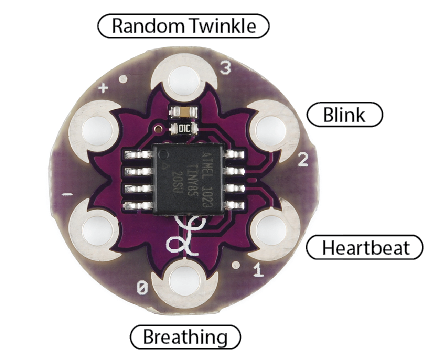
DEV-11590Option B: LilyTiny
The LilyTiny is pre-programmed with four different modes to choose from - blink, heartbeat, breathing, and random fade, depending on which numbered petal you sew the LEDs to.
Option C: LilyPad Arduino
For the most flexibility in your project's behavior, try programming a LilyPad Arduino Simple Board to light LEDs up in a twinkle, blink, or whatever pattern you choose. We will not be covering the programming side of things in this tutorial, for an introduction to programming take a look at one of our Programming tutorials.
Additional Supplies:
- Felt pennant - either store bought or hand cut. We found the pennants used in this tutorial at a craft store for 99 cents each.
- Scissors
- Hot Glue Gun
- Optional: Heat-N-Bond and iron for adhering shapes and letters
- Insulating material (examples: acrylic/fabric paint, fabric glue, iron-on interfacing, or extra fabric)
- Decorative craft supplies: extra felt, fabric, embroidery floss, beads, jewels, etc.
Step 1: Design Time
Time to get creative and decide what image you'd like to light up. Take time to sketch out ideas or collect pieces of felt, fabric, or other crafts to help you devise an interesting design. There are lots of photos online of retro pennants for sports teams to help inspire you if you are looking for a vintage style.
Planning Tips:
Decide if you want to see the components and stitching - strategic use of lettering or shapes can cover up the LilyPad pieces and let only the light from the LED shine through.
Leave enough room to sew - plan your design with enough space to attach components without crowding them too close together and risking conductive thread short circuits.
Lay out the pieces of your project first before attaching anything to the felt - this allows you to move things around and redesign as needed.
Leave easy access to the battery and/or power switch. For projects using a LilyPad Coin Cell Battery Holder - Switched, you'll need to leave some room on the side to slide the battery in/out when replacing. For LilyPad Arduino Simple projects, the battery can stay attached, but make sure to leave space to plug in the FTDI to recharge and access to the slide switch on the LilyPad for powering on/off.


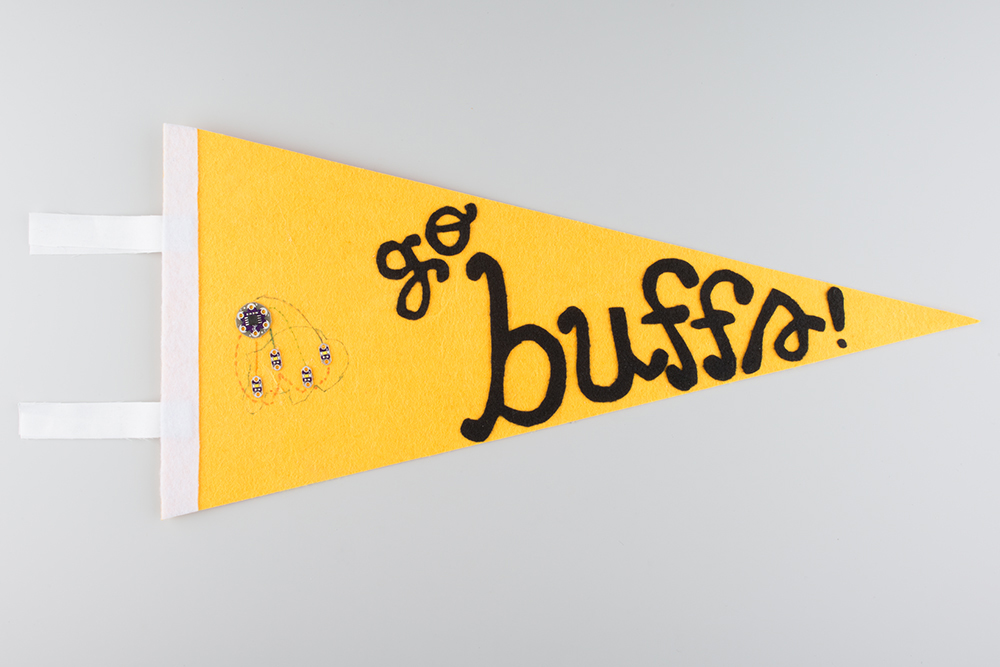
Protosnap LilyTwinkle Example
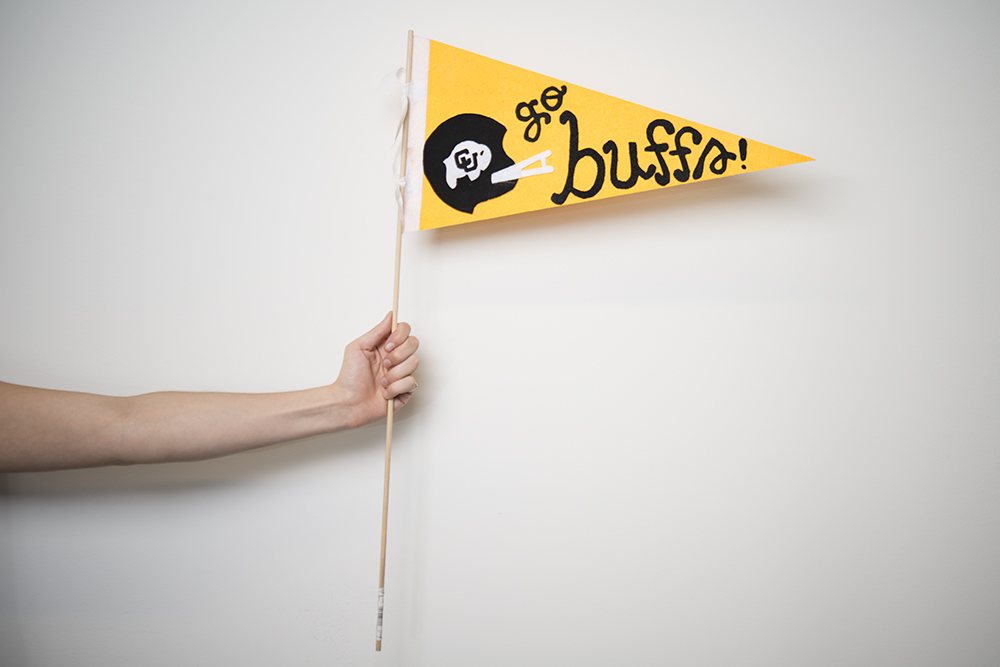
Maya chose to make a pennant with the University of Colorado Buffaloes logo sparkle using the ProtoSnap LilyTwinkle. Here's the layout she used to plan around the buffalo's outline. She also decided to put the battery holder on the back of the pennant, making sure there was enough space to sew without hitting the LilyTwinkle or LEDs on the reverse side.

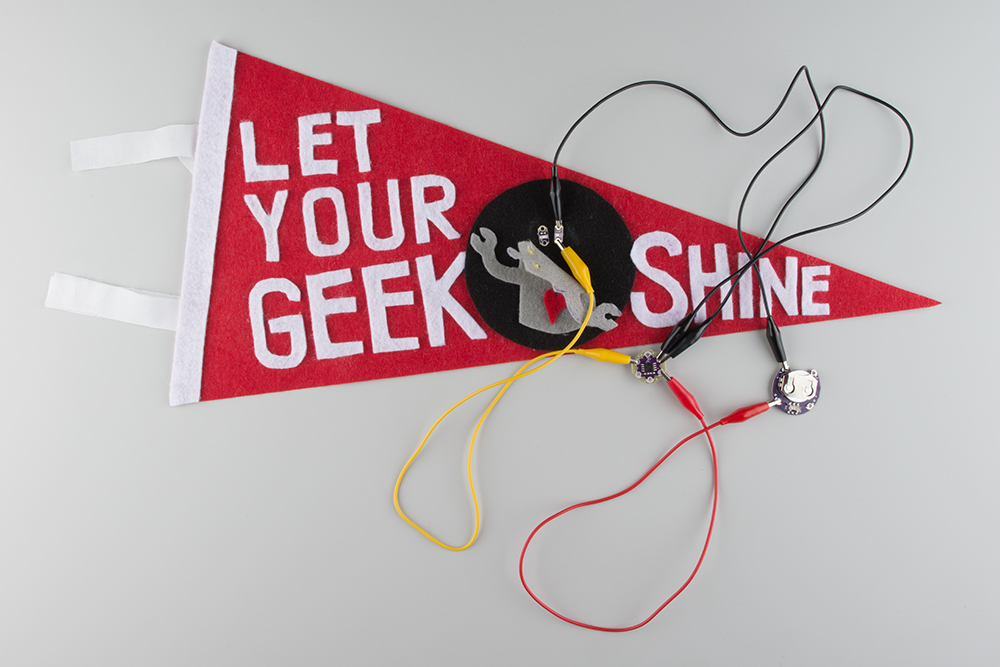
LilyTiny Example
Angela decided to use the LilyTiny's breathing fade mode programmed on petal 0 to light up a robot's eyes. She planned her circuit with two LEDs attached to one petal to make them light up at the same time. She also planned the battery holder to be attached to the reverse side of the felt.

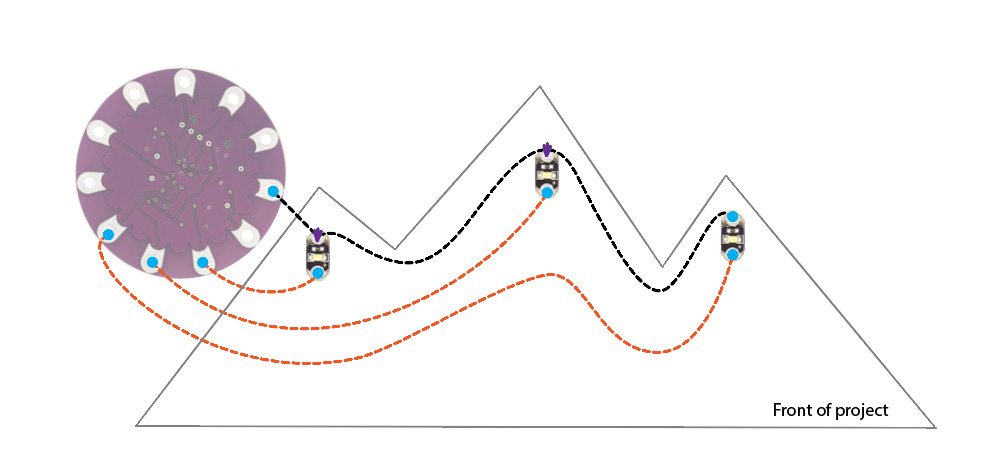
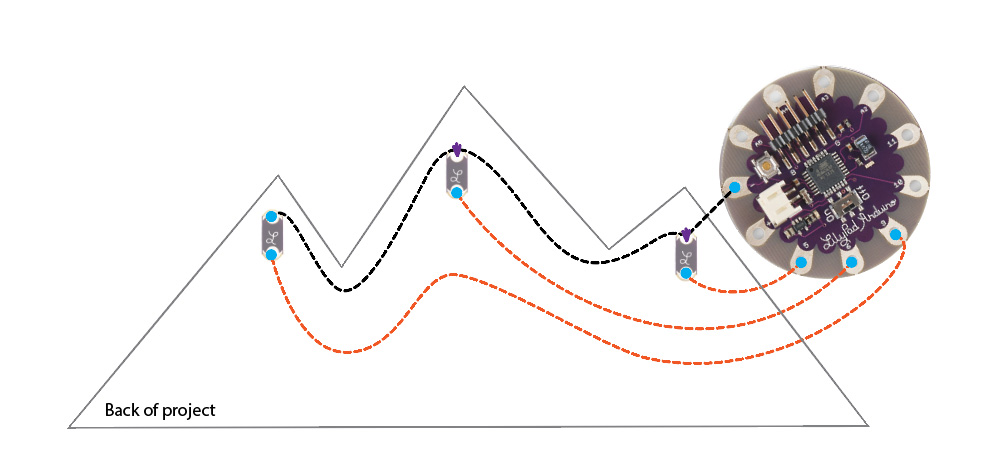
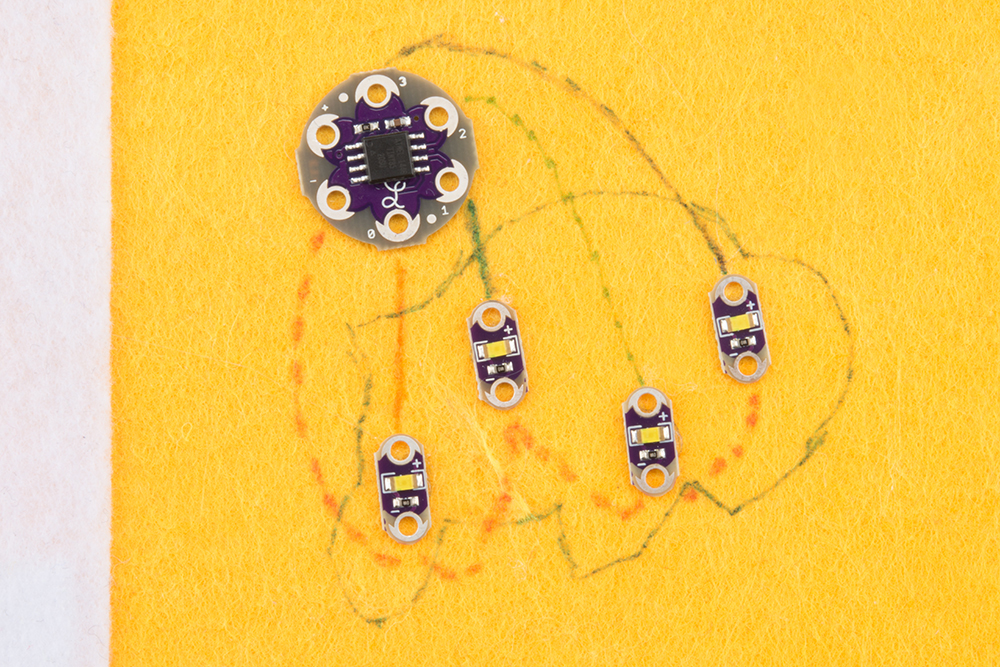
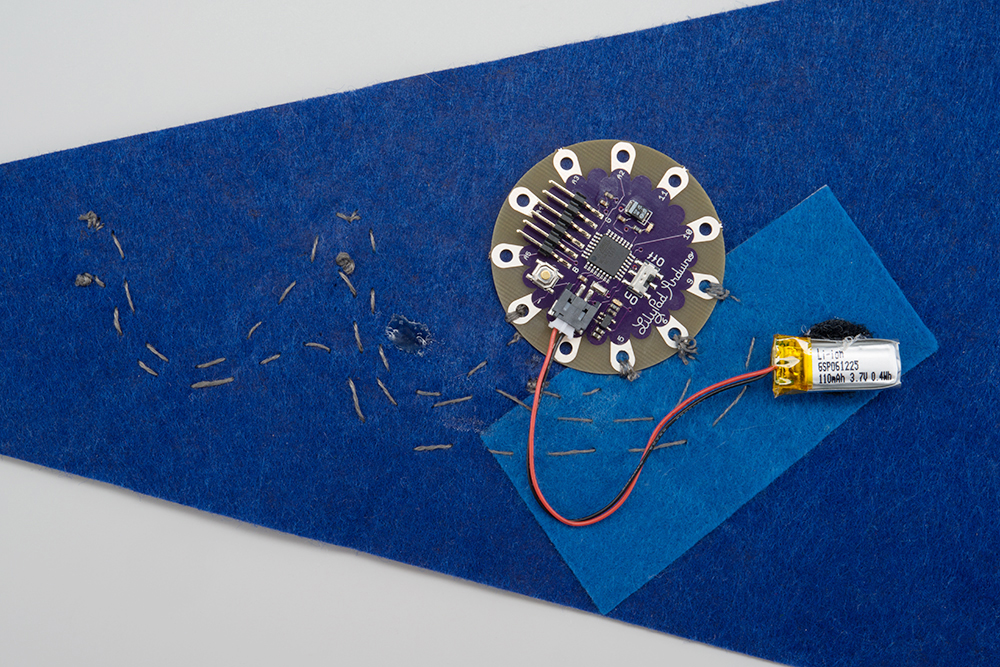
LilyPad Arduino Example
For her mountain scene pennant, Maya planned the LEDs to light up the peaks and the LilyPad Arduino to be on the reverse side of the felt, again for easy access. She designed as much of the stitching as possible to be hidden by the felt mountain cut outs she created.
Step 2: Attach Components
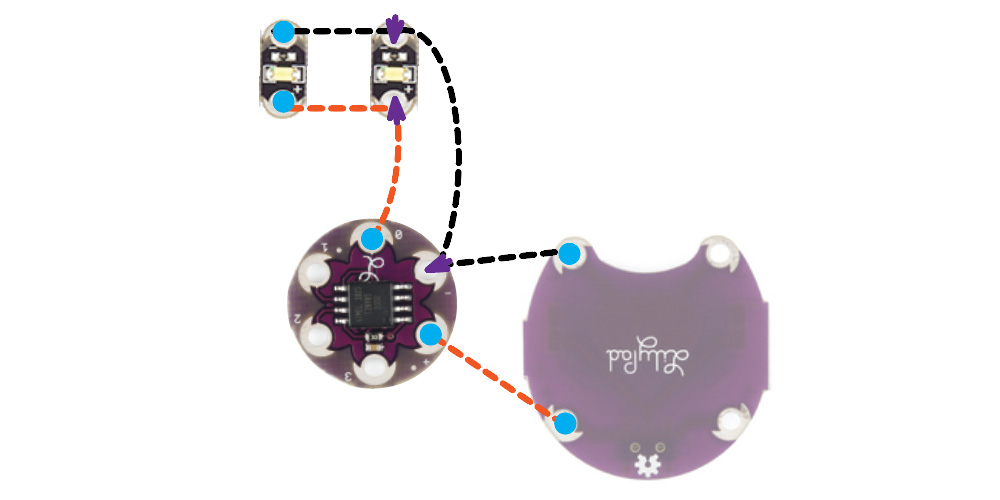
Once you've settled on a final design layout, arrange your components on the felt. Make sure to double check that the positive (+) side of the LED is set up to connect to a numbered petal on the LilyTwinke, LilyTiny, or LilyPad Arduino, and the negative (-) sides are arranged to easily connect to the negative petal on the boards.
If you'd like to double check everything before sewing, use alligator clips to connect the components together and power up. Make sure to remove the battery before you begin sewing with conductive thread.
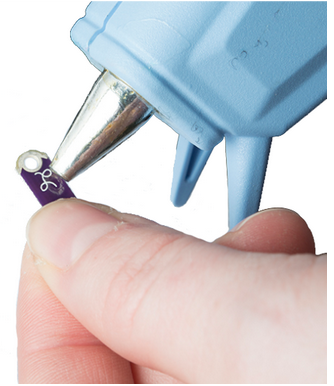
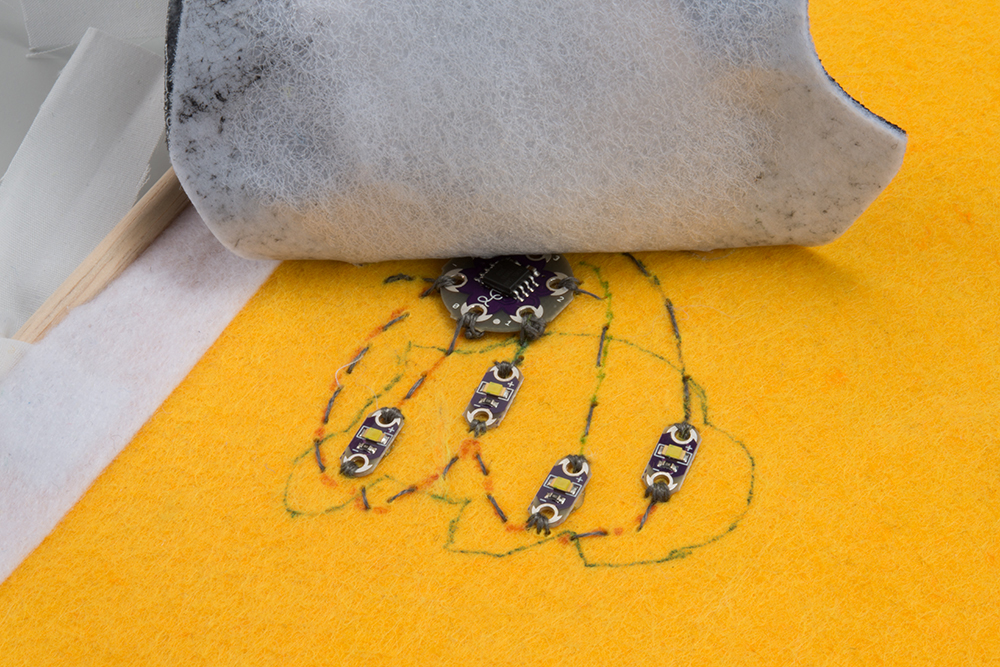
Using a small dab of hot glue, attach the components in place on the felt so they don't move around while you sew. Be careful not to accidentally fill the sewing holes with glue, especially on smaller components like the LilyPad LEDs.
To help plan your stitching, use tailor's chalk or a pen to draw stitch lines.
Step 3: Conductive Thread Connections
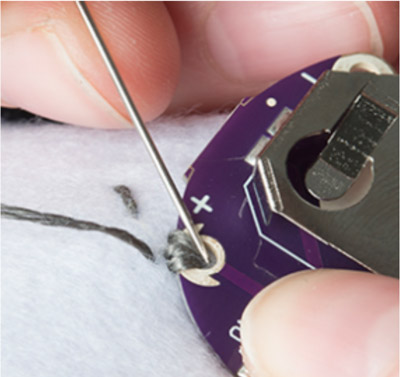
Carefully sew the connections you planned, making sure to loop snugly around the sewing holes at least four times for a good electrical connection.
Step 4: Power It Up
Once all the stitching is done, check for any loose knot tails or places where the conductive thread may be accidentally touching components or other stitches. After everything checks out, insert (or plug in) the battery for the project and power it up using the ON/OFF slide switch. Examine your project for any LEDs that are not lighting up properly and recheck your connections if necessary.

Step 5: Decoration and Finishing Touches
Add some felt loops for authentic pennant feel and hang on a wall or use a wooden dowel to make a wave-able piece of team spirit.
For extra protection of your project, or if there are any spots on where thread is exposed and could use some insulation, take a look at our Insulation Techniques for e-Textiles. Since this project will most likely be hanging on a wall and not being worn, you will not have to worry as much about the project bending and short circuiting. Be aware if you plan to hang it near any metallic surface, the exposed thread or components could touch the metal and short circuit.
Resources and Going Further
Now that you've finished up a decorative project, how about trying a costume or wearable project?