How to Install CH340 Drivers
Mac OSX
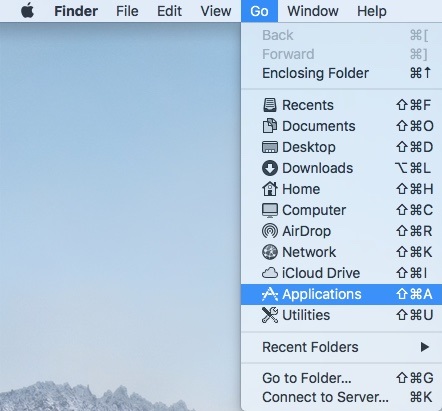
Open the Terminal program by selecting Go > Applications.
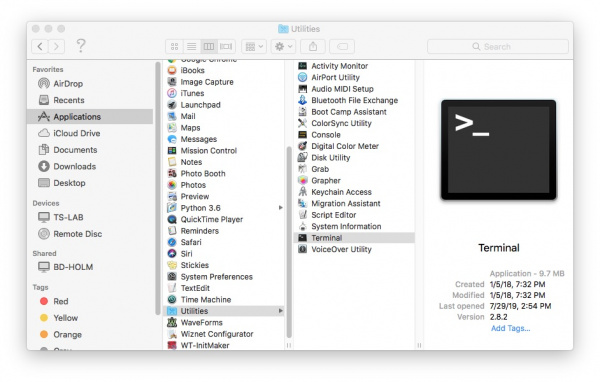
Select and open the Terminal program under Applications > Utilities > Terminal.
If you are still unsure of how to access the Terminal, watch this video or read this Apple support article.
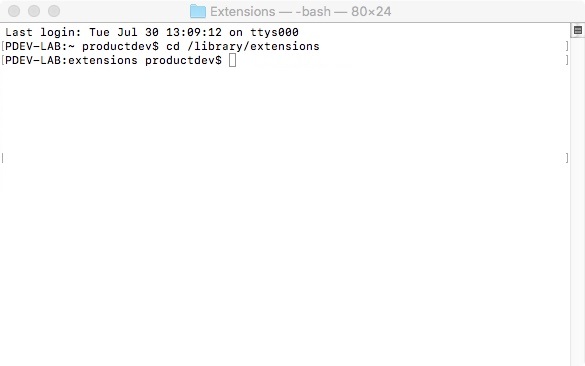
You'll need to move to the directory where the *.kext files are stored.
For Mac OSX v10.9+, you will need to use this command:
language:bash
cd /Library/Extensions
For Mac OSX v10.8 and below, you will need to use this command:
language:bash
cd /System/Library/Extensions
In this case, we will be using Mac OSX v10.13, so we will need to use the first command.
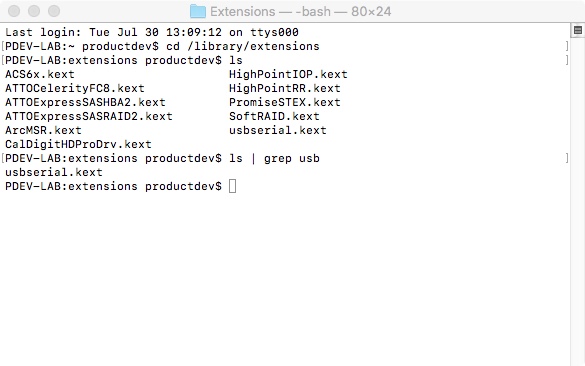
To check to see if the CH340 driver is in the correct path, use the following command to list the contents of the folder.
language:bash
ls
To look for CH340 driver files (i.e. usb.kext or usbserial.kext) in the path, you could use the following command.
language:bash
ls | grep usb
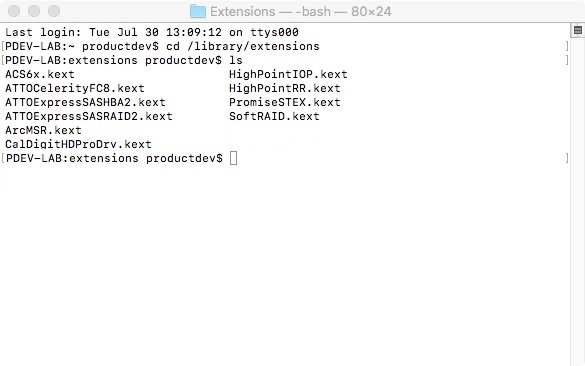
You should see something similar to the output below after using the commands.
If you have found the file in the path, you will need to run each of the following commands in the CLI/Terminal to remove old CH340 drivers. In this case, there was only the usbserial.kext file but it does not hurt to run both commands. Make sure to have administrative privileges to ensure that the drivers are removed.
language:bash
sudo rm -rf /Library/Extensions/usb.kext
sudo rm -rf /Library/Extensions/usbserial.kext
Check if the old drivers were removed in the paths by using the ls command with your respective OS version. You will notice that the *.kext file is removed from the respective paths. In this case, the usbserial.kext was removed from Mac OSX High Sierra.
language:bash
ls
Download and extract the folder.
Then, open the "*.pkg" file from the unzipped folder and follow the instructions. You'll need to restart your computer for the changes to take effect.
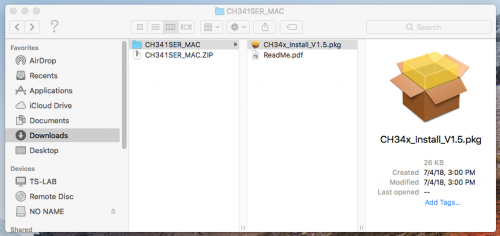
Mac OSX CH340 Driver Installation File
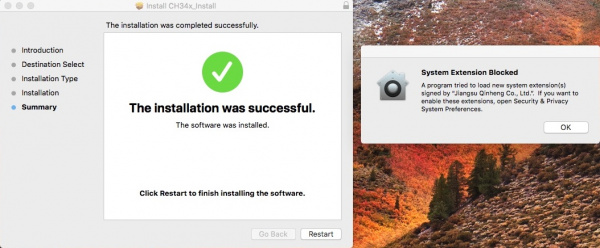
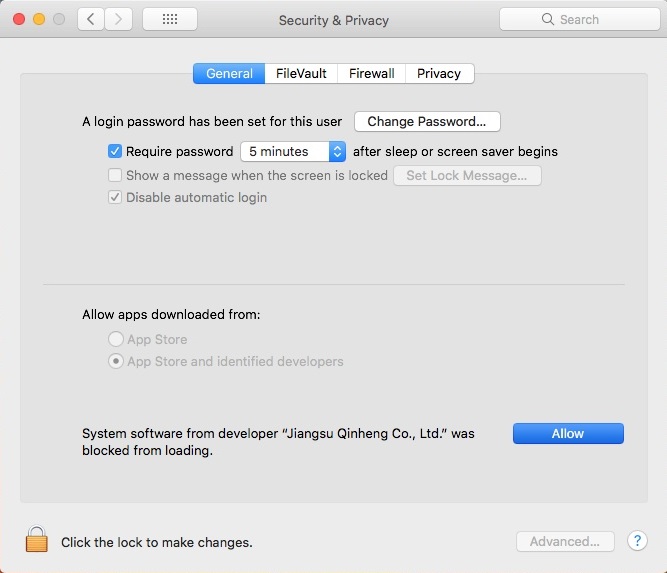
If you receive a window that indicates that the system extension is blocked, you'll need to open a search with Spotlight by pressing ⌘ (Command) + space bar (Space Bar). Type Security & Privacy and click on the "Allow" button to enable the CH340 drivers.
Driver Verification for Macs
To verify that your driver is working, you should see a difference in the following pictures after plugging the CH340 to a USB port.
Command Line
Open the Terminal by heading to Applications > Utilities > Terminal if the program is not open yet.
If you are still unsure of how to access the Terminal, watch this video or read this Apple support article.
Then run the following command:
language:bash
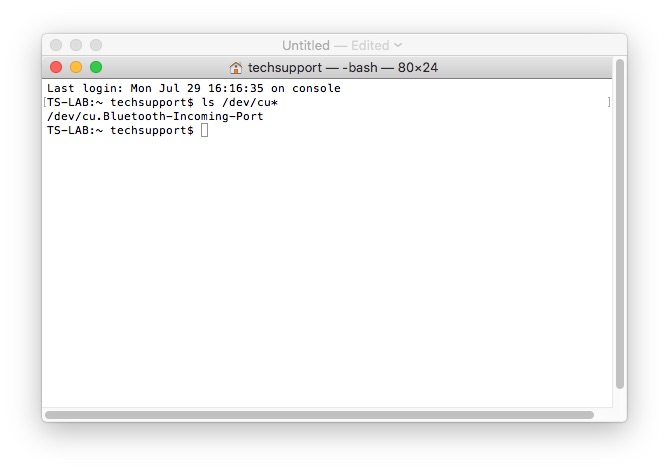
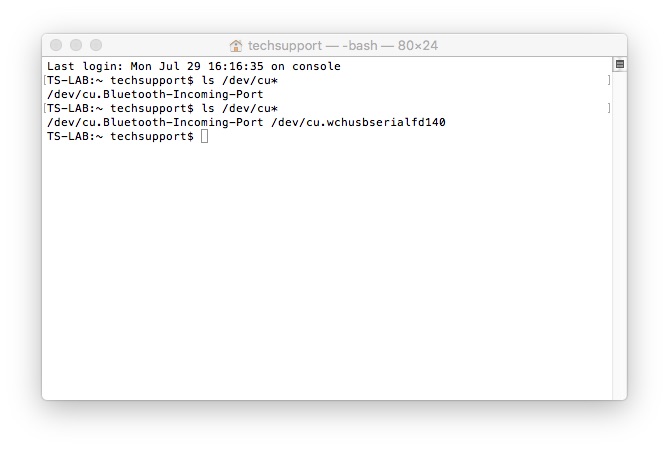
ls /dev/cu*
A list of devices connected to your Mac's COM ports will be displayed as a result. Assuming that the CH340 is not connected to your computer, you should see something similar to the image below.
Connect the CH340 to one of your Mac's COM ports. Check for the following changes (your board may show up under a different device name). The CH340 should show up as /dev/cu.wchusbserial*****. Depending on your computer, the COM port may show up as a different number.
Arduino IDE
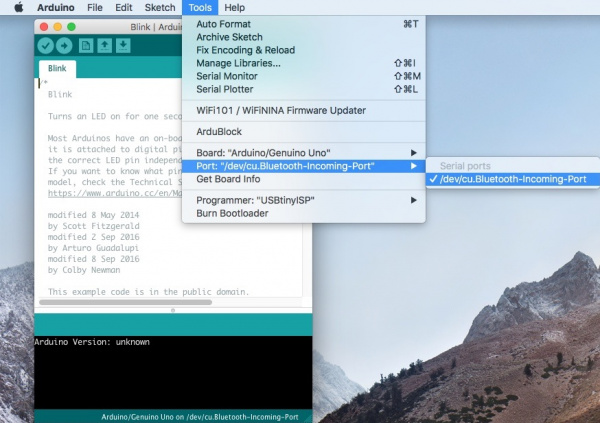
Alternatively, if you have the Arduino IDE installed, you should also see a change in the number of available COM Ports (you may need to restart the Arduino IDE for the board to populate). Without the CH340 connected to your computer, click on Tools > Port. Take note of the Serial Ports available.
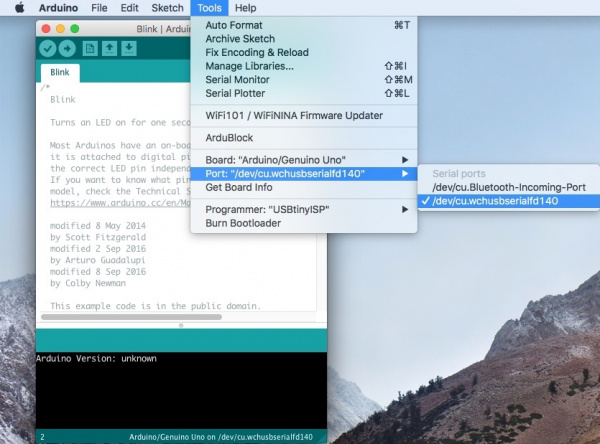
Connect the CH340 to your computer's USB port. Click on somewhere else on the screen for the menu to refresh itself. Then head back to the menu by clicking on Tools > Port. A new COM port should pop up. By process of elimination, the CH340 should have enumerated to the new COM port! Feel free to click on the COM port to select if you are uploading code to a microcontroller. Depending on your computer, the COM port may show a different number.
Serial Loop Back Test
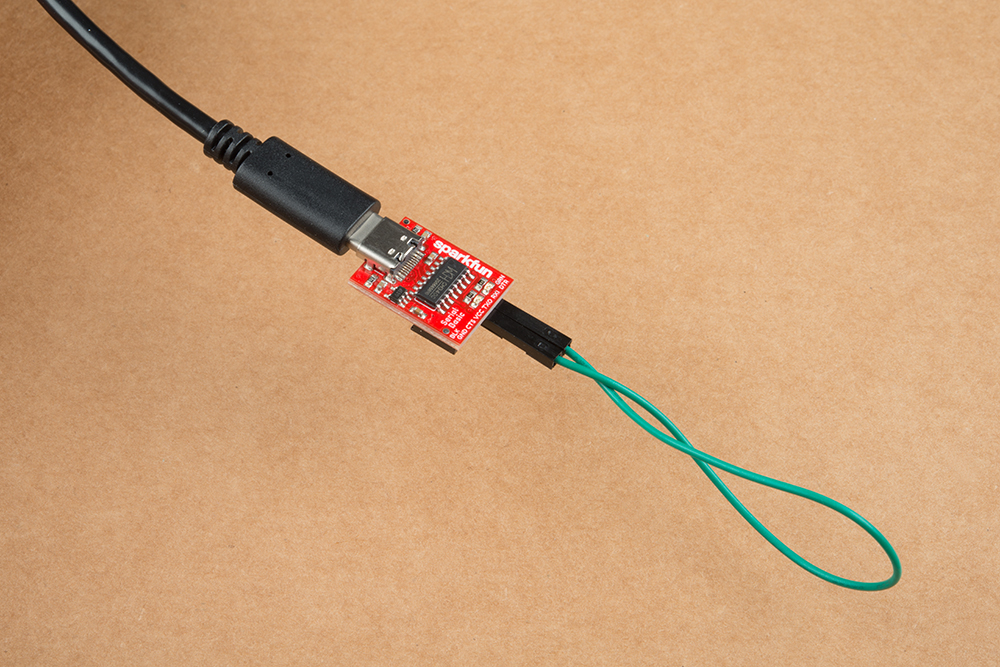
You can also verify if the USB-to-serial converter is working by doing a serial loop back test or echo test. If you are using the breakout board, you can add a jumper between the Tx and Rx to try and echo a character in a terminal program. For more information, try checking out the Hardware Test for the serial basic hookup guide.
