How to Install CH340 Drivers
 bboyho, santaimpersonator
Linux
Raspbian for Raspberry Pi
Run the following commands in the CLI/Terminal when using Raspbian on a Raspberry Pi. After updating, the latest CH340 should be installed!
language:bash
sudo apt-get update
sudo apt-get upgrade
Other Linux Distributions
Here is a downloadable *.ZIP of standard CH340 drivers for Linux.
There are some reported cases of serial communication failure when using the factory drivers in Linux. If you encounter this problem, you can try installing patched drivers as explained in this forum post. Here are the steps (to run in the command line):
- Plug and unplug your CH340 device from the USB port
- Type
dmesgto see what has happened- The expected output (shows "ch341") should have the following in the recent log:
[  xxx] ch341-uart ttyUSB0: ch341-uart converter now disconnected from ttyUSB0
[ xxx] ch341 3-2:1.0: device disconnected- Download the patched drivers repository and unzip the files
cdinto the directory where the files are savedmake cleanmakesudo make loadsudo rmmod ch341to uninstall the broken driverlsmod | grep ch34to list what modules are currently installed- Plug and unplug your CH340 device again on the USB port
dmesg- Expected output (should show "ch34x" now):
[  xxx] ch34x ttyUSB0: ch34x converter now disconnected from ttyUSB0
[  xxx] ch34x 3-2:1.0: device disconnected
Depending on your root permissions, you may need to configure the serial port with the following two commands. Make sure to adjust the $username with respect to the user ID that is currently logged in.
language:bash
sudo usermod -a -G dialout $username
sudo chmod a+rw /dev/ttyUSB0
/dev/ttyUSB0 may be different. Try using ls command as explained in the Driver Verification if you have issues configuring the serial port settings and adjusting the port as necessary.
Driver Verification for Linux
Command Line
Plug the CH340 back to your computer's USB port. Then run the following command in the CLI/Terminal on any Linux distribution. Check for the following changes (your board may show up under a different device name).
language:bash
ls /dev/ttyUSB*
The serial port that CH340 is connected to should pop up as a result.
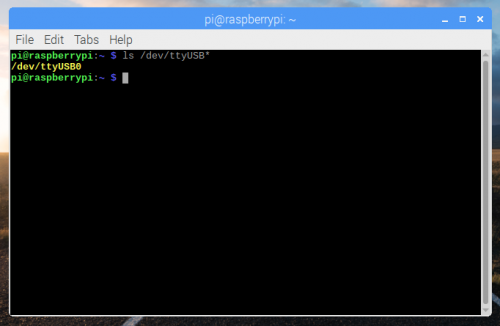
Screenshot of Raspberry Pi CLI with the CH340 on ttyUSB0. Click to enlarge
Arduino IDE
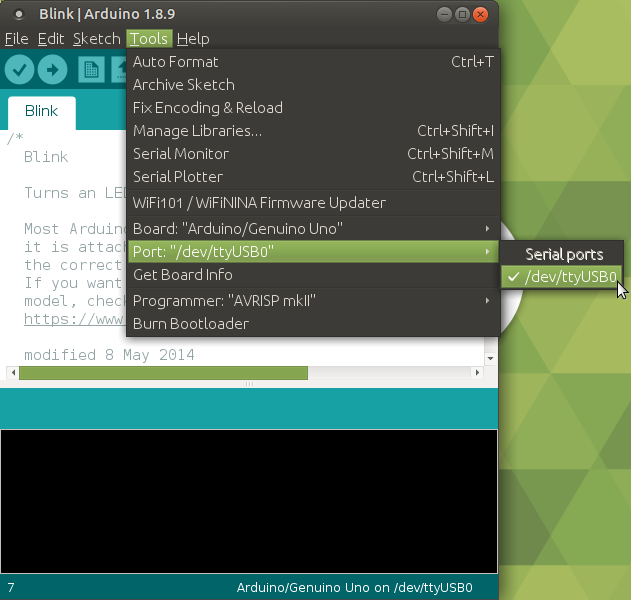
Alternatively, if you have the Arduino IDE installed, you should also see a change in the number of available COM Ports (you may need to restart the Arduino IDE for the board to populate). Without the CH340 connected to your computer, click on Tools > Port. Depending on the Linux flavor that you have, the Ports may not open to display any serial ports. Take note of the Serial Ports available if it opens up.

Connect the CH340 to your computer's USB port. Click on somewhere else on the screen for the menu to refresh itself. Then head back to the menu by clicking on Tools > Port. A new COM port should pop up. By process of elimination, the CH340 should have enumerated to the new COM port! Feel free to click on the COM port to select if you are uploading code to a microcontroller. Depending on your computer, the COM port may show a different number.
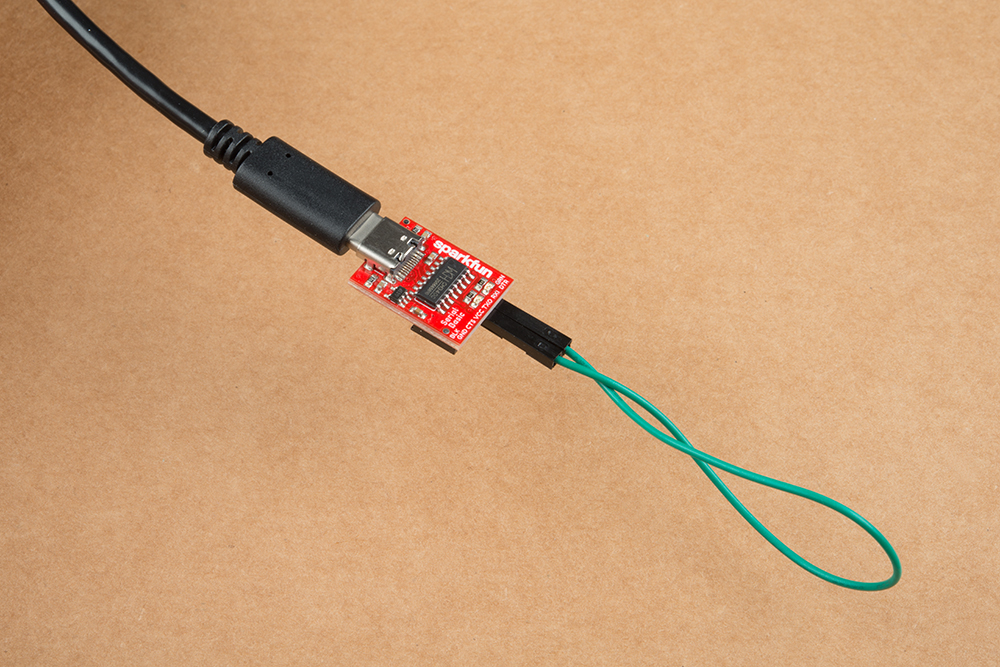
Serial Loop Back Test
You can also verify if the USB-to-serial converter is working by doing a serial loop back test or echo test. If you are using the breakout board, you can add a jumper between the Tx and Rx to try and echo a character in a terminal program. For more information, try checking out the Hardware Test for the serial basic hookup guide.