How to Install an ATtiny Bootloader With Virtual USB
Change Fuses
Most microcontrollers come with a number of configuration bits that reside in nonvolatile memory outside of the normal program space. In AVR chips, like our ATtiny84, these bits are known as "fuses." By default, the fuses on a new ATtiny84 are set to:
- Divide the clock by 8
- Disabled brown-out detection
- No self-programming
We want to change the fuses so that we have:
- No clock divider
- Brown-out detection at 2.7V (not necessary, but useful if running off battery)
- Self-programming
To see which fuses need to be changed, select ATtiny84 from the dropdown list on the AVR Fuse Calculator site.
Burning Fuses with AVRDUDE
If you change the features on the fuse calculator, you'll see that we need to set the following:
- Low Fuse Byte:
0xE2 - High Fuse Byte:
0xDD - Extended Fuse Byte:
0xFE
To do that, we'll use AVRDUDE. Once again, navigate to the directory with AVRDUDE in Arduino and execute the following command:
avrdude -C ../etc/avrdude.conf -c arduino -p t84 -P <Serial Port> -b 19200 -U lfuse:w:0xe2:m -U hfuse:w:0xdd:m -U efuse:w:0xfe:m
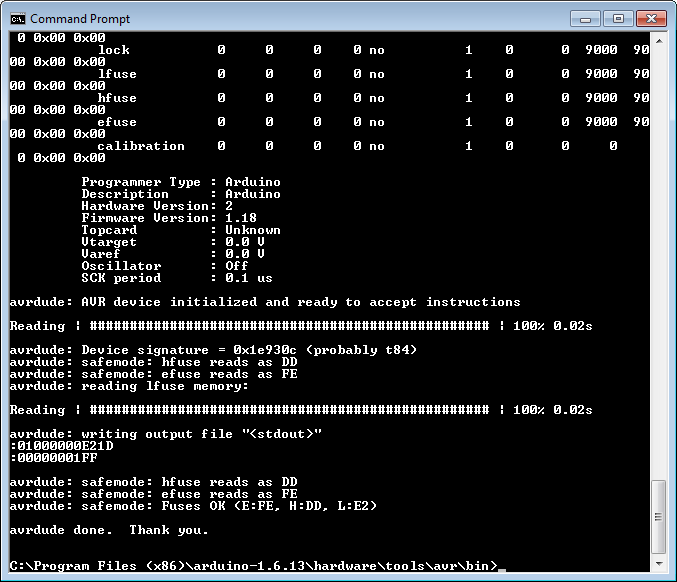
Verify that the fuses have been written with the following:
avrdude -C ../etc/avrdude.conf -c arduino -p t84 -P <Serial Port> -b 19200 -U lfuse:r:-:i
While you are telling AVRDUDE to specifically read the lfuse, it will print out the state of all the fuses. You should see the following at the bottom of the printout:
avrdude: safemode: Fuses OK (E:FE, H:DD, L:E2)
