Hookup Guide for the Qwiic Motor Driver
Experiment 2: Interactive Commands with UART
This example demonstrates the basic commands, plus some direct register access possible with only a UART available. This type of program could be easily run from a script from a more classic PC where I2C isn't available.
Interactive UART
Requirements
- Computer serial terminal set to 9600 baud.
- Terminal set to send CR and LF (Carriage return and line feed).
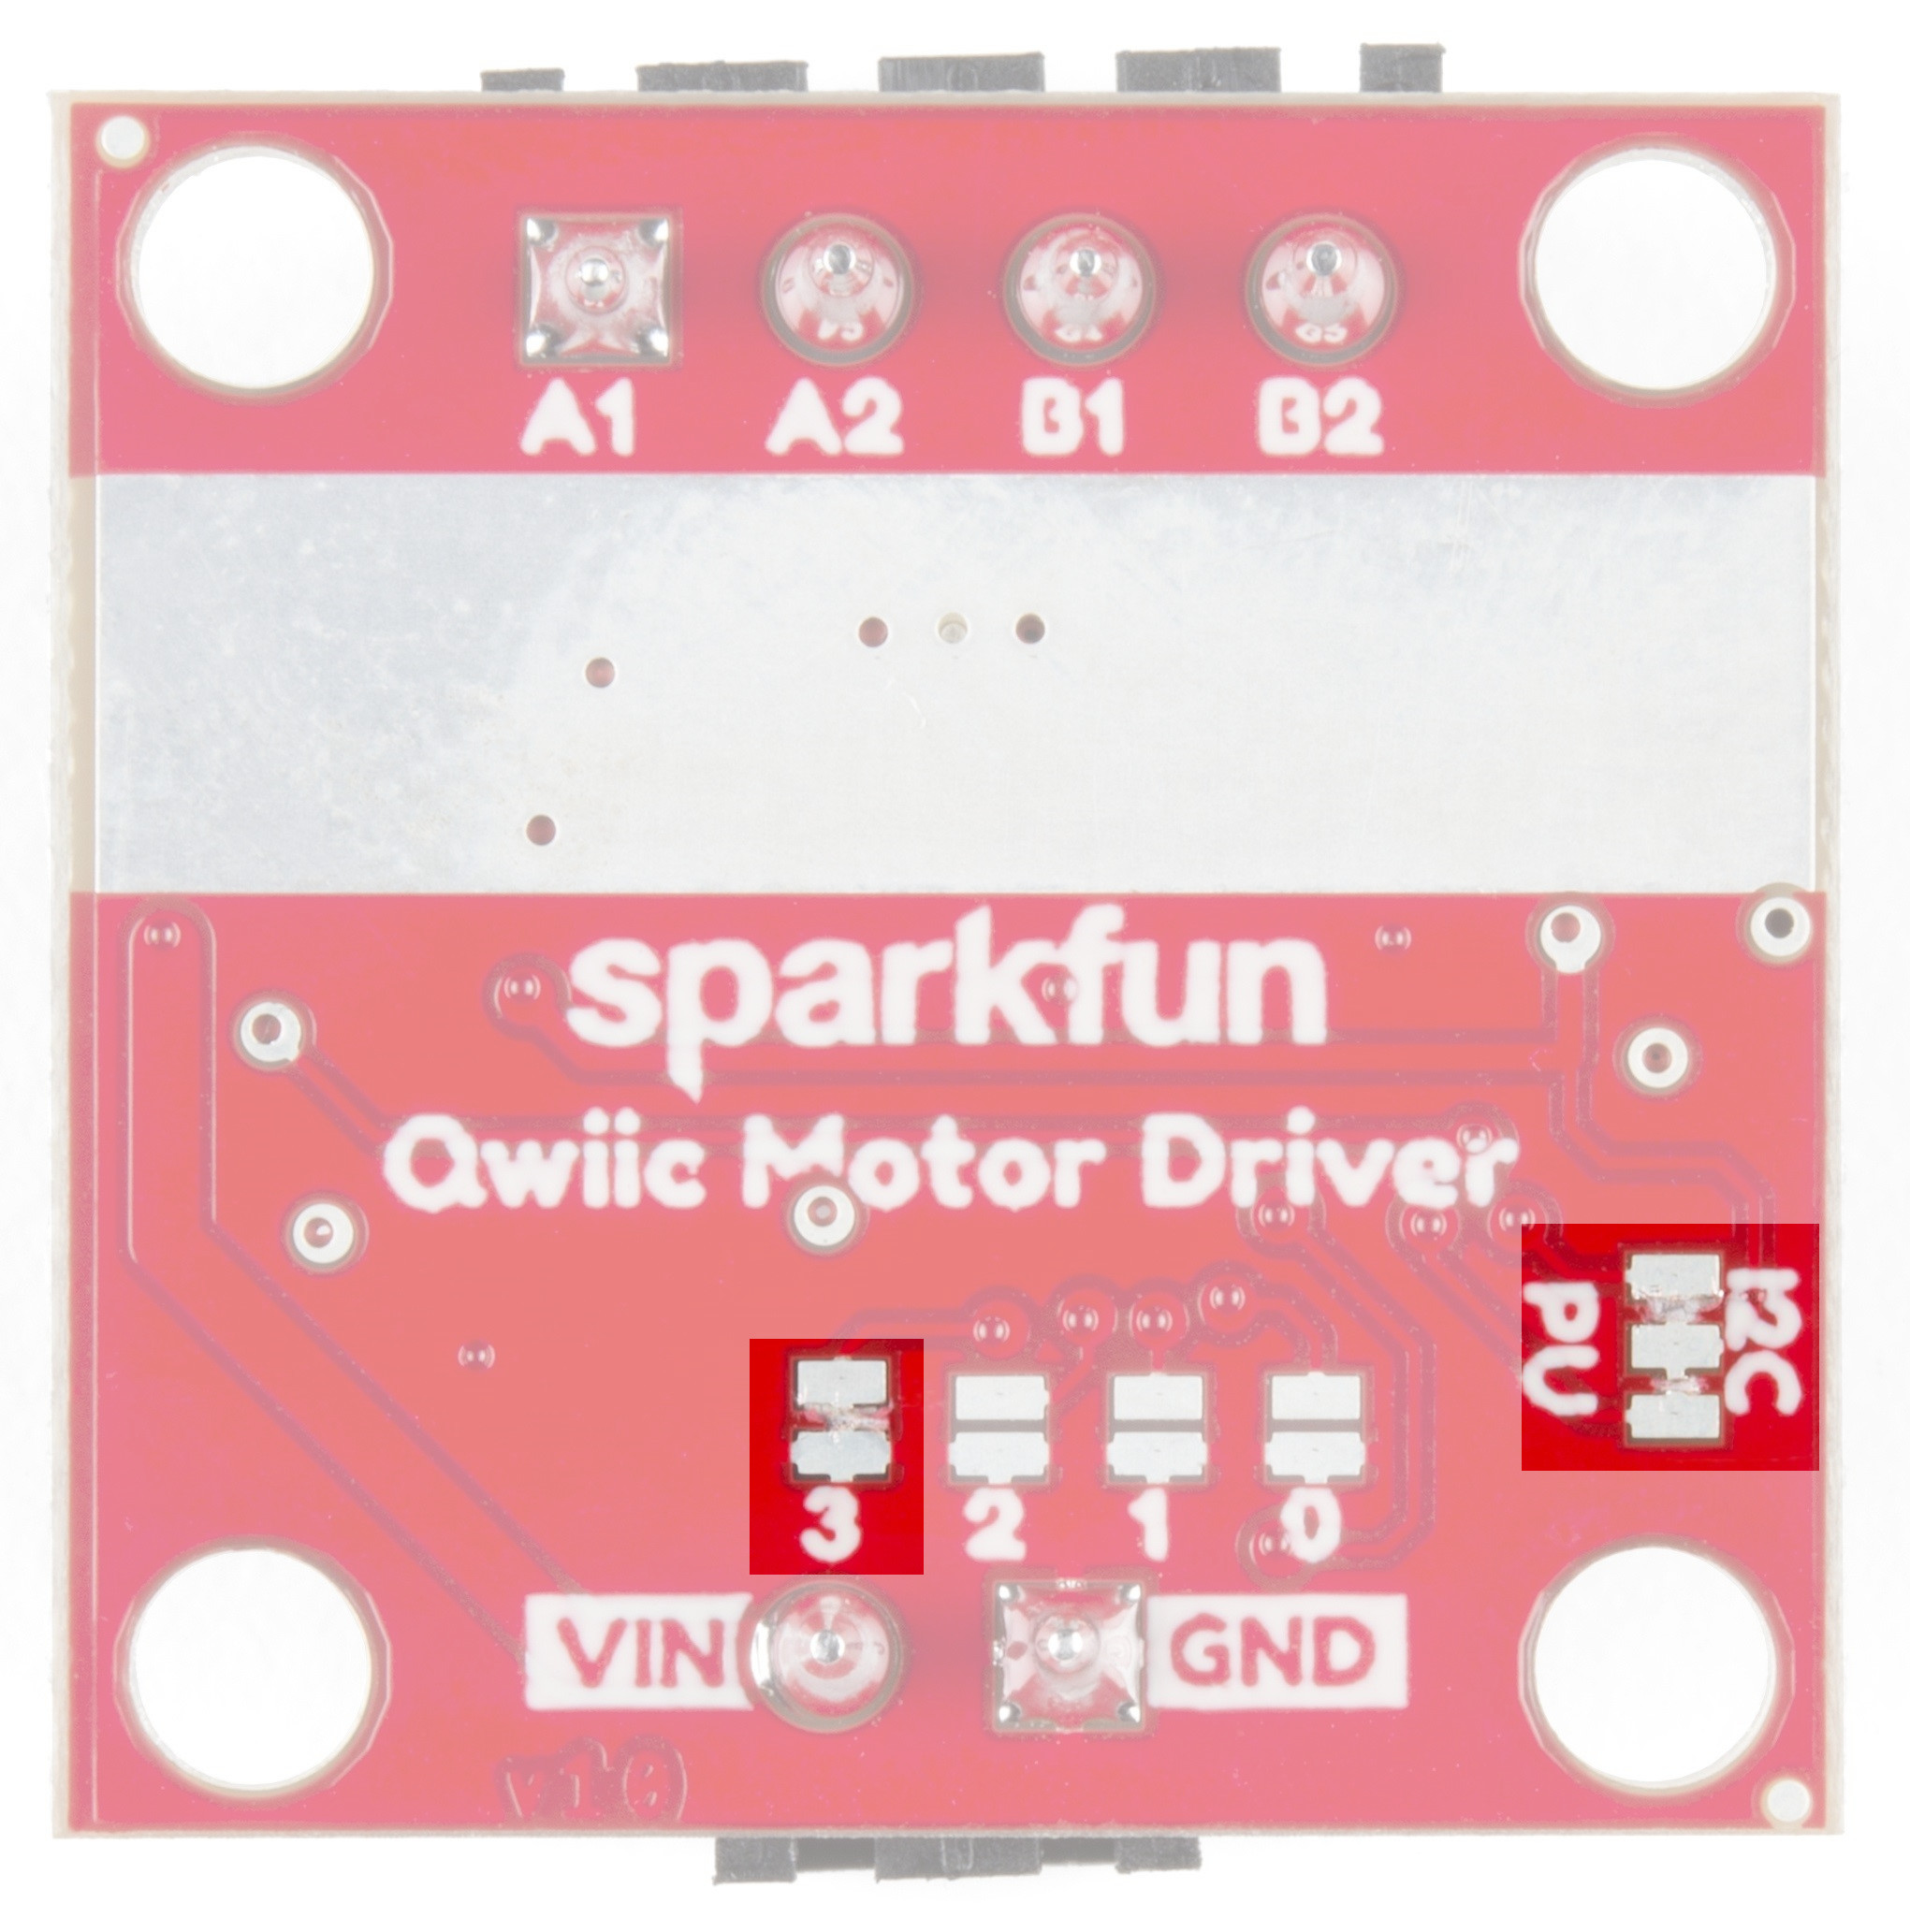
- Config jumpers set to '0000', or all open.
- I2C PU jumper fully open
- FTDI Basic or Serial Basic - either will work but ensure you have the 3.3V version
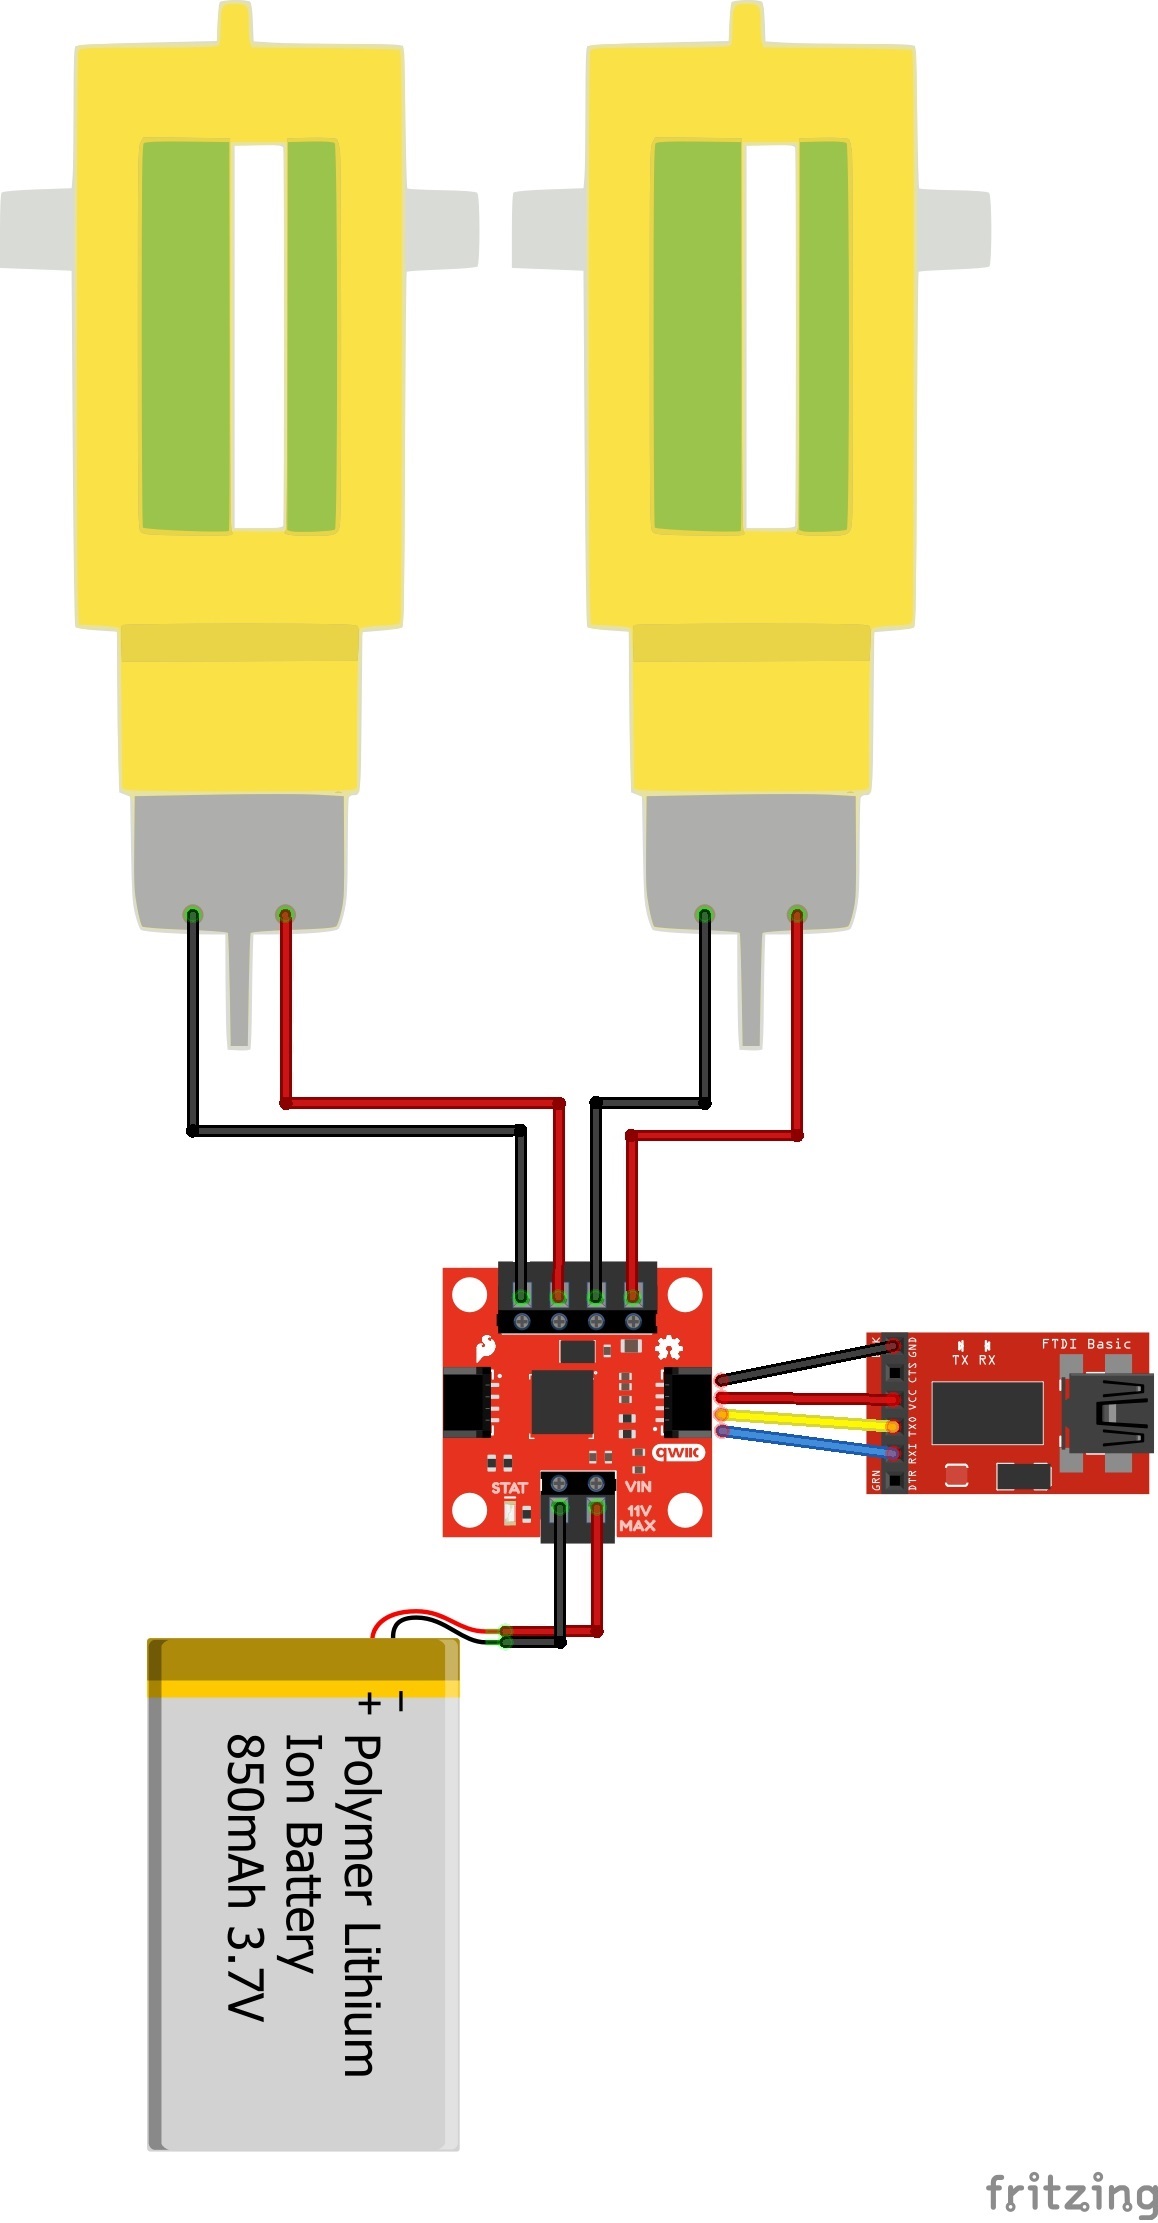
Connect the FTDI to the Qwiic Motor Driver as you see in the Fritzing diagram below. Attach two motors to the driver, one between A1 and A2, and the other between B1 and B2.
Example Commands
When you're ready, make sure you have the correct COM port selected in your Arduino IDE, open a Serial Monitor, and send the following commands:
"R01"
This will read the ID register and return 0xA9
"M0F50"
This will tell motor 0 to drive at half speed, forward -- But nothing will happen yet!
"E"
This will enable all drivers. Motor 0 should begin spinning at half speed.
"M1R100"
This will tell motor 1 to drive at full speed in reverse. Now both should be spinning opposite directions.
"D"
D will disable both motors, which will stop spinning.
See the section UART Commands in the Serial Controlled Motor Driver Hookup Guide for a full command listing.