Hackers in Residence: The Sound Visualizer
 onebeartoe
Hardware Assembly
Raspberry Pi
If you're new to Raspberry Pi, SparkFun has a Getting Started with Rasbian Guide. There is also plenty of great info to setup your Raspberry Pi on the Raspberry Pi Website . Come on back once you have your Pi booting into Rasbian.
Pixel
Use this quick start guide to get familiar with the Pixel hardware.
Attaching a Microphone
The Pixel board has several ports for attaching input sensors or output components. This project uses the SparkFun microphone or the SparkFun Sound Detector. The Pixel board uses Grove ports, while the SparkFun breakouts do not, so the port housing needs to be removed to attach the microphone. A pair of needle nose pliers can be used to gently remove the port housing.
Using some female to female jumper wires, cut one in half, and solder the bare end directly to the microphone (or Sound Detector). You can also use hookup wire if you do not wish to cut your jumper wires. Then use the female end to connect to header pins on the Pixel board. E6000, or any other adhesive you have around, can be used to better secure the female jumper wire to the Pixel board.
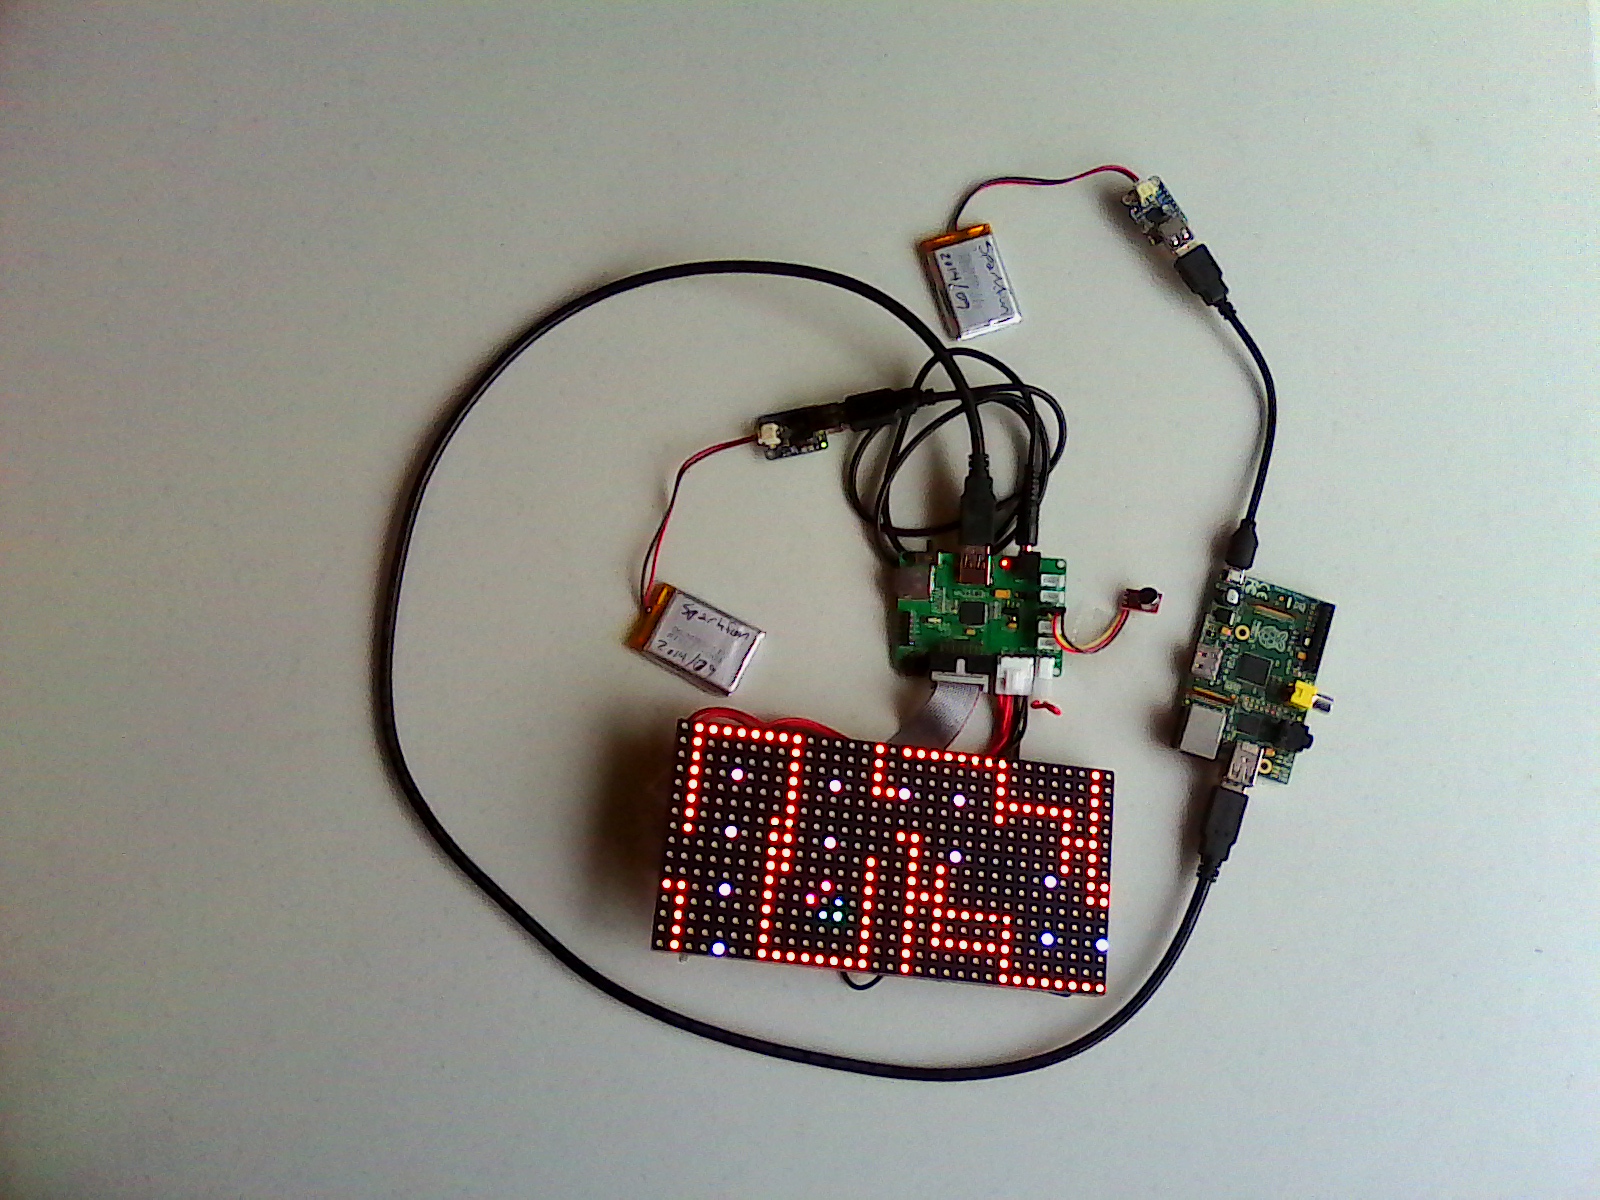
Here is the Pixel board before the port housing is removed:
Gently pull on the sides of the port housing until it comes off the board.
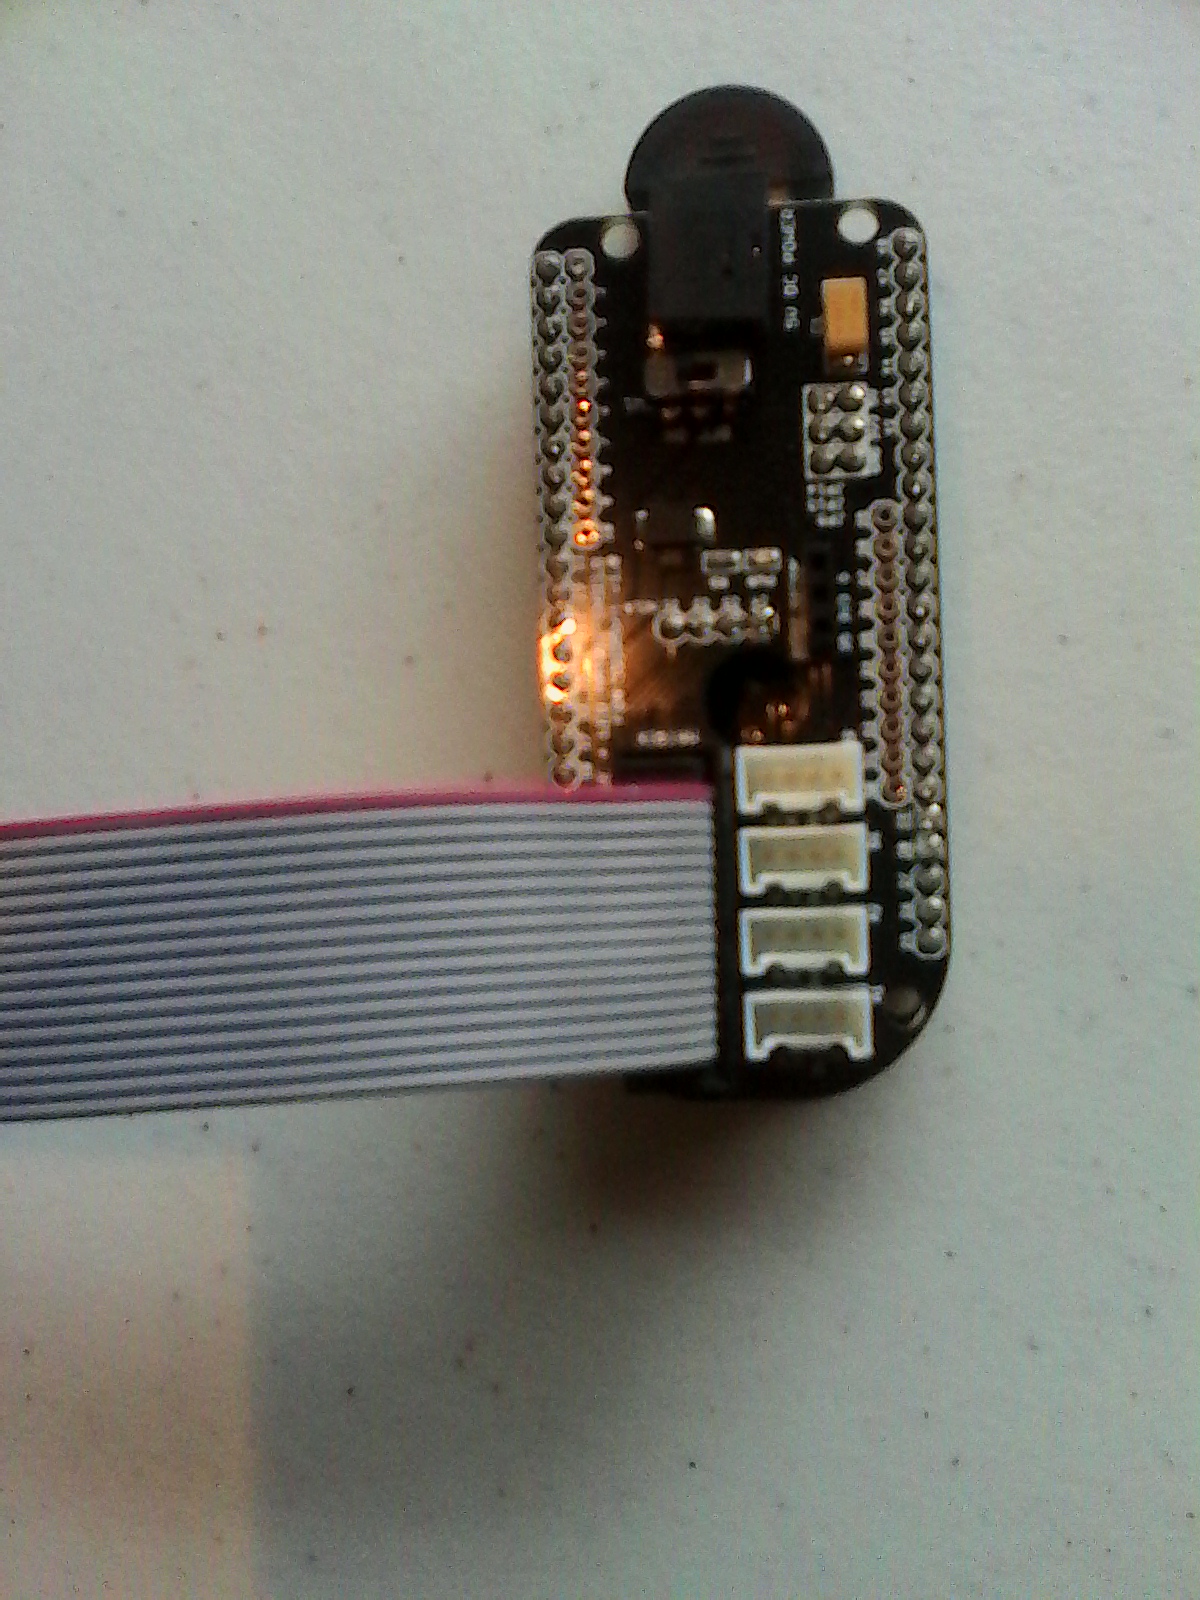
On the Pixel board, the microphone port is the one closest to the end of the board. Here is the Pixel board with the housing for the microphone port removed:

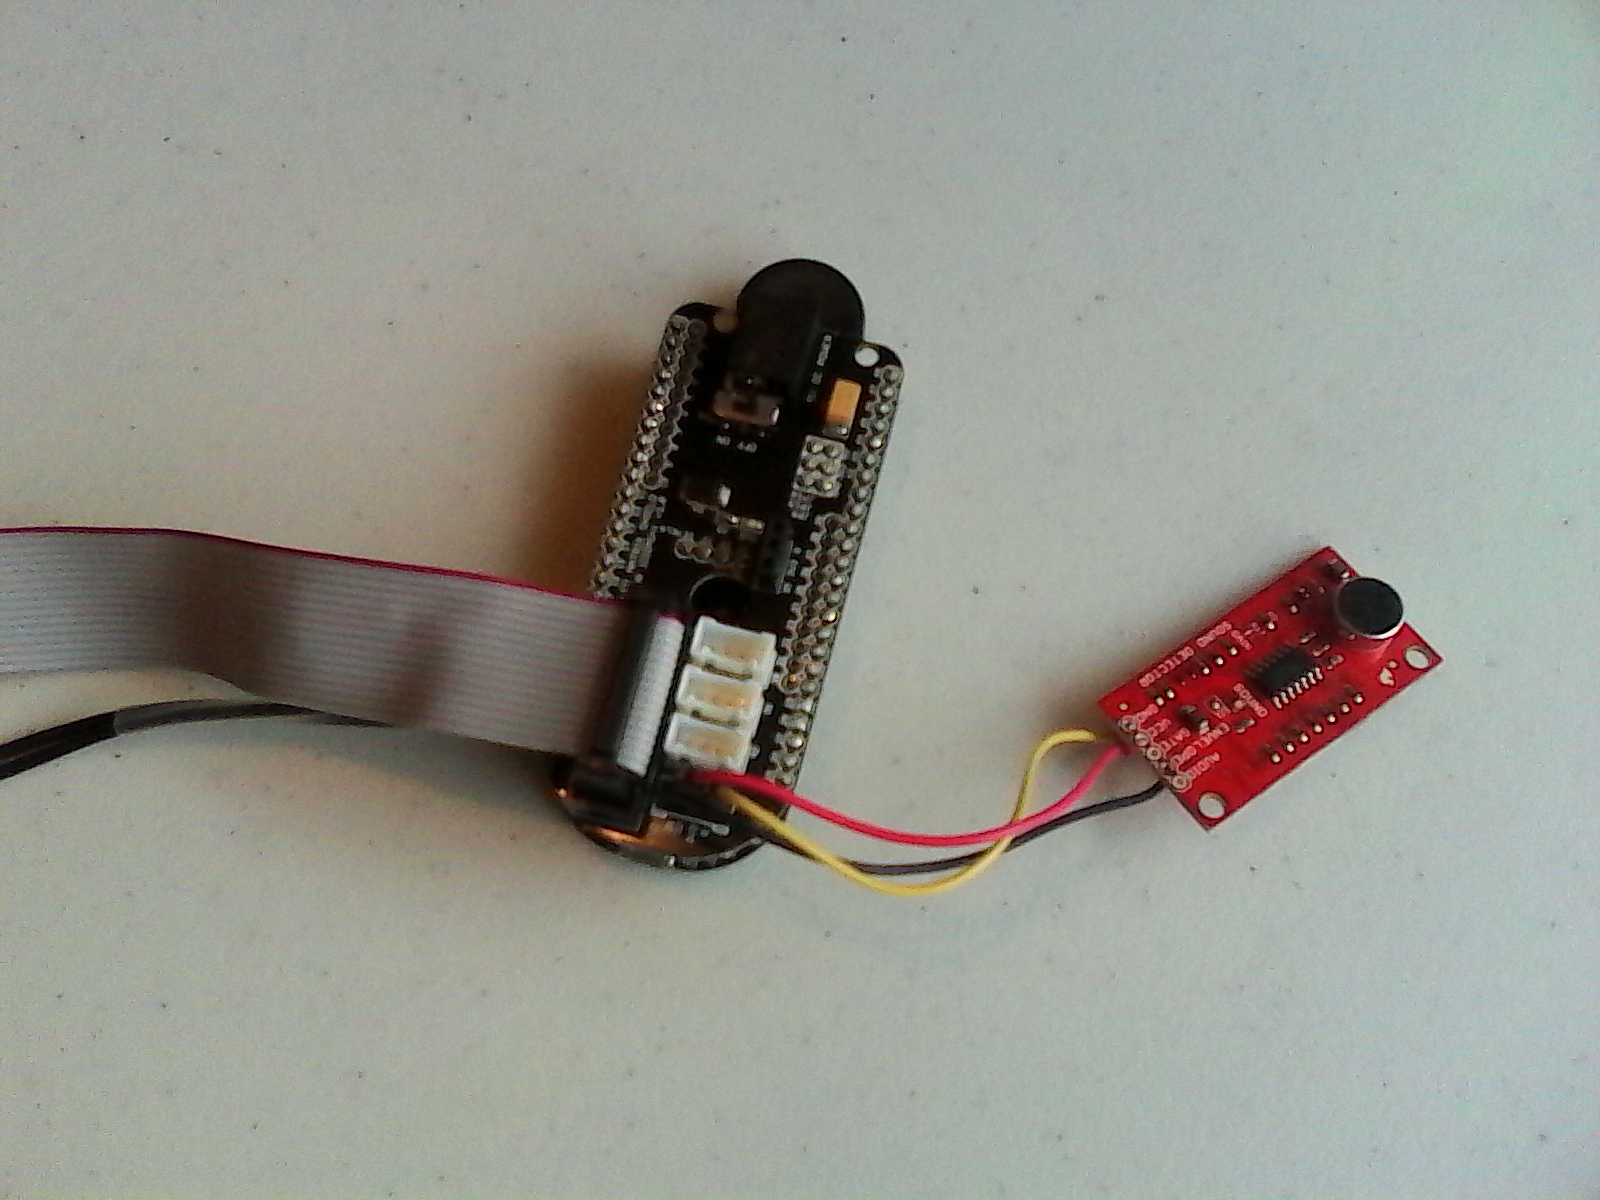
Although the physical port location differs between the V1 and V2 Pixel boards, the SparkFun Sound Detector (or other microphone) is connected to the pin labeled 31 for both versions. Ground is connected to ground, and Vcc is connected to the power pin.
Here is the SparkFun Sound Detector attached to the Pixel board.
Pixel V2
If you are using V2 of the Pixel Board, your setup will look different. For the V2 Pixel board, the microphone port is the middle one of the 5 ports. The following image shows the SparkFun Mic Breakout attached to this port on the Pixel V2.

Powering the Pixel
This project powers the Pixel with a PowerBoost 1000 and a LiPo Battery. You could also use a rechargeable battery pack for this. The Pixel connects to the PowerBoost with a USB to barrel jack, as seen in the next photo.
Male to Male USB Connection for Pixel and Raspberry Pi
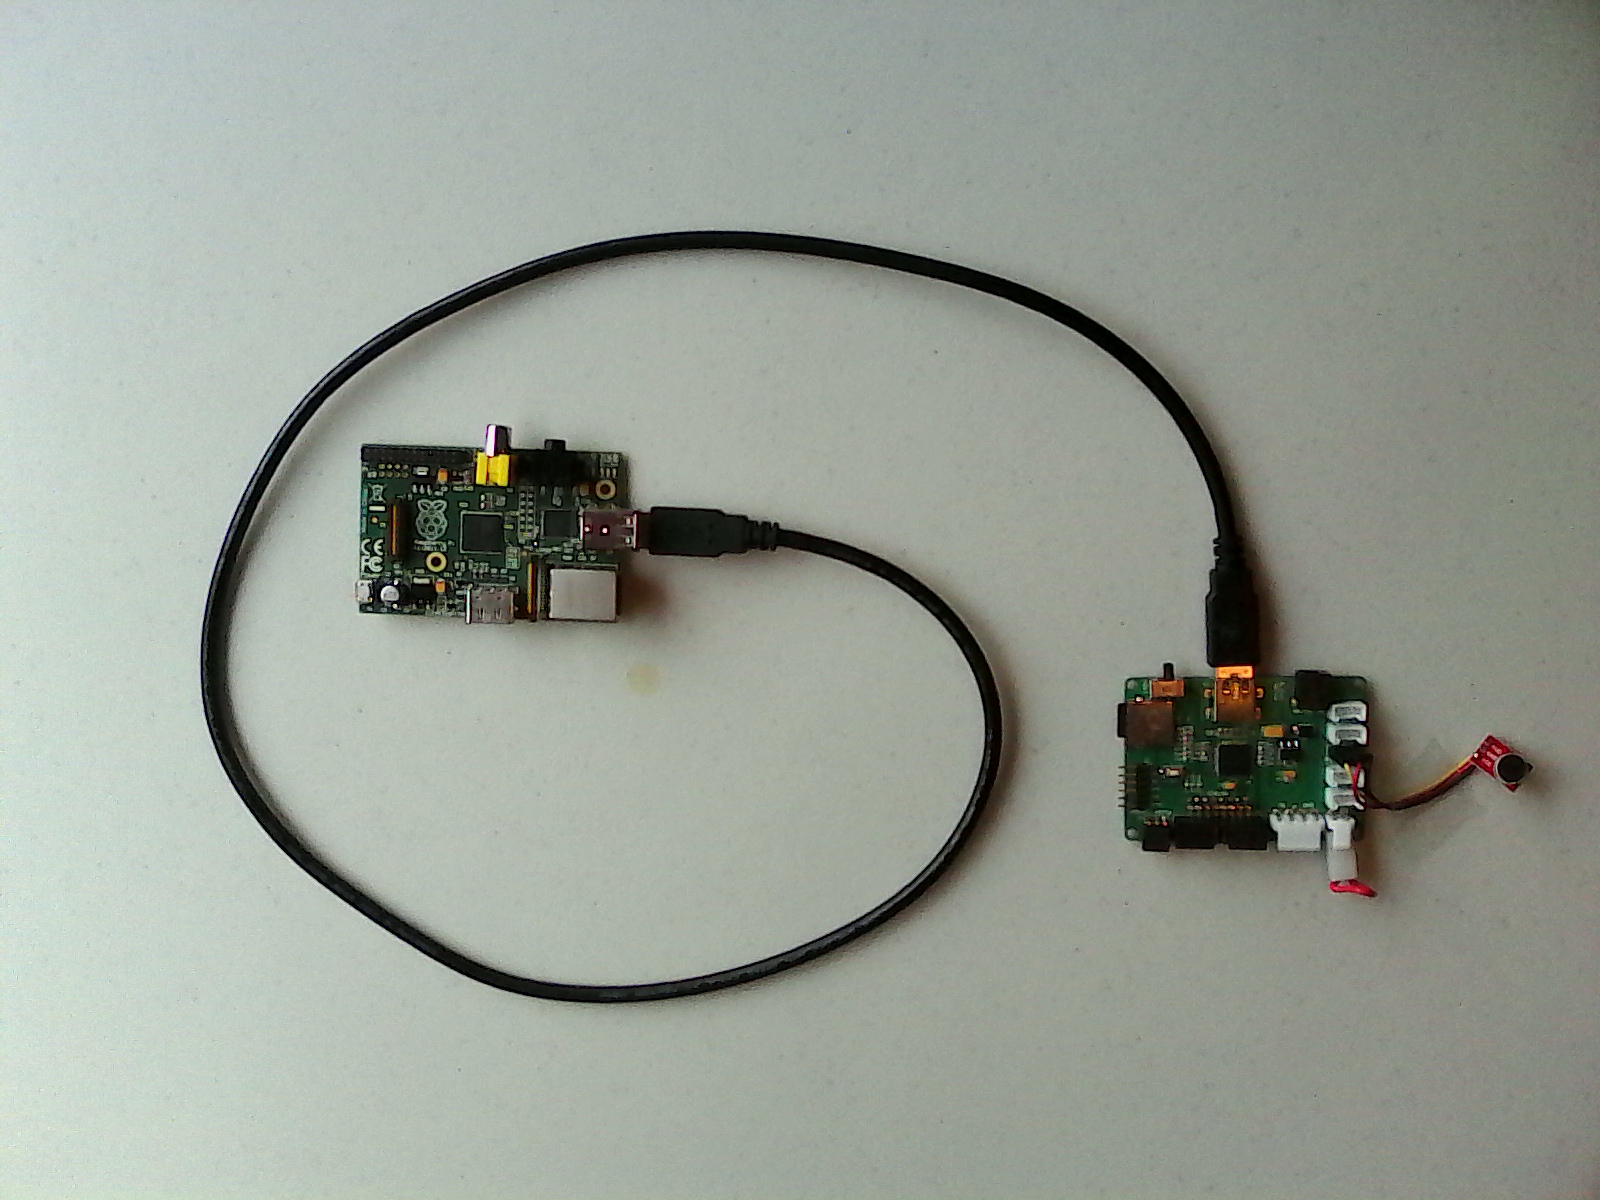
The Java application used in this project communicates from the Raspberry Pi to the Pixel hardware over a serial USB connection. A male to male USB cable is required for this connection. Here is a photo showing the male to male USB cable connecting the Raspberry Pi to the Pixel board:
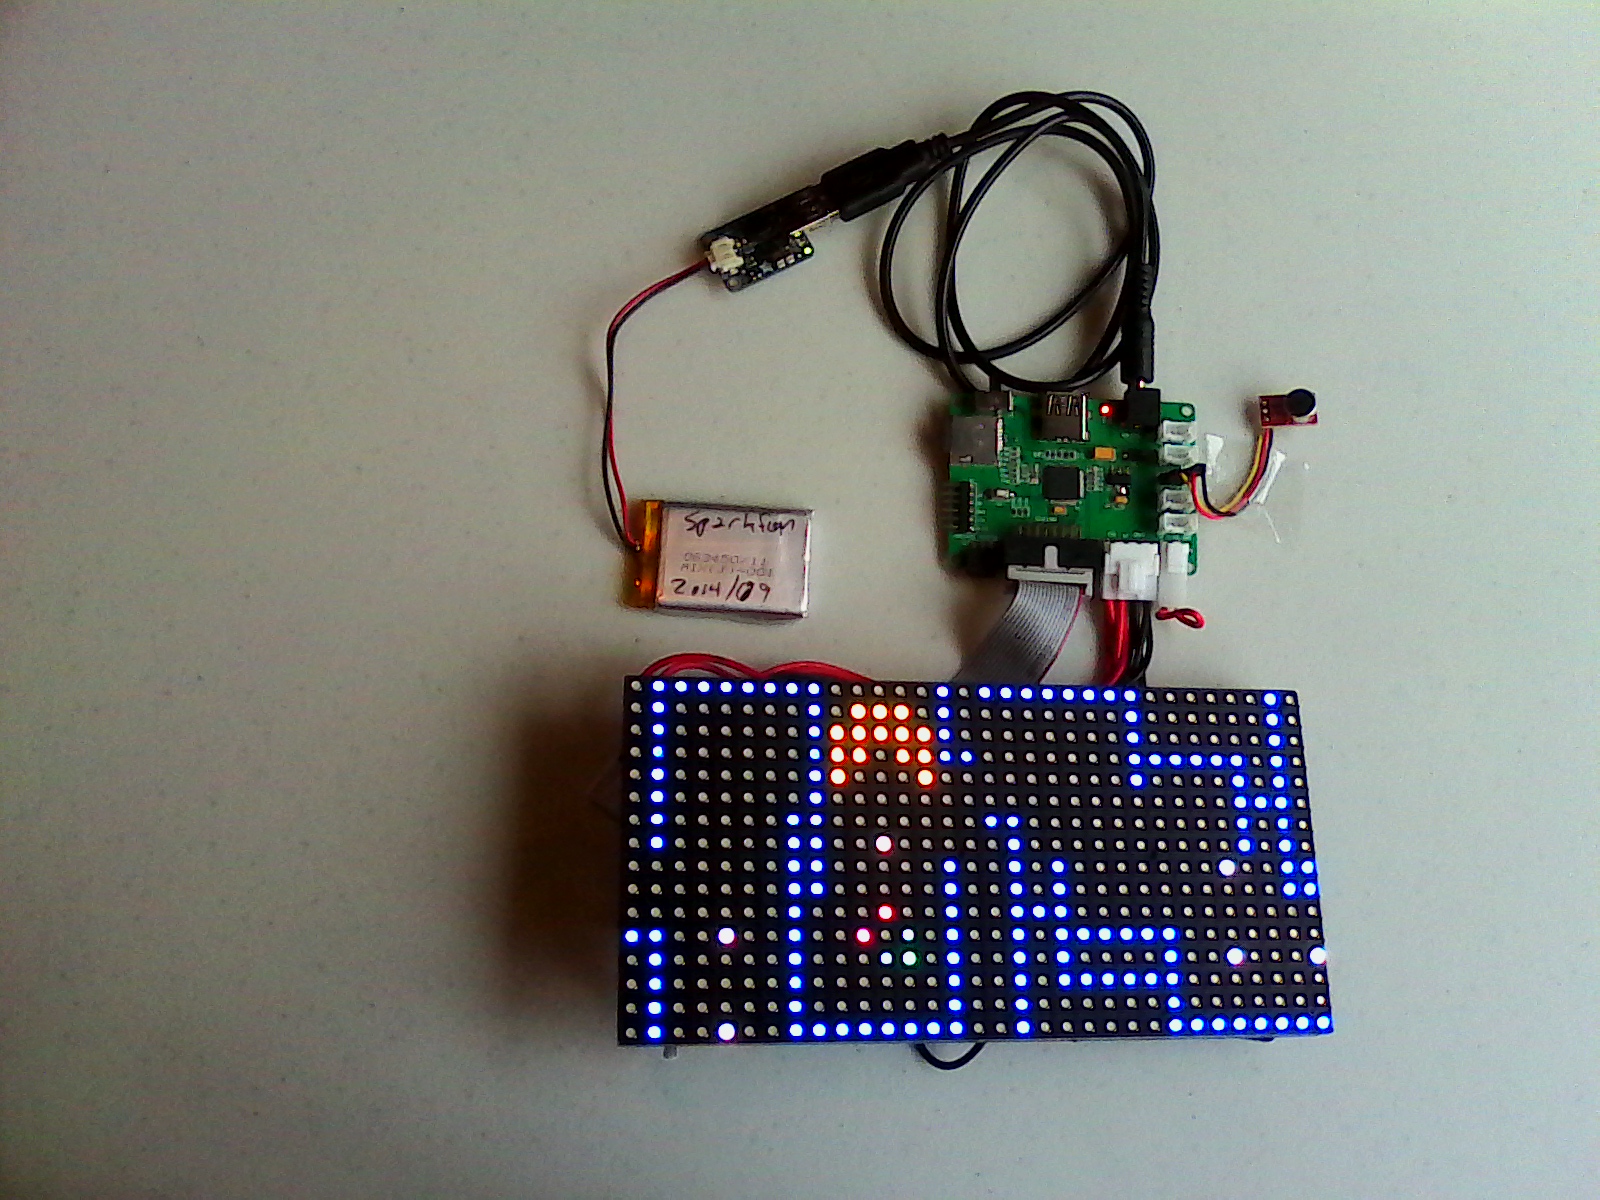
All Together Now
Here is the project with all electronic components connected.