Hack Your Roshamglo Badge
 Shawn Hymel
Install USB Driver
Roshamglo is emulating USB 1.1 using two of its pins. However, there are no common operating system drivers available that work with this custom USB class. As a result, we will need to install custom drivers in order to communicate with (and send our Arduino programs to) the Roshamglo board. Choose your operating system below and follow the directions to install the driver.
Windows
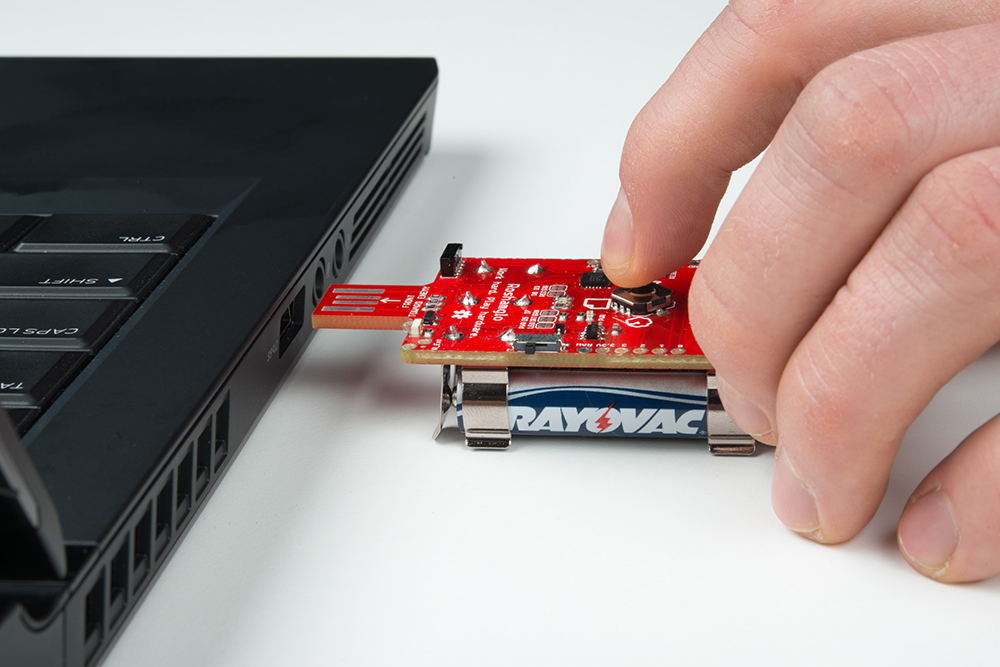
Make sure the Roshamglo board is OFF, hold the Down button (pull the five-way switch toward the SparkFun logo) and insert it into an available USB slot.
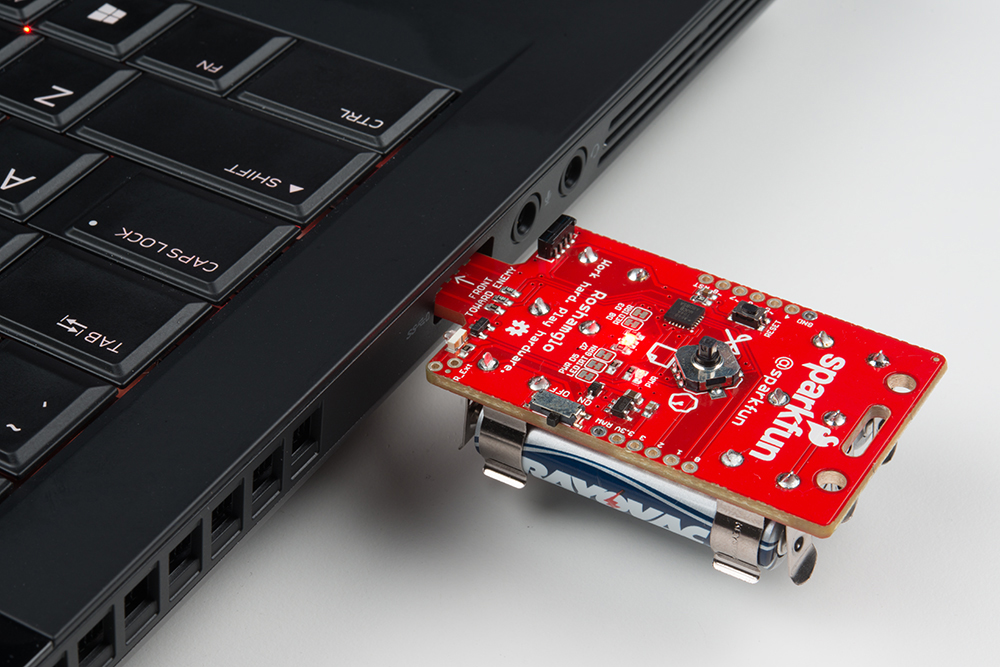
Once plugged in, the status LED should begin to quickly flash red in short bursts. This means the badge is in "Bootloader Mode."
Download the SparkFun ATtiny USB drivers by clicking on the link below.
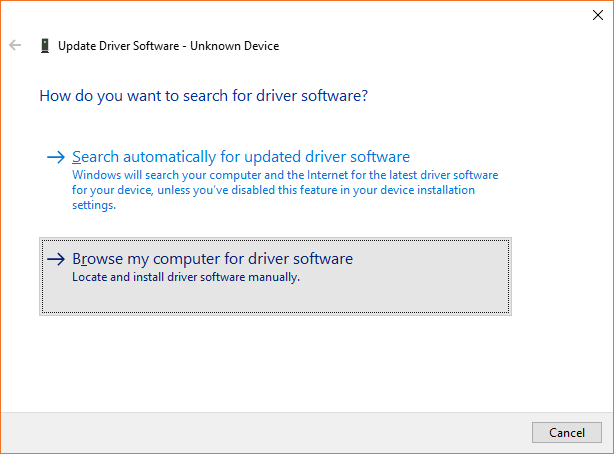
Unzip the file. Open the Windows Device Manager, and you should see an Unknown device. Right-click on Unknown device and select Update Driver Software.

In the pop-up window, click Browse my computer for driver software.
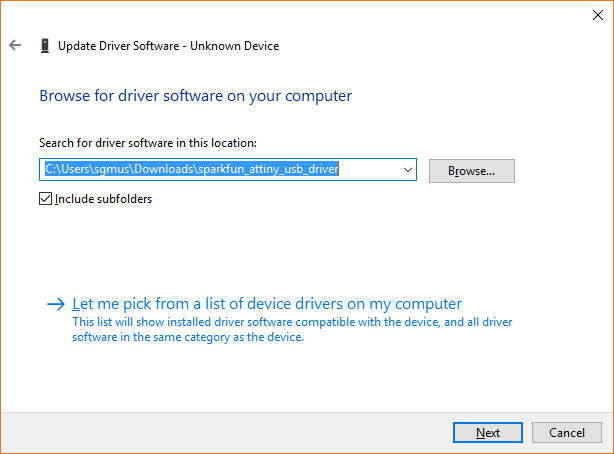
Click Browse... and open the folder that contains the drivers you just unzipped. It will likely be the sparkfun_attiny_usb_driver folder.
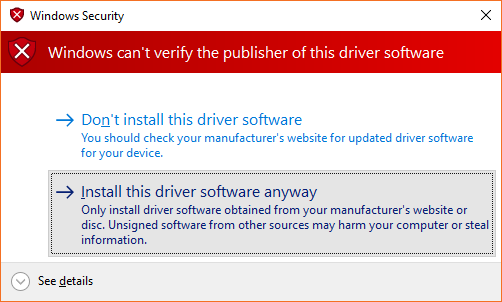
Click Next. You may get a warning pop-up that says "Windows can't verify the publisher of this driver software." That's OK. Just click Install the driver software anyway.
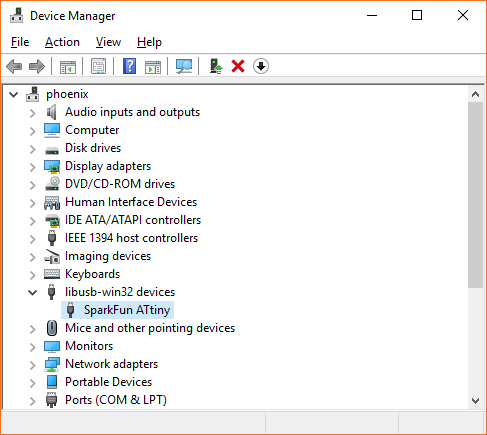
You should see a notification that the SparkFun ATtiny driver was installed successfully. Close that window, and verify that your Unknown device now shows up as SparkFun ATtiny in the Device Manager.
MacOS
You'll need to install Homebrew and use it to install libusb. Enter the following commands into a Terminal:
/usr/bin/ruby -e "$(curl -fsSL https://raw.githubusercontent.com/Homebrew/install/master/install)"
brew doctor
brew install libusb-compat
Linux
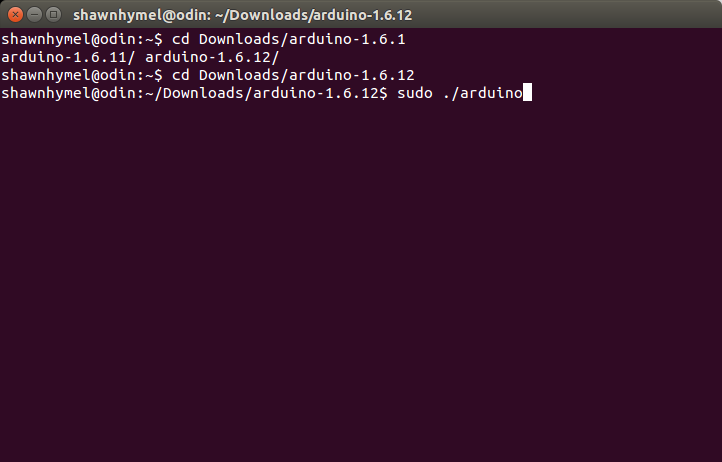
Good news! Linux doesn't require special drivers. However, you will need to do one of the following to be able to program Roshamglo from Arduino:
1) When you download the Arduino IDE (next section), make sure you run it as root: sudo ./arduino
2) Or, you can add some udev rules so that Linux enumerates your device with write permissions. Create a file in rules.d:
sudo edit /etc/udev/rules.d/49-micronucleus.rules
Copy the following contents into that file:
# UDEV Rules for Micronucleus boards including the Digispark.
# This file must be placed at:
#
# /etc/udev/rules.d/49-micronucleus.rules    (preferred location)
#   or
# /lib/udev/rules.d/49-micronucleus.rules    (req'd on some broken systems)
#
# After this file is copied, physically unplug and reconnect the board.
#
SUBSYSTEMS=="usb", ATTRS{idVendor}=="16d0", ATTRS{idProduct}=="0753", MODE:="0666"
KERNEL=="ttyACM*", ATTRS{idVendor}=="16d0", ATTRS{idProduct}=="0753", MODE:="0666", ENV{ID_MM_DEVICE_IGNORE}="1"
#
# If you share your linux system with other users, or just don't like the
# idea of write permission for everybody, you can replace MODE:="0666" with
# OWNER:="yourusername" to create the device owned by you, or with
# GROUP:="somegroupname" and mange access using standard unix groups.
Save and exit.