Hack Your Roshamglo Badge
Introduction
So you've put together your Roshamglo badge, and now you want more? Well, we can help you with that. In addition to playing infrared (IR) Rock-Paper-Scissors, the Roshamglo board can be reprogrammed with user-created code.
SparkFun Roshamglo Badge Kit
KIT-14130This will allow you to create your own applications for the badge. What can you make with some blinking lights, a five-way switch and IR communication? Well, how about a TV remote or a laser tag game, for starters.
Required Materials
The only things you'll need to reprogram your Roshamglo badge are a fully constructed badge and a computer.
Suggested Reading
If you aren't familiar with the following concepts, we recommend checking out these tutorials before continuing.
IR Communication
What is an Arduino?
How to Install an ATtiny Bootloader With Virtual USB
Roshamglo Hookup Guide
Hardware Overview
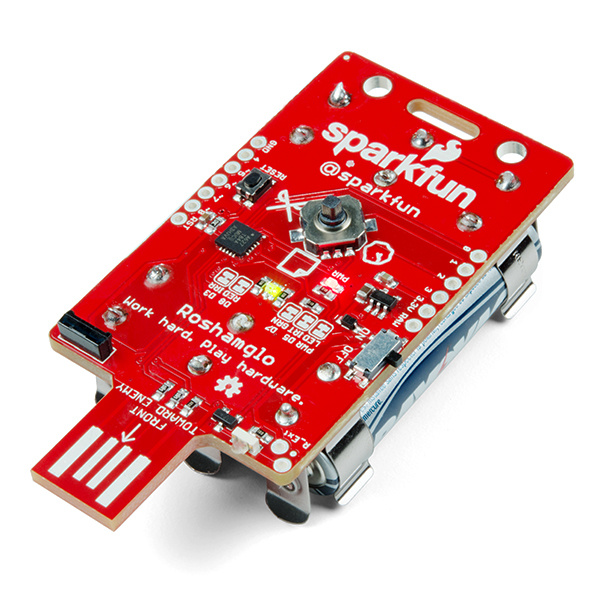
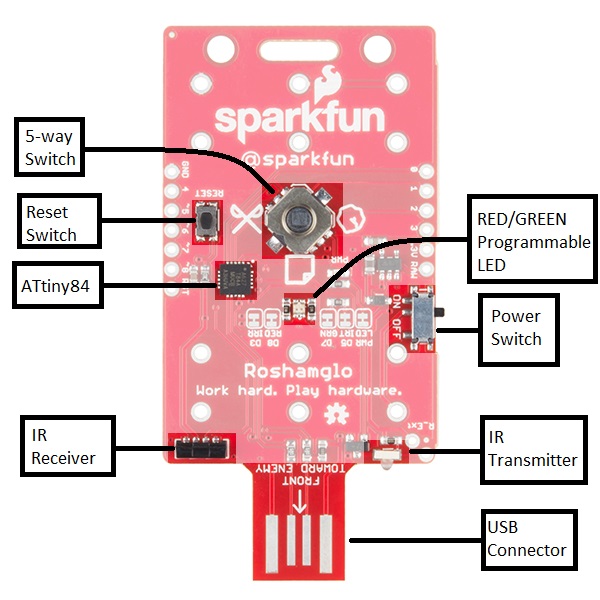
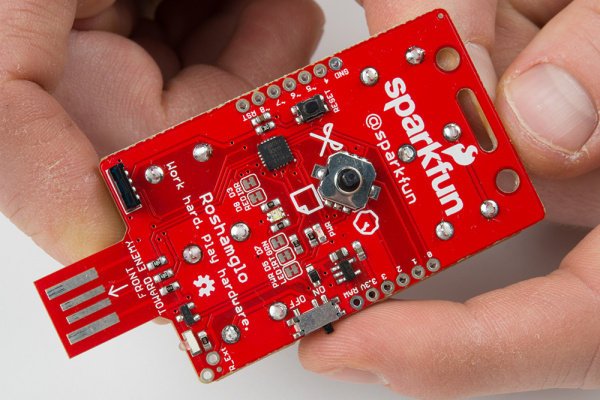
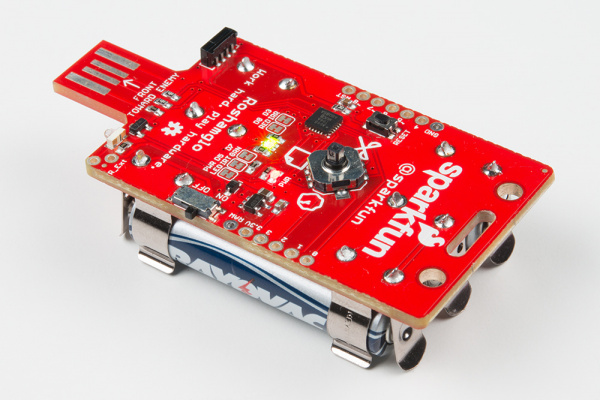
The Roshamglo uses the following:
- ATtiny84
- IR LED
- IR receiver with built-in 38kHz demodulator
- USB programming
- Programmable red and green LED
- Power switch
- 5-way switch for input
- Reset switch
- 6 AAA PTH battery clips
- 3 AAA batteries for power
The brains behind the Roshamglo is an ATtiny84, a lightweight Arduino-compatible microcontroller. The ATtiny84 comes with the following:
- 8kB of flash memory for our program (~6kB after the bootloader is installed)
- 512B of SRAM, which stores our variables used in our program
- 512B of EEPROM
- 12 I/O pins MAX (the Roshamglo breaks out 9 of these pins)
- 10-bit analog-to-digital converter, which can be used on 8 pins
For details about what each pin is able to do, refer to the table below.
| Pin | Analog or Digital | Additional Uses | Roshamglo Uses |
|---|---|---|---|
| 0 | Both | Analog Reference | 5-way switch down |
| 1 | Both | -- | 5-way switch right |
| 2 | Both | -- | 5-way switch up |
| 3 | Both | -- | IR Receiver |
| 4 | Both | SCK, SCL | 5-way switch left |
| 5 | Both | MISO, PWM | IR LED |
| 6 | Both | MOSI, SDA, PWM | 5-way switch center |
| 7 | Both | PWM | Green LED |
| 8 | Digital | PWM | Red LED |
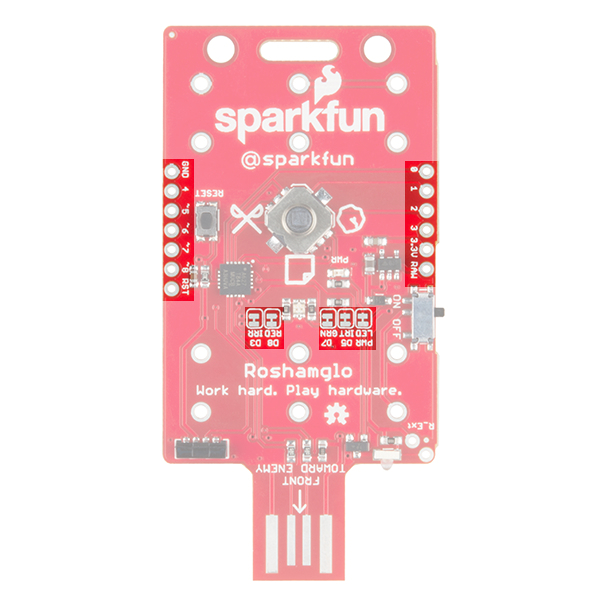
Each of these pins has been broken out to the edge of the board to make customization easy! If you would like to use any of these pins for something other than what it's currently connected to, we provided jumpers that can easily be cut with a hobby knife. The only pins that do not have a jumper on them are the pins used for the five-way switch. The pins for the switch use the ATtiny's internal pull-up resistors, so as long as the switch is not closed, the pin can be configured in any way you'd like without having to cut traces.
One Important Feature Missing
If you hadn't noticed in the pin description, there was no mention of RX or TX pins. This is because, unfortunately, the ATtiny84 doesn't have a hardware UART. The UART is used for serial communication, whether it's for programming or printing messages to the serial window. You might be thinking, "But doesn't the USB connector provide communication between the ATtiny and the computer?" You're right; it does. To keep the bootloader size as small as possible, the bootloader only allows for USB programming. For serial debugging, you'll need a USB cable and a USB-to-Serial adapter, and the SoftwareSerial library to send messages to a computer. You can learn more about serial communication here.
Install USB Driver
Roshamglo is emulating USB 1.1 using two of its pins. However, there are no common operating system drivers available that work with this custom USB class. As a result, we will need to install custom drivers in order to communicate with (and send our Arduino programs to) the Roshamglo board. Choose your operating system below and follow the directions to install the driver.
Windows
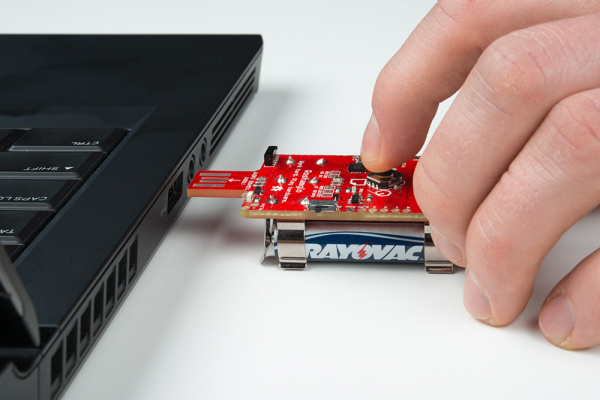
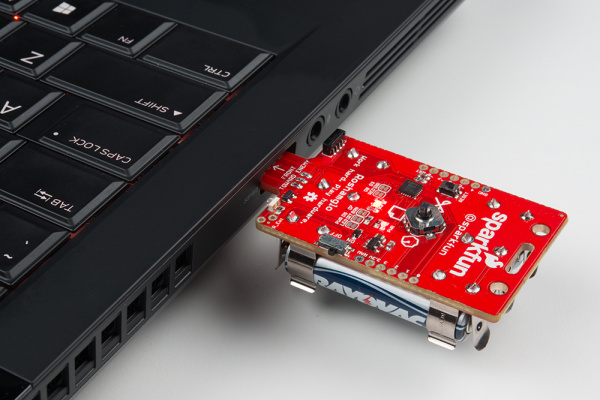
Make sure the Roshamglo board is OFF, hold the Down button (pull the five-way switch toward the SparkFun logo) and insert it into an available USB slot.
Once plugged in, the status LED should begin to quickly flash red in short bursts. This means the badge is in "Bootloader Mode."
Download the SparkFun ATtiny USB drivers by clicking on the link below.
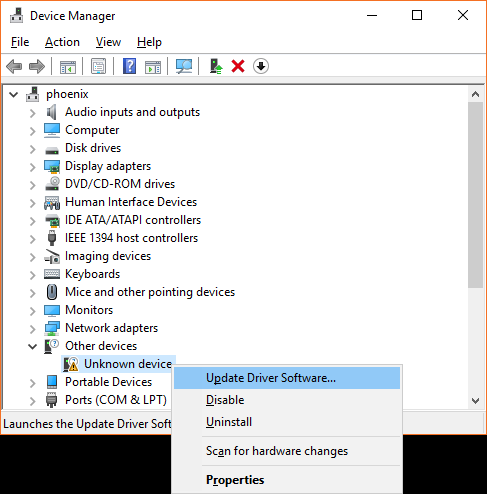
Unzip the file. Open the Windows Device Manager, and you should see an Unknown device. Right-click on Unknown device and select Update Driver Software.
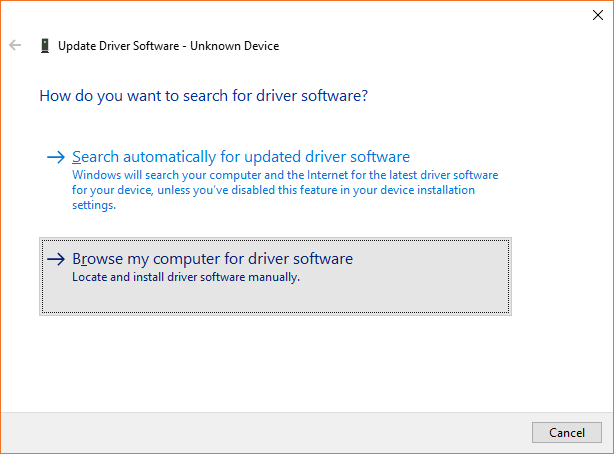
In the pop-up window, click Browse my computer for driver software.
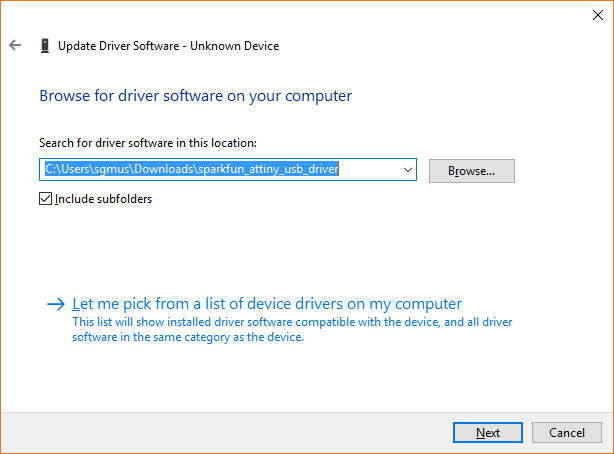
Click Browse... and open the folder that contains the drivers you just unzipped. It will likely be the sparkfun_attiny_usb_driver folder.
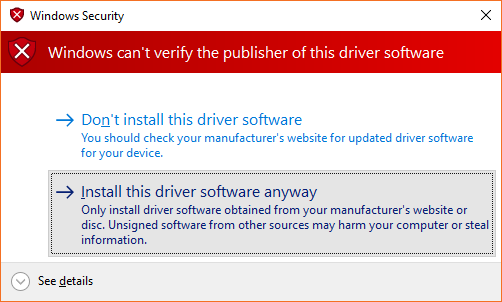
Click Next. You may get a warning pop-up that says "Windows can't verify the publisher of this driver software." That's OK. Just click Install the driver software anyway.
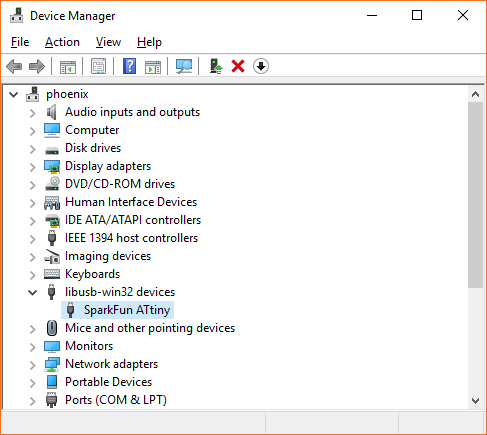
You should see a notification that the SparkFun ATtiny driver was installed successfully. Close that window, and verify that your Unknown device now shows up as SparkFun ATtiny in the Device Manager.
MacOS
You'll need to install Homebrew and use it to install libusb. Enter the following commands into a Terminal:
/usr/bin/ruby -e "$(curl -fsSL https://raw.githubusercontent.com/Homebrew/install/master/install)"
brew doctor
brew install libusb-compat
Linux
Good news! Linux doesn't require special drivers. However, you will need to do one of the following to be able to program Roshamglo from Arduino:
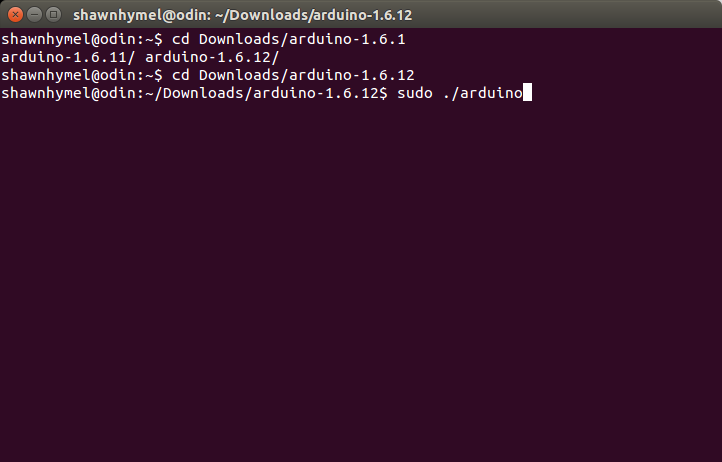
1) When you download the Arduino IDE (next section), make sure you run it as root: sudo ./arduino
2) Or, you can add some udev rules so that Linux enumerates your device with write permissions. Create a file in rules.d:
sudo edit /etc/udev/rules.d/49-micronucleus.rules
Copy the following contents into that file:
# UDEV Rules for Micronucleus boards including the Digispark.
# This file must be placed at:
#
# /etc/udev/rules.d/49-micronucleus.rules    (preferred location)
#   or
# /lib/udev/rules.d/49-micronucleus.rules    (req'd on some broken systems)
#
# After this file is copied, physically unplug and reconnect the board.
#
SUBSYSTEMS=="usb", ATTRS{idVendor}=="16d0", ATTRS{idProduct}=="0753", MODE:="0666"
KERNEL=="ttyACM*", ATTRS{idVendor}=="16d0", ATTRS{idProduct}=="0753", MODE:="0666", ENV{ID_MM_DEVICE_IGNORE}="1"
#
# If you share your linux system with other users, or just don't like the
# idea of write permission for everybody, you can replace MODE:="0666" with
# OWNER:="yourusername" to create the device owned by you, or with
# GROUP:="somegroupname" and mange access using standard unix groups.
Save and exit.
Adding Arduino Compatibility
Arduino is not a full-featured development environment, but it does allow us to prototype embedded programs quickly and easily. To begin, navigate to Arduino's software page and download the Arduino IDE for your operating system.
If you need help installing Arduino for your operating system, you can follow this guide.
Download and Install the Board Package
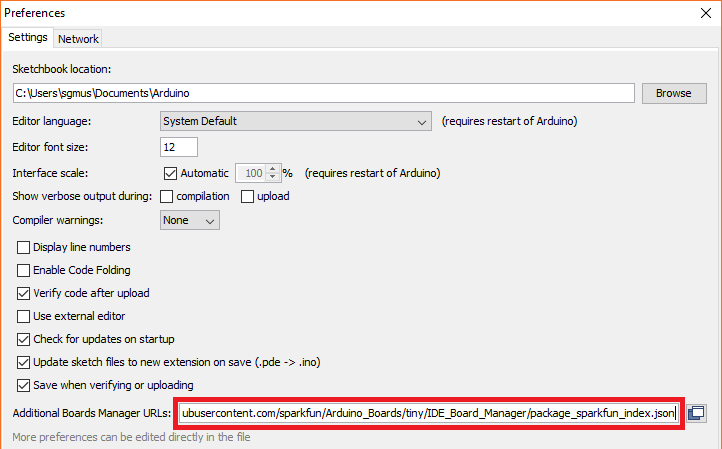
https://raw.githubusercontent.com/sparkfun/Arduino_Boards/tiny/IDE_Board_Manager/package_sparkfun_index.jsonBecause the Roshamglo board is not supported by the Arduino IDE by default, we need to add it manually. Open the Arduino program and go to File > Preferences. Then copy and paste the URL below into the Additional Board Manager URLs text box.
language:bash
https://raw.githubusercontent.com/sparkfun/Arduino_Boards/tiny/IDE_Board_Manager/package_sparkfun_tiny_index.json
Then hit OK, and navigate to the Tools > Board > Boards Manager… tool. A search for “tiny” should turn up a SparkFun ATtiny Boards result. Select that and click Install.
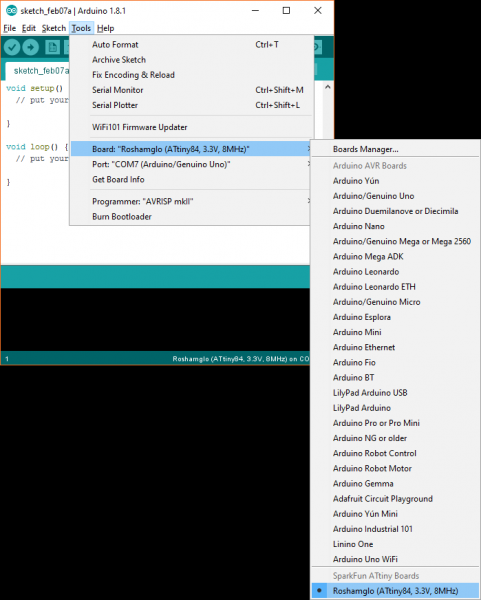
Once the installation is complete, go to Tools > Board and select Roshamglo (ATtiny84, 3.3V, 8MHz) under the SparkFun ATtiny Boards section.
Make Something Blink
The Roshamglo board comes with two LEDs (a red LED and green LED built into one package), as well as a five-way switch (left, right, up, down and center). We can test that our Roshamglo board can be reprogrammed by writing and uploading a simple program.
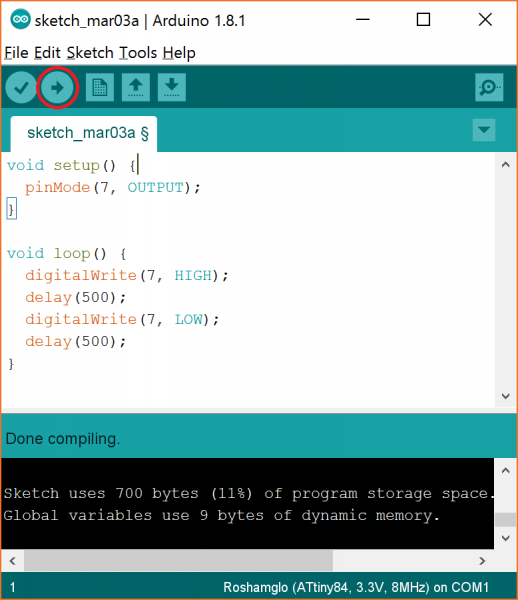
Open the Arduino IDE and enter the following code:
language:c
void setup() {
  pinMode(7, OUTPUT);
}

void loop() {
  digitalWrite(7, HIGH);
  delay(500);
  digitalWrite(7, LOW);
  delay(500);
}
Click on the Upload button.
If you are asked to save your work, click Cancel (save it if you want, but you don't need to save to compile and upload your code).
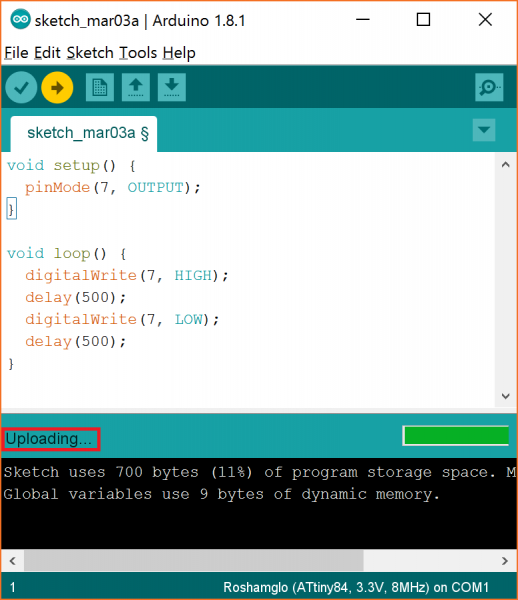
Wait until you see Uploading appear in the Arduino IDE.
Make sure the Roshamglo board is OFF, hold the Down button (pull the five-way switch toward the SparkFun logo) and insert it into an available USB port while continuing to hold the Down button.
Let go of the Down button, and the status LED should begin to quickly flash red in short bursts. This means the badge is in "Bootloader Mode." You will need to do this every time you upload a new program to it.
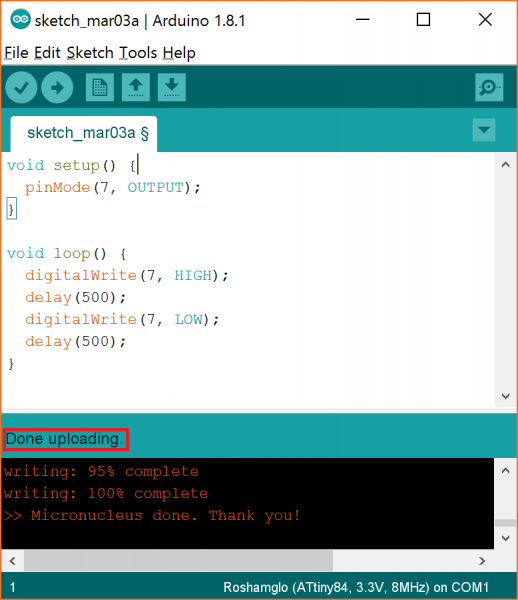
After a moment, you should see Done uploading appear in Arduino.
Remove the Roshamglo board from your computer. Slide the power switch to ON.
And that's it! Your Arduino should begin flashing the green LED on and off every second.
- Try a different USB port
- Unplug other USB devices
- Close other programs that might be running
- Reinstall the Roshamglo USB driver
- Try a different computer
Resources and Going Further
Being able to make something blink is an important first step. You can now reprogram your Roshamglo to perform a wide variety of tasks, like blinking in different patterns, controlling the blink with the control stick, etc.
But wait, there's more! The board comes equipped with an infrared (IR) transmitter and IR receiver. That means you could control TVs (with the right IR codes) or set up a simple "laser tag" game to play with your friends.
For more information, such as the Roshamglo source code, check out these resources:
These tutorials might help as inspiration for your next project:
