GNSS Timing Breakout - ZED-F9T (Qwiic) Hookup Guide
 Nate,
Nate,  El Duderino
Hardware Assembly
The GNSS Timing Breakout requires very little assembly to initialize the device, get a lock and start receiving data. Setting up a device network to take advantage of the differential timing mode or using the GNSS Timing Breakout with the SparkFun u-blox Arduino library requires a bit more assembly and configuration.
Basic Assembly (Single GNSS Timing Breakout)
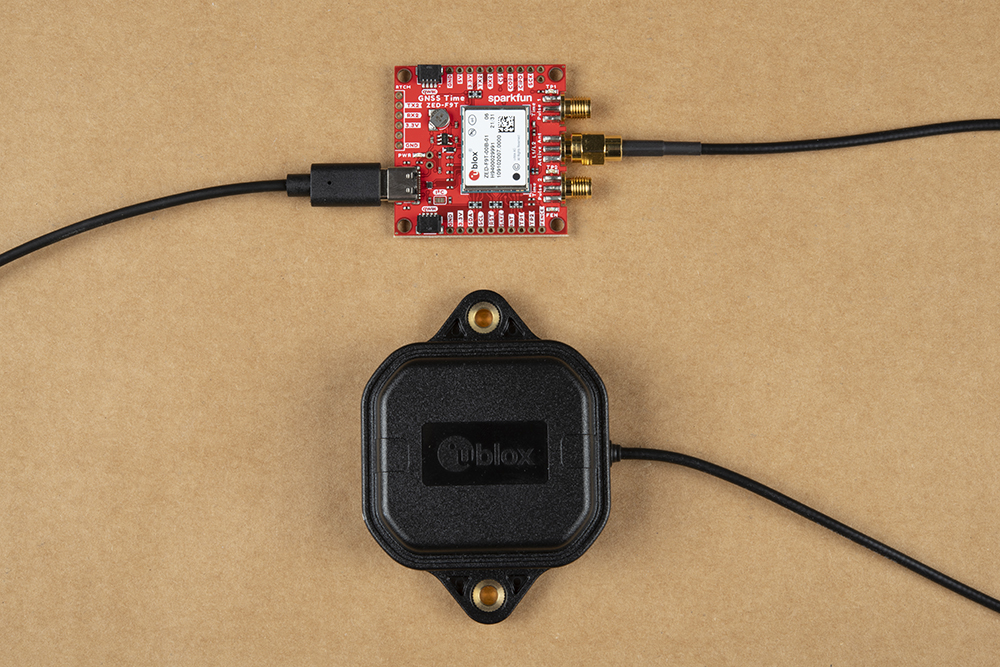
Initial setup and use of the GNSS Timing Breakout only requires a USB-C cable and GNNS antenna connected to the board. On first connection, drivers should automatically install. In case drivers do not install, head over to this section of our Getting Started with u-center for u-blox tutorial. Verify the port the device enumerated on and either open u-center (Windows only) to interact with and configure the device. Users who prefer to can use a serial terminal program and the Interface Description document.
With a clear view of the sky, the ZED-F9T should achieve a lock within 26s from a Cold Start (2 seconds from a Hot Start).
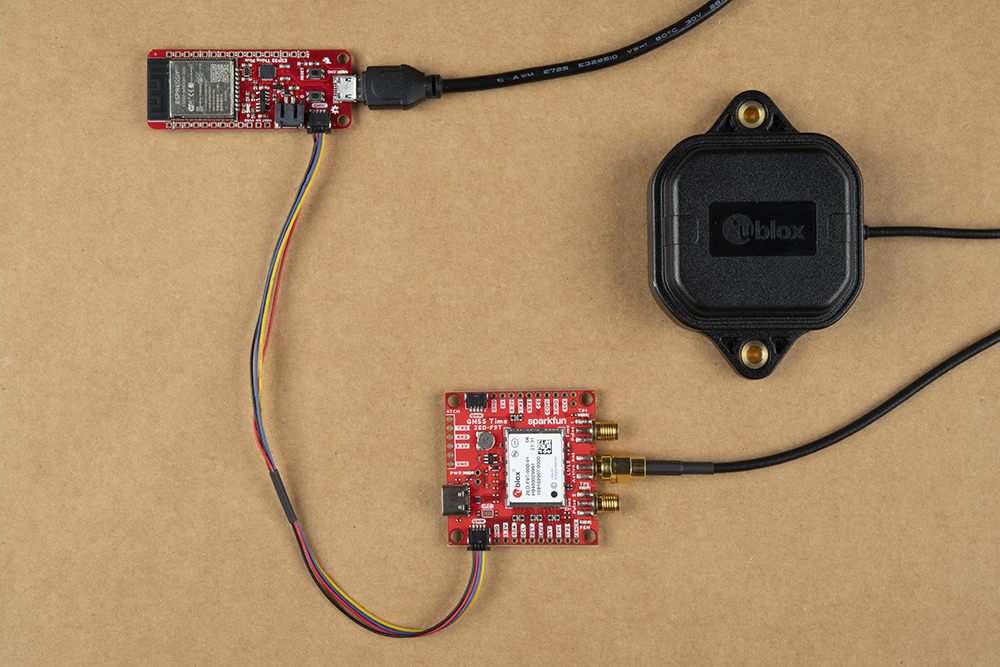
Arduino Assembly via Qwiic
Assembling the GNSS Timing Breakout into an Arduino circuit is easy thanks to the Qwiic system. Simply connect a GNSS antenna to the SMA connector and then connect the breakout to a Qwiic-enabled microcontroller like the SparkFun Thing Plus - ESP32 WROOM using a Qwiic cable.
Differential Timing Network
The GNSS Timing Breakout can be configured to act as a controller operating in reference station mode to provide timing correction data to a network of ZED devices. All that is needed here is 2 or more ZED devices with one acting as the reference station and a way to transmit the correction data (hard-wired, radio or WiFi.
For more information on setting up a Differential Timing Network using multiple devices, read on to the Using the ZED-F9T in Differential Timing Mode section of this guide as well as the Differential Timing Setup appnote from u-blox.