Getting Started with U-Center for u-blox
Introduction
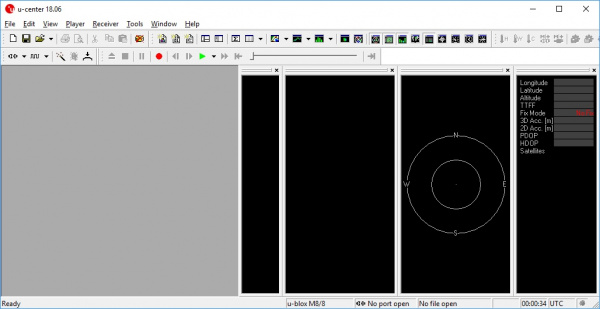
U-center from u-blox is a free software tool for configuring u-blox GPS receivers under Windows. U-center is a dense program with many interface elements. It can be overwhelming at first but over time it will become easier to use. For all its GUI weaknesses, it is very powerful for configuring the u-blox line of modules (such as the NEO-M8P-2 and SAM-M8Q to name a few). In this tutorial, we will be exploring some of its features with the NEO-M8P-2.
Required Materials
To follow along with this tutorial, you will need the following materials. You may not need everything though depending on what you have and the design of the u-blox's board. We'll be using the NEO-M8P-2 throughout this guide. Feel free to add it (or another u-blox module) to your cart, read through the guide, and adjust the cart as necessary.
Required Software
The software can be obtained from u-blox. To follow along with this tutorial please download and install u-center. Once completed, open it.
Install Drivers
For this tutorial we'll assume you have the SparkFun GPS-RTK but u-center can be used with any u-blox based product. Start by attaching a micro-B cable to the GPS-RTK board.
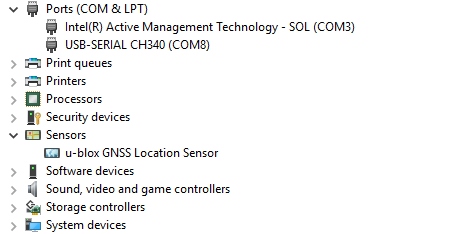
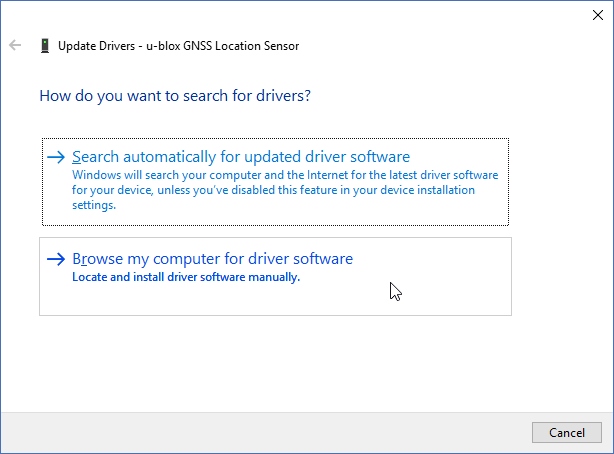
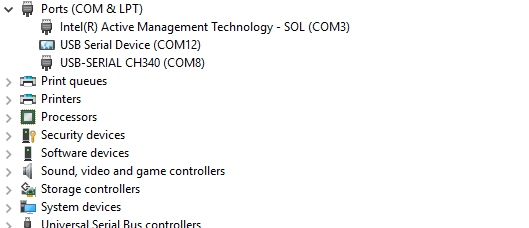
Now open Windows Device Manager. The NEO-M8 series has an annoying feature where the module comes up as a Windows Sensor rather than a serial device. If your u-blox receiver does not appear under COM ports then right click on the u-blox GNSS Location Sensor and then Update Driver. Next, click on Browse my computer for driver software.
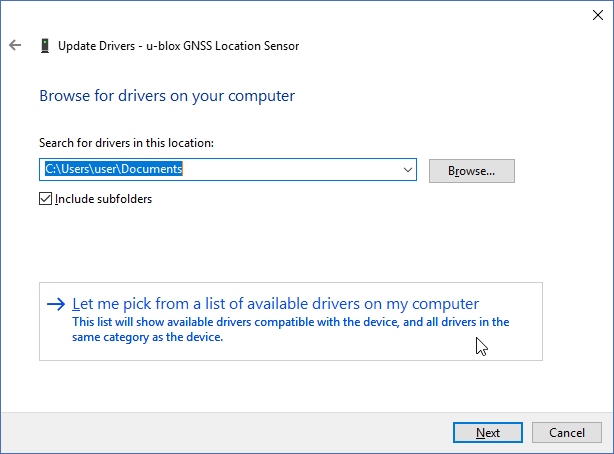
Then “Let me pick”...
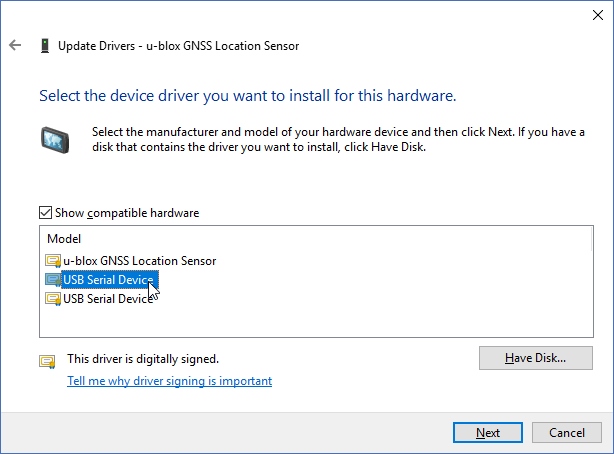
Select the first USB serial device.
The SparkFun GPS-RTK board should now enumerate as a USB serial COM port. In the list below, the GPS-RTK board is COM12.
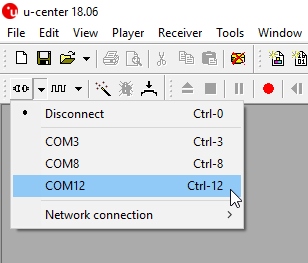
Return to u-center and drop down the port list. Select the COM port that is your RTK board. Congrats! You can now use u-center.
Configuring and Outputting NMEA Sentences
Let’s go over a few features you’ll likely use:
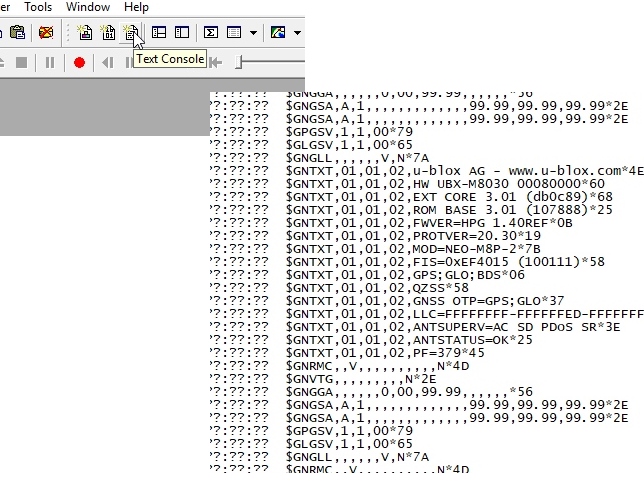
Text Console
The text console button will show you the raw NMEA sentences. This is handy for quickly inspecting the visible ASCII coming from the module over USB.
Configure
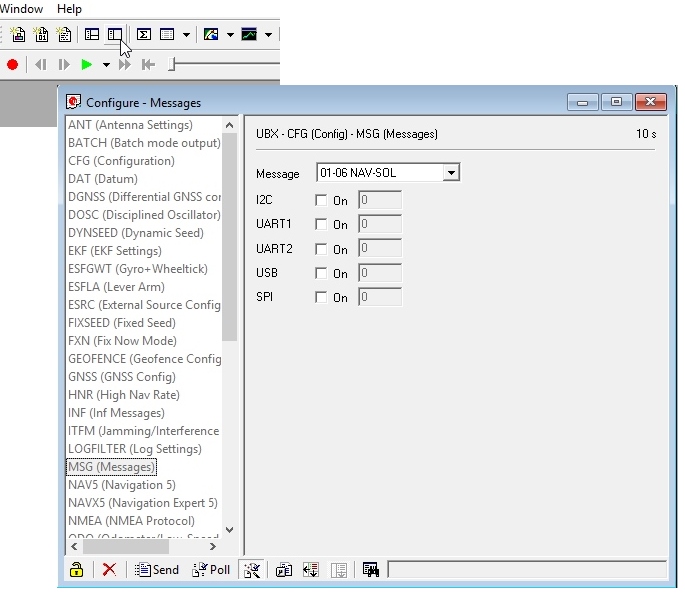
The configuration button opens the most powerful window. From this window you can inspect and configure new settings. It’s not obvious but when you click on a setting such as ‘MSG (Messages),’ u-center will poll the module for its current state. The ‘10s’ in the corner indicates how old the displayed information is. In this case it’s been 10 seconds since this setting was last queried. Click on the ‘Poll’ button to update the information. Go ahead and select the F0-00 NMEA GxGGA message. As you click the dropdown menu, the software will poll the current settings. It’s a bit disorienting at first but gets better over time.
The MSG configuration is very powerful. It allows you to enable or disable various NMEA sentences as well as binary protocols such as NAV-PVT (checkout the full protocol datasheet). Once a sentence is selected, such as GxGGA, the check boxes will be populated. If you want to disable the GxGGA sentence for the SPI interface, uncheck the SPI checkbox and then click ‘Send’. Congrats! The GxGGA sentence is no longer presented on the SPI interface. This raises an important fact:
Note: The NEO-M8 series has 4 interfaces: USB(serial), I2C, SPI, and UART. All interfaces can access information simultaneously. This means you can inspect configuration settings over the USB serial port while your Arduino makes setting changes over the I2C port. You can read NMEA sentences over the I2C port or send RTCM data into the module over SPI. It’s all highly configurable.
What is the USB Port on the NEO-M8P?
It’s like any other USB to serial device. It will enumerate on your computer as a COM port and acts as such. It is independent and separate from the UART port that is a dedicated TTL serial port.
If something is not accessible through u-center, it probably means that feature or setting is not compatible with the currently attached device. For example, the UART2 box is grayed out in the image above. The NEO-M8P does not have a second UART so you can’t address it.
Ports
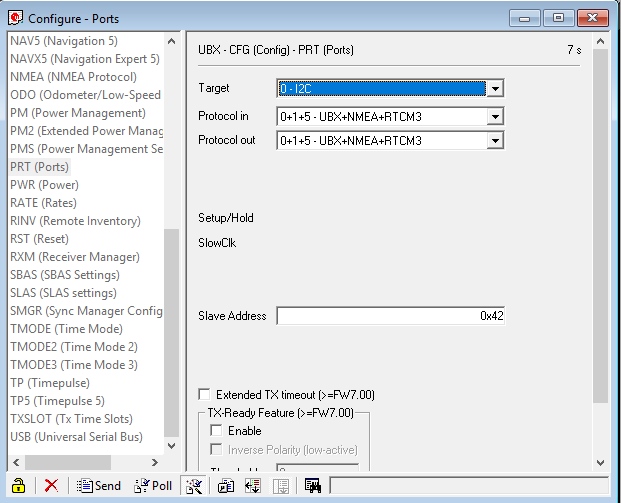
The Ports (PRT) sub-menu under Configuration is very helpful. You can do things like change the baud rate, I2C address, and protocols. Depending on your application, you may want to enable or disable entire interface protocols. For example, if you want to enable NMEA sentences for the SPI interface, you would do it here. Fortunately, the factory default for the NEO-M8P is good for I2C and UART1 for RTK purposes (input of RTCM3 is enabled for both ports).
This is also the menu that allows you to change the I2C address of your GPS-RTK. Because we are big fans of the Qwiic system, we’ll be using the GPS-RTK on the I2C bus. If we had another device on the bus that uses address 0x42 this menu will allow us to change the address of the GPS-RTK.
Poke around the various config menus. If you get your module into an unknown state you can unplug and replug to reset the settings.
Messages
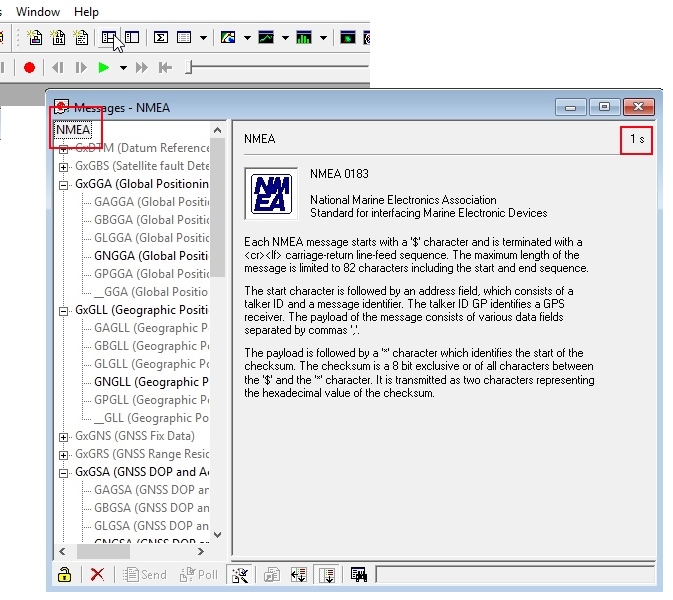
The messages window will allow you to view the various sentences reported by the module. It’s not obvious but if you double click on ‘NMEA’, the tree of messages will fold away. Similarly, if you double click on ‘UBX’, it will expand showing the various UBX sentences. By default, many of these are not enabled.
Resources and Going Further
Ready to get hands-on with GPS?
We've got a page just for you! We'll walk you through the basics of how GPS works, the hardware needed, and project tutorials to get you started.
We only went over a few of the features with the u-center. For more resources, we recommend checking your module's protocol specification and the u-center's documentation for more information.
Once you've mastered U-Center you're ready to begin configuring your Ublox module! Check out some of these related tutorials:
